Overview
The HubSpot Contact Field Mapping feature lets you map Goldcast’s Standard and Custom Event User properties to your HubSpot Contacts. In Goldcast, standard fields are mapped at the organization level, while custom fields are mapped at the event level. In this article, we explain how to map your standard fields. For custom field mapping, refer here.
Before You Begin: Make sure your event registration forms are set up to collect the Goldcast properties you’ve mapped to HubSpot. If you aren’t collecting registrant data for your mapped properties, no data can be sent to HubSpot. To know more about how to create and assign forms for your events, click here.
Prerequisites
To set up your Contacts Field Mapping for HubSpot in the Goldcast, you should install and connect your Goldcast org to your HubSpot.
Login to Goldcast Studio and follow these steps to set up Contact Field Mapping:
-
Click on your Avatar Logo in the top right corner of your screen and click on the Integrations menu. Alternatively, click Integrations on the menu on the left of the homepage.

-
Next, locate the connected HubSpot integration and click on it. You will land on the HubSpot settings page.

- Scroll to the Contact Field Mapping section and click Edit.

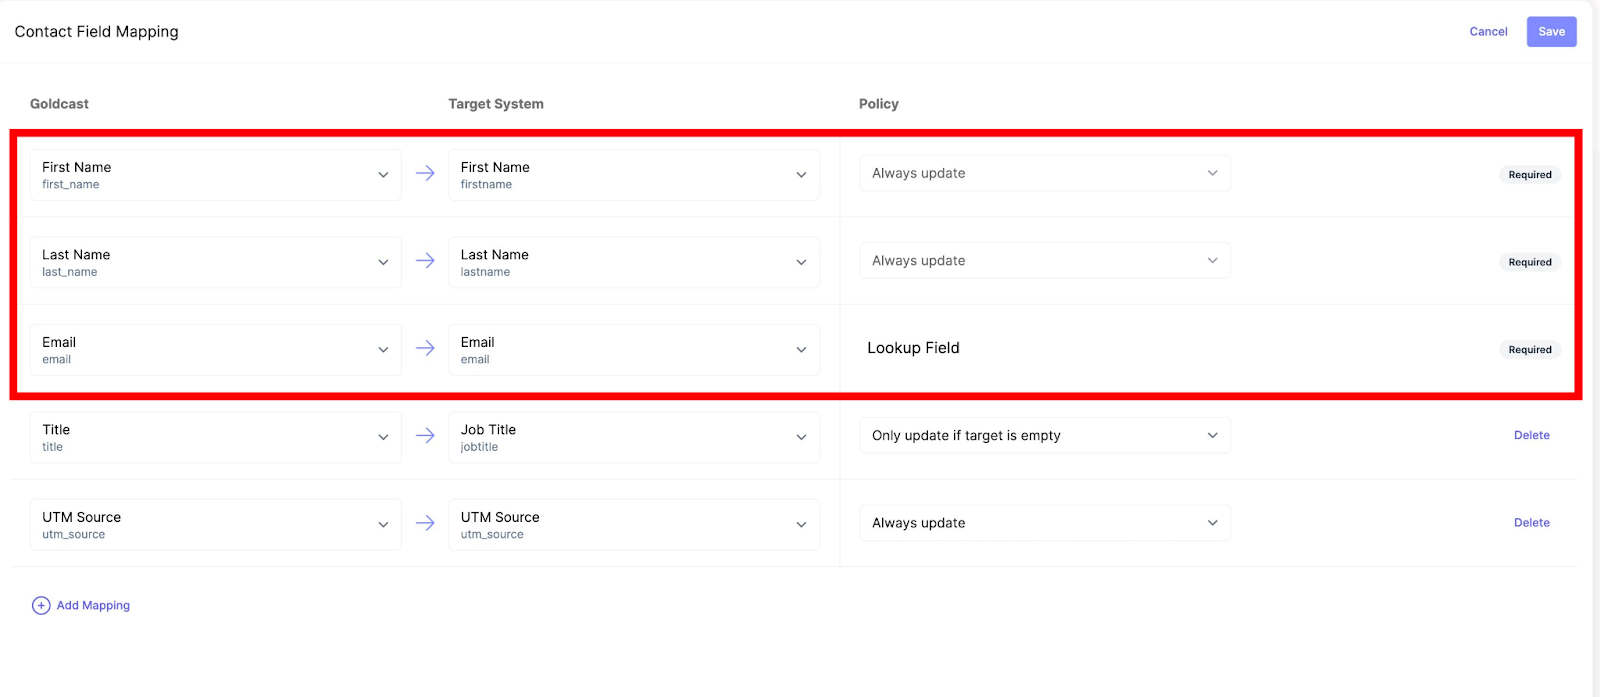
You will see a drawer that lets you map your Goldcast Standard properties to Contact Properties in HubSpot. Here, you will see three default mappings already set up: First Name, Last Name and Email.
Note: Email is a unique field in Goldcast that is used to identify an event registrant. Hence, the update policy for the email field cannot be modified.
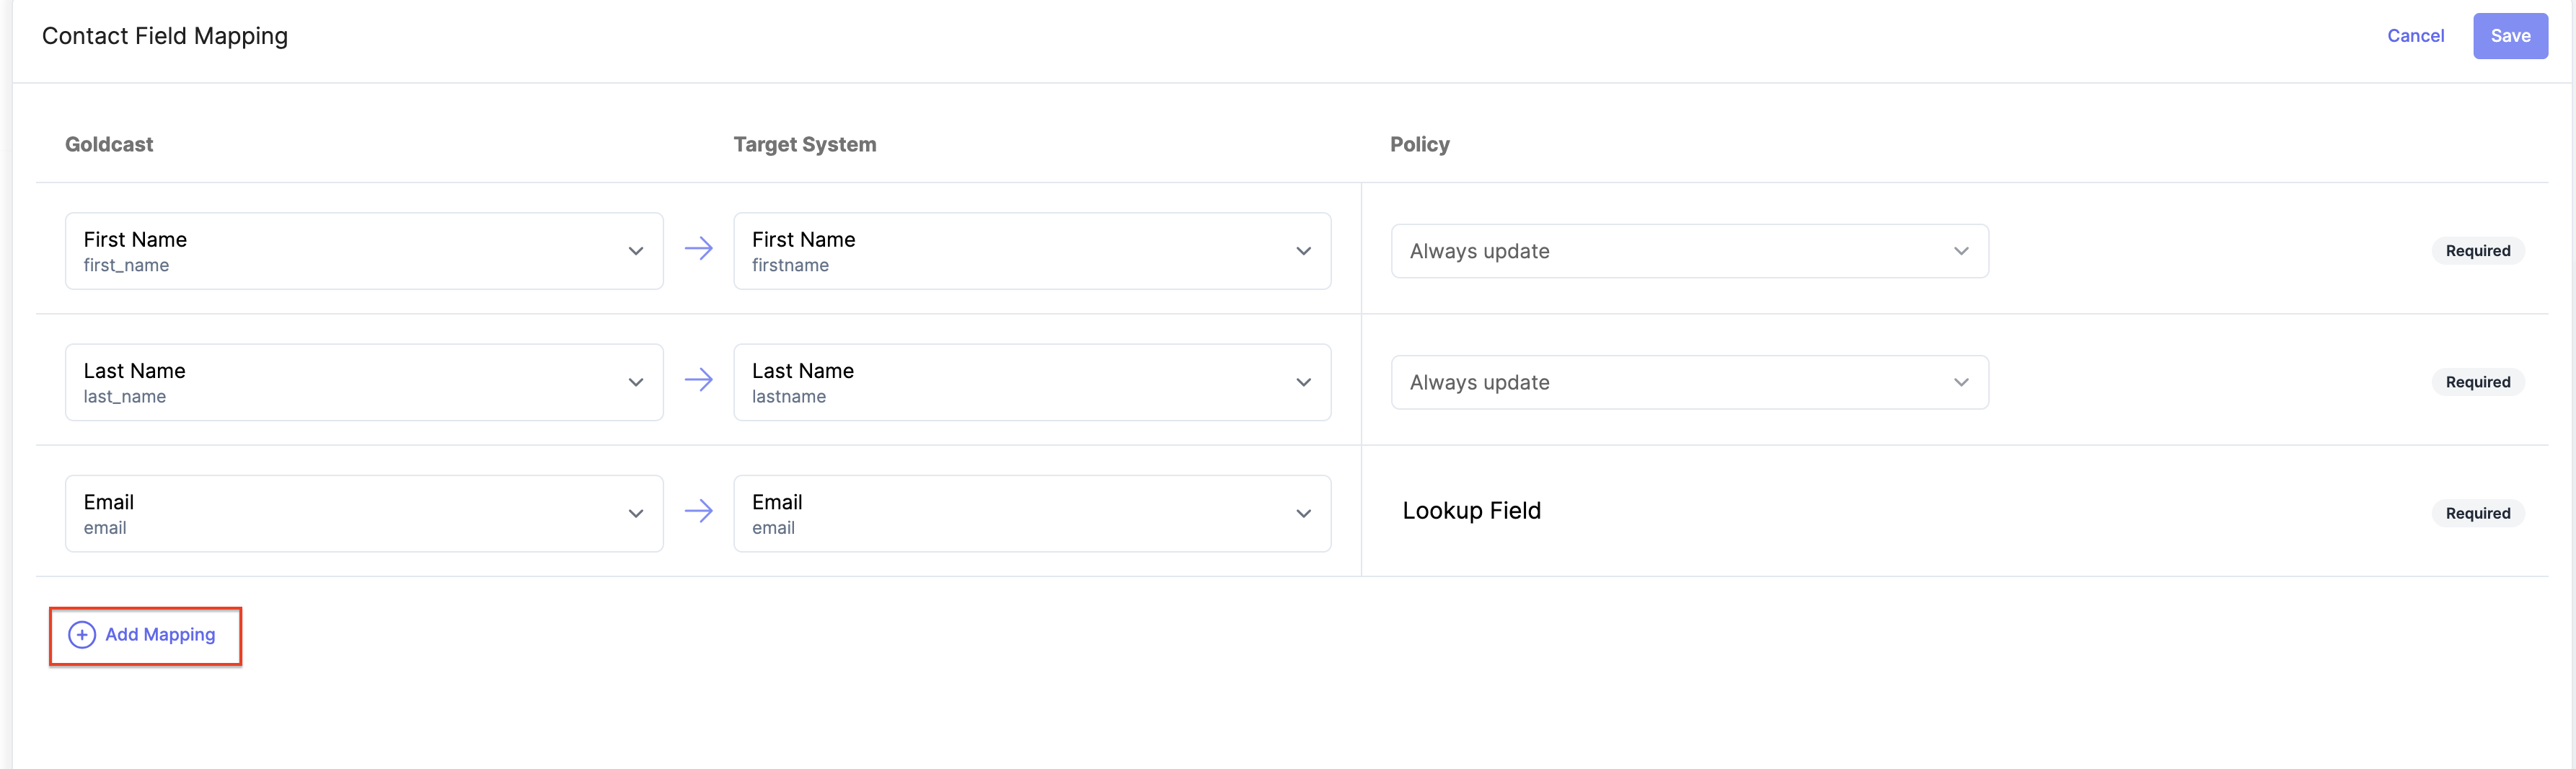
Click on Add Mapping to map any additional Goldcast standard fields to your connected HubSpot account.
Note: The Policy(Update Policy) denotes how the fields in HubSpot will get updated upon change in Goldcast Fields. We have three options for Update policy
- Always Update: This will update your Contacts in HubSpot always when your mapped field in Goldcast gets updated.
- Don’t update if source is empty: This will not update your Contacts in HubSpot if the mapped field in Goldcast is empty.
- Only update when target is empty: This will only update your Contacts in HubSpot if the mapped field in HubSpot is empty.
Configuring Field Mapping in your Goldcast org
Set up your new mapping from the record added using Add mapping CTA. This will consist of selecting 3 components :
- Standard Fields in Goldcast will be collected from your forms.
- Contacts Property Field in HubSpot will get updated.
- Update Policy: This is how Contact Field Mappings will update target fields in HubSpot.
- To add a new mapping, click on the Add Mapping button.
- Select your Field name in Goldcast from the first drop-down. For example, Magic Link.
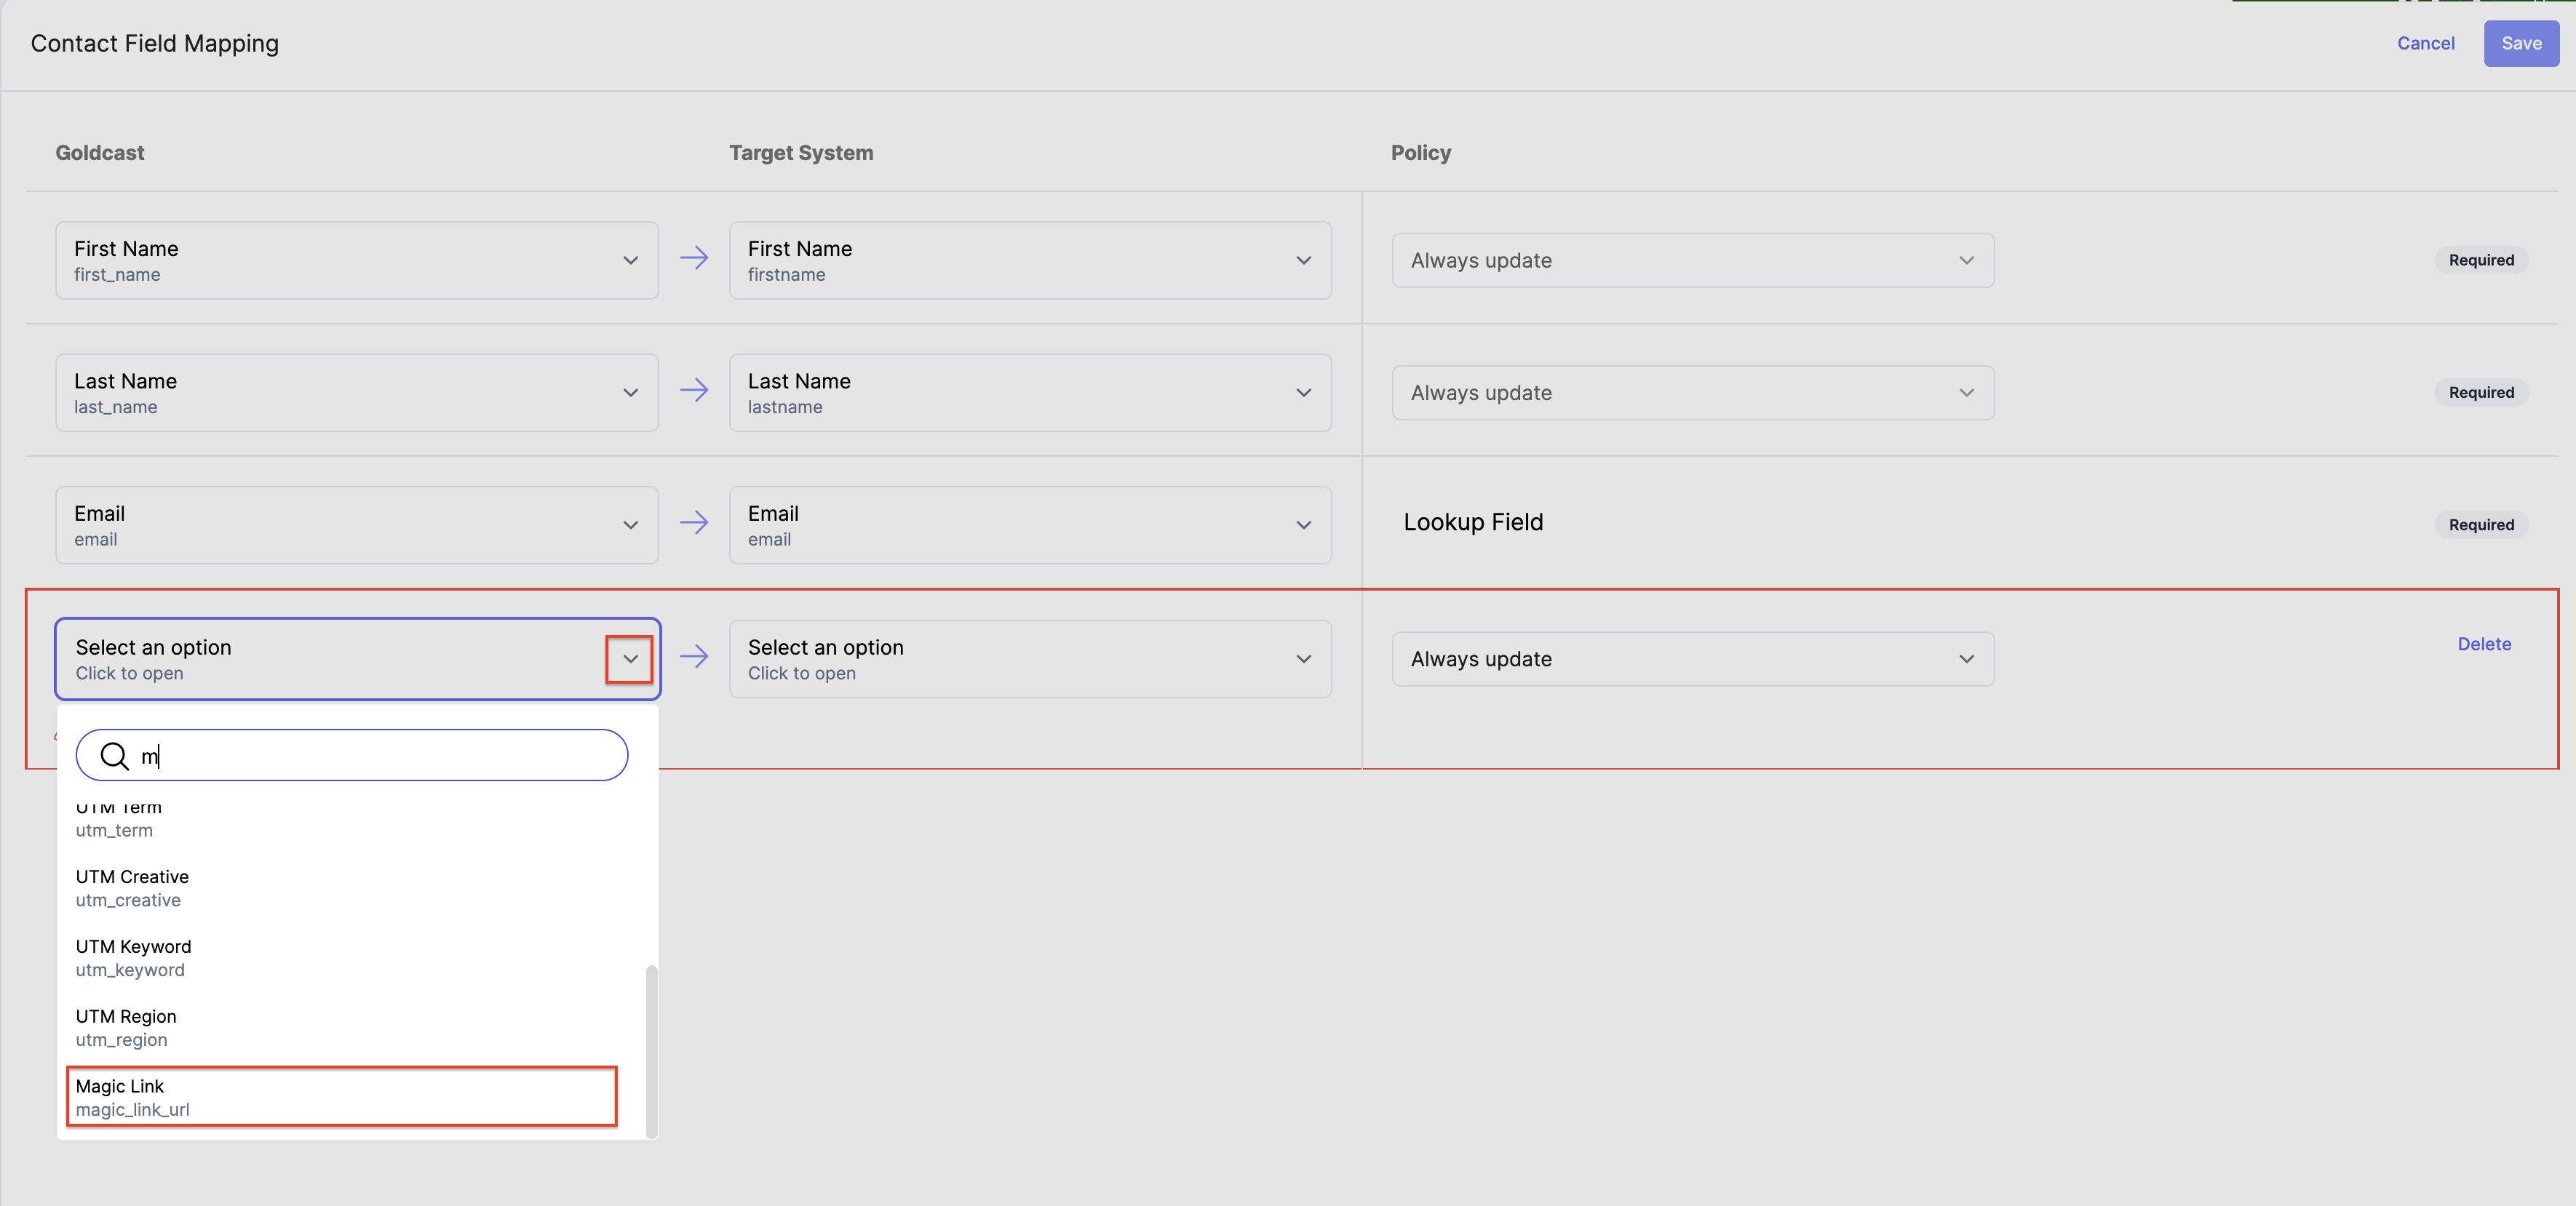
- Select the corresponding Contact Field name in HubSpot.
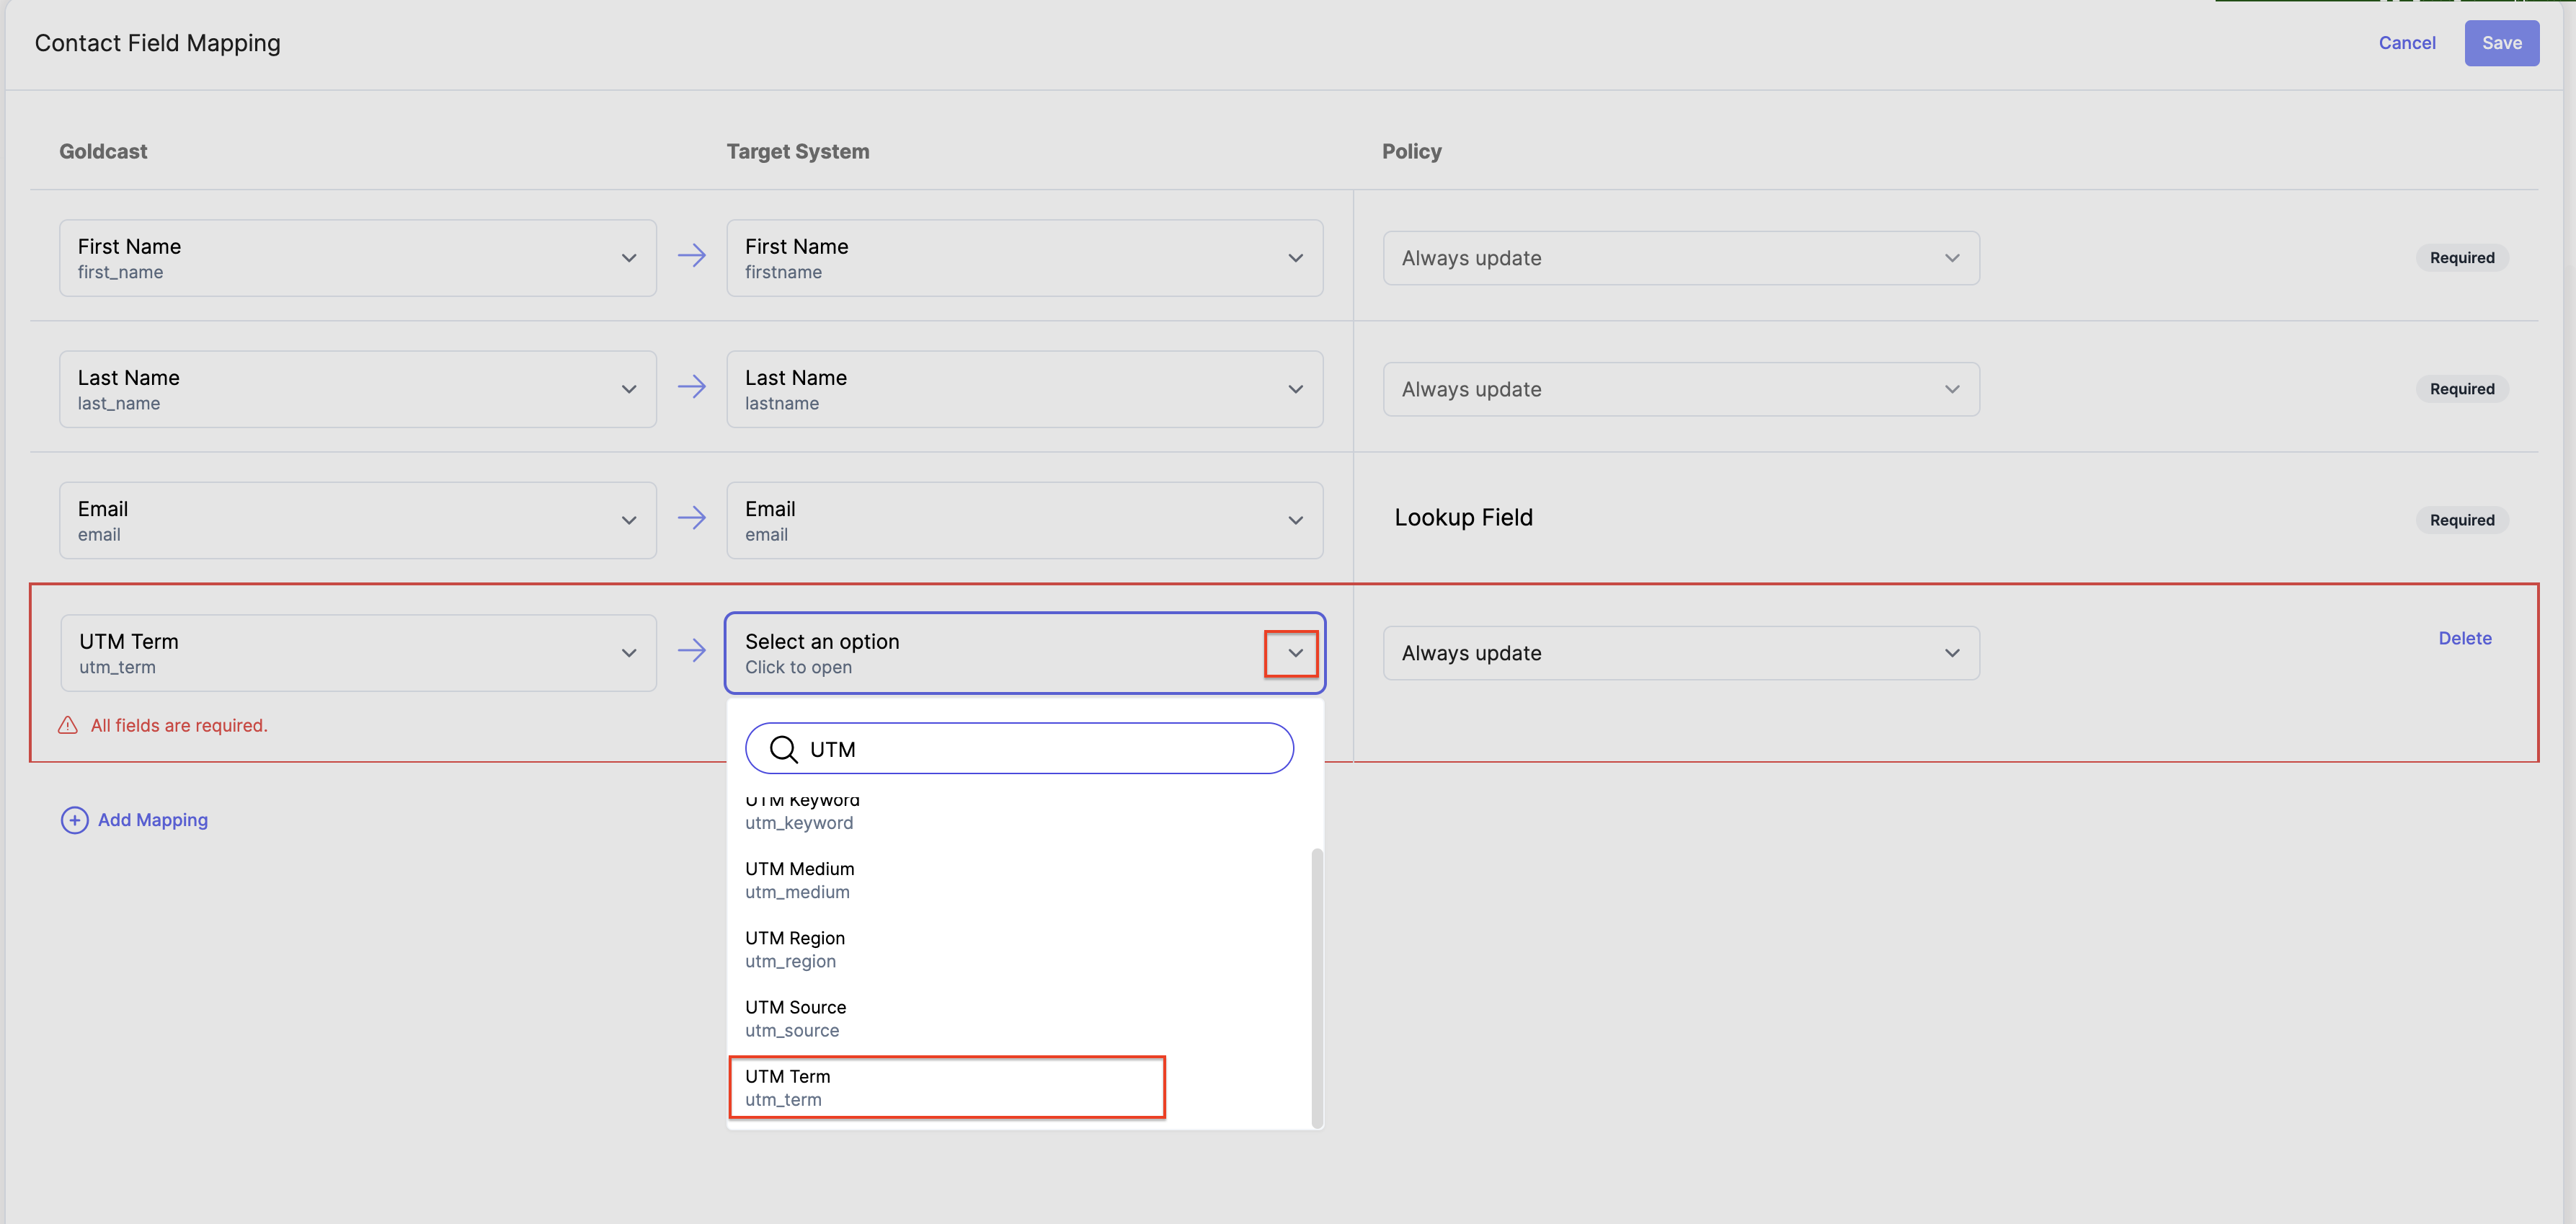
- Choose the update policy that seems appropriate according to your requirement for Contacts in HubSpot.

- Similarly, repeat this process for all the Standard Fields you want to map.
- Once done, click on Save to save the field mapping for HubSpot; this will give you a success
message indicating HubSpot Field Mapping has been Updated Successfully.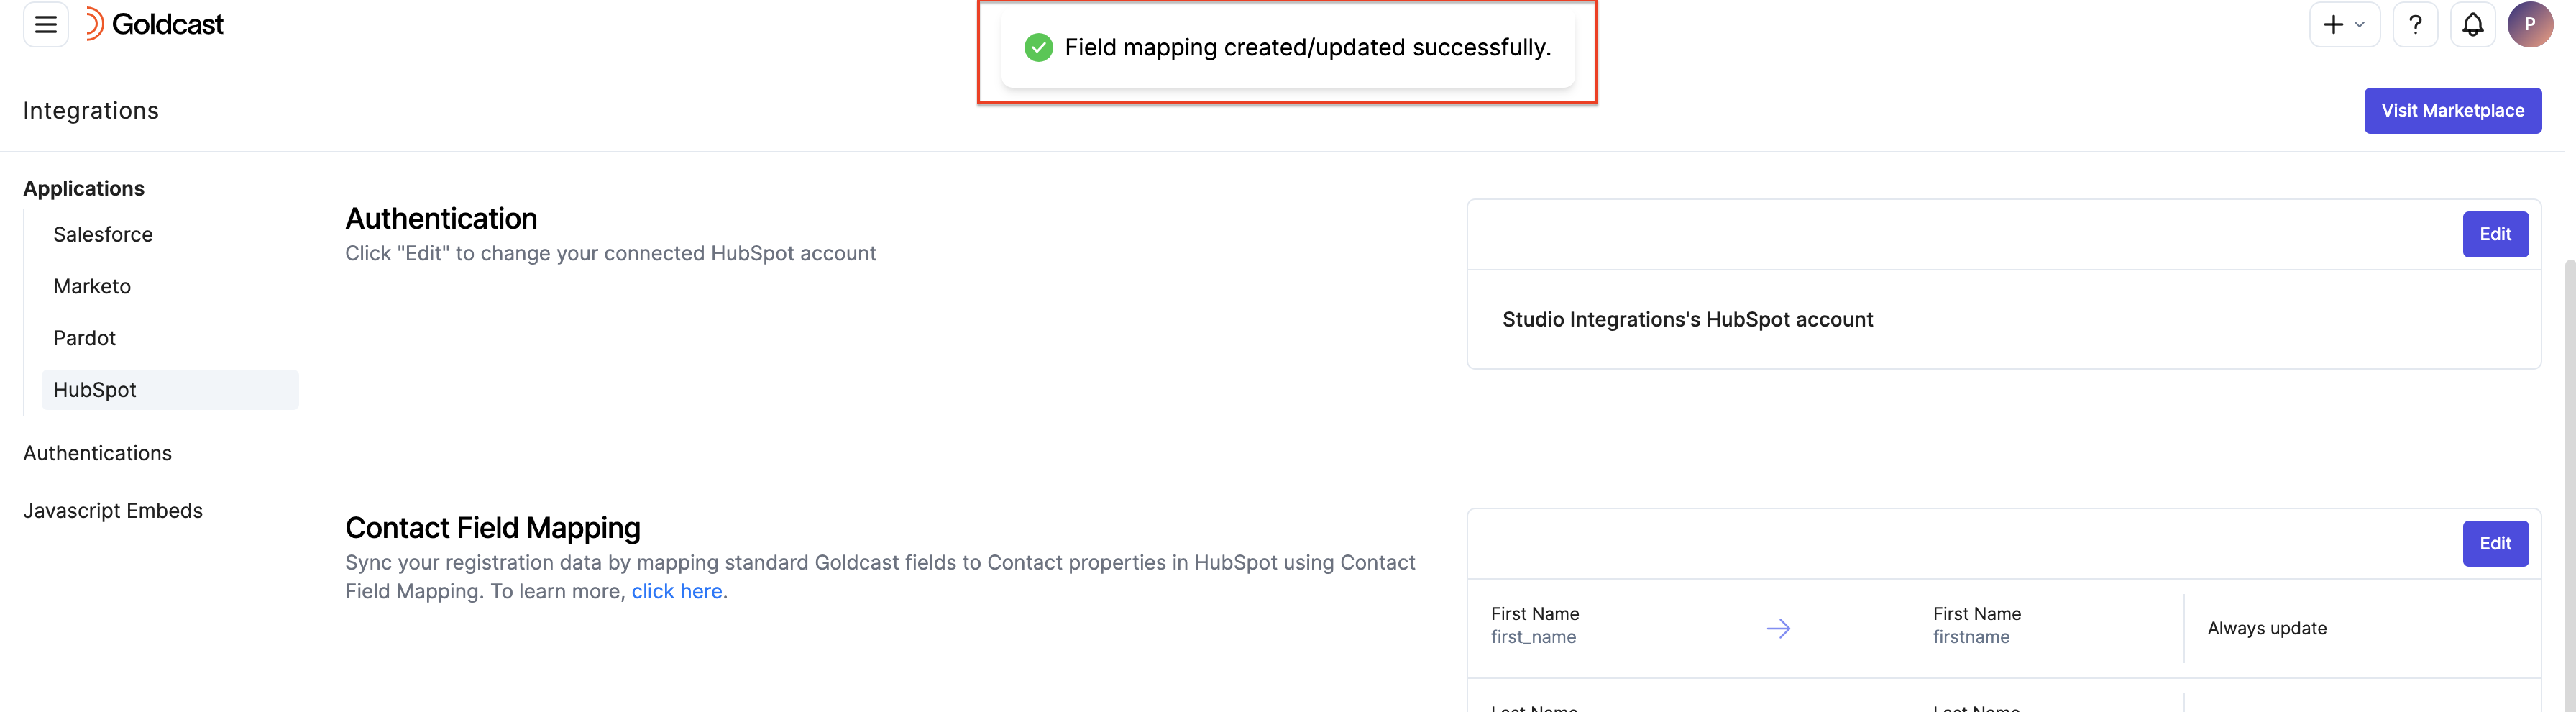
Viewing data in HubSpot
To see the field mapping in action, you must set up a form using our Form Builder. For more information, check out this guide on creating and editing registration forms. Please make sure the Goldcast Fields you want to map to HubSpot Contacts are present in the Form(default form).
For Events
- Login to Goldcast Studio using your credentials and click the Events tab to open your preferred event. This will take you to the Event Dashboard.
-
Click Registration Page of the event on the bottom left.

- Registration page for the event opens on a new tab of the browser. Click on Register CTA.
- Enter your details on the Registration Form. Please copy the email ID that is being entered, as we'll use it in later steps.
 The registration form must include Goldcast standard fields which you wish to map back to HubSpot Contact.
- Click on Submit to finish your registration process.
- Go to Contacts in your HubSpot Instance that has been authenticated with Goldcast.
- Search the email ID you copied in the steps above. This will fetch you the associated contact with that email.
- Click on the Contact Name to view the Contact Profile.
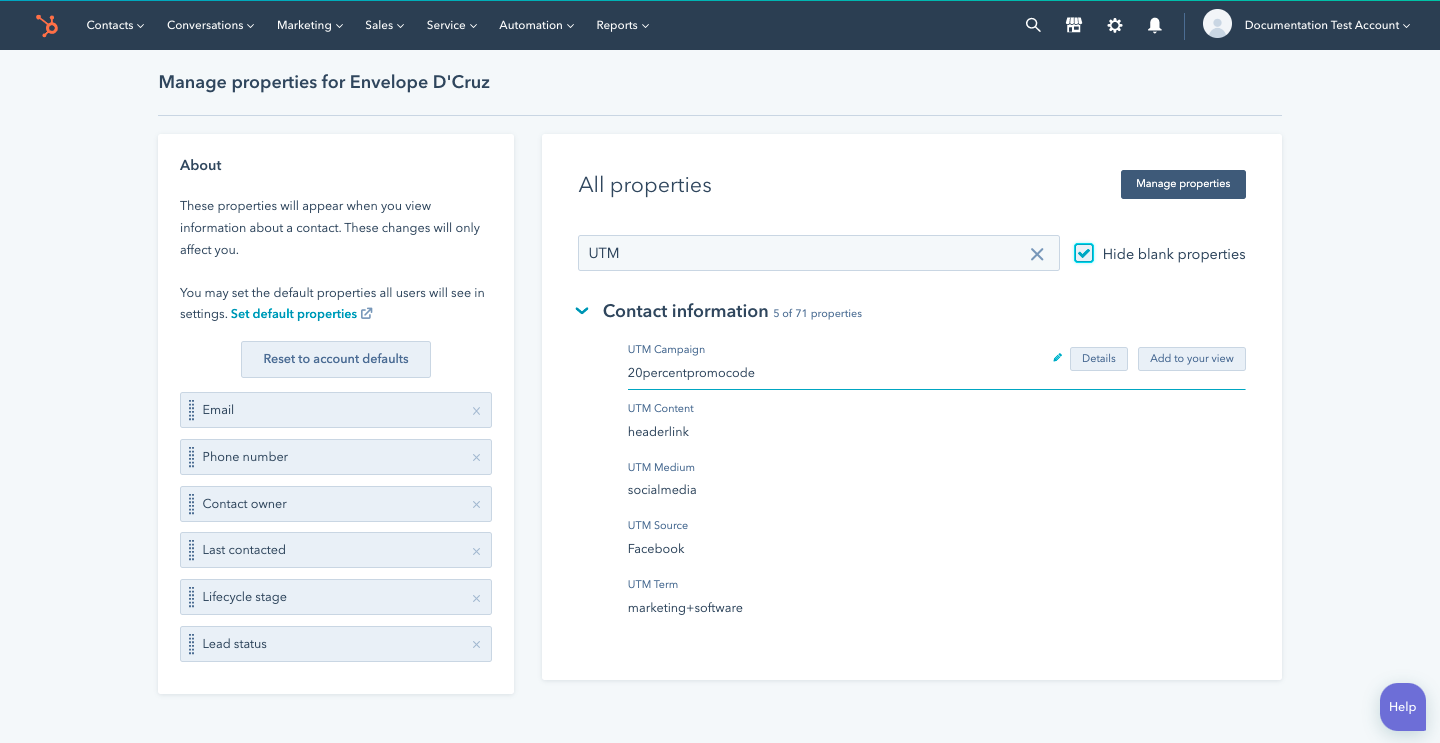
- Scroll down in the left pane to find View All Properties.
- You can now observe the changes in the property value of fields that were mapped in your Goldcast org, in this case, UTM Parameters.
- Click on Details for each property to view details such as Source and Timestamp when it gets updated.
For Webinars
- Login to Goldcast Studio using your credentials and click the Events tab to open your preferred webinar. This will take you to the Webinar Dashboard.
-
Click the
 Paintbrush icon on the top right and click Registration Page.

-
Click the View Page button on the top.

- Registration page for the event opens on a new tab of the browser. Click on Register CTA.
- Enter your details on the Registration Form. Please copy the email ID that is being entered, as we'll use it in later steps.The registration form must include Goldcast standard fields which you wish to map back to HubSpot Contact.
- Click on Submit to finish your registration process.
- Go to Contacts in your HubSpot Instance that has been authenticated with Goldcast.
- Search the email ID you copied in the steps above. This will fetch you the associated contact with that email.
- Click on the Contact Name to view the Contact Profile.
- Scroll down in the left pane to find View All Properties.
- You can now observe the changes in the property value of fields that were mapped in your Goldcast org, in this case, UTM Parameters.
- Click on Details for each property to view details such as Source and Timestamp when it gets updated.
List of Standard Fields in Goldcast
| UTM Hidden Field | |||
| UTM Hidden Field | |||
| UTM Hidden Field | |||
| UTM Hidden Field | |||
| UTM Hidden Field | |||
| UTM Hidden Field | |||
| UTM Hidden Field | |||
| UTM Region | utm_region | string | UTM Hidden Field |
|---|---|---|---|
Important Notes:
- By default, the Country form field in Goldcast has Country Name to Country mapping.
The country name is displayed in the form when a user selects it. However, while syncing this value, it syncs as Country Code. Make sure the field in your target system is configured to accommodate Country. If you want the country name to be synced, you must change it manually in the Goldcast form in the Field's data section. - UTM Tracking Fields should be passed through your Registration Form URL to capture the data and then passed to your target system.
- The Calendar Invite URL field is more than 500 characters, so choose your target field accordingly.
- QR Code URL field is only applicable for field events.