HubSpot allows you to create and set up workflows that run behind the scenes, automating your marketing activities.
This article explains how to create a workflow to import registrant data from HubSpot to Goldcast. When set up, this workflow identifies specific Contacts in HubSpot and automatically registers them for your upcoming Goldcast event.
Pre-requisites
Before you begin, make sure you have the requisite permissions to:
- Goldcast: Organization Admin or Integrations Editor access to Goldcast Studio and your HubSpot integration in a connected status.
- HubSpot: A HubSpot account with a Sales, Service, or Marketing Hub Professional subscription plan.
Setting up a workflow to pass event registrant information from HubSpot to Goldcast
With Workflows, you can import registrant data from your HubSpot account to Goldcast. This process uses HubSpot’s Membership List enrollment trigger and Goldcast’s custom registration action, which are automatically added to your actions list once you’ve set up the Goldcast + HubSpot integration. This workflow automatically imports contact information into the event registrant list in Goldcast.
To set up the workflow:
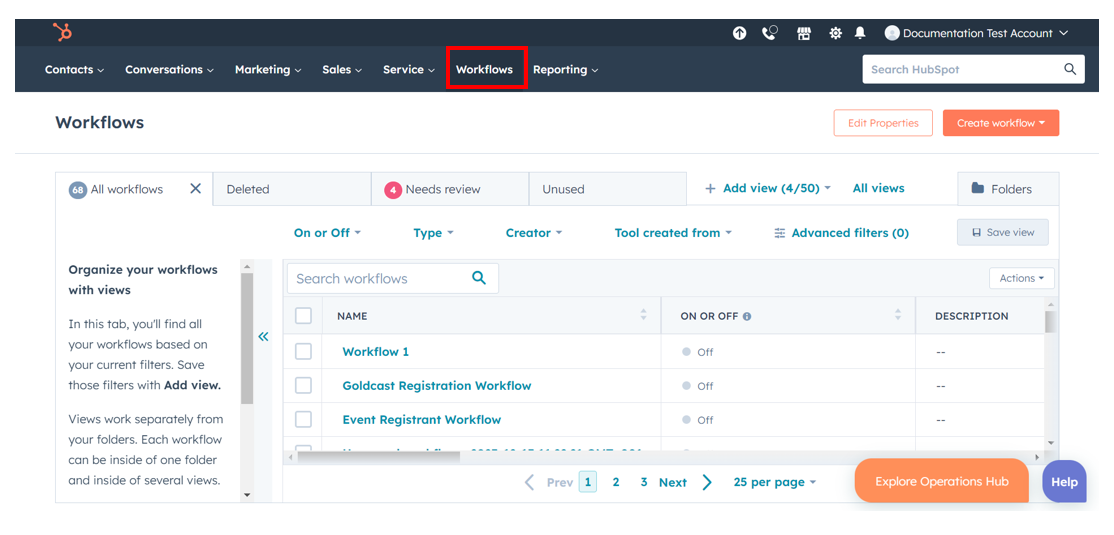
- Log into your HubSpot account and click Workflows in the top navigation menu.
- Select the Create Workflow button, and choose From Scratch.
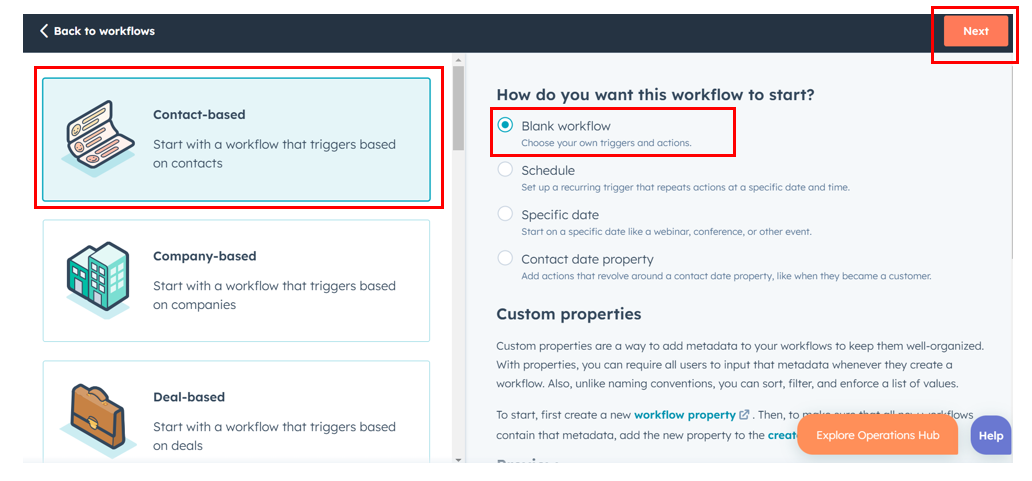
- Select Contact-based, choose Blank Workflow and click Next.
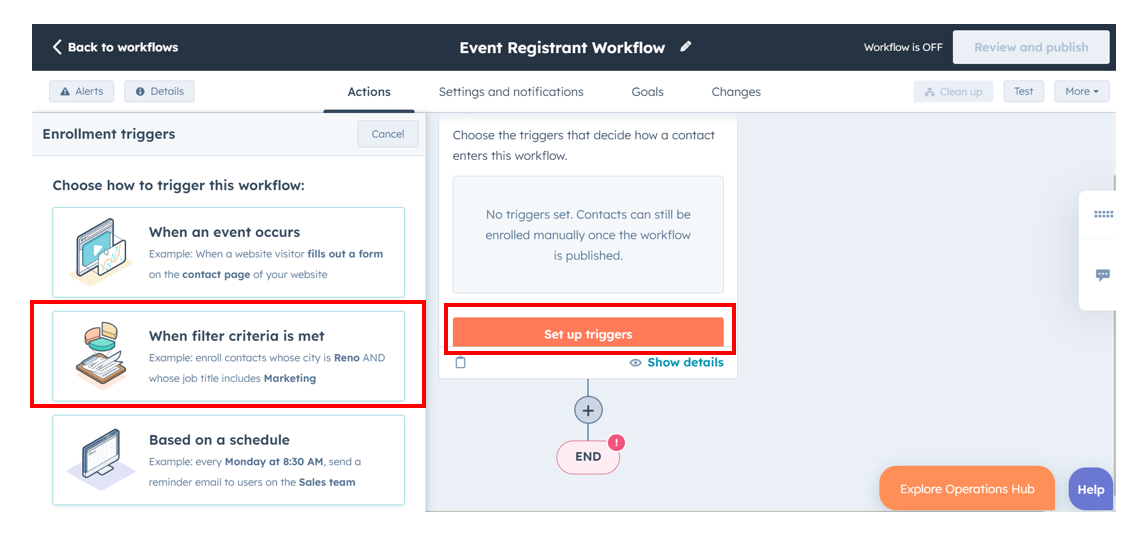
- The next step is to set up the triggers for this workflow. Click the Set up triggers button, and select When filter criteria is met.
- Select List Membership as the filter type, choose the list you’d like to use to register guests for your Goldcast event, and click Save.
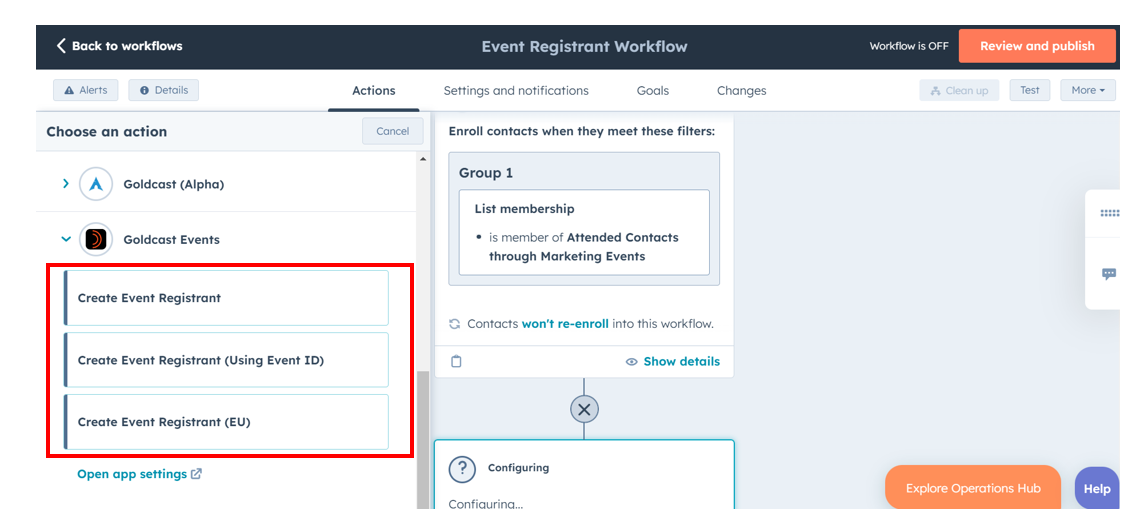
- Next, select the + (New Action) button, scroll to the bottom of the Choose an Action drawer on the left, and select Goldcast Events in the Connected Apps section.
- You can choose the specific Goldcast event to which you want to pass registrant information in three ways:
-
Create Event Registrant: Use the dropdown to select your preferred Goldcast event to which you want to pass the registrant information.
 Note: This option displays all upcoming and past events up to three months. If you want to use an event more than three months old, we recommend using the following option using the event ID.
 - Create Event Registrant (Using Event ID): Pick this option if you know the Event ID.
-
Create Event Registrant (EU): Use this one if you’re EU-based.
-
Create Event Registrant: Use the dropdown to select your preferred Goldcast event to which you want to pass the registrant information.
- Click Save to complete the workflow setup.
Once you’ve set up the workflow, Review and Publish it to begin sending information to your preferred Goldcast event.
Heads Up! HubSpot will not send any information to Goldcast if the workflow is off. So, make sure to turn on the workflow for seamless data flow.
Creating multiple checkboxes property in HubSpot
This section explains how to create a property in HubSpot. We'll explain this with the following example: Adding multi-select checkboxes to the event registrant form.
To add multi-select checkboxes:
- Click Reporting → Data Management → Integrations on the top navigation menu.
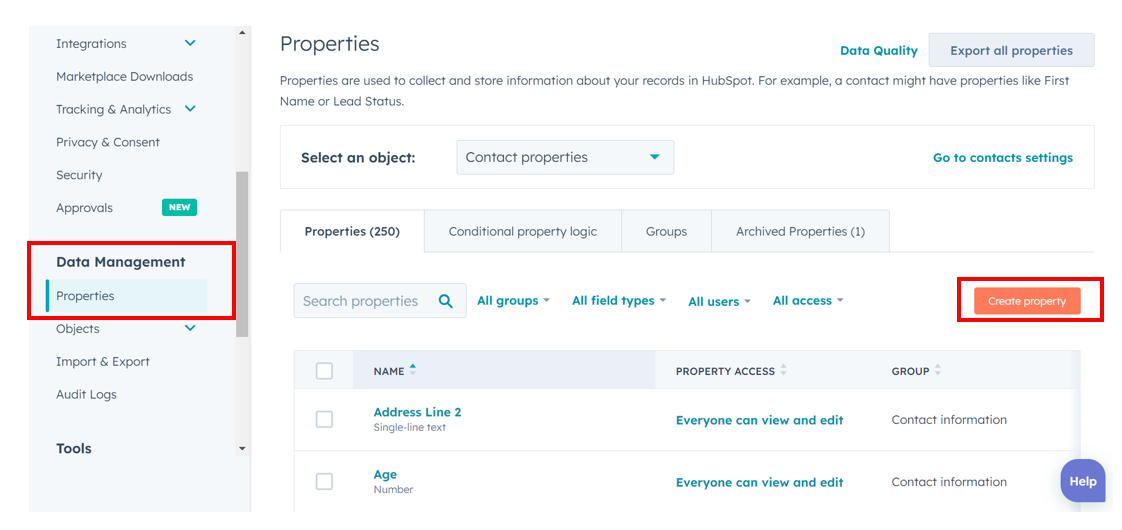
- Navigate to Data Management → Properties using the left sidebar.
- Click the Create Property button. This opens the new property window.
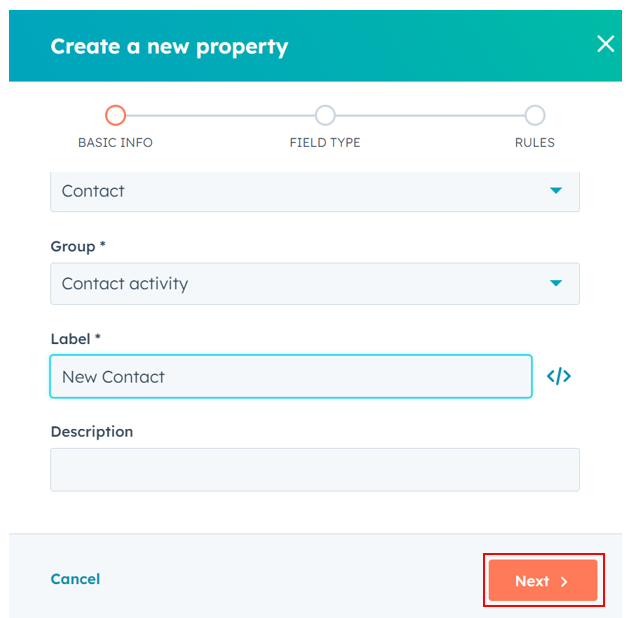
- Select your preferred Object type and Group.
- Type your preferred Label Name (Mandatory) and Description (Optional).
- Click Next.
- In the Field Type dropdown list, select Multiple checkboxes.
- In the Sort dropdown, select your preferred option.
- In the Label field, type the name you want to assign to this option.
- Click + Add an option to add more labels.
- In the IN FORMS column, turn on the toggles of the labels you wish to display in the forms.
- Go to the Rules tab, and select the Show in forms, pop-up forms, and bots check box.
- Click Create.


Once the registrants select the required option(s), the workflow adds guests to your Goldcast event registration list.
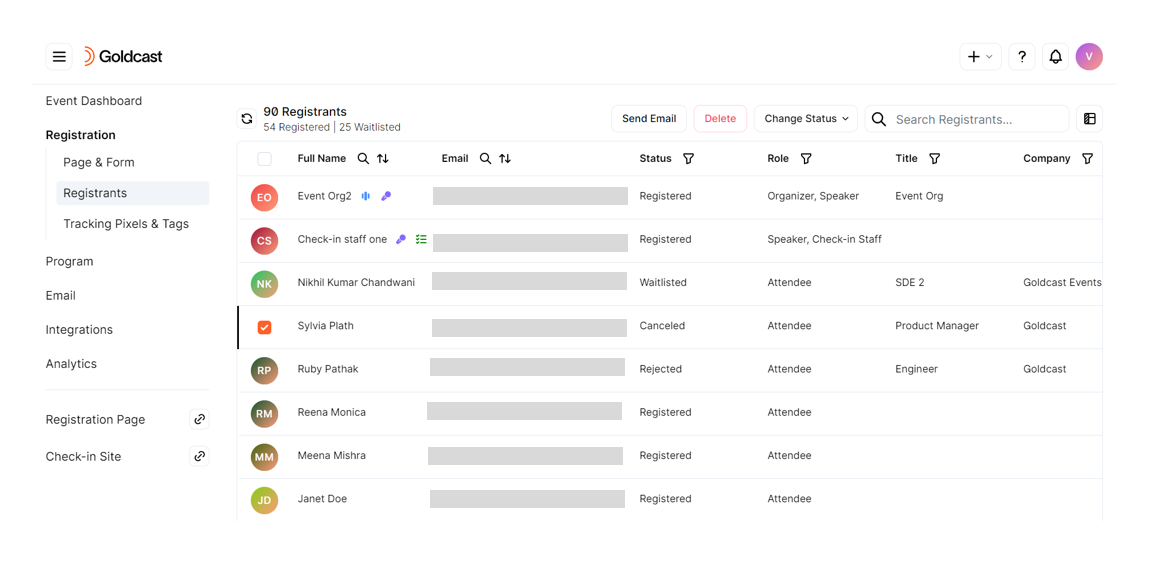
Viewing registrations in Goldcast
Once you’ve set up and turned on the workflow, contact information passed from HubSpot appears in the Registrants tab of your Goldcast event after they have been identified in HubSpot.
Note: This process might take several minutes.
To view registrant information in Goldcast:
- Log into Goldcast Studio, navigate the events list, and select your preferred event.
- Navigate to Registration → Registrants using the left sidebar to view the list of registrants. Check if your contact information has been synced from HubSpot.
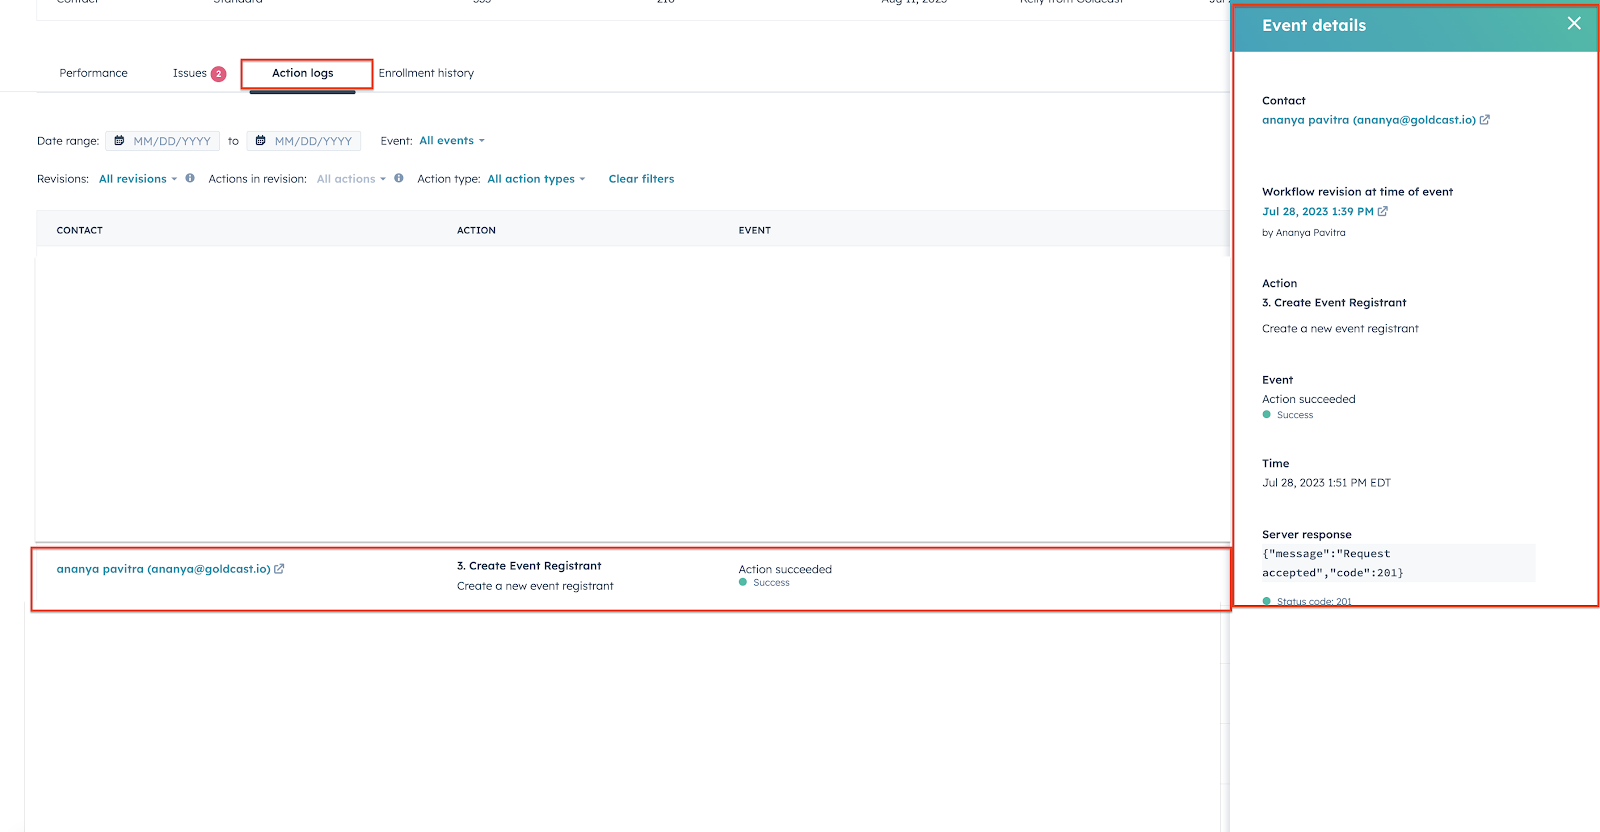
Note: If your HubSpot form submission (or workflow trigger condition) does not align with your event registration, please verify that the Create Event Registrant step within the HubSpot workflow shows a successful record of the corresponding Contact. You must complete this step to ensure the registration information is effectively transmitted to your Goldcast Event.
To access these details for any Contact in HubSpot, refer to your Enrollment History or Action Logs within your HubSpot Workflow.
If you have questions or cannot see the HubSpot contacts reflected in your Goldcast event registration, please contact the Goldcast support team at support@goldcast.io.