Table of Contents
HubSpot, the all-in-one CRM, offers a wide range of features to help streamline your marketing, sales, customer service, and operations. By connecting your HubSpot account with Goldcast, you can take your lead generation to the next level.
This integration automatically sends registrant data to HubSpot contacts, helping your sales team easily follow up on the leads you generate from your Goldcast events. By syncing event registrant data, your sales team can quickly send emails, schedule meetings, or track registrant activity directly from your HubSpot account.
Prerequisites
You need access to the following account features to complete this integration:
Goldcast: Access to Goldcast Studio as an Organization Admin or Integrations Editor.
HubSpot: Your HubSpot account must have Super Admin permissions to integrate with your Goldcast Studio. Only Super Admins can authorize platform integrations in HubSpot.
Connect a Goldcast Org to HubSpot
Heads up!
- Before beginning the HubSpot integration process, we recommend logging into your Goldcast Studio and HubSpot account to avoid doing so later in the setup process.
- Goldcast uses OAuth 2.0 authentication to connect to HubSpot and doesn't use any API keys.
Install the HubSpot integration
Follow these steps to install the HubSpot integration package for Goldcast:
-
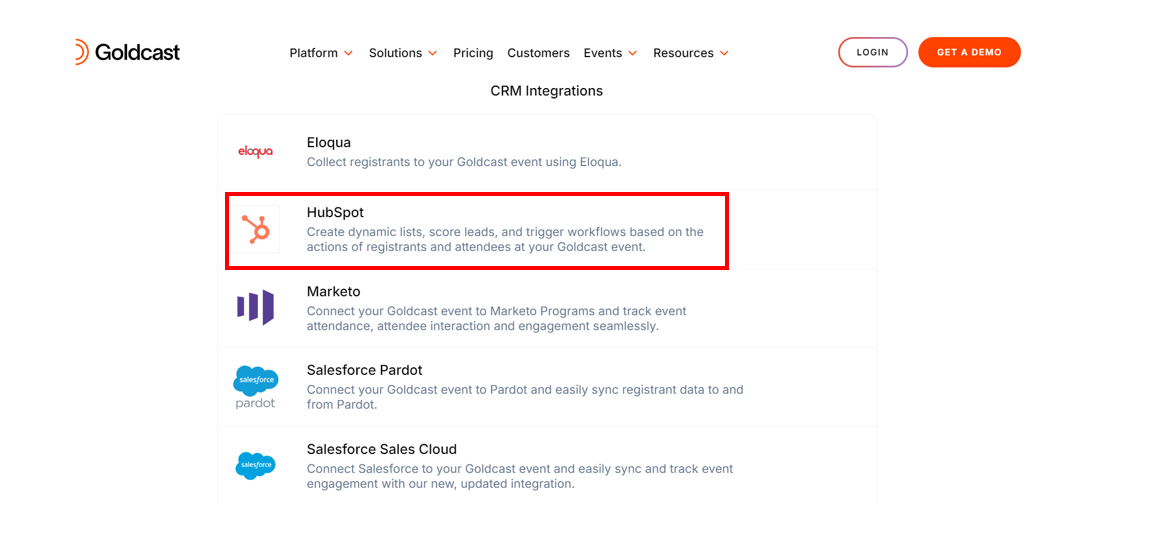
Open Goldcast Marketplace (https://www.goldcast.io/marketplace), and click the HubSpot tile.
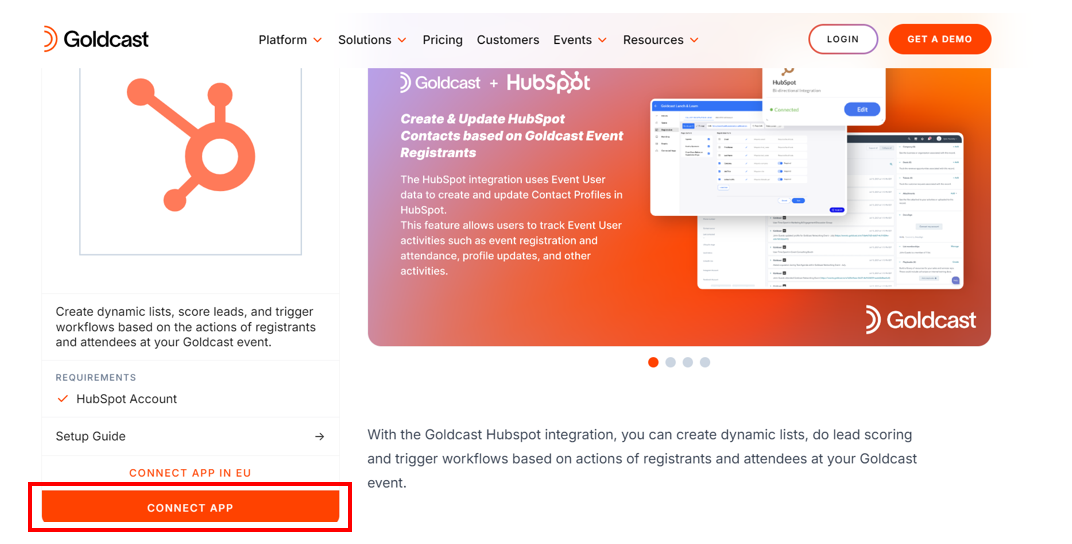
- Click the Connect App button.
Note: If your Goldcast instance is hosted on our EU servers, click the Connect App in EU button.
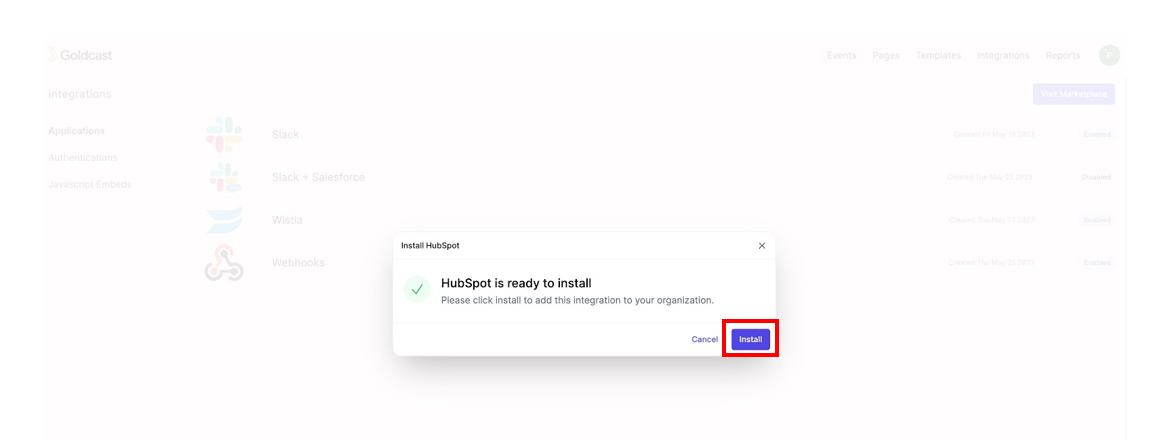
-
You’ll be redirected to the Integrations page for your Goldcast Org. A popup titled Install HubSpot will appear. Click the Install button to complete the process.
Connect your HubSpot account in Goldcast
- Select the New Authentication button on the screen.
- A popup will appear. Assign a name to your integration and click the Create button to continue.
- You’ll be redirected to an authentication screen where you will be asked to provide access to information from your HubSpot account. Select the account you want to add and approve any requests to connect it to your Goldcast org.
-
If the account connection is successful, a message will appear indicating that the authentication has been successfully created. Click the Finish button to complete this process.
-
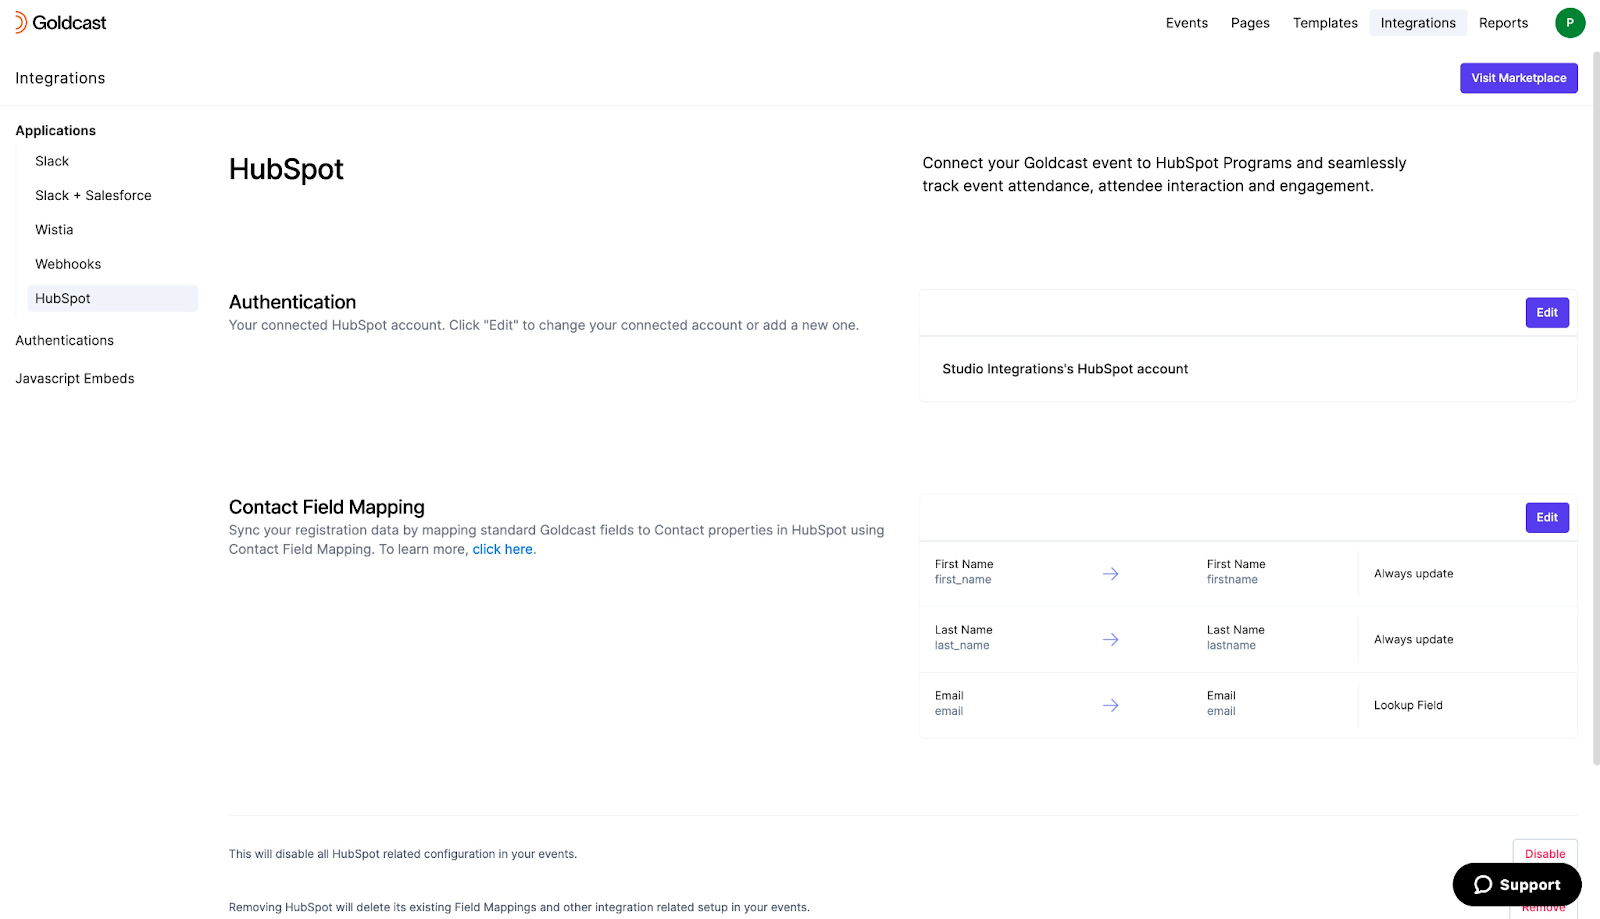
Once you click Finish, you’ll land on the HubSpot connection settings page.

How to sync registrant data to HubSpot contact profiles
Heads up! It may take up to five minutes for Event Registrations in Goldcast to be imported into your HubSpot Contacts. If you do not see new registrants in your contact list, please check back in a few minutes.
After you've connected your HubSpot account to an event in Goldcast, all users registered for the event will automatically have a Contact Profile created for them in HubSpot. Once a user is registered, they will begin having Timeline Activities associated with their Contact Profile.
Follow these steps to view the associated timeline activities for a Goldcast event registrant in HubSpot:
- Open your HubSpot account and navigate to Contacts from the Contacts tab.
- Click on any preferred Contact and navigate to the Activities tab.
-
Click the Filter By option and select Goldcast and Goldcast Events to view the contact’s activities in Goldcast.
Note: If you don't see the Goldcast activities for the Contact, double check if you've selected Goldcast Events in the Filters. Goldcast Events have to be enabled in the filters to view associated activities for a contact.
How to view timeline activities for a Goldcast event in HubSpot
Timeline activities track user engagement and interaction with your event, such as attendance, time spent at the event, and participation in polls, Q&A sessions, and discussion groups. Once the HubSpot integration has been enabled, you can select the Timeline Activities you wish to sync to the user's HubSpot Contact Profiles.
Currently, Goldcast offers 20+ timeline activity triggers you can sync with HubSpot. For more information, refer to Event Engagement Activities.
Note: Individual timeline activities can be enabled and disabled for an event. You can choose which activity’s trigger data to send to HubSpot. All Timeline activities Goldcast offers are enabled to true by default for a newly created event.
Follow these steps to view and update these settings:
For Events
- Log in to Goldcast Studio and open your preferred event.
-
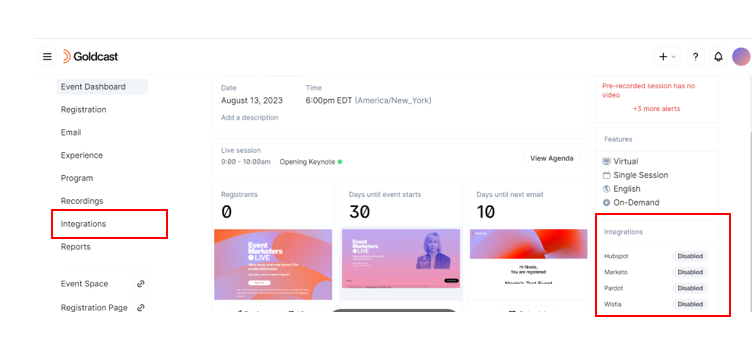
From the event dashboard, click Integrations on the left side panel. Alternatively, click the Configure option in the Integrations available section within the Event dashboard.
-
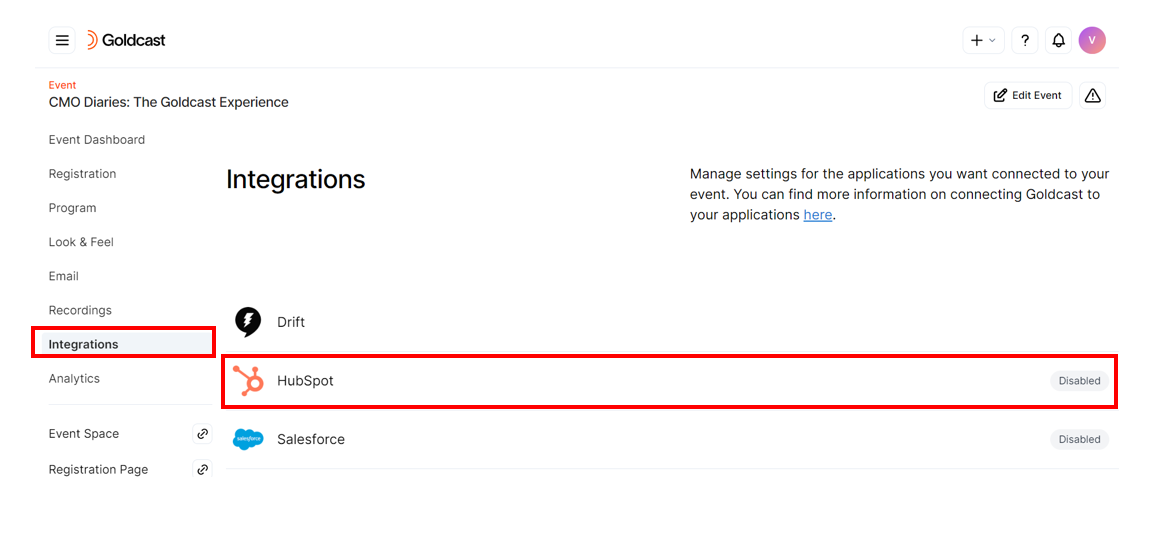
Select HubSpot from the integrations list.
-
This opens the HubSpot Settings drawer. Turn on/off the toggles depending on which timeline activities you wish to sync back to the users’ HubSpot contact profile for this event.
Note: You can view the Custom Activities toggle settings only when HubSpot settings are enabled for the event. Ensure the Enabled for Event toggle is turned on.
-
Click Save to complete the action.

Once enabled, you can see the Timeline Activities syncing to the users’ HubSpot Contact Profile.
For Webinars
- Log in to Goldcast Studio and open your preferred webinar.
- From the webinar dashboard, click Integrations on the tabs at the top.

-
Select HubSpot from the integrations list and click Settings.

-
This opens the HubSpot Settings drawer. Turn on/off the toggles depending on which timeline activities you wish to sync back to the users’ HubSpot contact profile for this event.
- Click Save to complete the action.

Once enabled, you can see the Timeline Activities syncing to the users’ HubSpot Contact Profile.
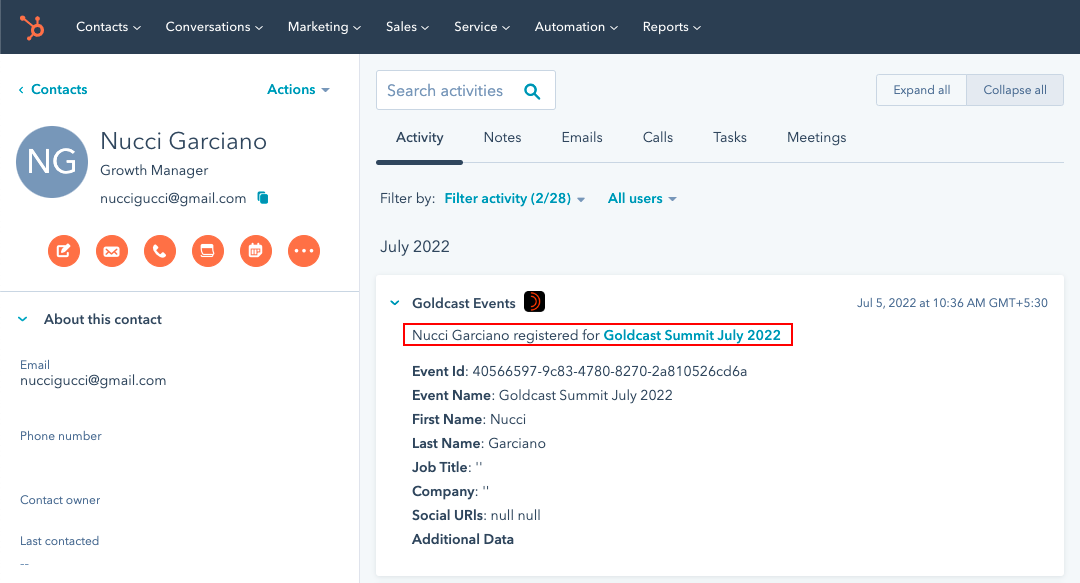
Here’s an example of a Registered activity trigger sent to HubSpot as a Timeline Activity.
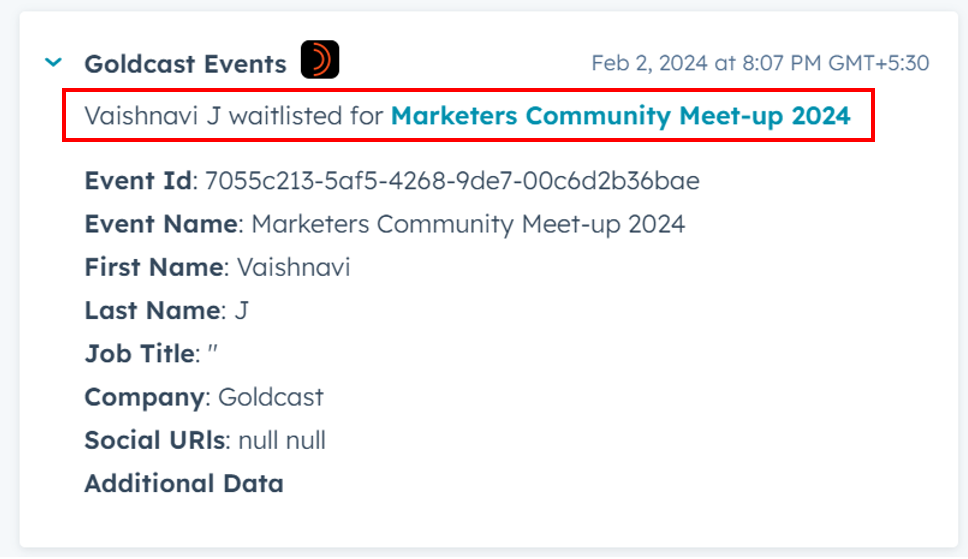
Here’s an example of a Waitlisted activity trigger sent to HubSpot as a Timeline Activity.
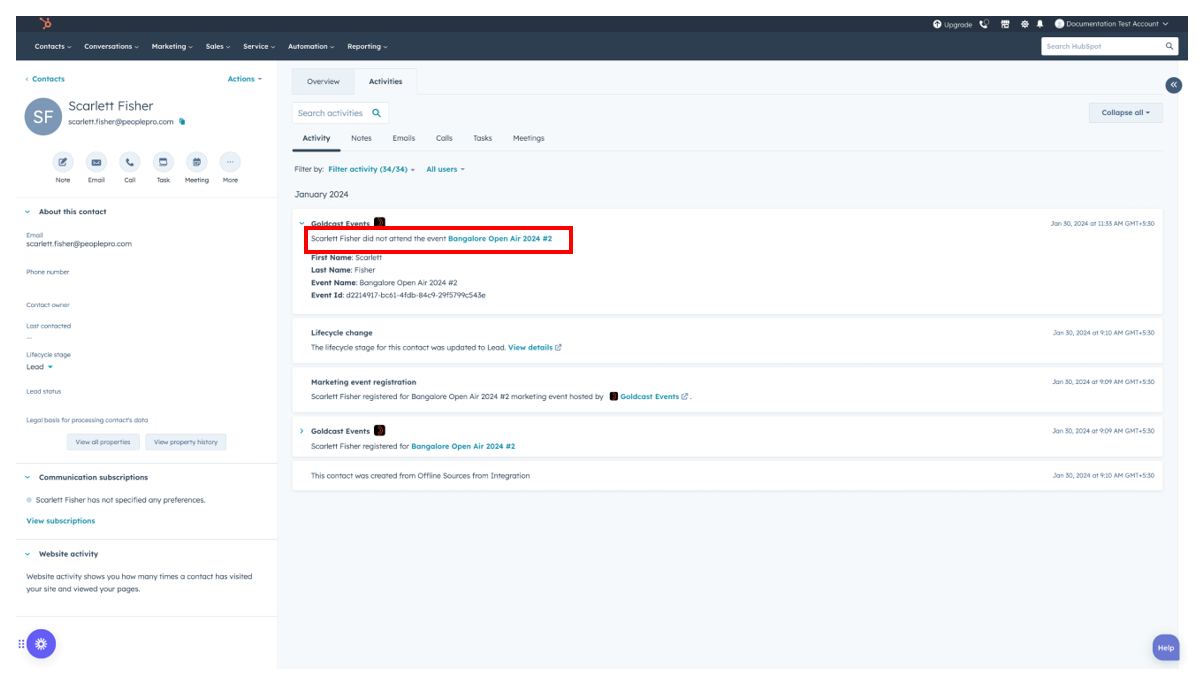
Here’s an example of an Event No Show activity trigger sent to HubSpot as a Timeline Activity.
On-Demand Timeline Activities in HubSpot
We sync four user engagement activities for On-Demand events, distinguished by the Engagement Type property in the Timeline Activity. These activities include:
- Attended
- Attended Session
- Event CTA
- Resource Downloaded
For these activities, Engagement Type can have two different values, i.e., Live and On-Demand. You don't need to explicitly enable these activities in your Events HubSpot Settings, as these are automatically done.
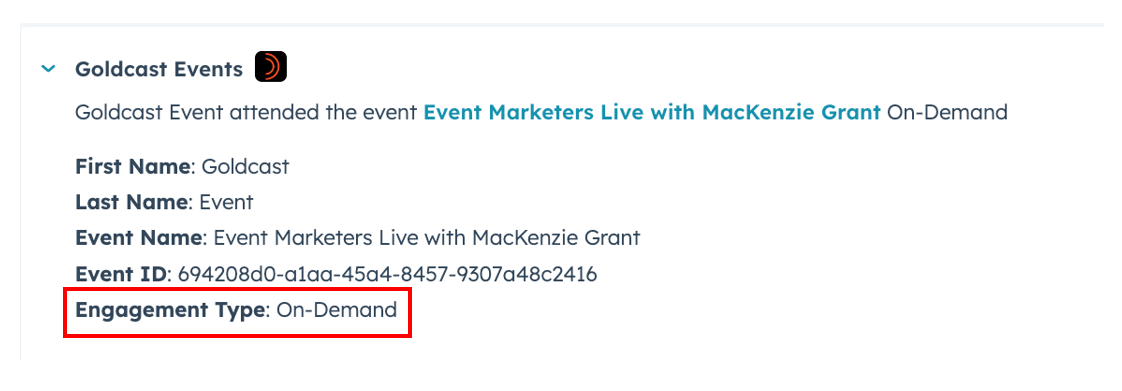
You can utilize the Engagement Type property to filter and automate actions in HubSpot workflows, lists, and other automation. Here’s an example of how the On-Demand Engagement Type appears in Contact Timeline Activities.
Event Attendance for a user with Engagement Type: On-Demand
The other mentioned activities above, like Attended Session, etc., in the On-Demand mode of your event will include a corresponding property as well. As the example below demonstrates, you can utilize this property in your workflow and automation filters.
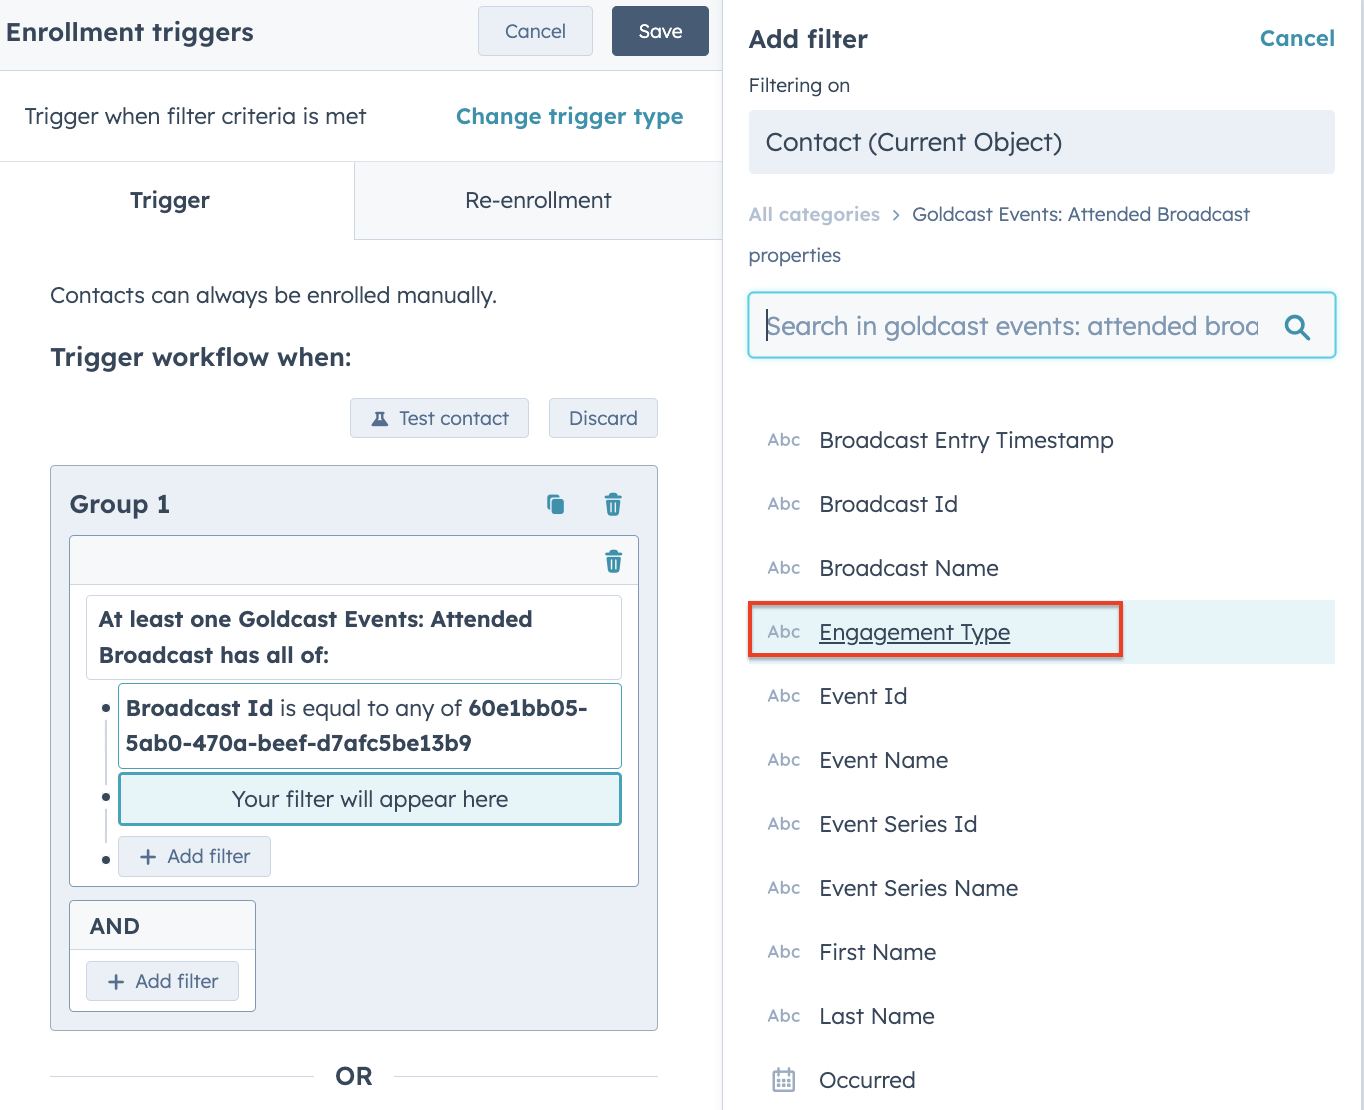
Note: Please ensure that you use the exact spelling of the values in your HubSpot Workflow trigger conditions to achieve the most accurate results when filtering.
How to view Goldcast events data in HubSpot
After enabling your HubSpot integration for an event, you can view more information about your events from the Marketing Events page of your HubSpot Account.
- Click the Contacts tab, select the Contacts dropdown and choose Marketing events from the list.
- Select your preferred event to view additional information about it.
Note: For each event created or updated after the HubSpot Integration was enabled in your Goldcast Studio org, a corresponding Marketing Event will be created in HubSpot.
You can view the following information in HubSpot:
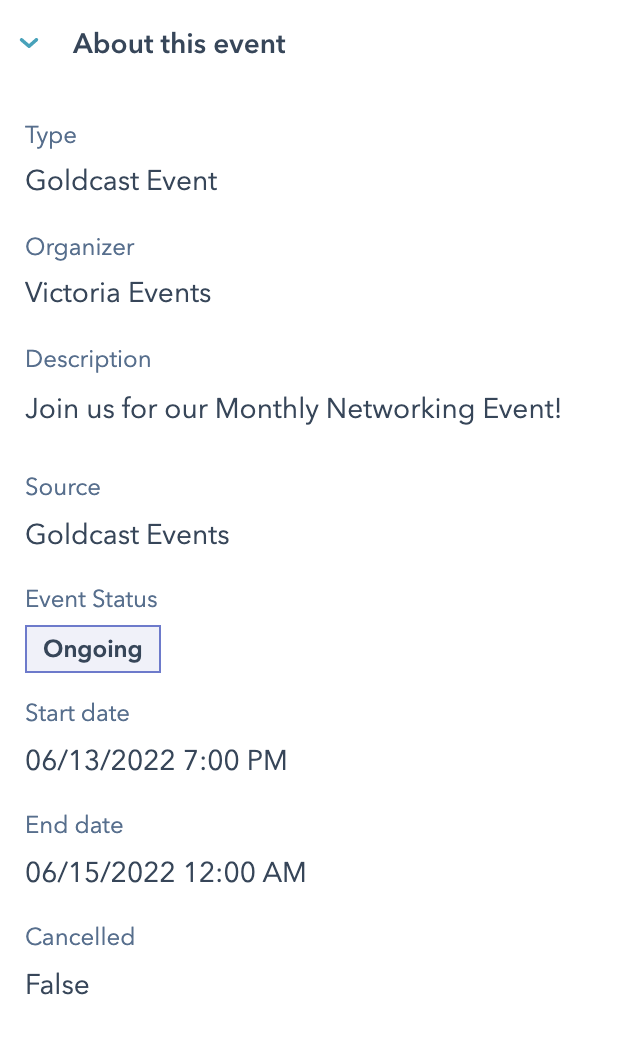
Event details
|
Goldcast Event is the Type for any event imported from your Goldcast Org. The name of your Goldcast Org is listed in the Organizer field. The description you provided in the event’s dashboard will appear under the Description field. You can also find the event Start and End Dates and Times mentioned here. The Cancellation status of your event will remain in a False state unless the event is canceled from your Goldcast Org. |
 |
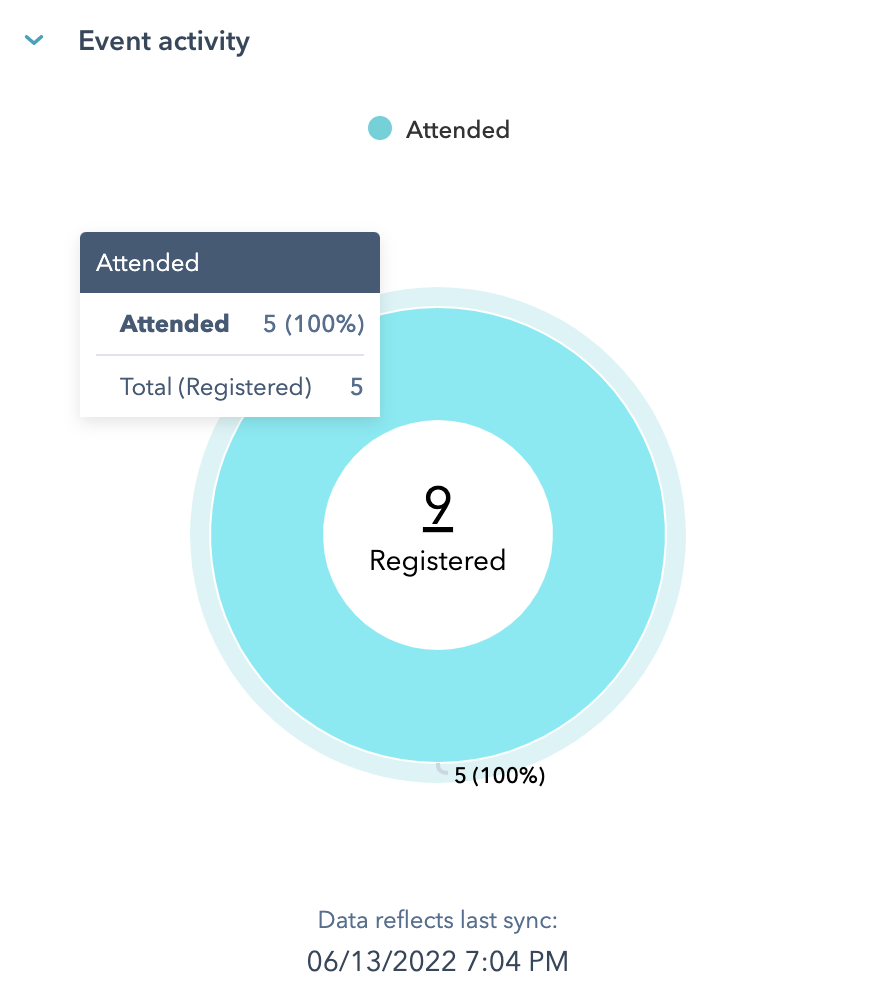
Event activity
|
The Event Activity section displays the total number of guests who have registered for your event. Additionally, it also provides updates on the number of guests who have attended your event and details of the latest sync time. |
 |
View all properties
Select the View All Properties button at the bottom of the left panel to get a comprehensive list of all event properties tracked on the Marketing Events page.

View property history
To review the change history for your event properties, select the View Property History button at the bottom of the left panel.
FAQs & Troubleshooting
I've completed all the steps mentioned above, but my Goldcast data still isn't syncing with HubSpot. What could be the issue?
If you're not seeing data transfer between the two platforms, try whitelisting the Goldcast domain in your HubSpot settings. This might resolve the syncing problem.
Need more help? If you're experiencing any issues with the integration, contact gc.support@cvent.com for additional assistance.