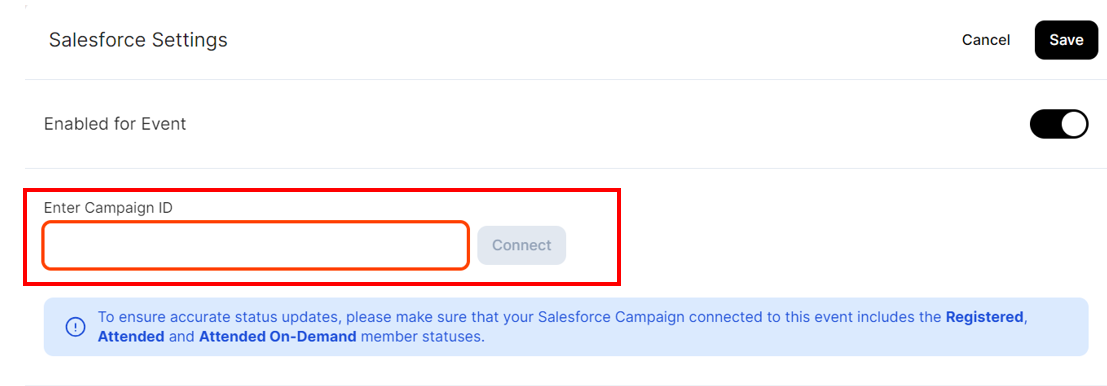
In order to use this Salesforce Integration for your events, you will need to configure settings at an event level. This step involves connecting a Salesforce campaign to your Goldcast event, which facilitates the updation of Campaign Member Statuses and also syncing Custom Activities to Salesforce.
Campaign Member Status Updates in Salesforce
Goldcast Integration creates and/or updates your Campaign Member statuses to:
- Registered: When a user registers for an event in Goldcast and status in the Registrants tab is Registered.
- Waitlisted: When a user registers for a waitlisted Goldcast event and status in the Registrants tab is Waitlisted. This is only applicable to waitlisted events.
- Rejected: When an admin/organizer changes the user status to rejected in the Registrants tab. This is only applicable to waitlisted events.
- Canceled: When an admin/organizer changes the user status to canceled in the Registrants tab.
- Attended: When a registered user attends the event live or in person.
- Did Not Attend: When a registered event user doesn’t attend the event live or in person (for hybrid and field events).
- Attended On-Demand: When a registered user views the Goldcast event in on-demand mode. This is only updated for Goldcast On-Demand Events.
 Note: Currently, we update campaign member statuses to Registered, Waitlisted, Rejected, Canceled, Attended, Did Not Attend, and Attended On-Demand. To know the naming convention of the corresponding custom activities, refer to Event Engagement Activities in Goldcast.
We do not support custom campaign member status mapping in our integration. Please contact our Support Team if you require any further assistance.
How to connect a Salesforce Campaign to a Goldcast Event
After creating and setting up your Goldcast event, you can connect it to a Salesforce Campaign.
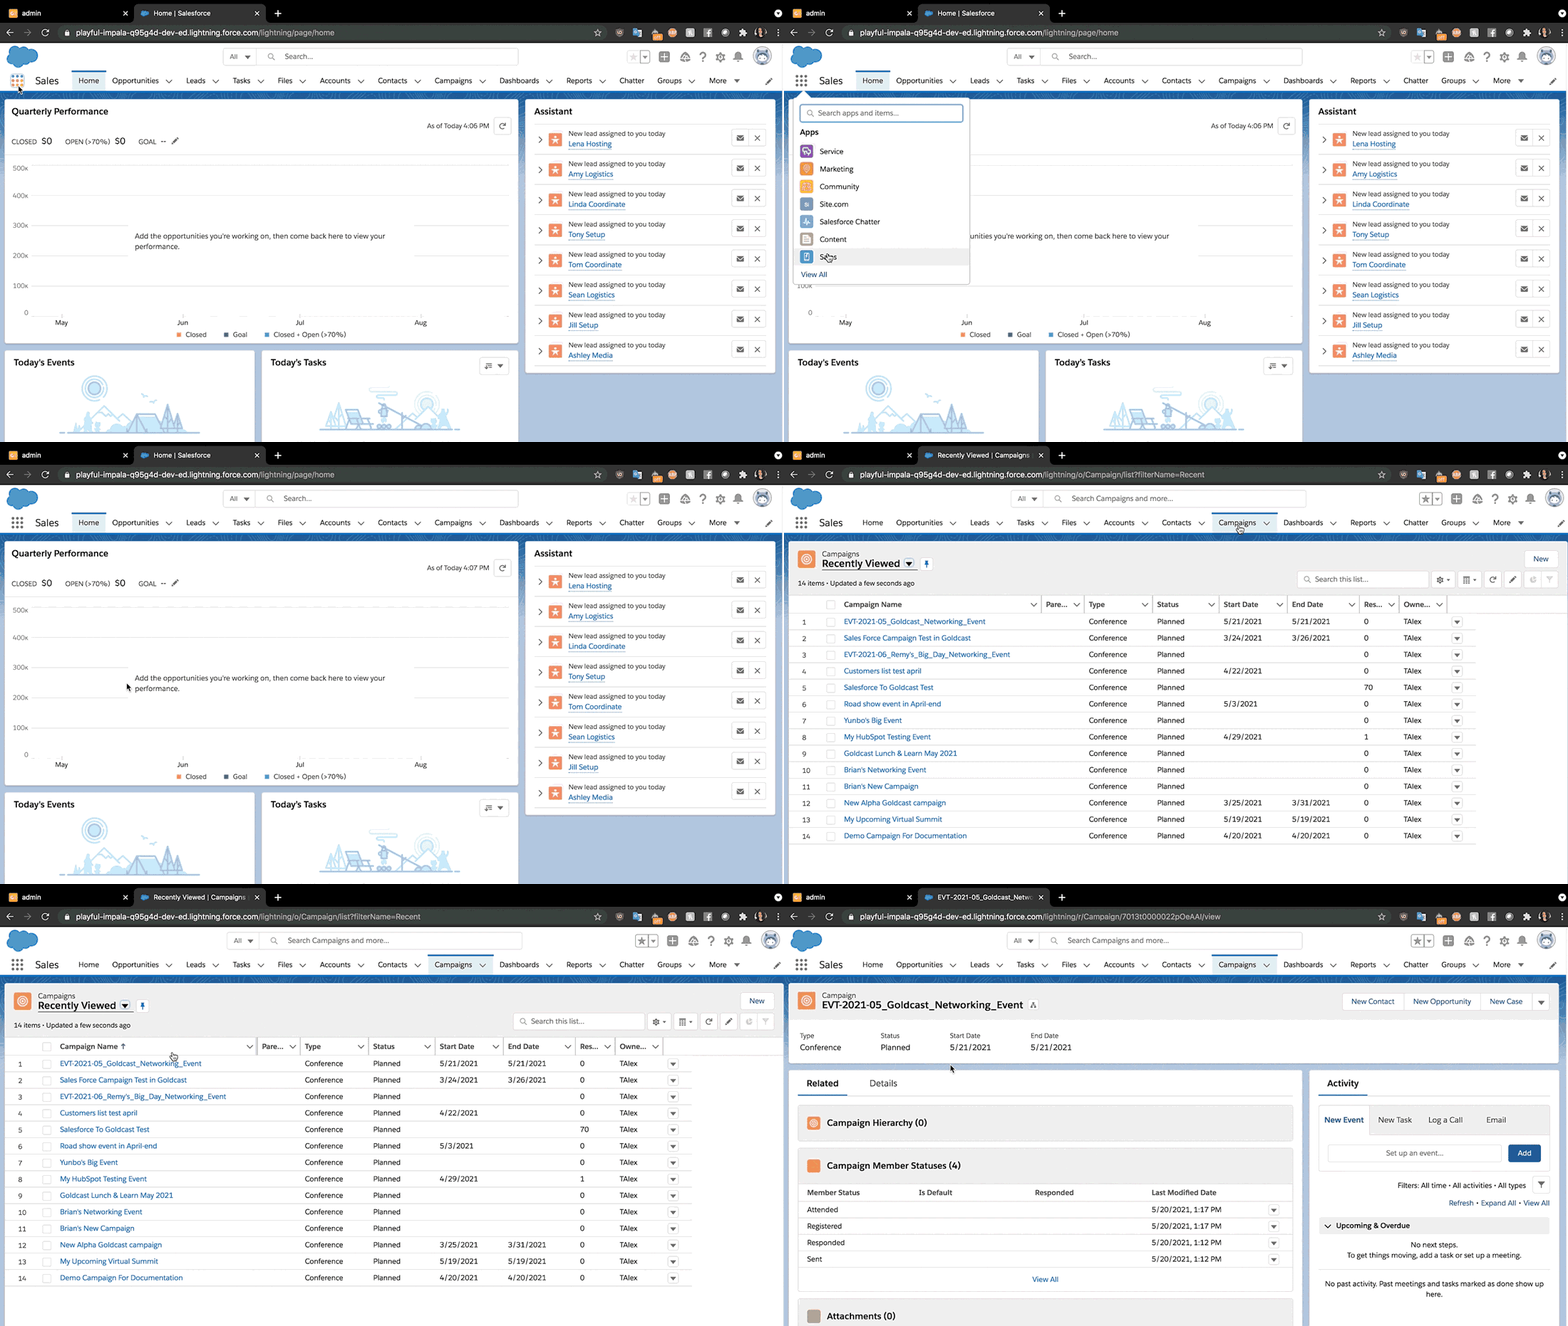
- Open the App Launcher Menu in the top-left corner and navigate to the Sales tab.
- Select the Campaigns menu from the top Navigation bar.
- Once redirected to the Campaigns page, select the campaign you want to connect to your Goldcast Event from the Campaign List.
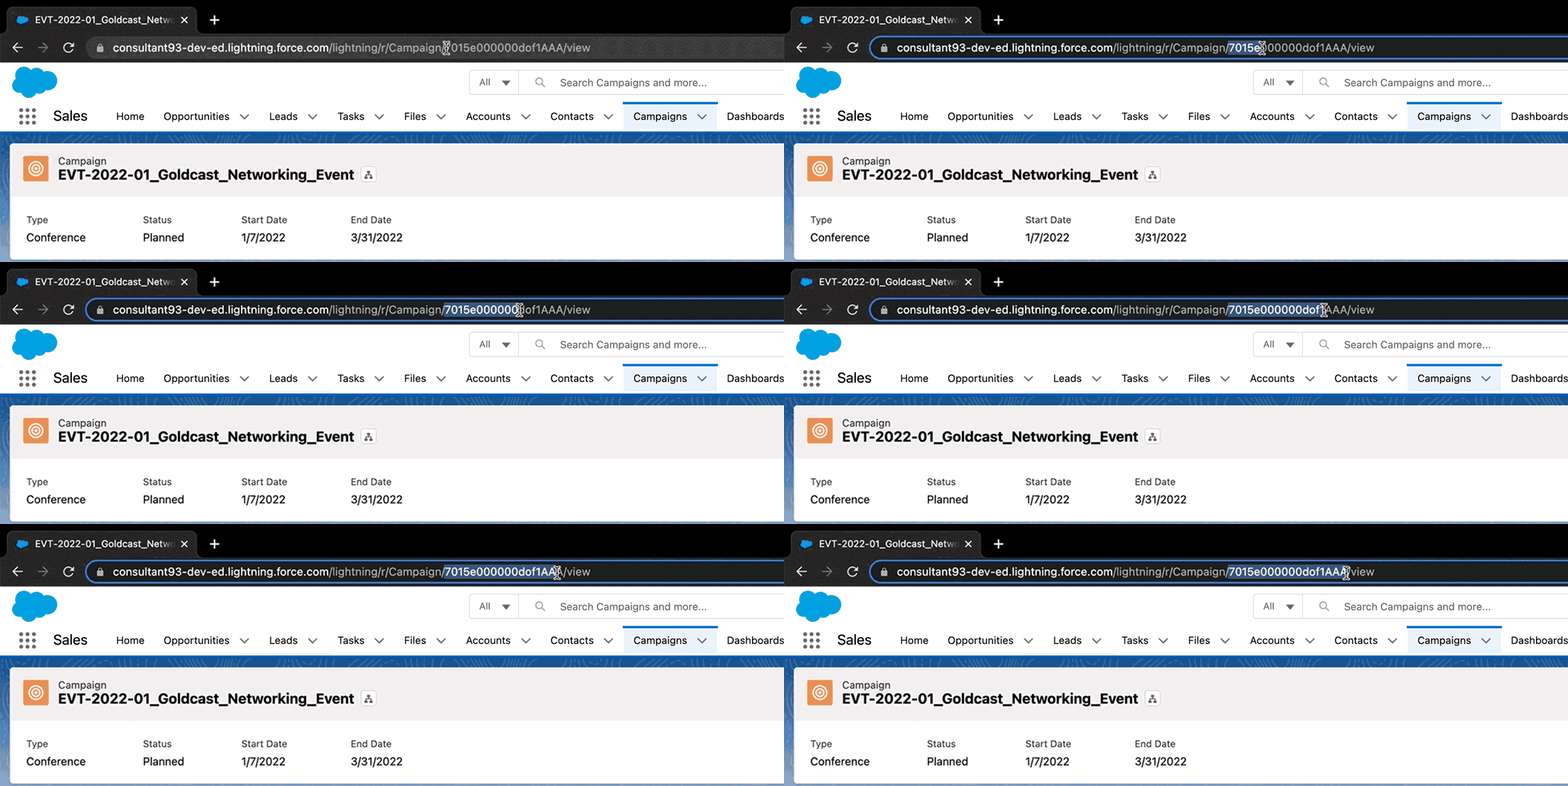
Once you are on the Campaign's page, copy its Campaign ID. You will use this ID to connect the campaign to your Goldcast event.
Campaign IDs are 15 or 18 characters long and will always begin with 701. Because Salesforce setups differ from user to user, we recommend copying this ID from the campaign's URL.
- Campaign IDs are located after the /Campaign/ path of the URL. Highlight and copy the Campaign ID. We recommend saving it in a note or document so it's easy to retrieve it later.
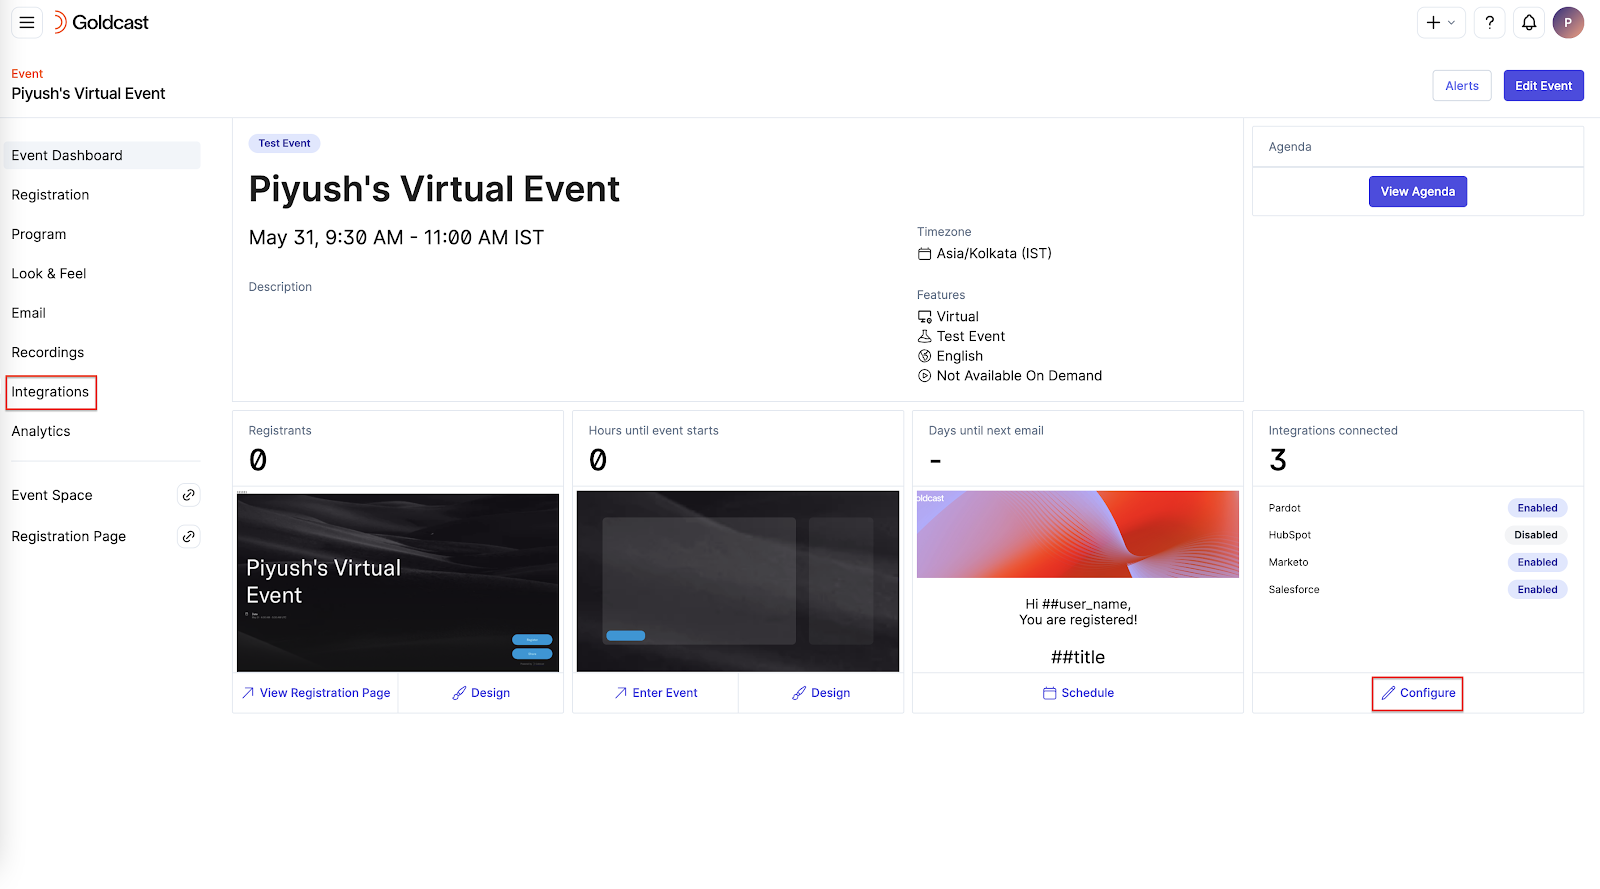
- In Goldcast Studio, navigate to your desired event from the events list.
- Click the Integrations tab using the left sidebar or Configure in the Integrations available section on the right side of the Event dashboard.
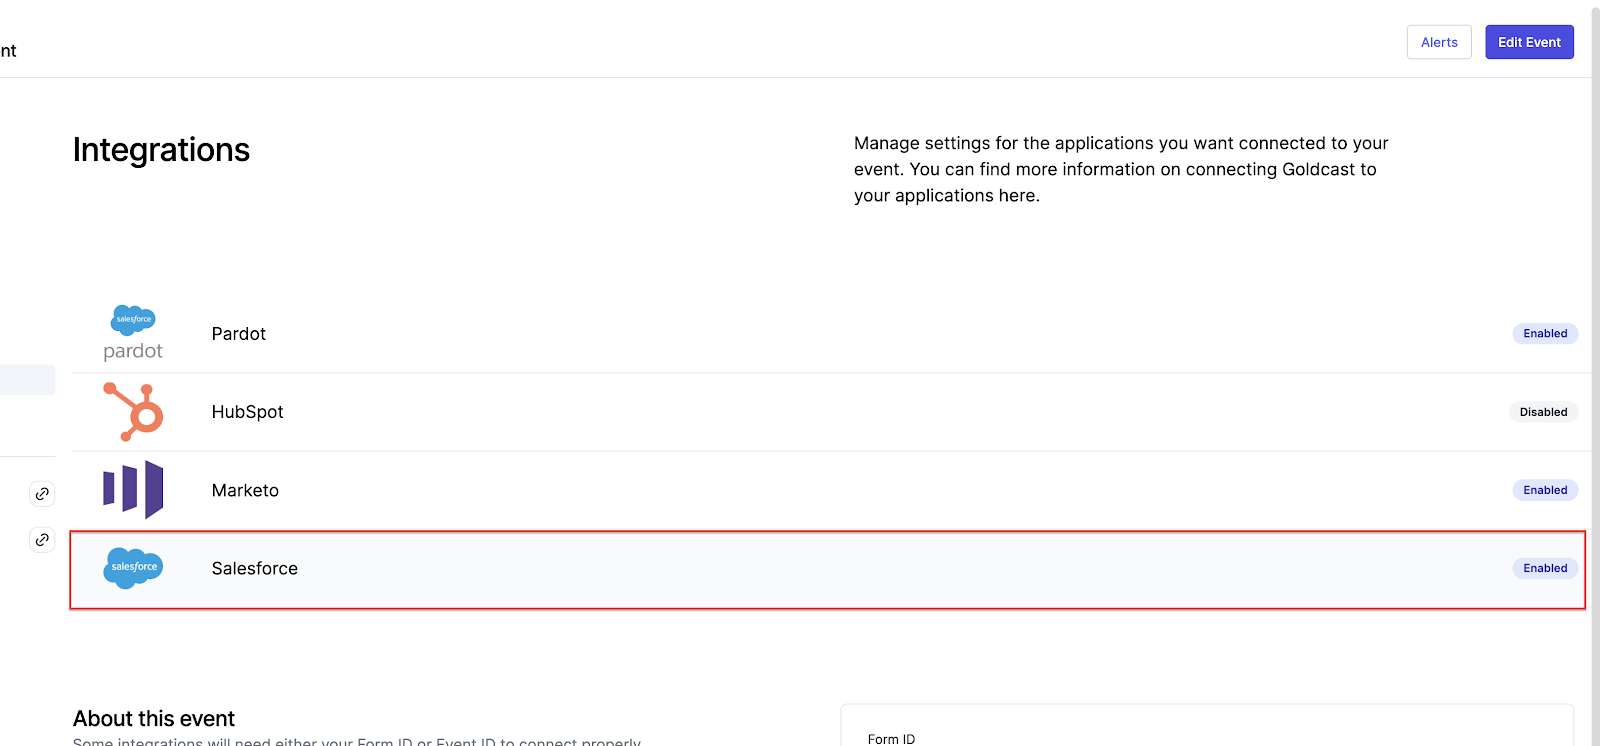
- Locate and click the Salesforce integration on the Integrations page.
- In the right-side drawer that appears, Paste the Campaign ID you copied earlier into the Enter Campaign ID field.
- A green verification message appears on the screen to indicate that the Campaign ID has been identified.
- Click the Connect button to connect the campaign to your Goldcast event.
- Scroll below and choose the event engagement activities you want to send to Salesforce for your event registrants. You can accordingly turn the toggle ON or OFF.

Upon making the above changes, Click the Save button to save the configuration for your event.
You’ve now successfully set up the event-level Salesforce configurations.
