Table of Contents
Overview
The Q&A is a popular engagement feature of Goldcast events. It allows event attendees, speakers and organizers to submit questions while the session is ongoing.
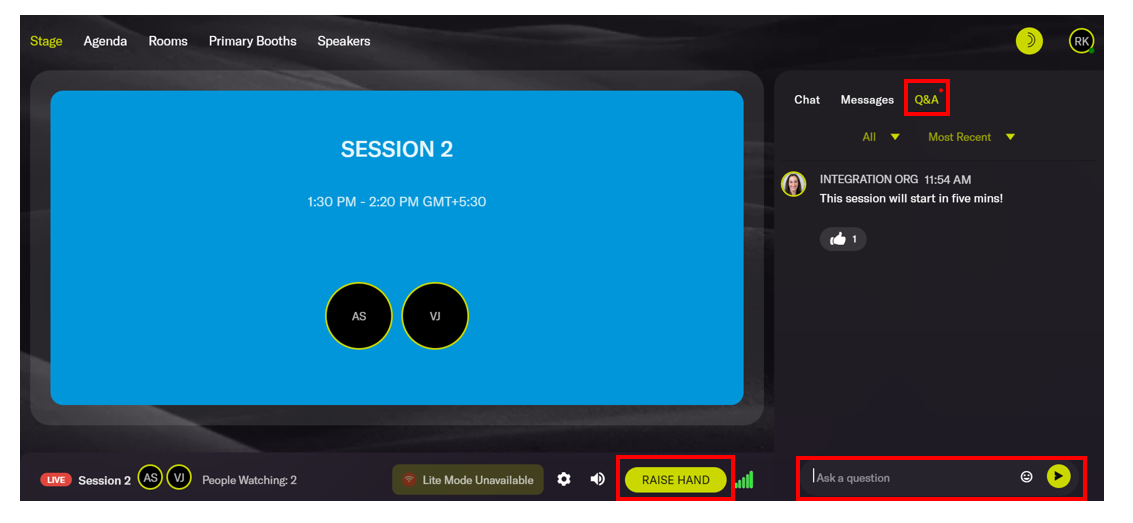
During a Goldcast session, attendees, speakers, and organizers can submit questions in text or video, depending on what the organizer has enabled for the session. Attendees can use the Q&A tab in the engagement panel on the right to submit text questions and click the Raise Hand button at the bottom to submit a video Q&A request. A red dot next to the Q&A tab indicates a text or video question has been submitted.
Audience stage view
Turn on/off Q&A at the session level
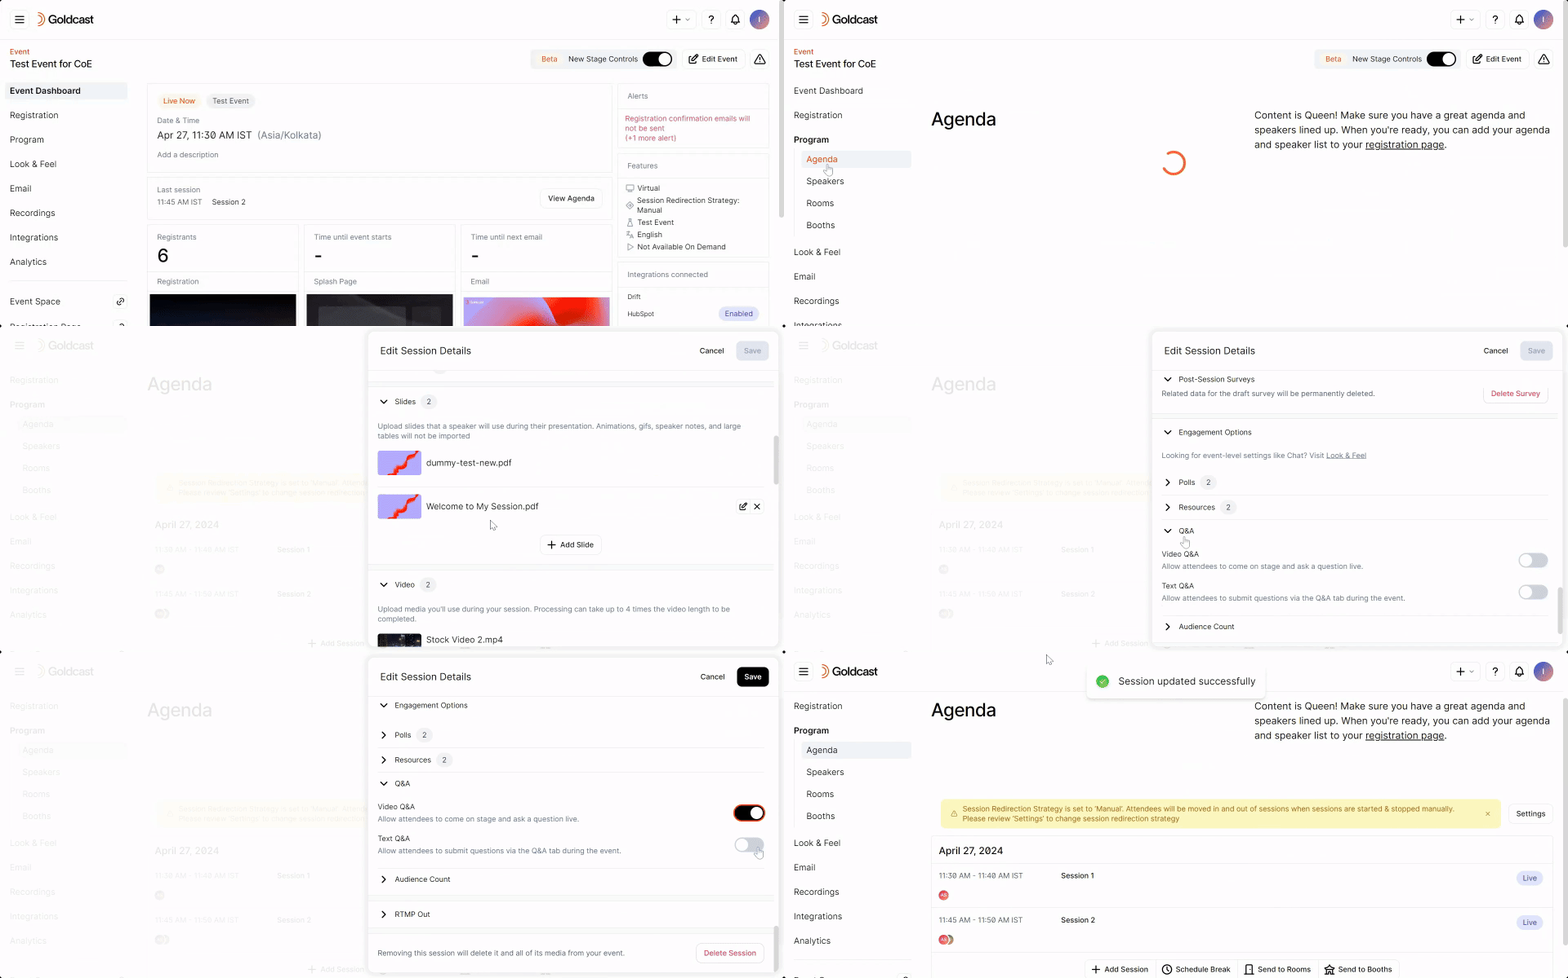
Follow these steps to turn on/off text and video Q&A for each session:
- Log into Goldcast Studio and open your preferred event.
- Navigate to Program → Agenda using the left side tab and click your preferred session to open the Edit Session Details window.
- Scroll to Q&A, and turn on/off Text Q&A and Video Q&A using their respective toggles.
- Click Save.
How to respond to audience questions
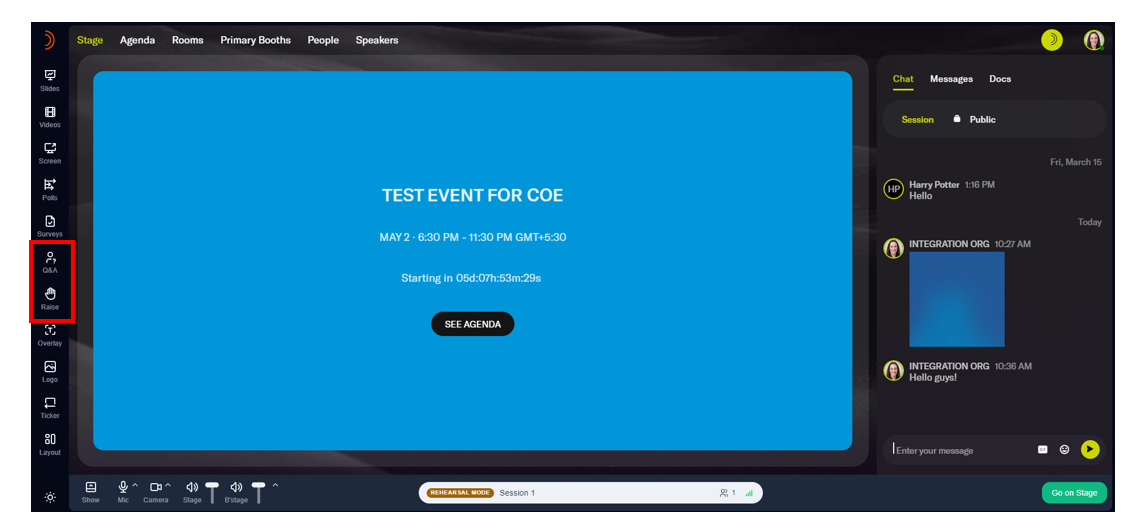
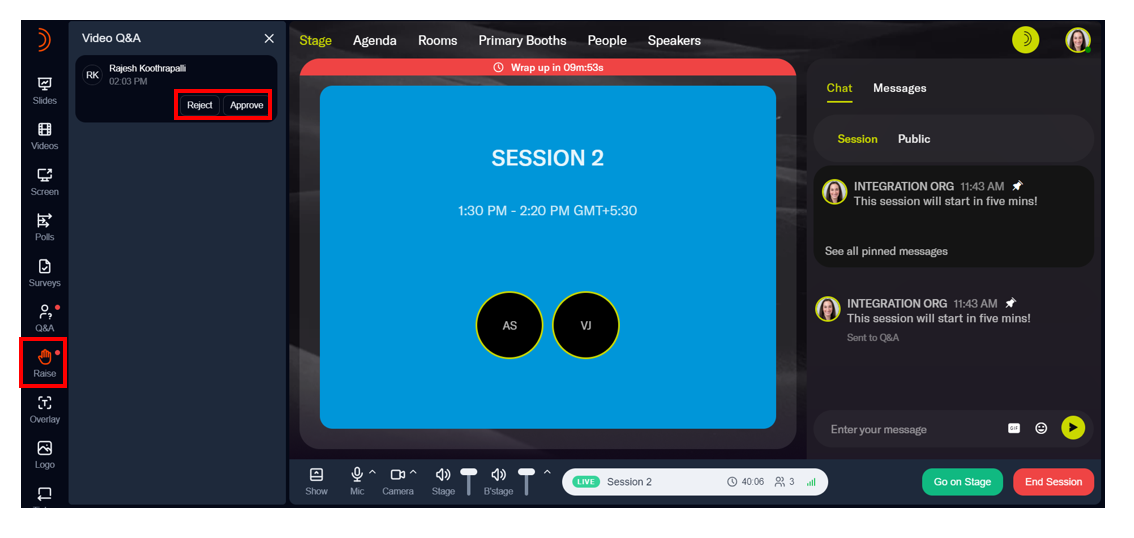
Use the Q&A icon on the left panel to respond to text queries and the Raise icon to accept or deny video Q&A requests.
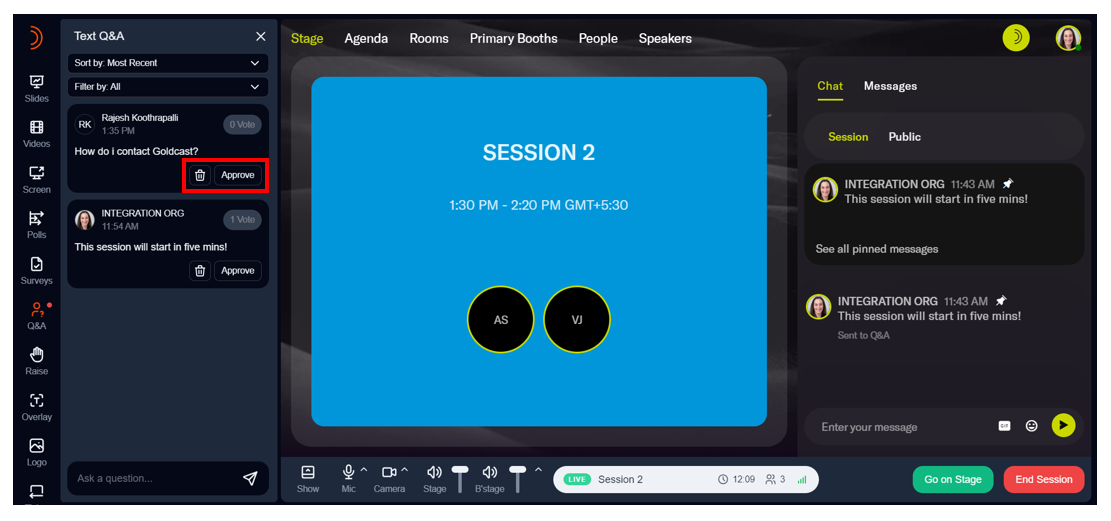
Approve
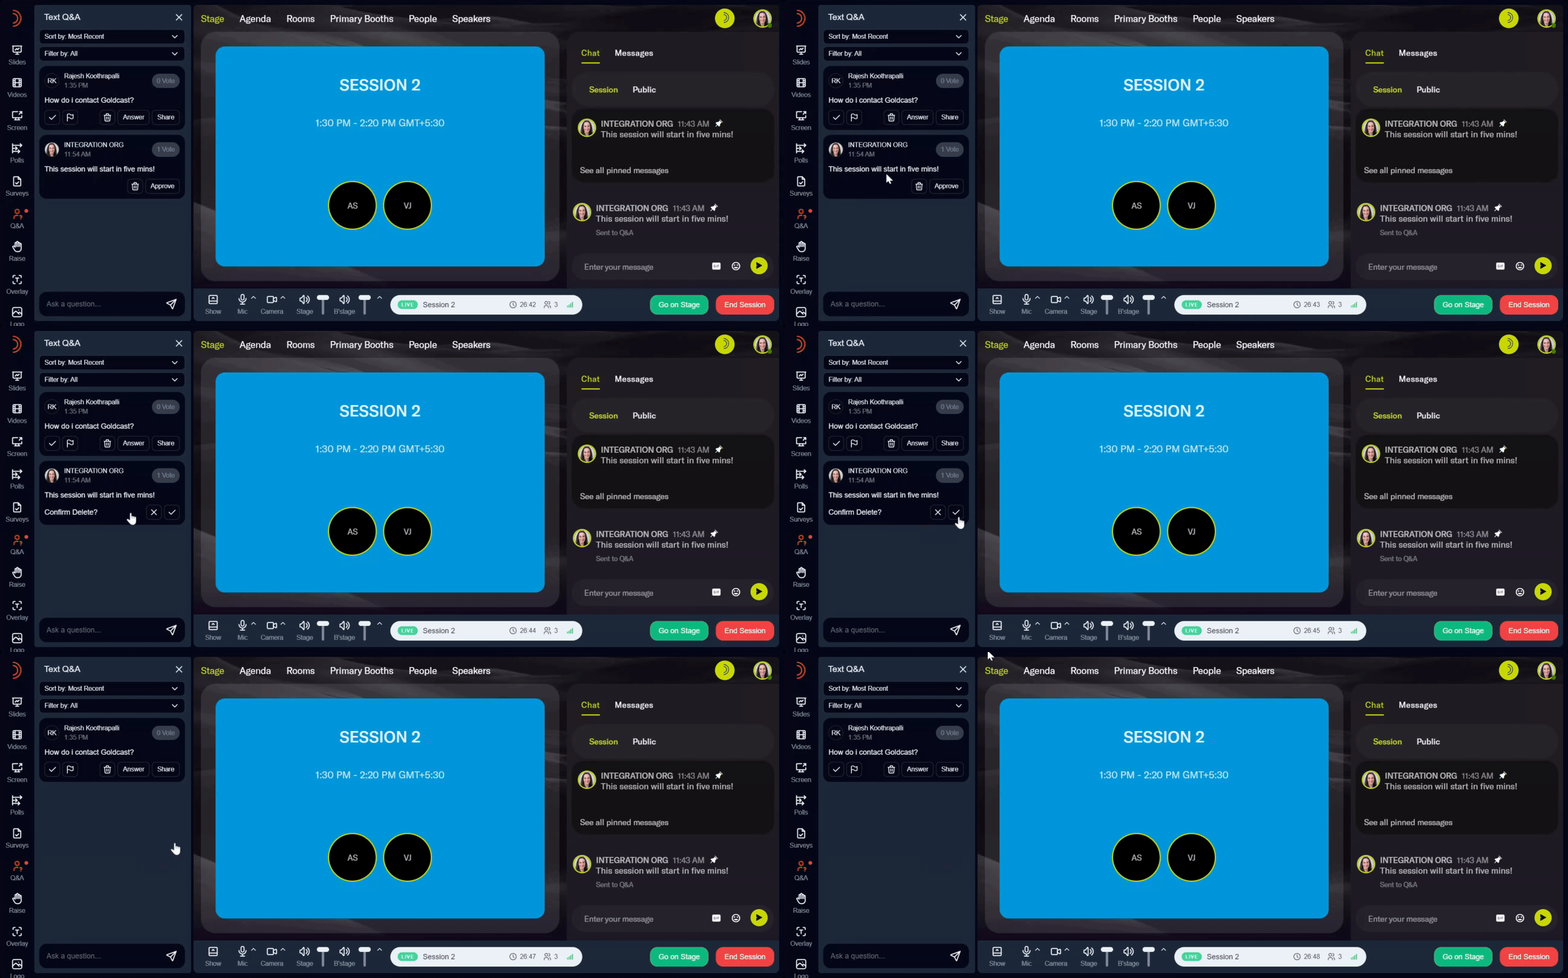
When a text or video question has been submitted, you can notice a red dot next to the Q&A and Raise icons. If you’ve enabled the Moderate Q&A parameter, you must click the Approve button to make the question visible to other attendees under the Q&A tab.
Share onstage
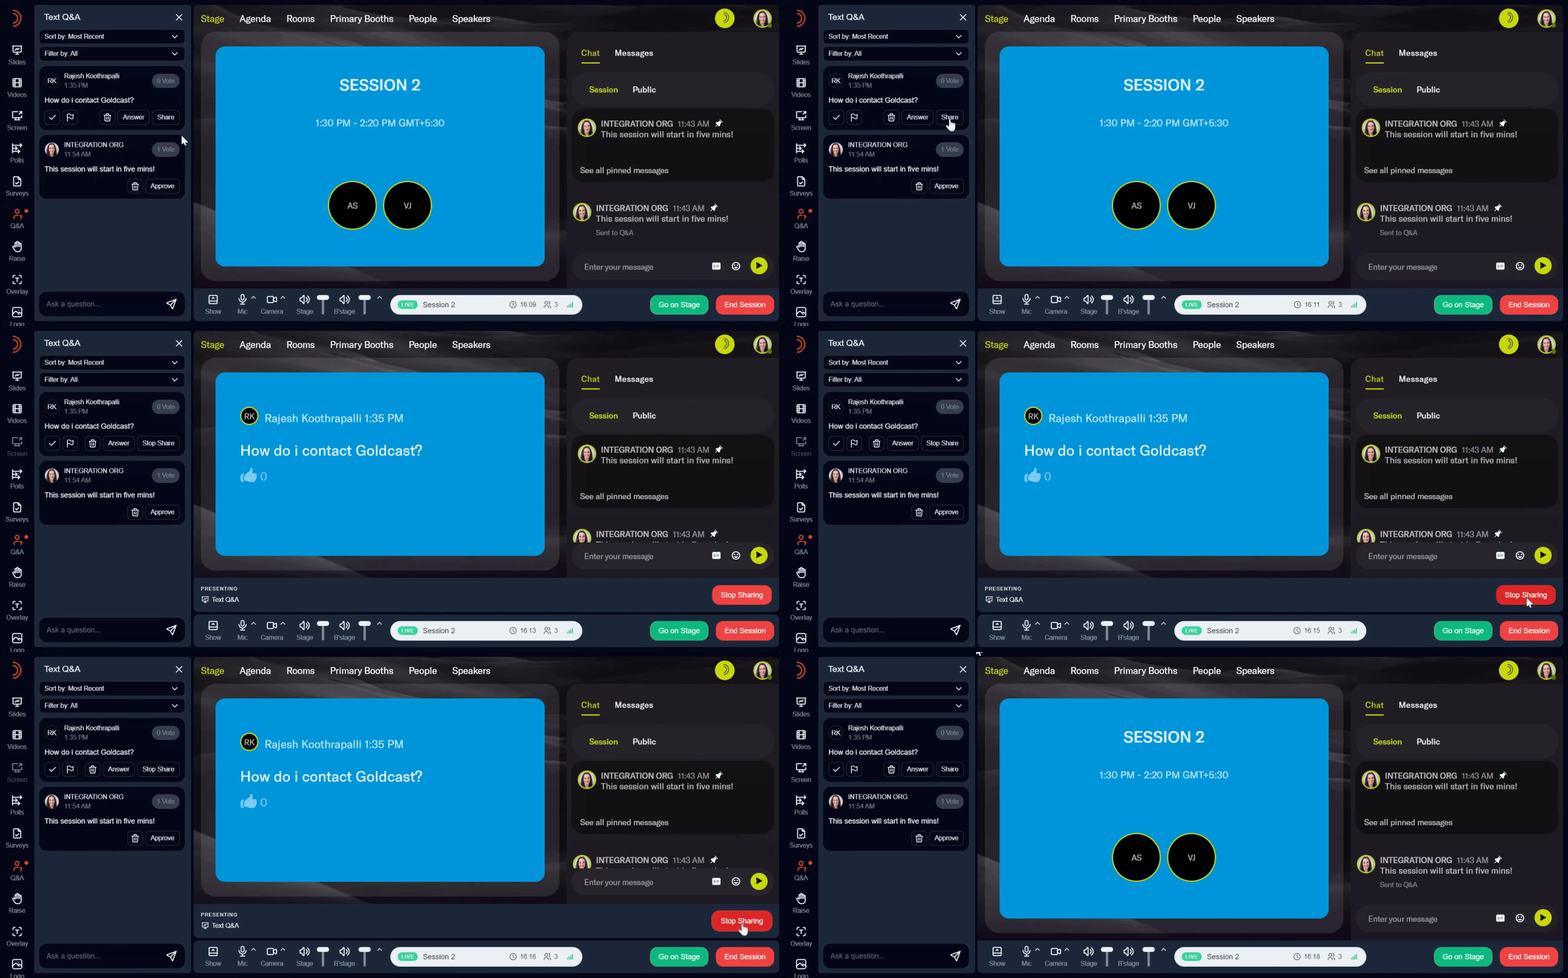
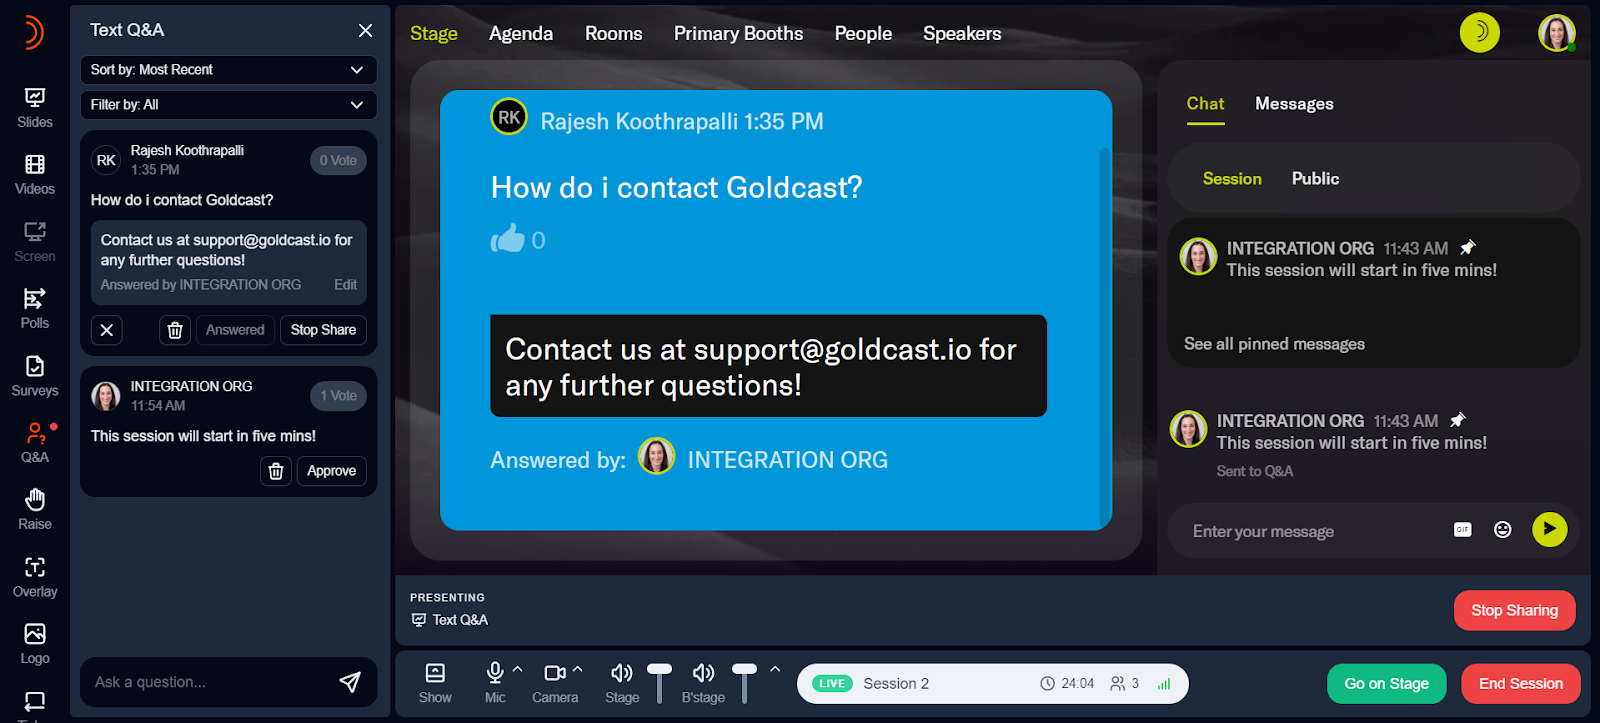
Once a text question has been submitted (and approved if Q&A is moderated), you can share it onstage by clicking the Share button. Click Stop Share on the left panel or the bottom right to remove the question from the stage.
Answer via text
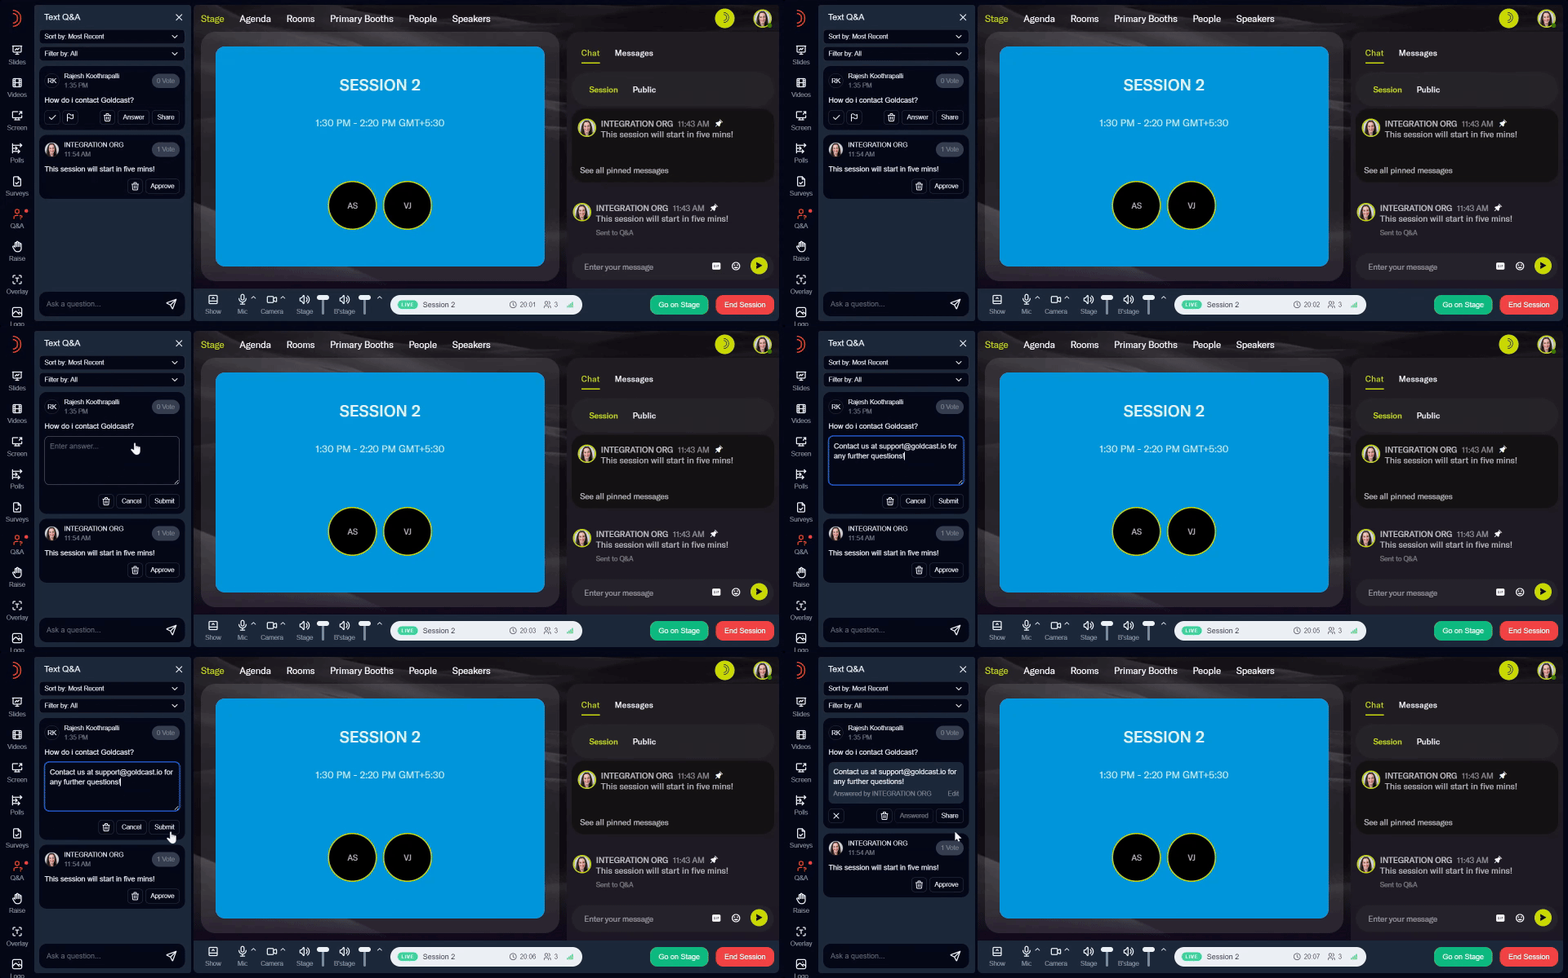
You can also respond to submitted questions via text by clicking the Answer button beneath the question. Your reply will be visible to all attendees directly under the question.
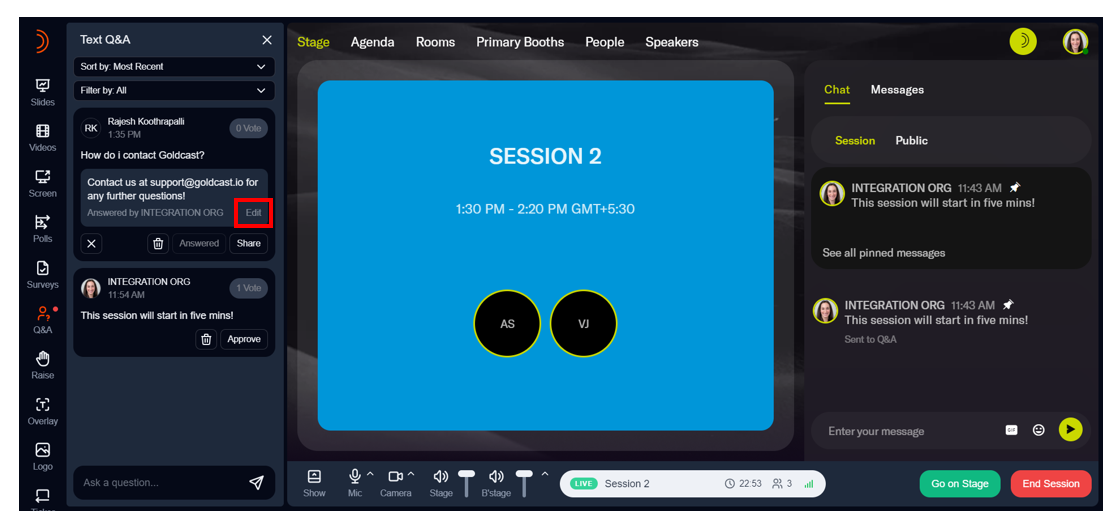
Note: You can submit only one response per question. If you typed a wrong response, you can modify it by clicking the Edit button. Both organizers and speakers can respond to questions and edit them.
Once you post a response to a question, it’ll be automatically marked as Answered, and attendees can view the reply. You can also share answered questions on the stage. However, it can no longer be upvoted.
Delete a question
Organizers and speakers can delete a question by clicking the delete (trash) icon next to the question.
Mark as priority
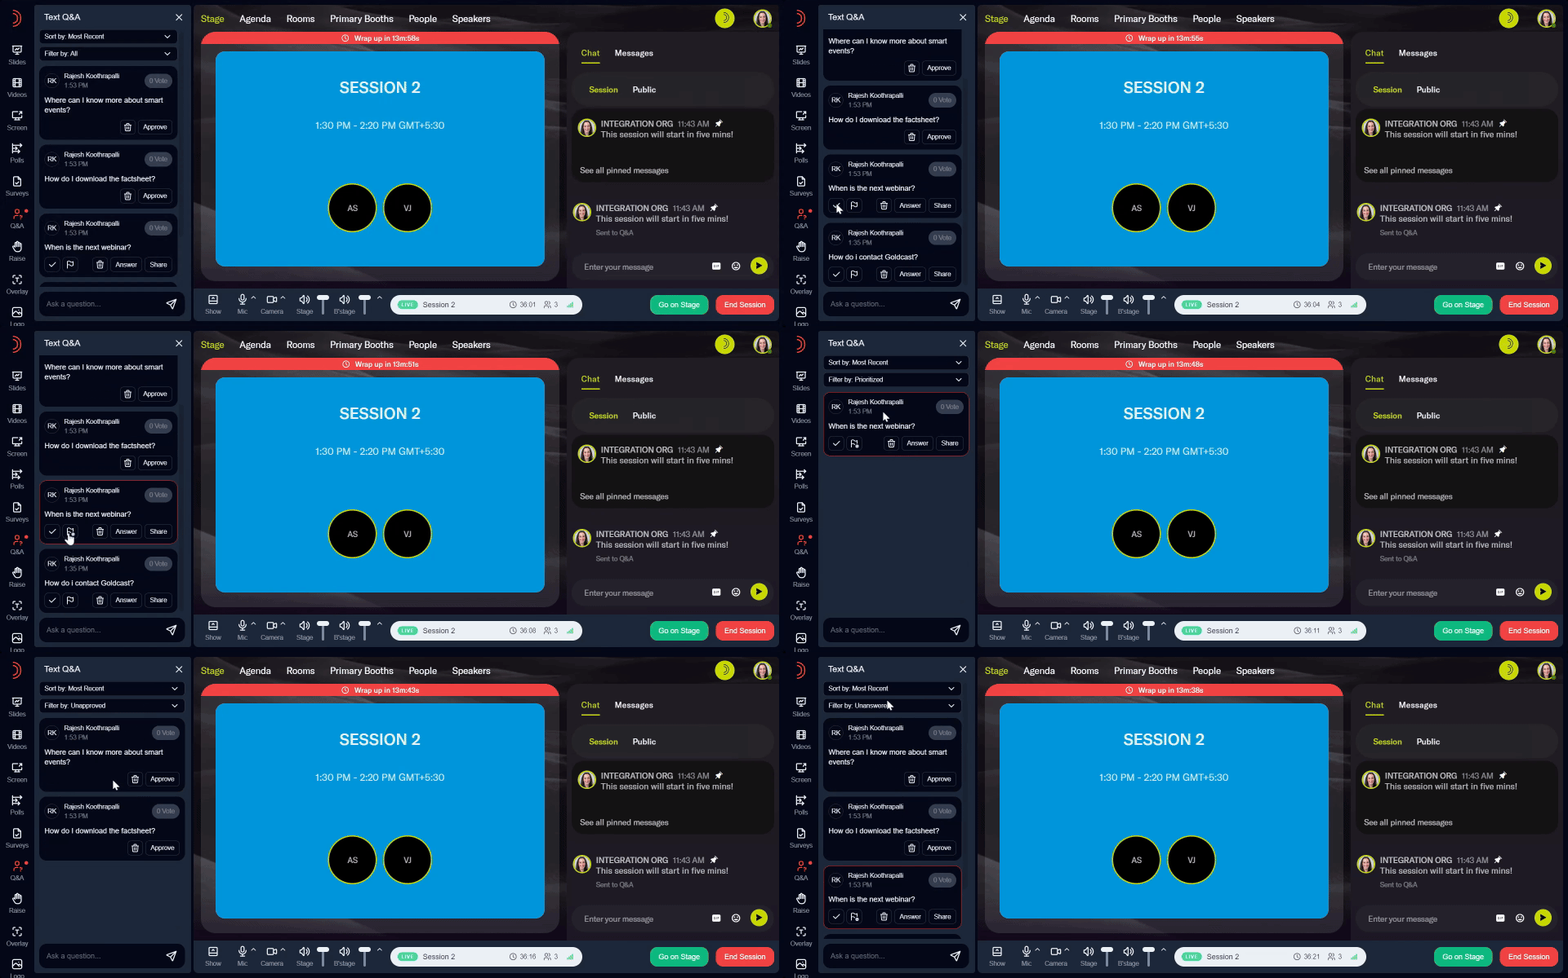
If you have multiple questions from the audience, you can mark the ones that must be answered on priority. Speakers and organizers can use the Filters at the top of the tab to quickly filter questions.
Video Q&A
Besides text Q&A, Goldcast also offers video Q&A for live sessions. If any attendee submits a video Q&A request, you will notice a red dot next to the Raise icon on the left panel. You can either approve or decline the request. If approved, the attendee will join the stage live and ask the speaker their question directly onstage.
Heads Up: Attendees can turn on/off their cameras before joining the stage.
Event-level Q&A settings
Goldcast offers several Q&A settings that can be set at the event level. This includes:
1. Moderated vs. Unmoderated Q&A
Goldcast allows you to view and approve text questions before allowing all attendees to view and upvote them.
2. Anonymous Text Q&A
Attendees can ask questions anonymously. All questions will include the attendee’s name if you've turned off this setting.
3. Show the answerer’s identity
Show the name of the person who answered each question. If you’ve turned off this setting, responses will not have the name of the organizer/speaker who answered them.
4. Answerers’ alias
Sometimes, you might want to use an alias like “Team Goldcast” or “Events Team,” etc., as the answerer to audience questions.
Turn on/off event-level Q&A settings
- Log into Goldcast Studio and open your preferred event.
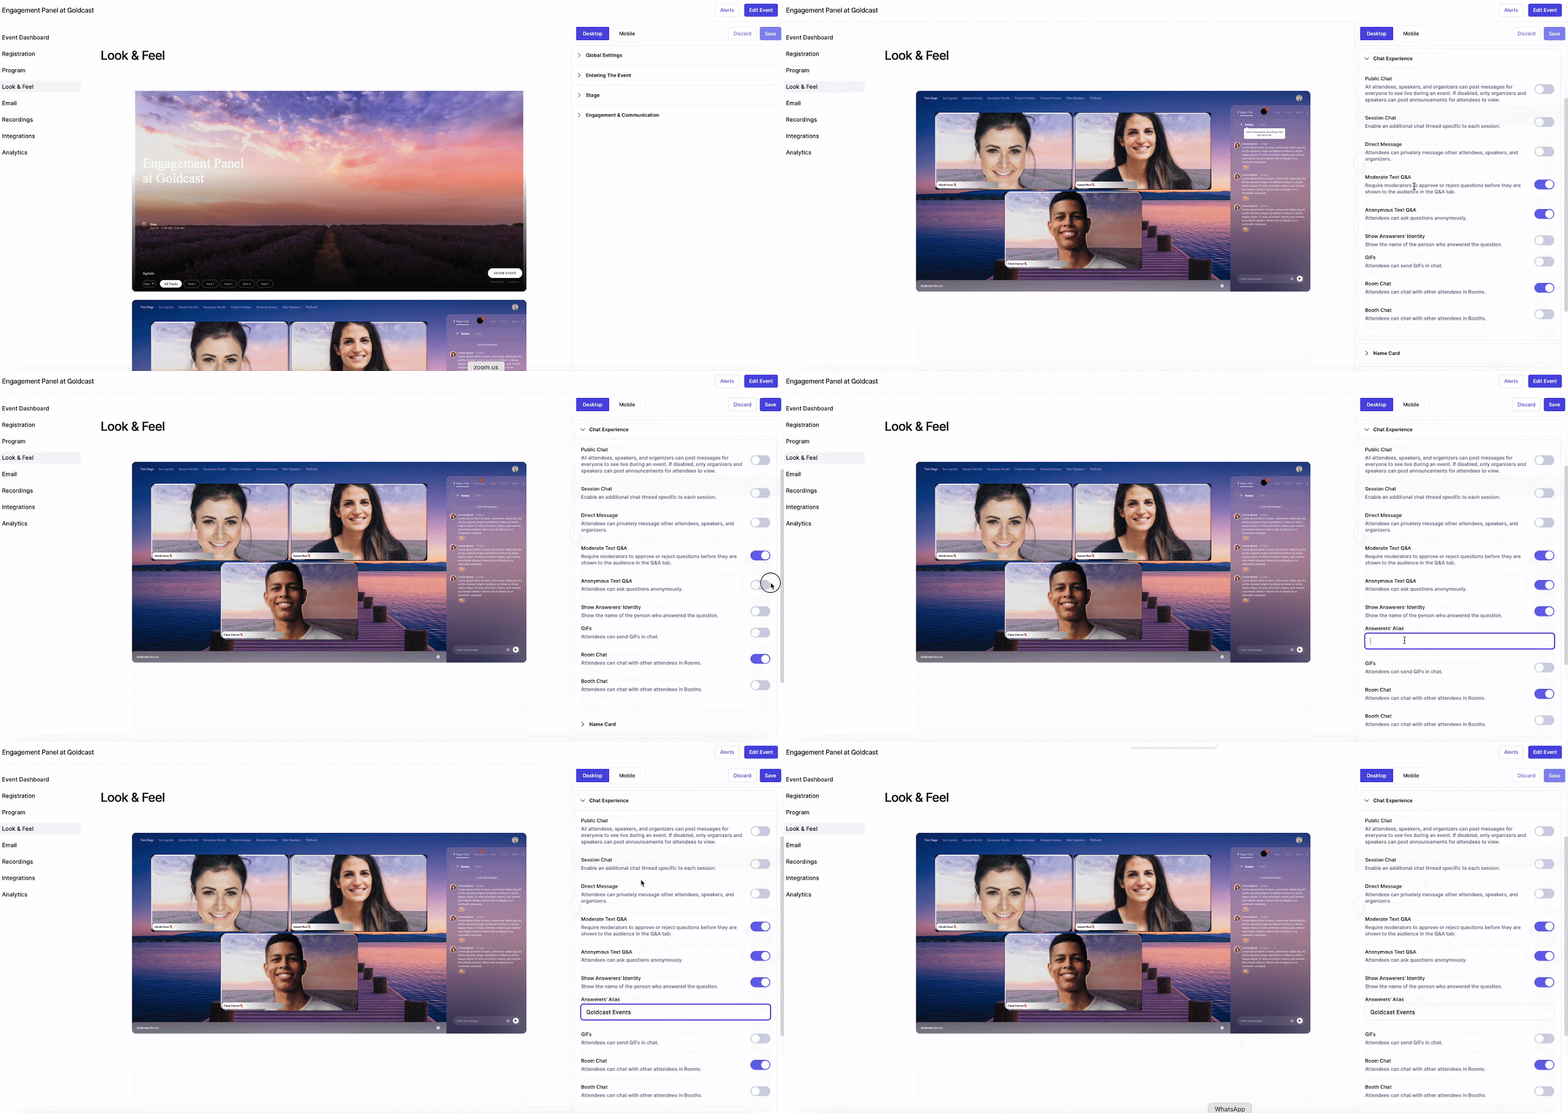
- Navigate to Look & Feel using the left side tab.
- Scroll to Engagement & Communication → Chat Experience in the menus on the right.
- Turn on/off Moderate Q&A, Anonymous Q&A, and Answerer’s Identity using their respective toggles.
- Use the Answerer’s Alias text box below the Answerer’s Identity toggle to add an alias.
- Click Save.
