Table of Contents
Overview
The Salesforce Field Mapping feature lets you map Goldcast’s Standard and Custom Event User properties to your Salesforce Leads, Contacts and Campaign Members properties. In Goldcast, standard fields are mapped at the organization level, while custom fields are mapped at the event level. In this article, we explain how to map your standard fields. For custom field mapping, refer here.
Before You Begin: Make sure your event registration forms are set up to collect the Goldcast properties you’ve mapped to Lead, Contact, or Campaign Member fields in Salesforce. If you aren’t collecting registrant data for your mapped properties, no data will be sent to your target system, i.e., Salesforce. For more information about how to create and assign forms for your events, refer to Creating and Editing Registration Forms.
Initial Setup
To set up your Leads, Contacts and Campaign Members mapping for Salesforce in the Goldcast, you should install and connect your Goldcast org to your Salesforce Sales Cloud(by installing the managed package) with appropriate permissions.
- Log in to Goldcast Studio with your credentials.
- Click Integrations on the left menu.

- Click Salesforce from the applications listed on this page.

You can perform three types of mapping via your Salesforce Integration, i.e., Leads, Contacts and Campaign Members. You will see three sections here: Lead Field Mapping, Contact Field Mapping, and Campaign Member Field Mapping.

If you cannot see the Lead, Contact and Campaign Member Mapping screen with the default field mappings and an option to add a mapping, make sure your authenticated user has enough permissions. Once you ensure your authenticated Salesforce User has all the mentioned permission, you can re-authenticate your integration and open the Field Mapping tabs to proceed to configure your mappings.
Lead Field Mapping
Navigate to the Lead Field Mapping Section and click Edit to configure or modify.
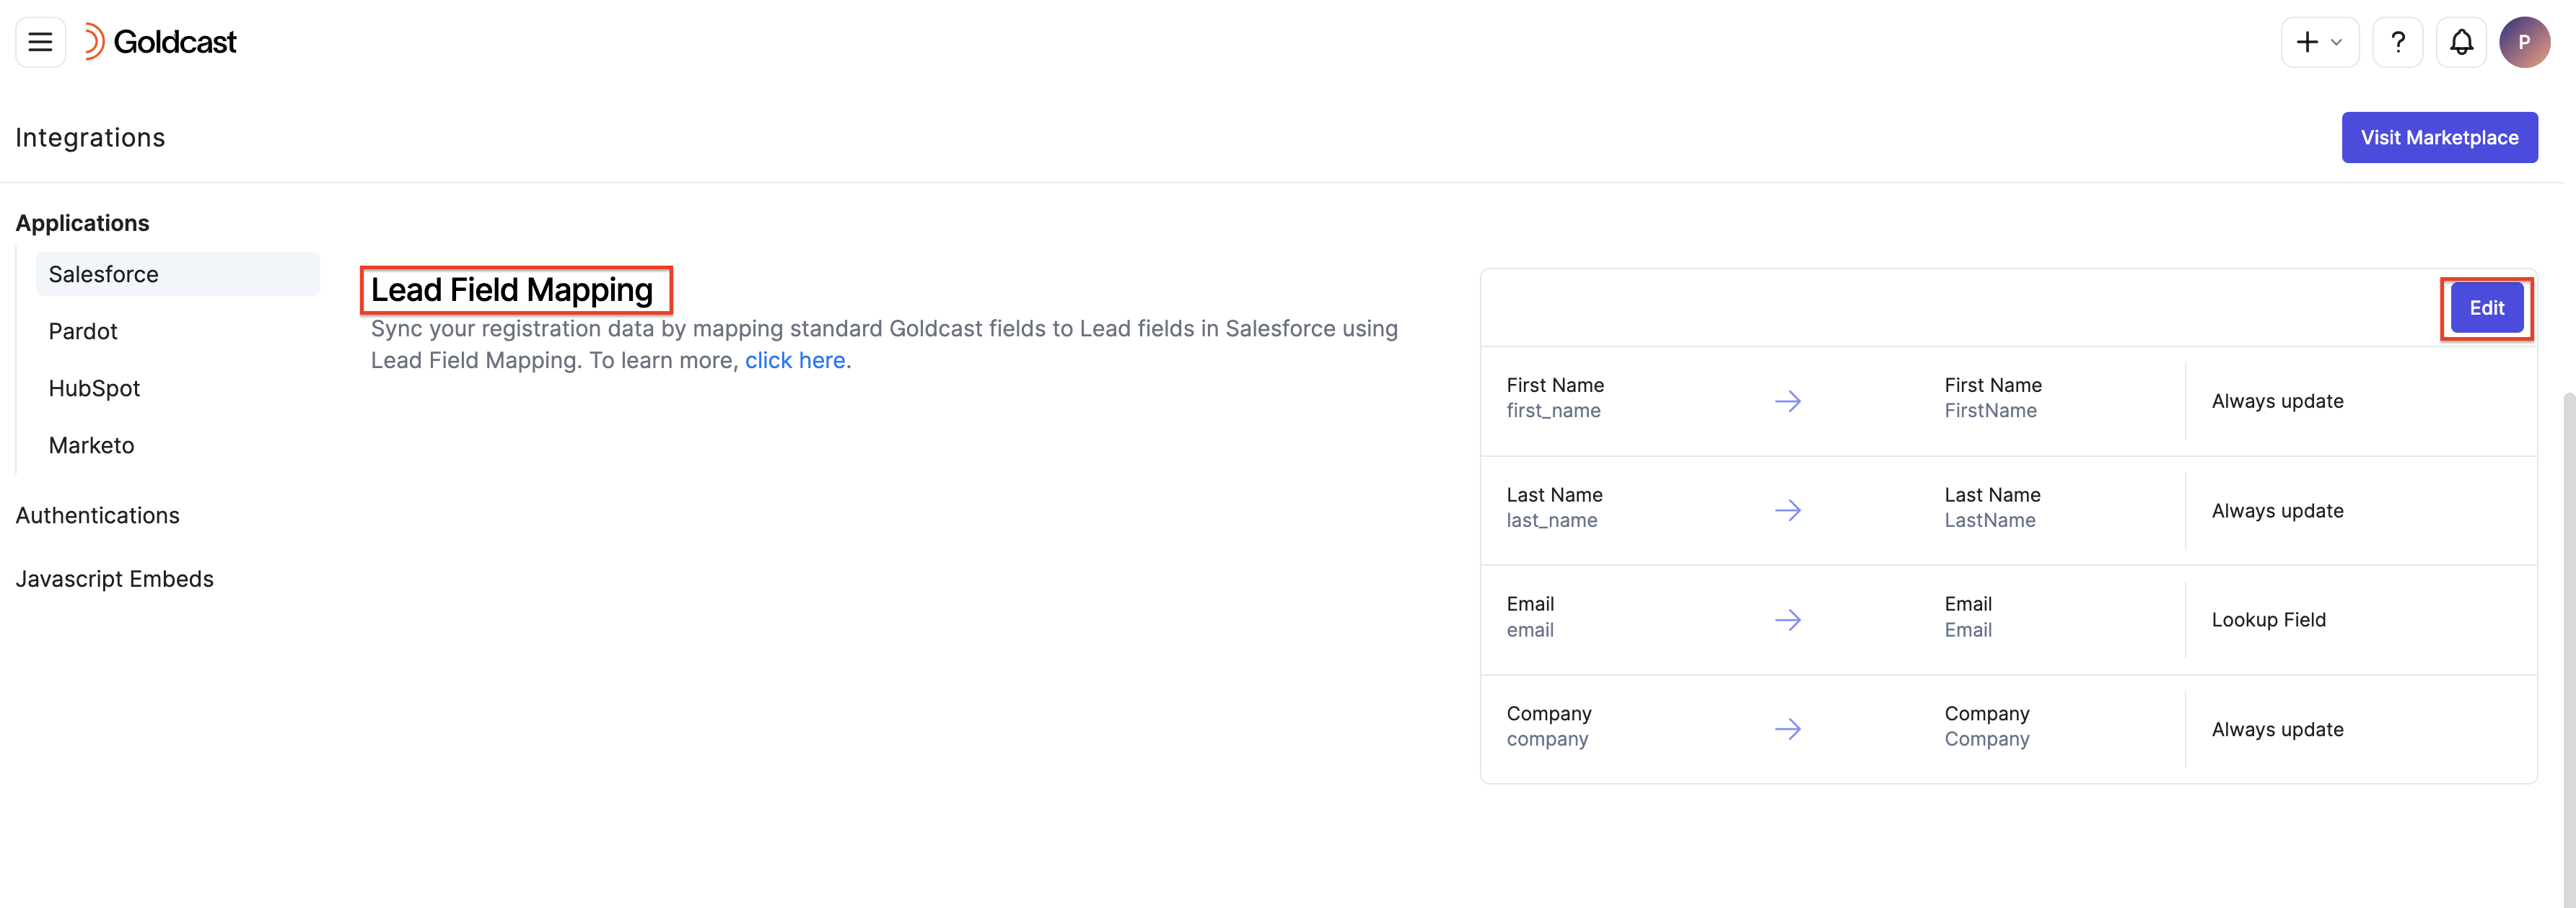
In Lead Field Mapping, you can see a screen that lets you map your Goldcast Standard properties to Lead Fields in Salesforce. Ensure you can see four default mappings already set up for First Name, Last Name, Email and Company.
Note:
- Email is a unique field in Goldcast that is used to identify an event registrant. So, the update policy for the email field cannot be modified.
- Company is a mandatory field, according to Salesforce Sales Cloud, for creating a lead. Hence, it has an existing default mapping and cannot be unmapped.
Contact Field Mapping
Navigate to the Contact Field Mapping Section and click Edit to configure or modify.
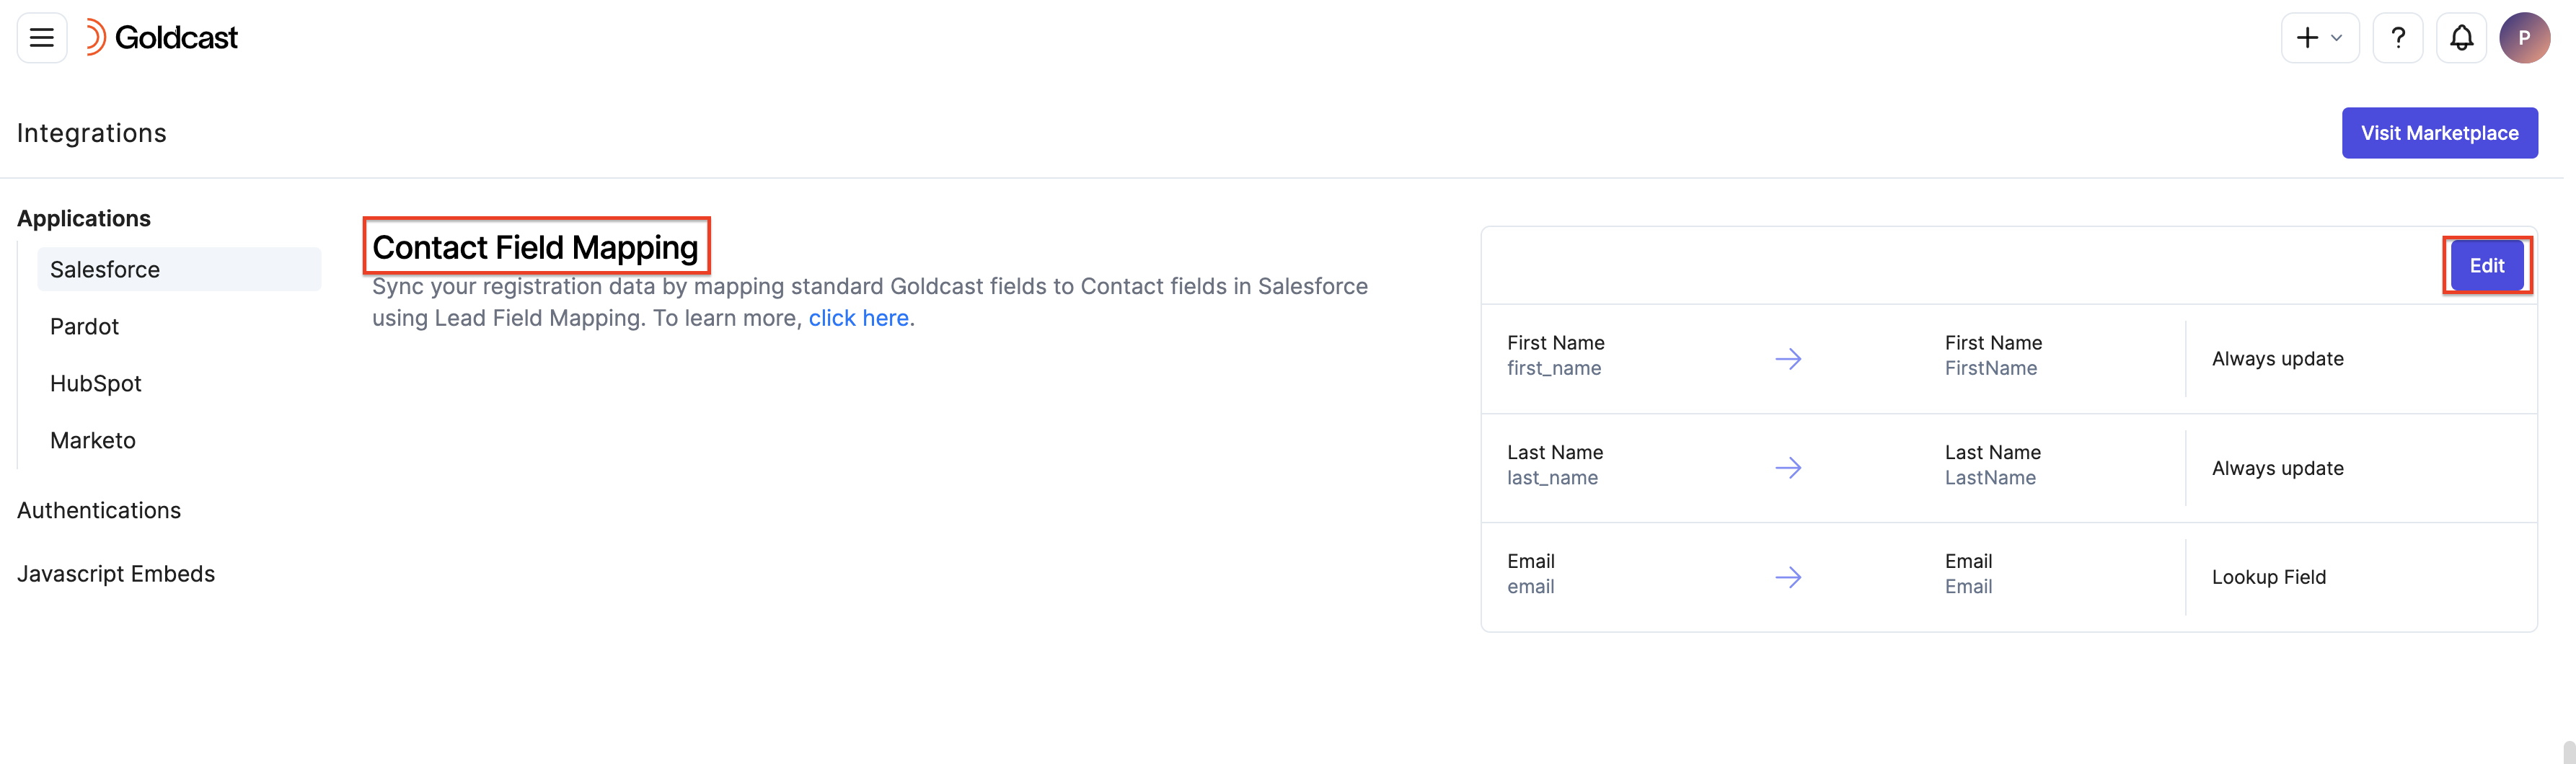
In Contact Field Mapping, you can see a screen that lets you map your Goldcast Standard properties to Contacts Fields in Salesforce. Ensure you see three default mappings already set up for First Name, Last Name, and Email.
Note:
- Email is a unique field in Goldcast that is used to identify an event registrant. So, the update policy for the email field cannot be modified.
Campaign Member Field Mapping
Navigate to the Campaign Member Field Mapping Section and click Edit to configure or modify.
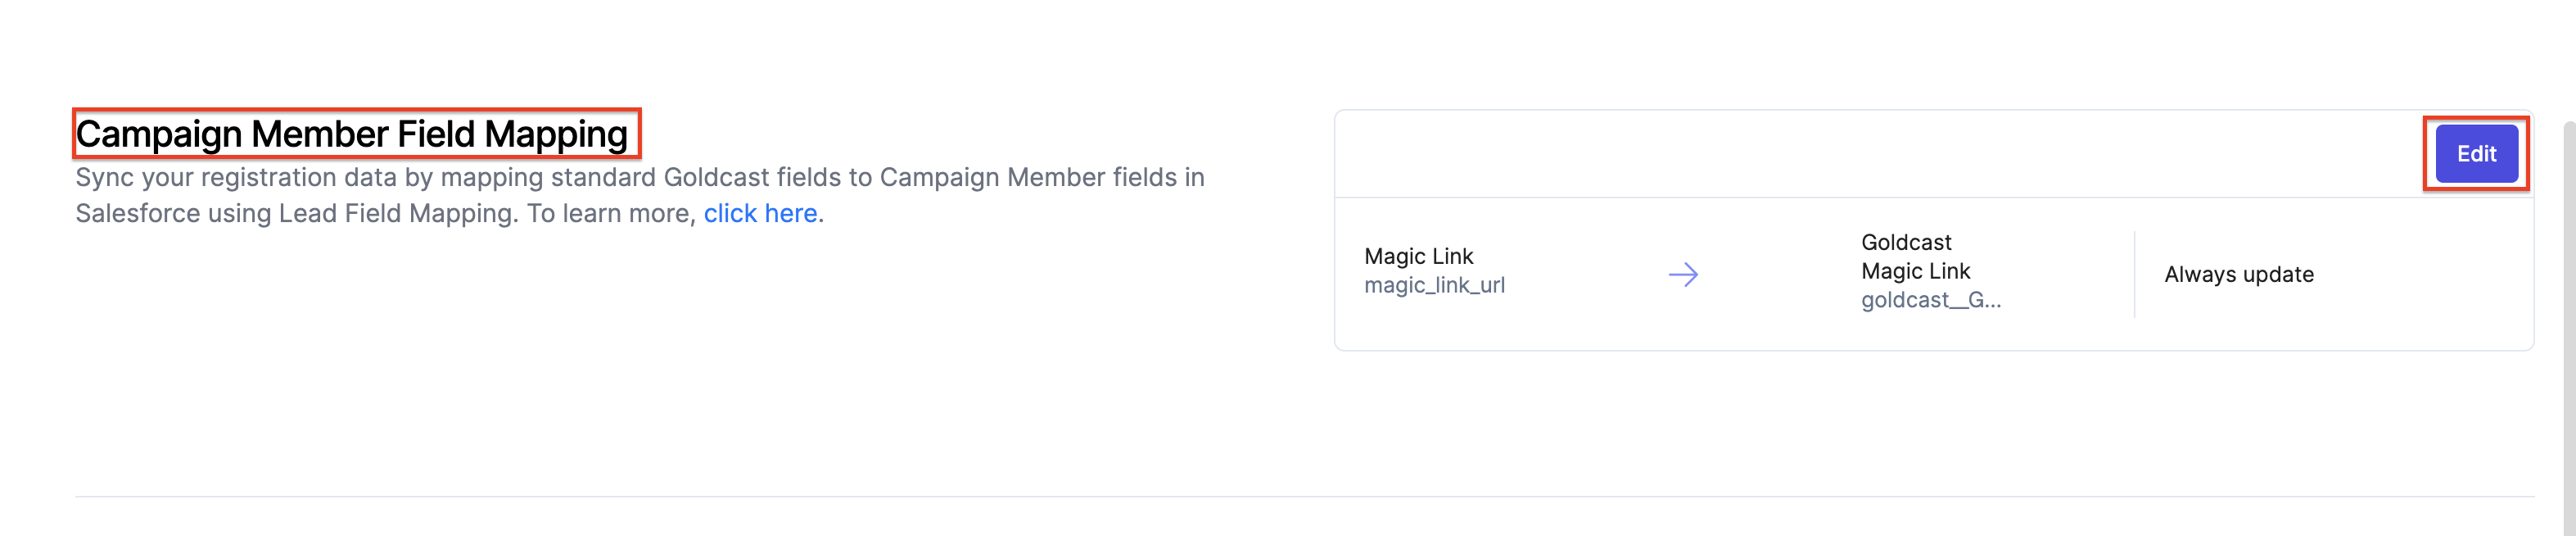
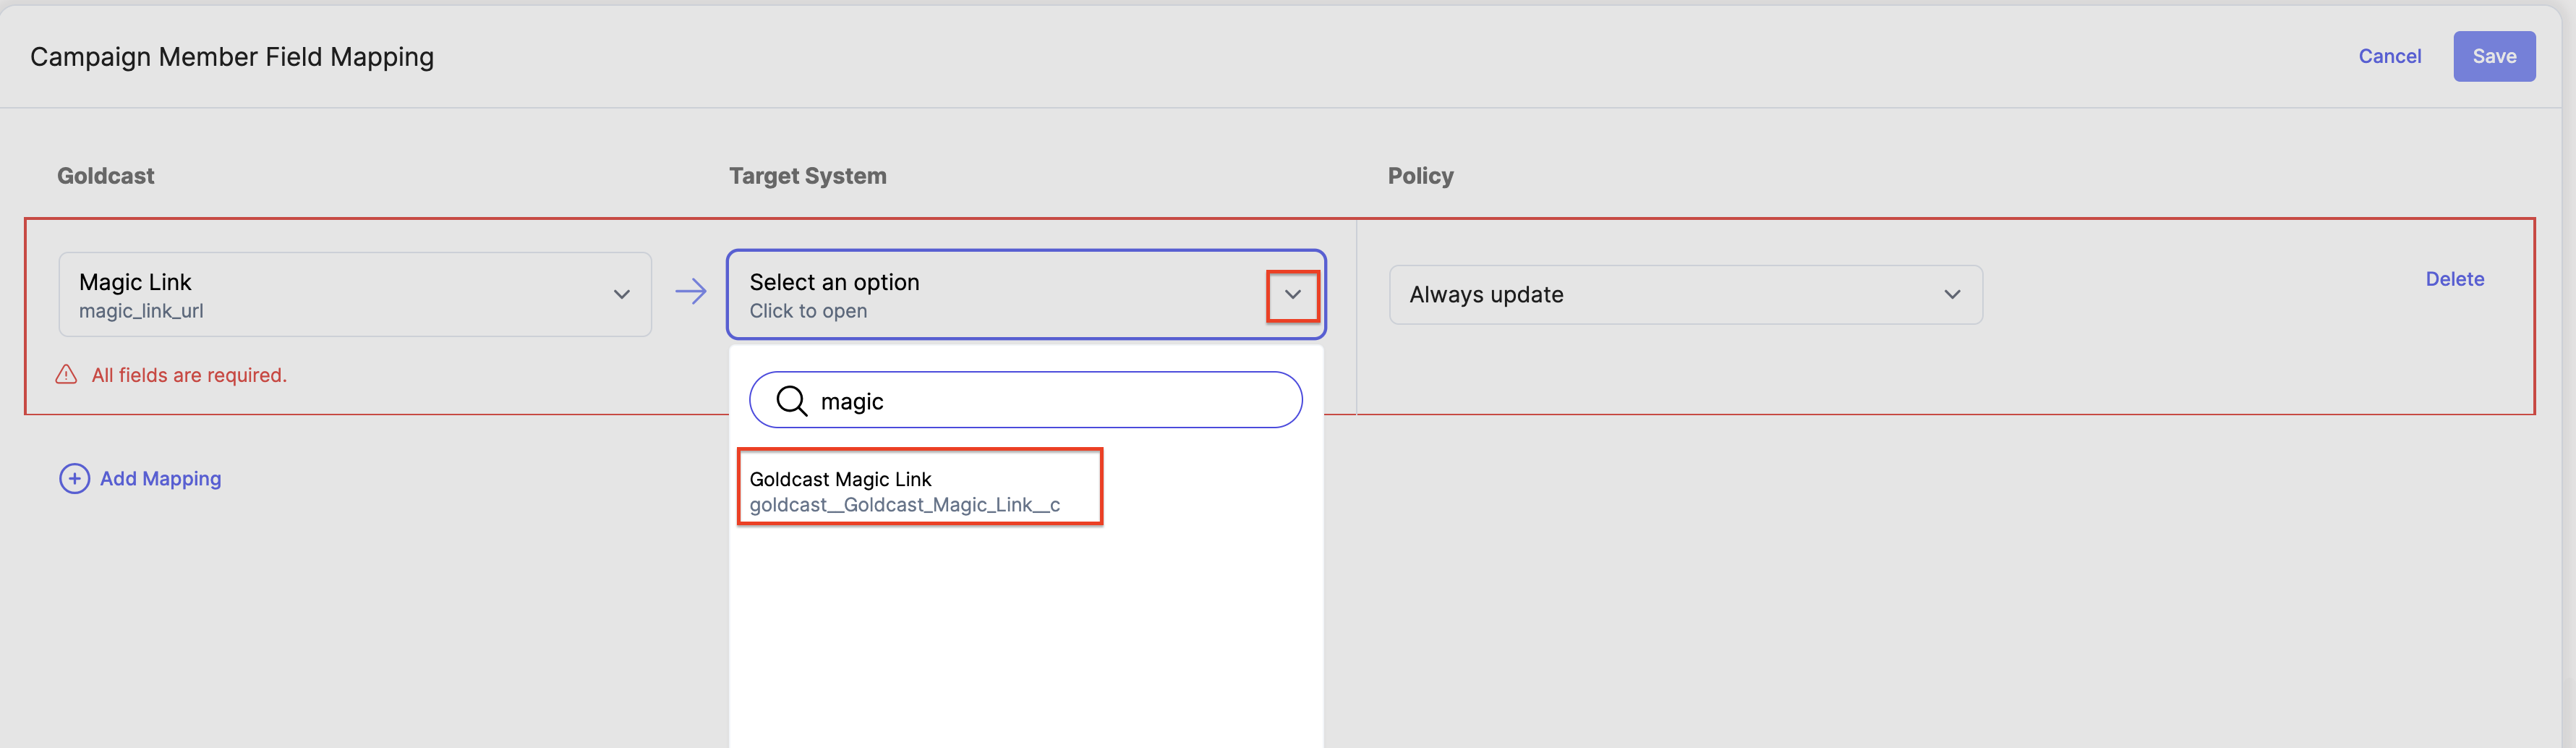
In Campaign Member Field Mapping, you can see a screen that lets you add a mapping that maps your Goldcast Standard Properties to Campaign Member Fields in Salesforce. There will be no default mapping available for the Campaign Member Mapping tab.
BEST PRACTICE: To ensure a seamless data sync with Salesforce via Campaign Member Field Mapping, make sure you have connected the Salesforce Campaign to your Goldcast event and set up the mappings before the registrations start for your event(recommended).
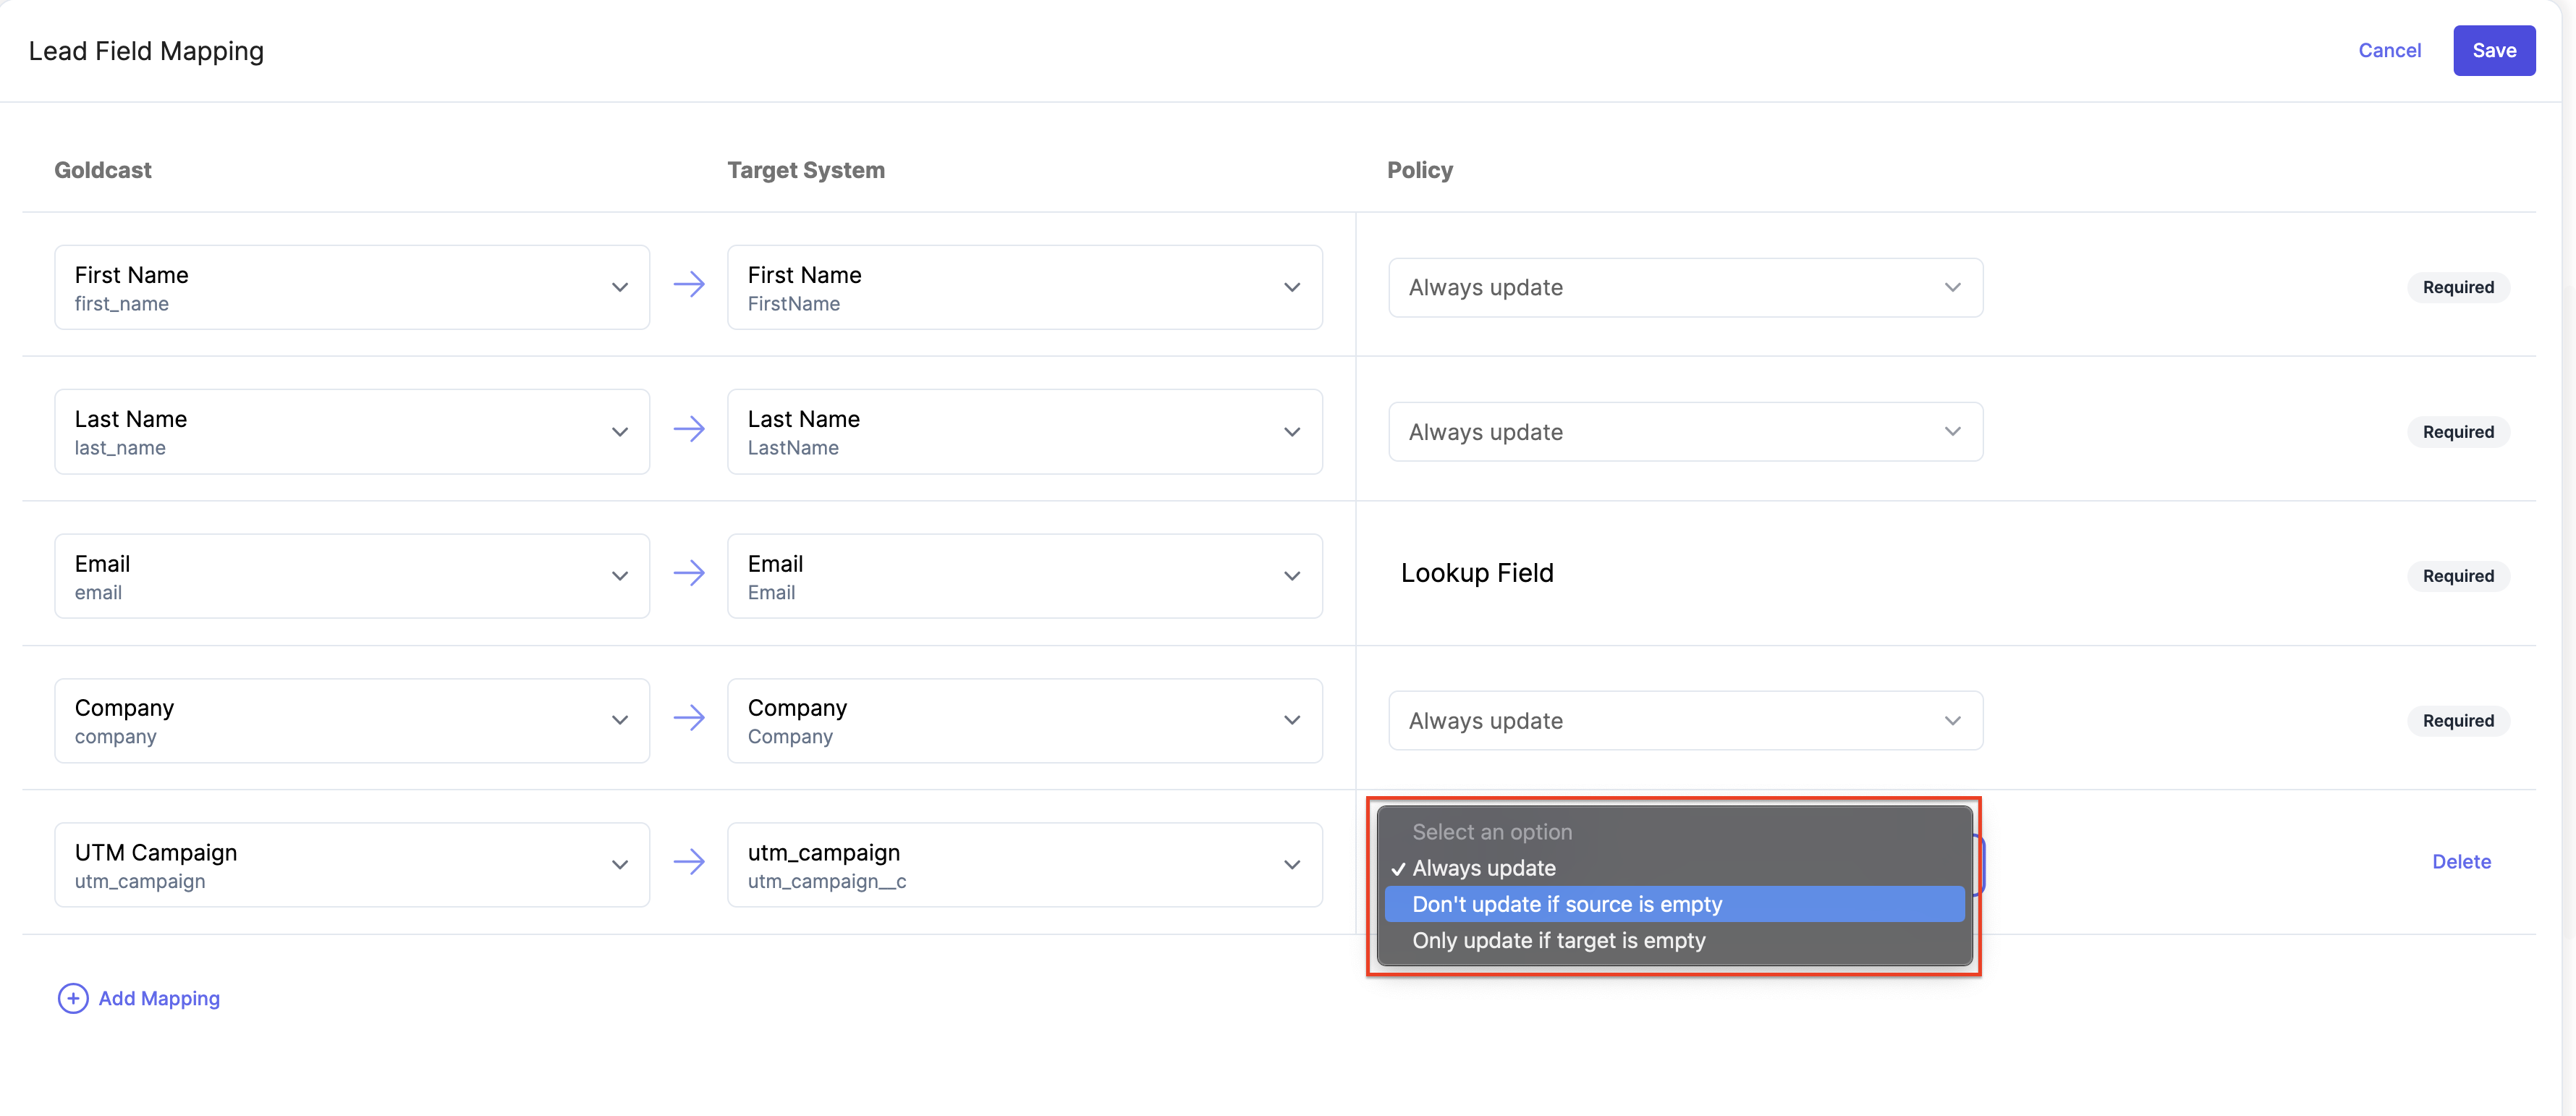
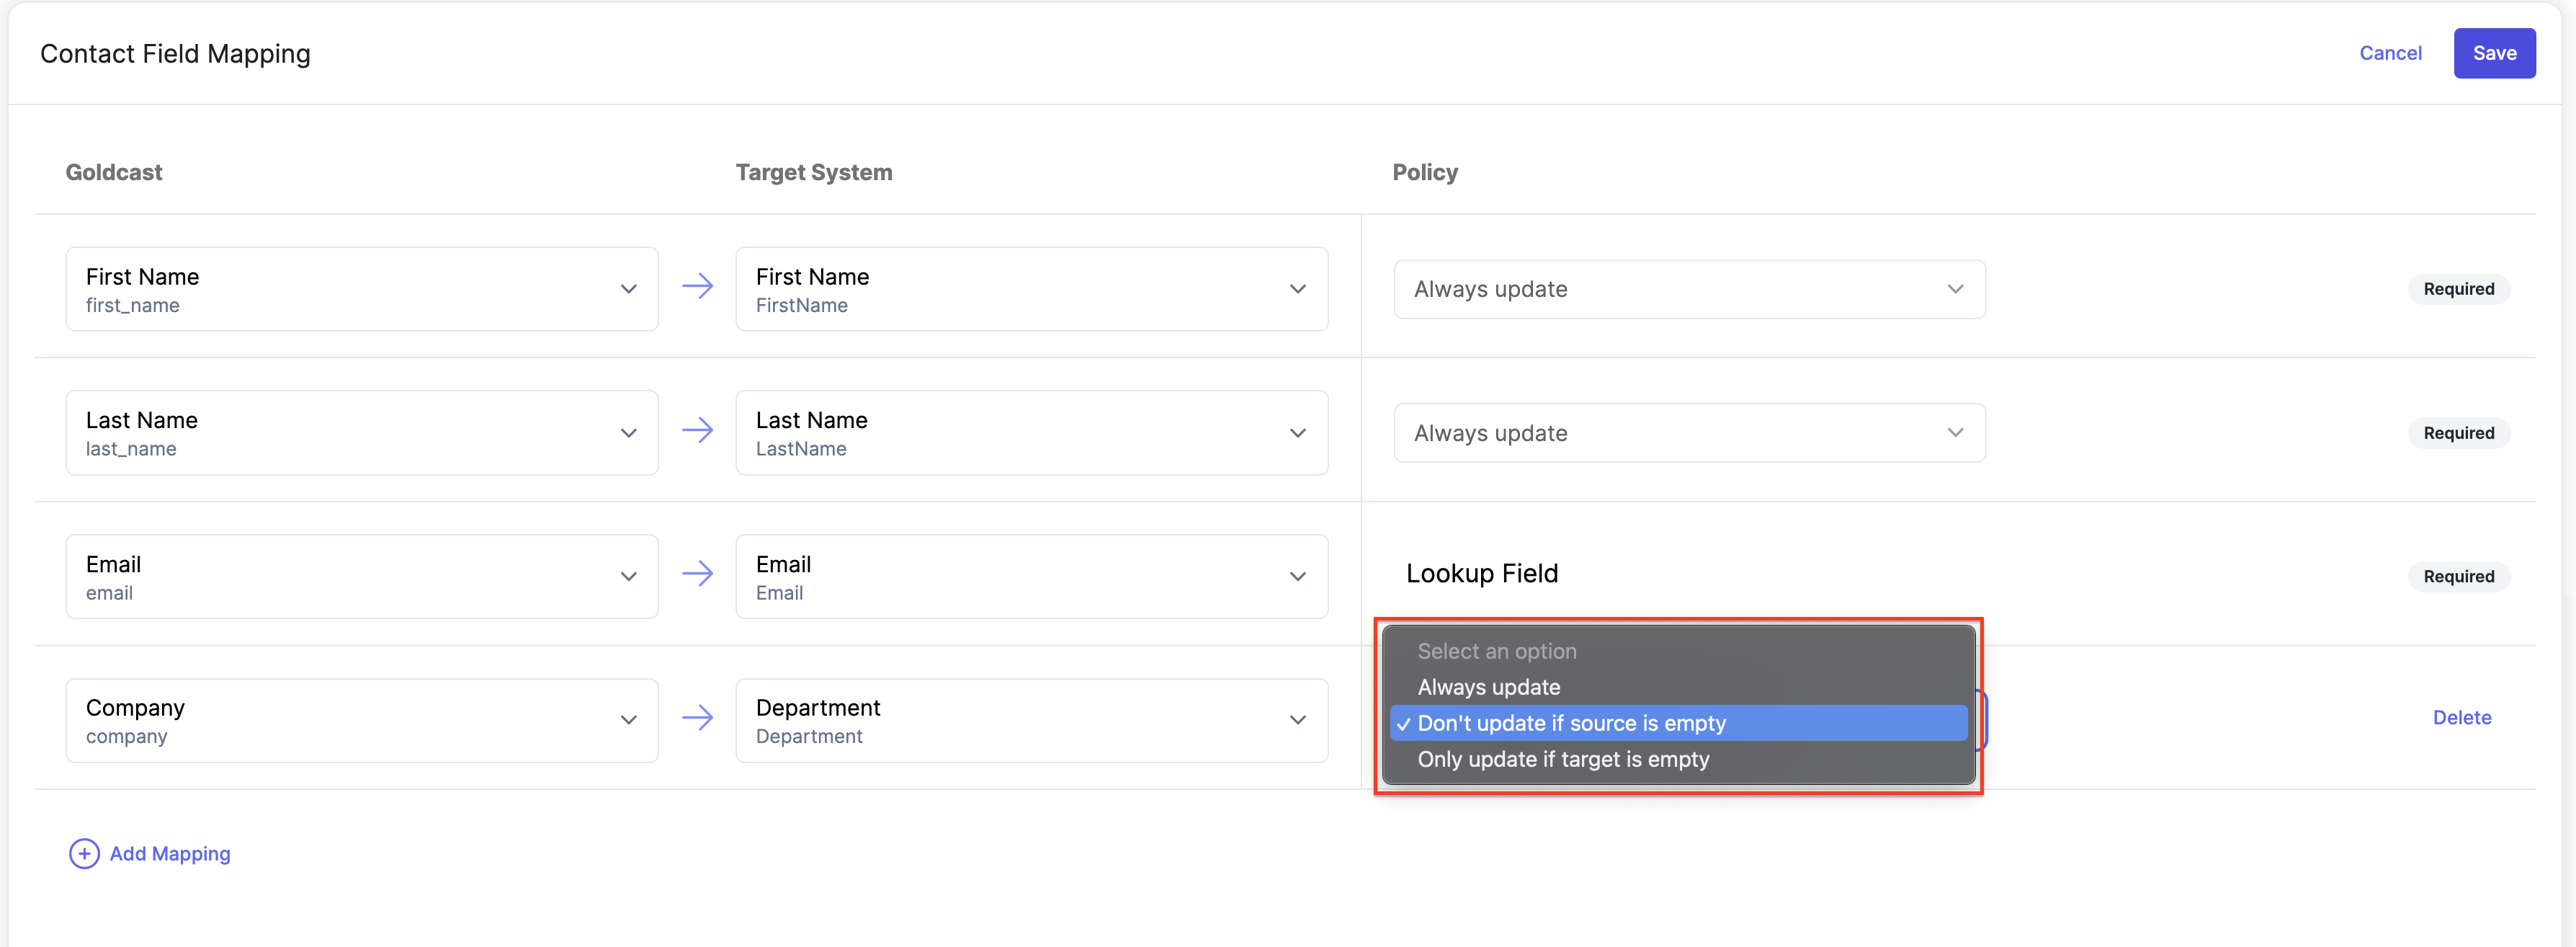
Note: The Policy (Update Policy) denotes how the fields in Salesforce will get updated upon change in Goldcast Fields. We have three options for the Update policy.
- Always Update: This option updates your Lead, Contact and Campaign Member fields in Salesforce always when your mapped field in Goldcast gets updated.
- Don’t update if source is empty: This option will not update your Lead, Contact and Campaign Member fields in Salesforce if the mapped field in Goldcast(source) is empty.
- Only update when target is empty: This option will only update your Lead, Contact and Campaign Member fields in Salesforce if the mapped field in Salesforce(target system) is empty.
Configuring Lead Field Mapping in your Goldcast org
Setup your new Lead Field mapping from the record created on the screen. This will consist of selecting 3 components :
- Standard Fields in Goldcast will be collected from your Goldcast Registration Forms.
- Lead Fields that will get updated in the target system i.e. Salesforce.
- Update Policy: This is the behavior in which our field mapping will sync data and update target Lead fields in Salesforce.
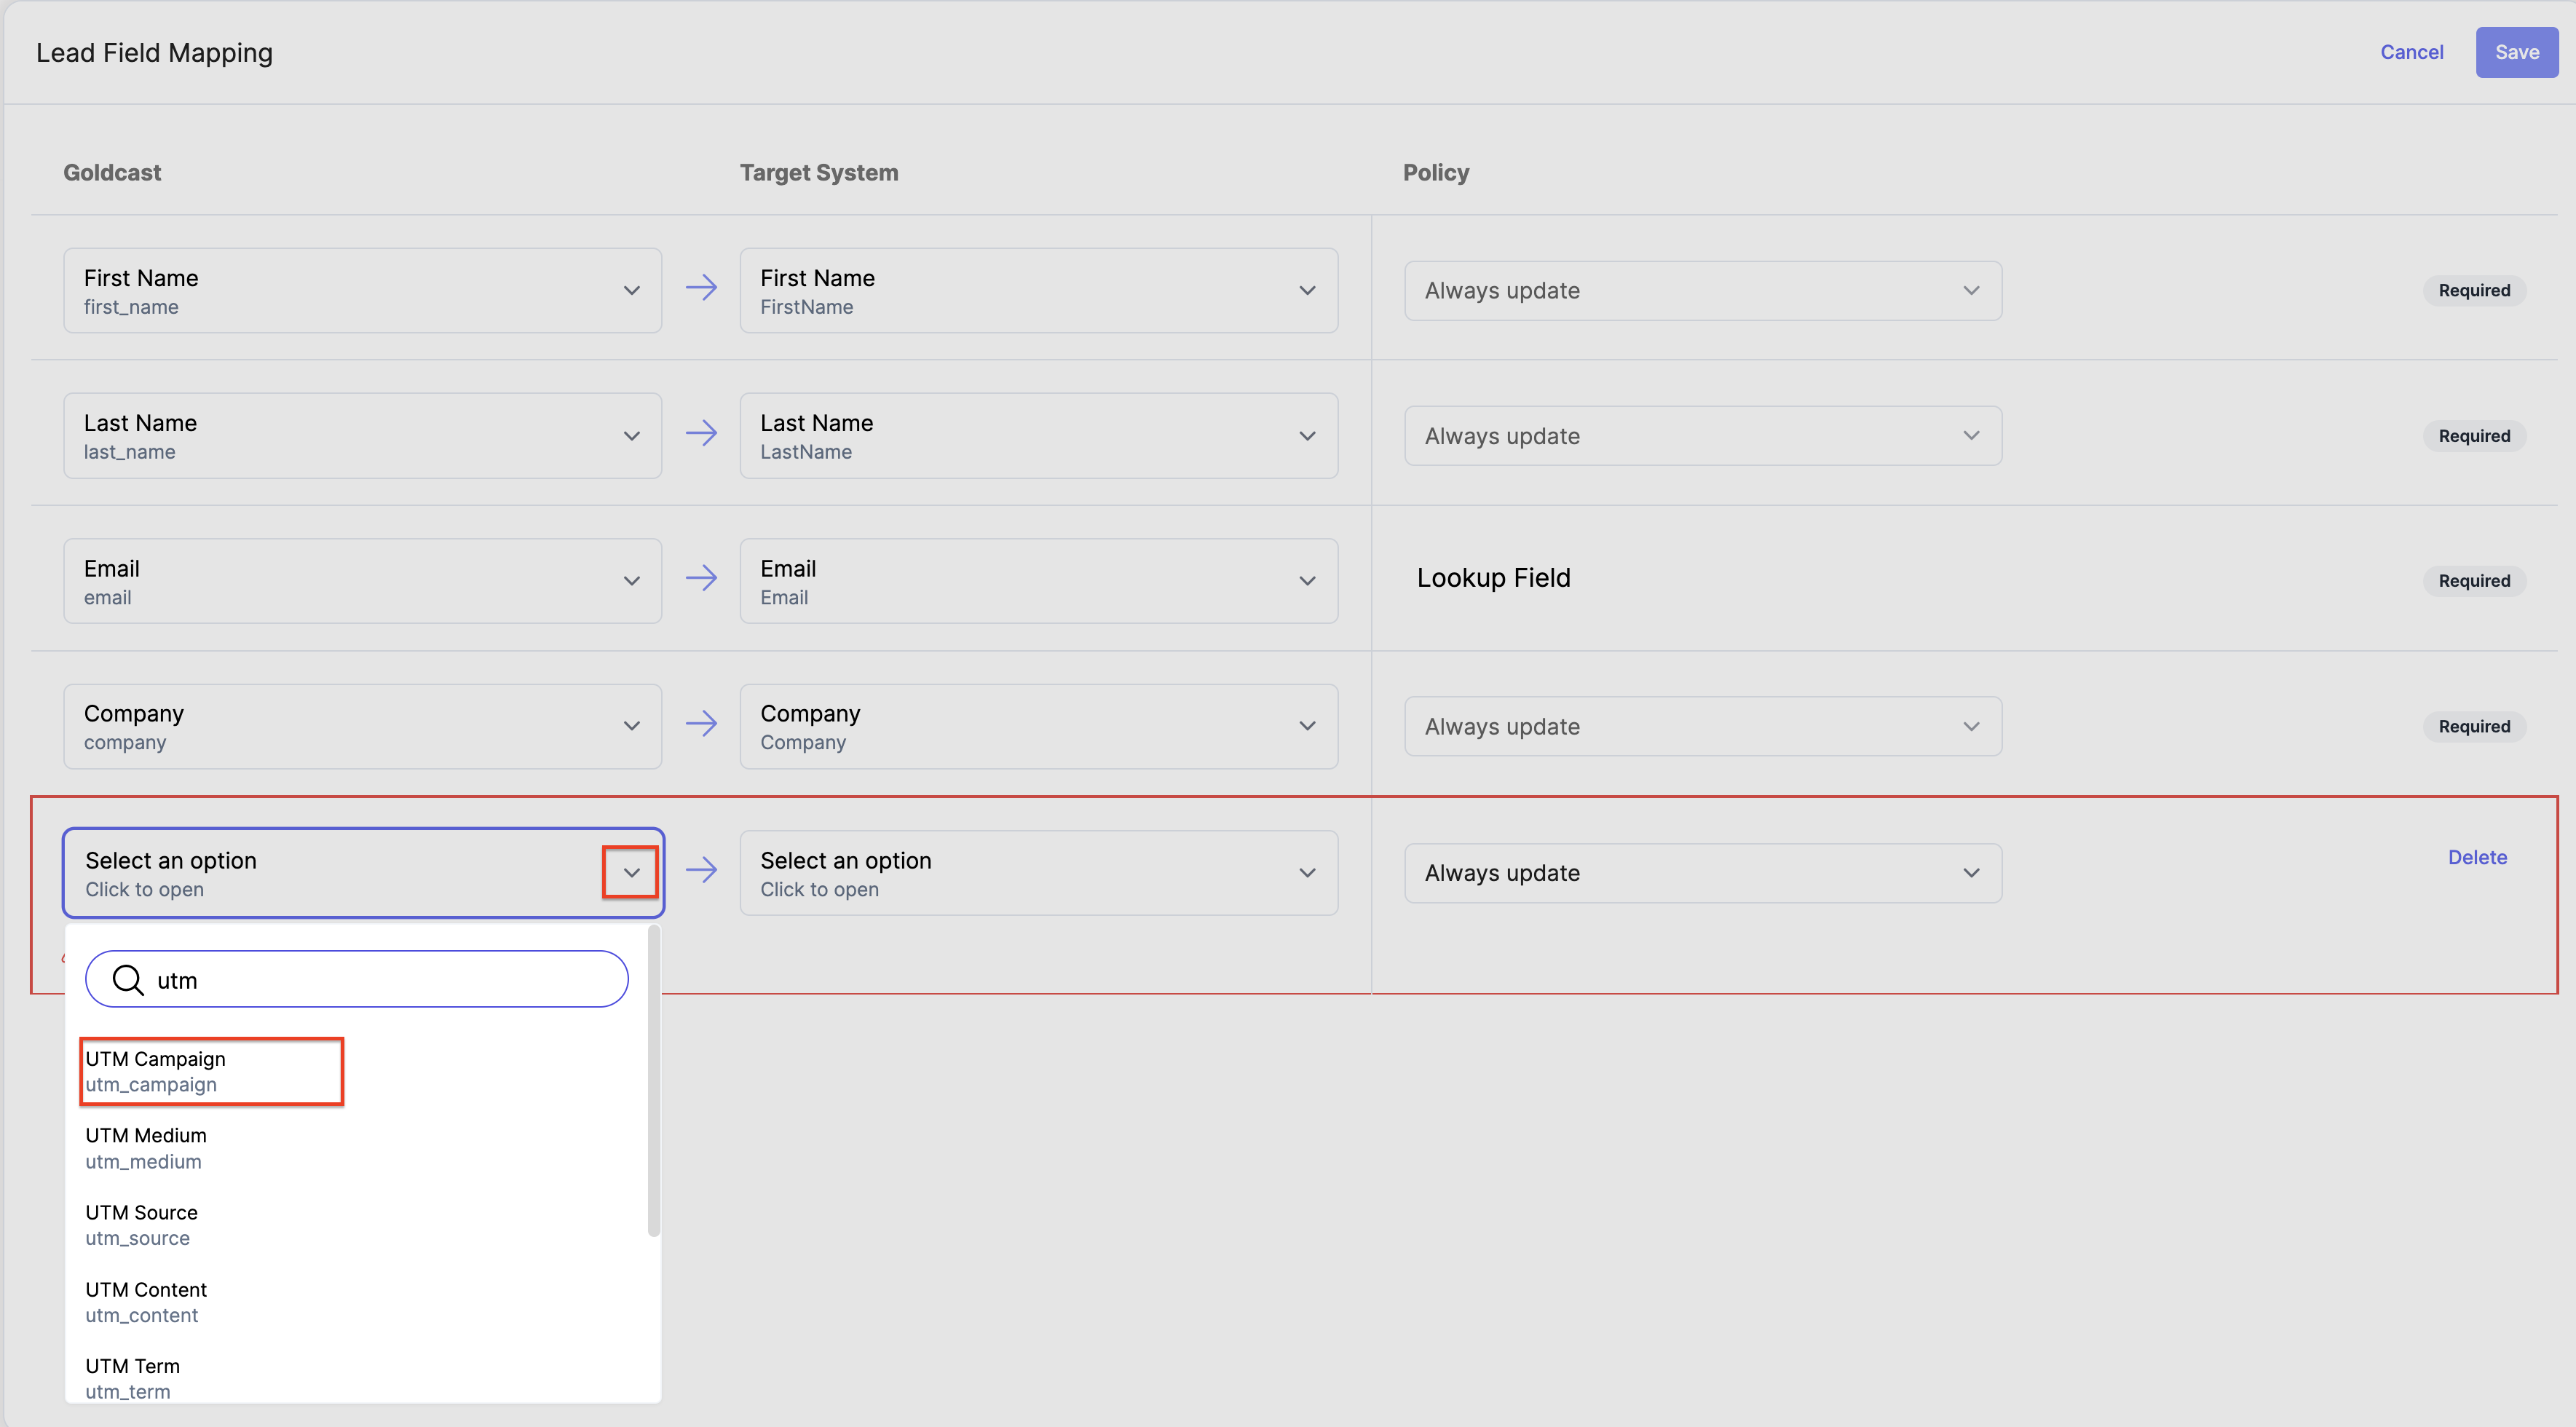
- To add a new mapping, click the Add Mapping button displayed at the bottom of your screen.
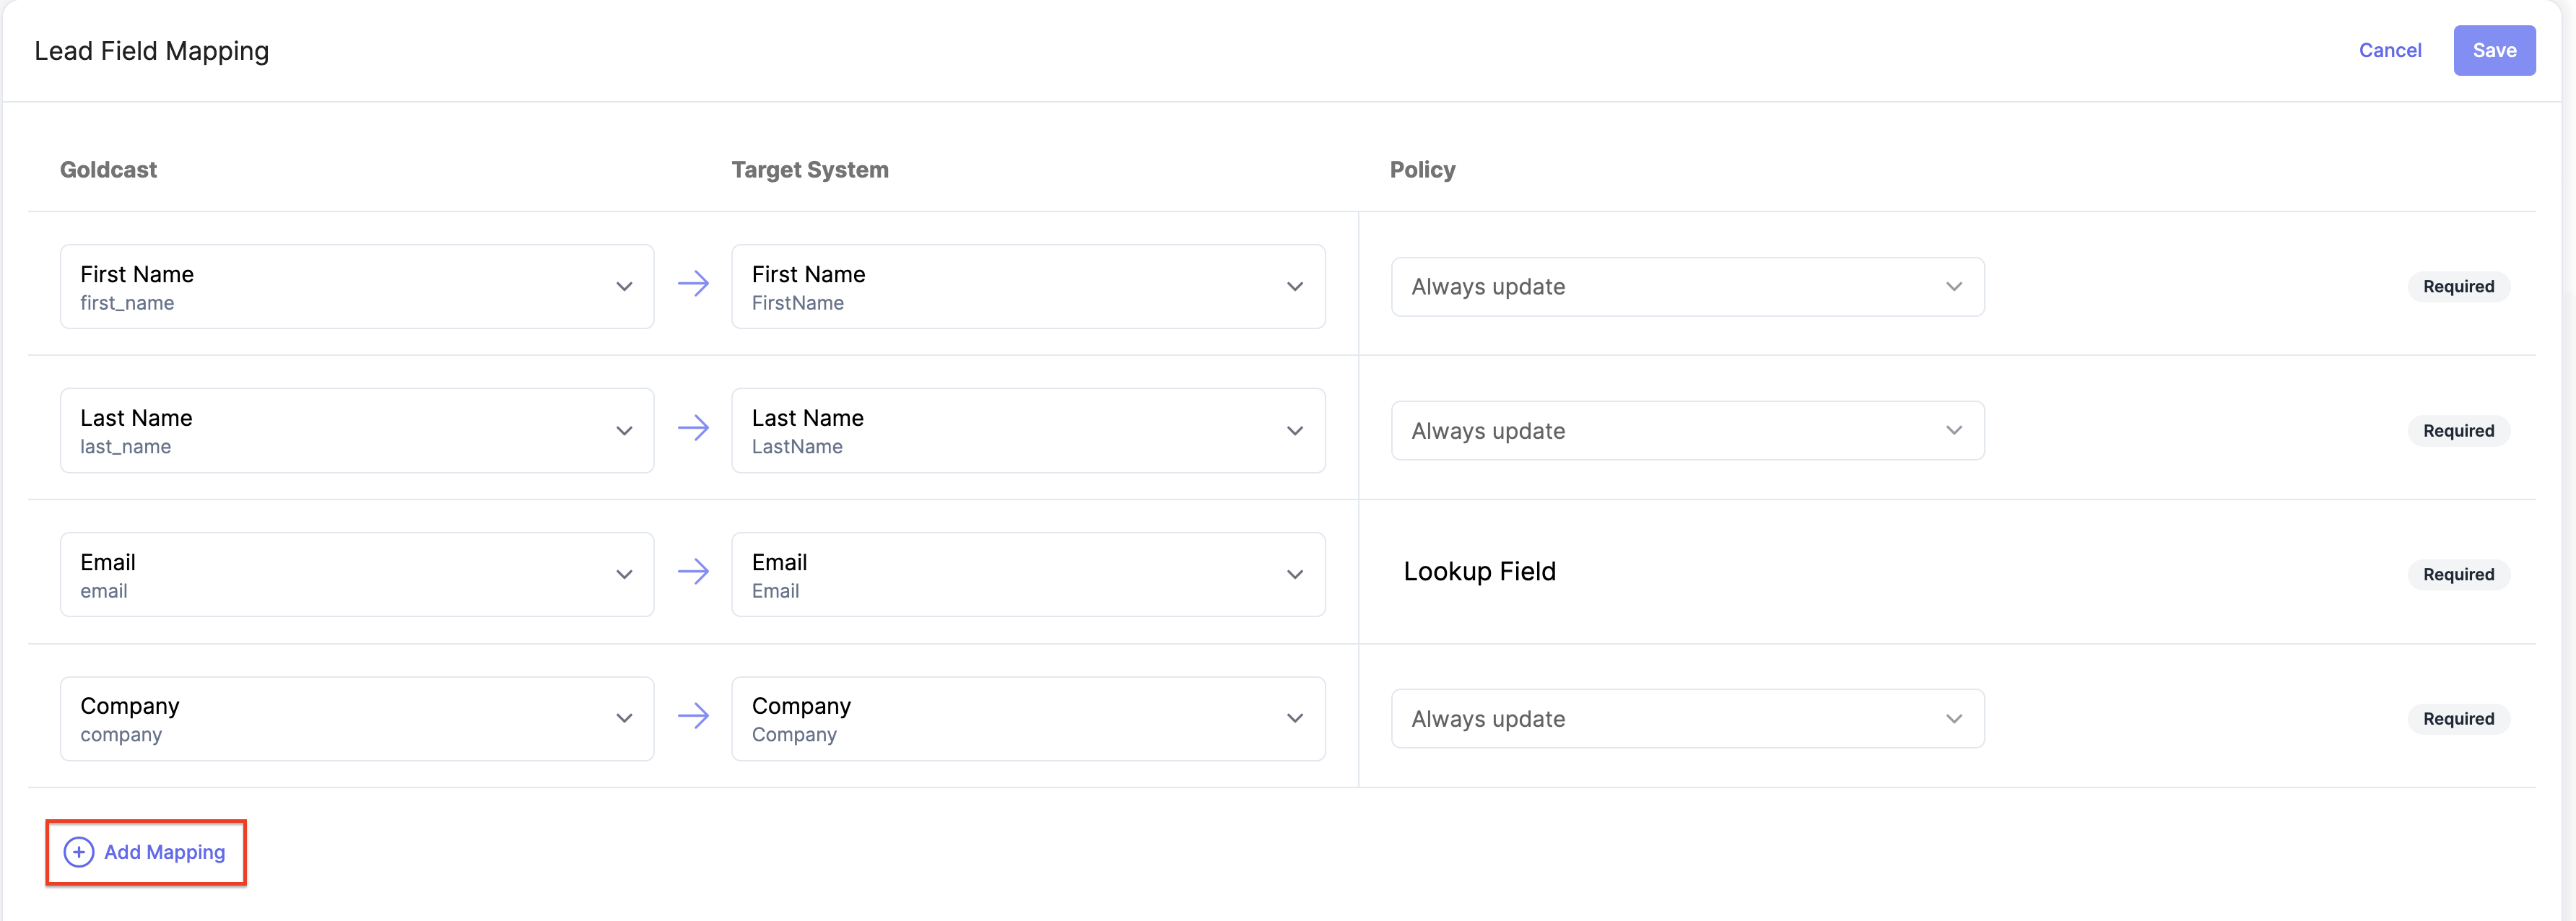
- Select your Field name in Goldcast from the first drop-down, for ex. Utm_Campaign.
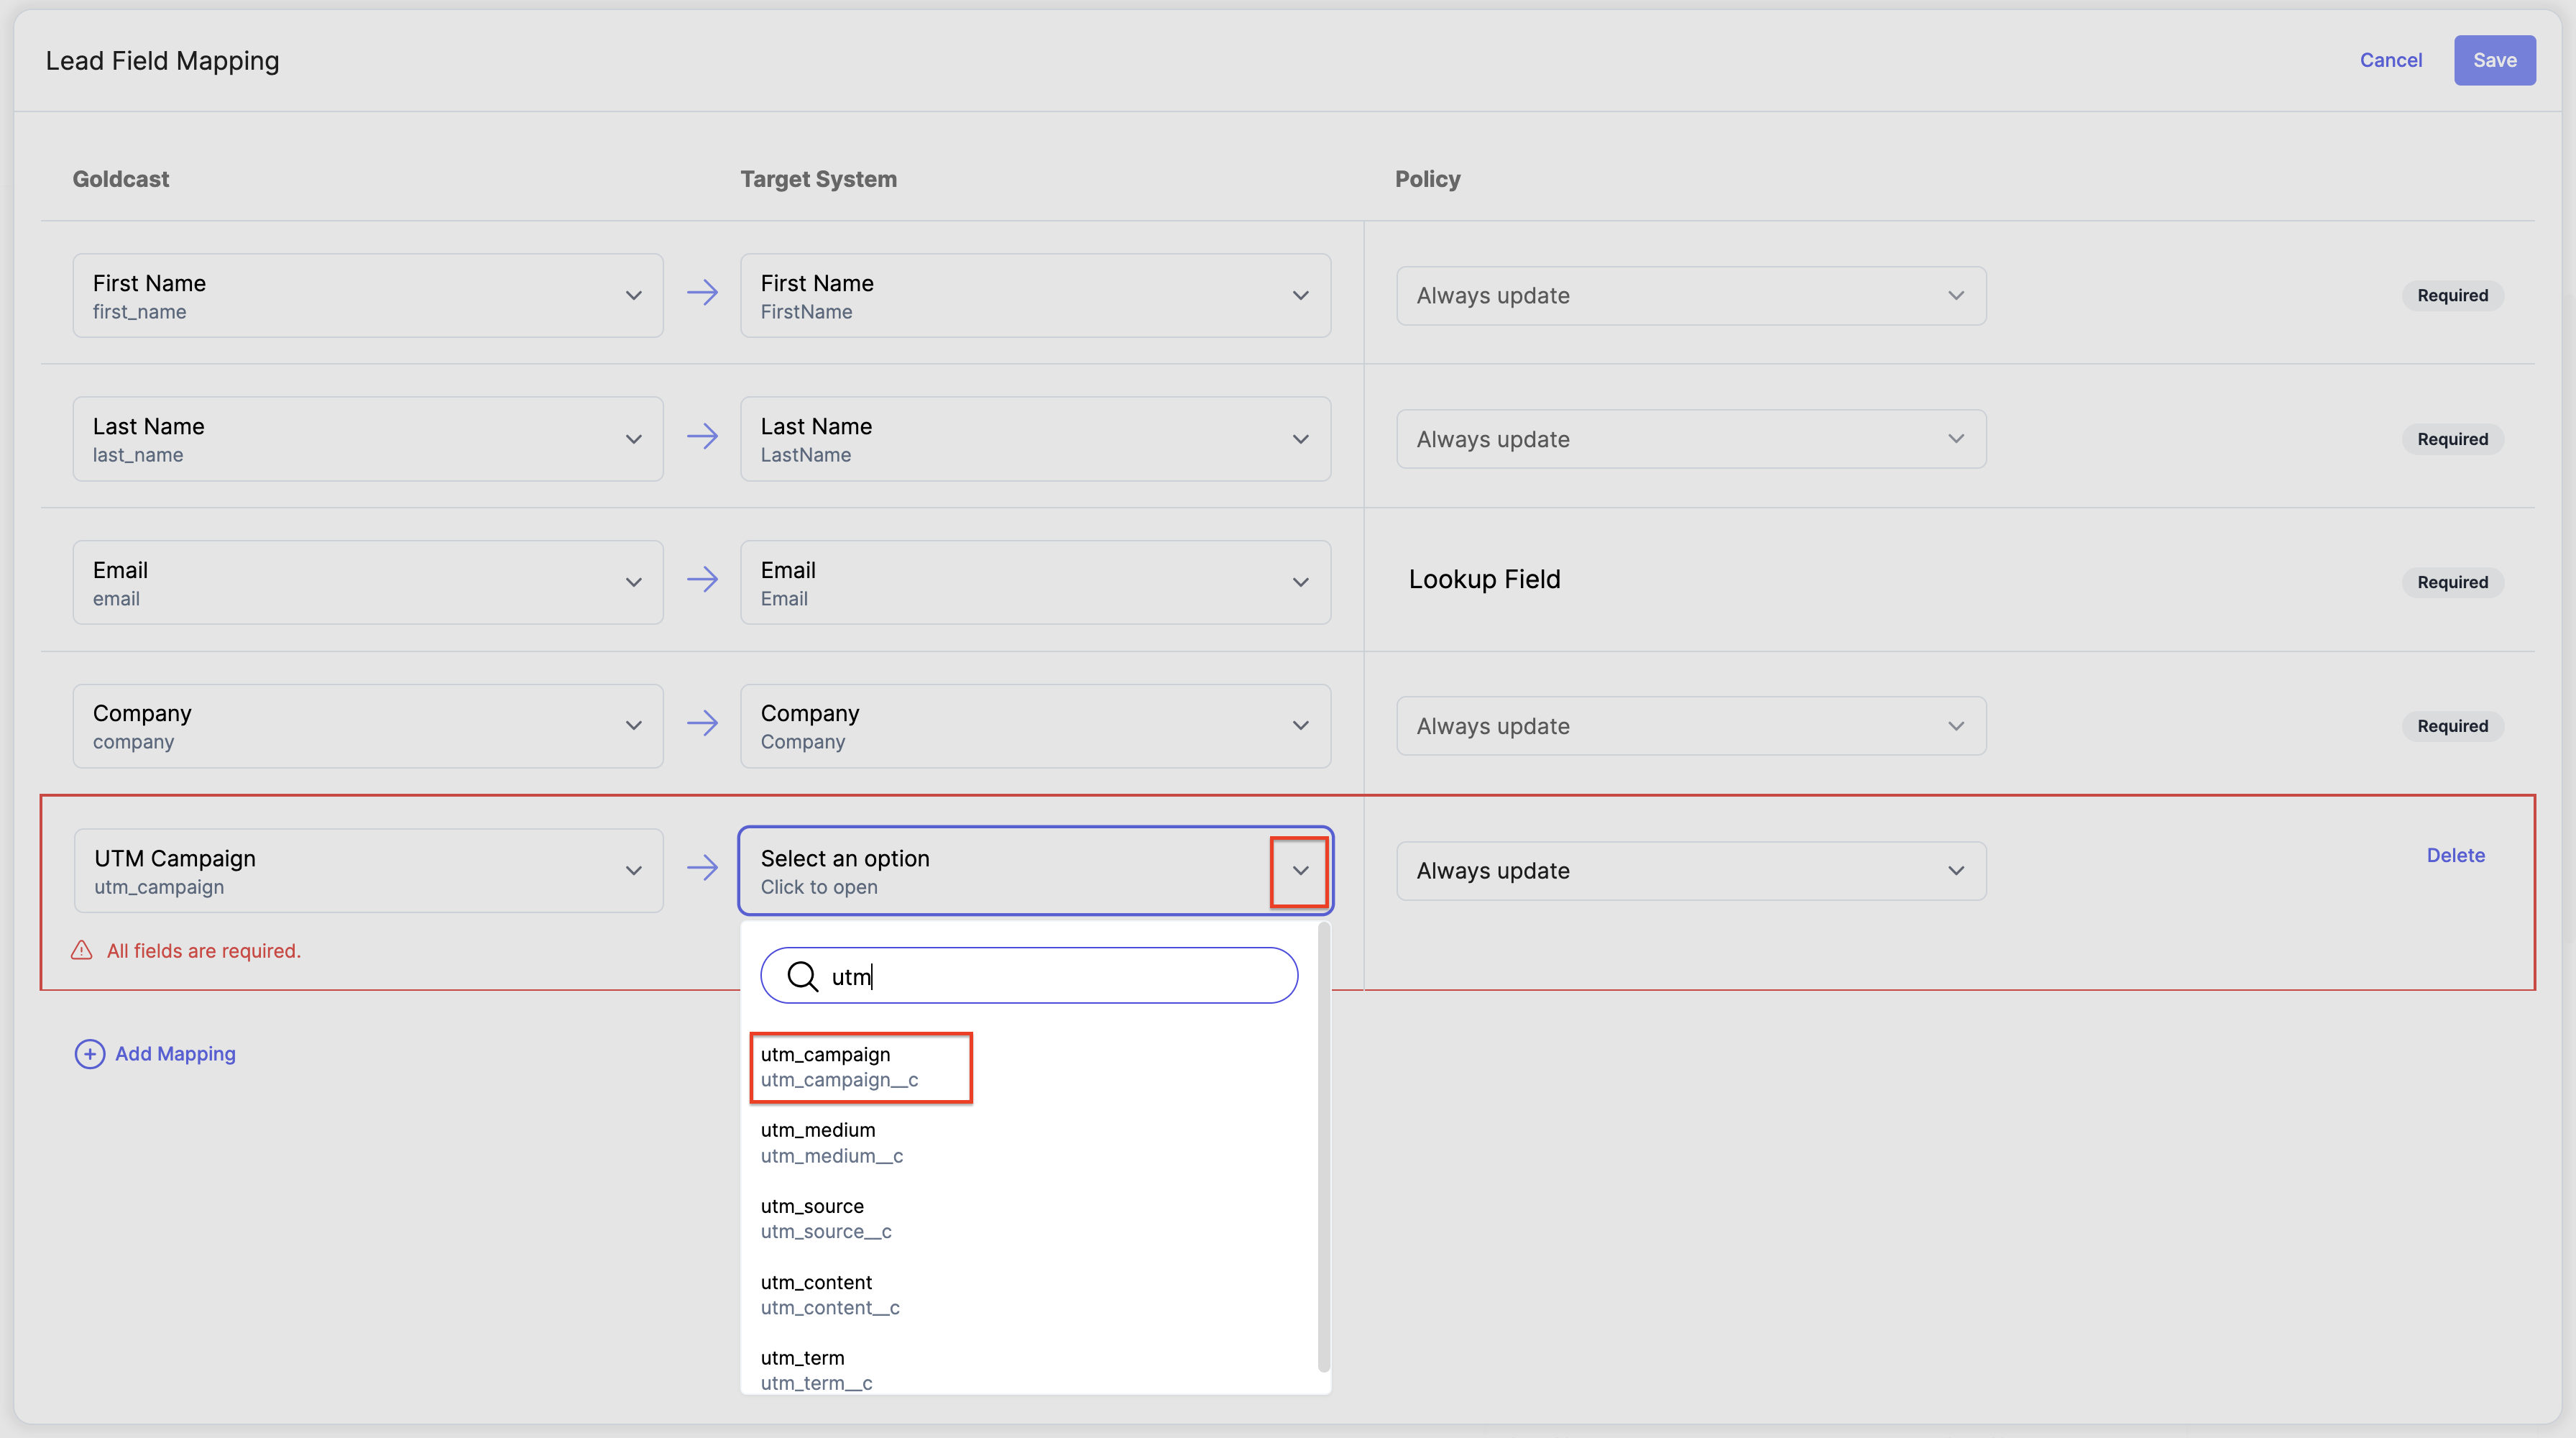
- Select the corresponding target Lead Field name in Salesforce from the Target System dropdown.
- Choose the update policy that seems appropriate according to your requirement for Leads in Salesforce.
- Similarly, repeat this process for all the necessary Standard Fields in Goldcast for your Goldcast Registration Forms you want to map.
- Once done, click on Save to save the Lead Field Mapping for your Salesforce Integration, this will give you a green pop up with a success message Lead Field Mapping Created/Updated Successfully.

Configuring Contact Field Mapping in your Goldcast org
Set up your new Contact Field mapping from the record created on the screen. This will consist of selecting 3 components :
- Standard Fields in Goldcast will be collected from your Goldcast Registration Forms.
- Contact Fields that will get updated in the target system i.e., Salesforce.
- Update Policy: This is the behavior in which our field mapping will sync data and update target Contact fields in Salesforce.
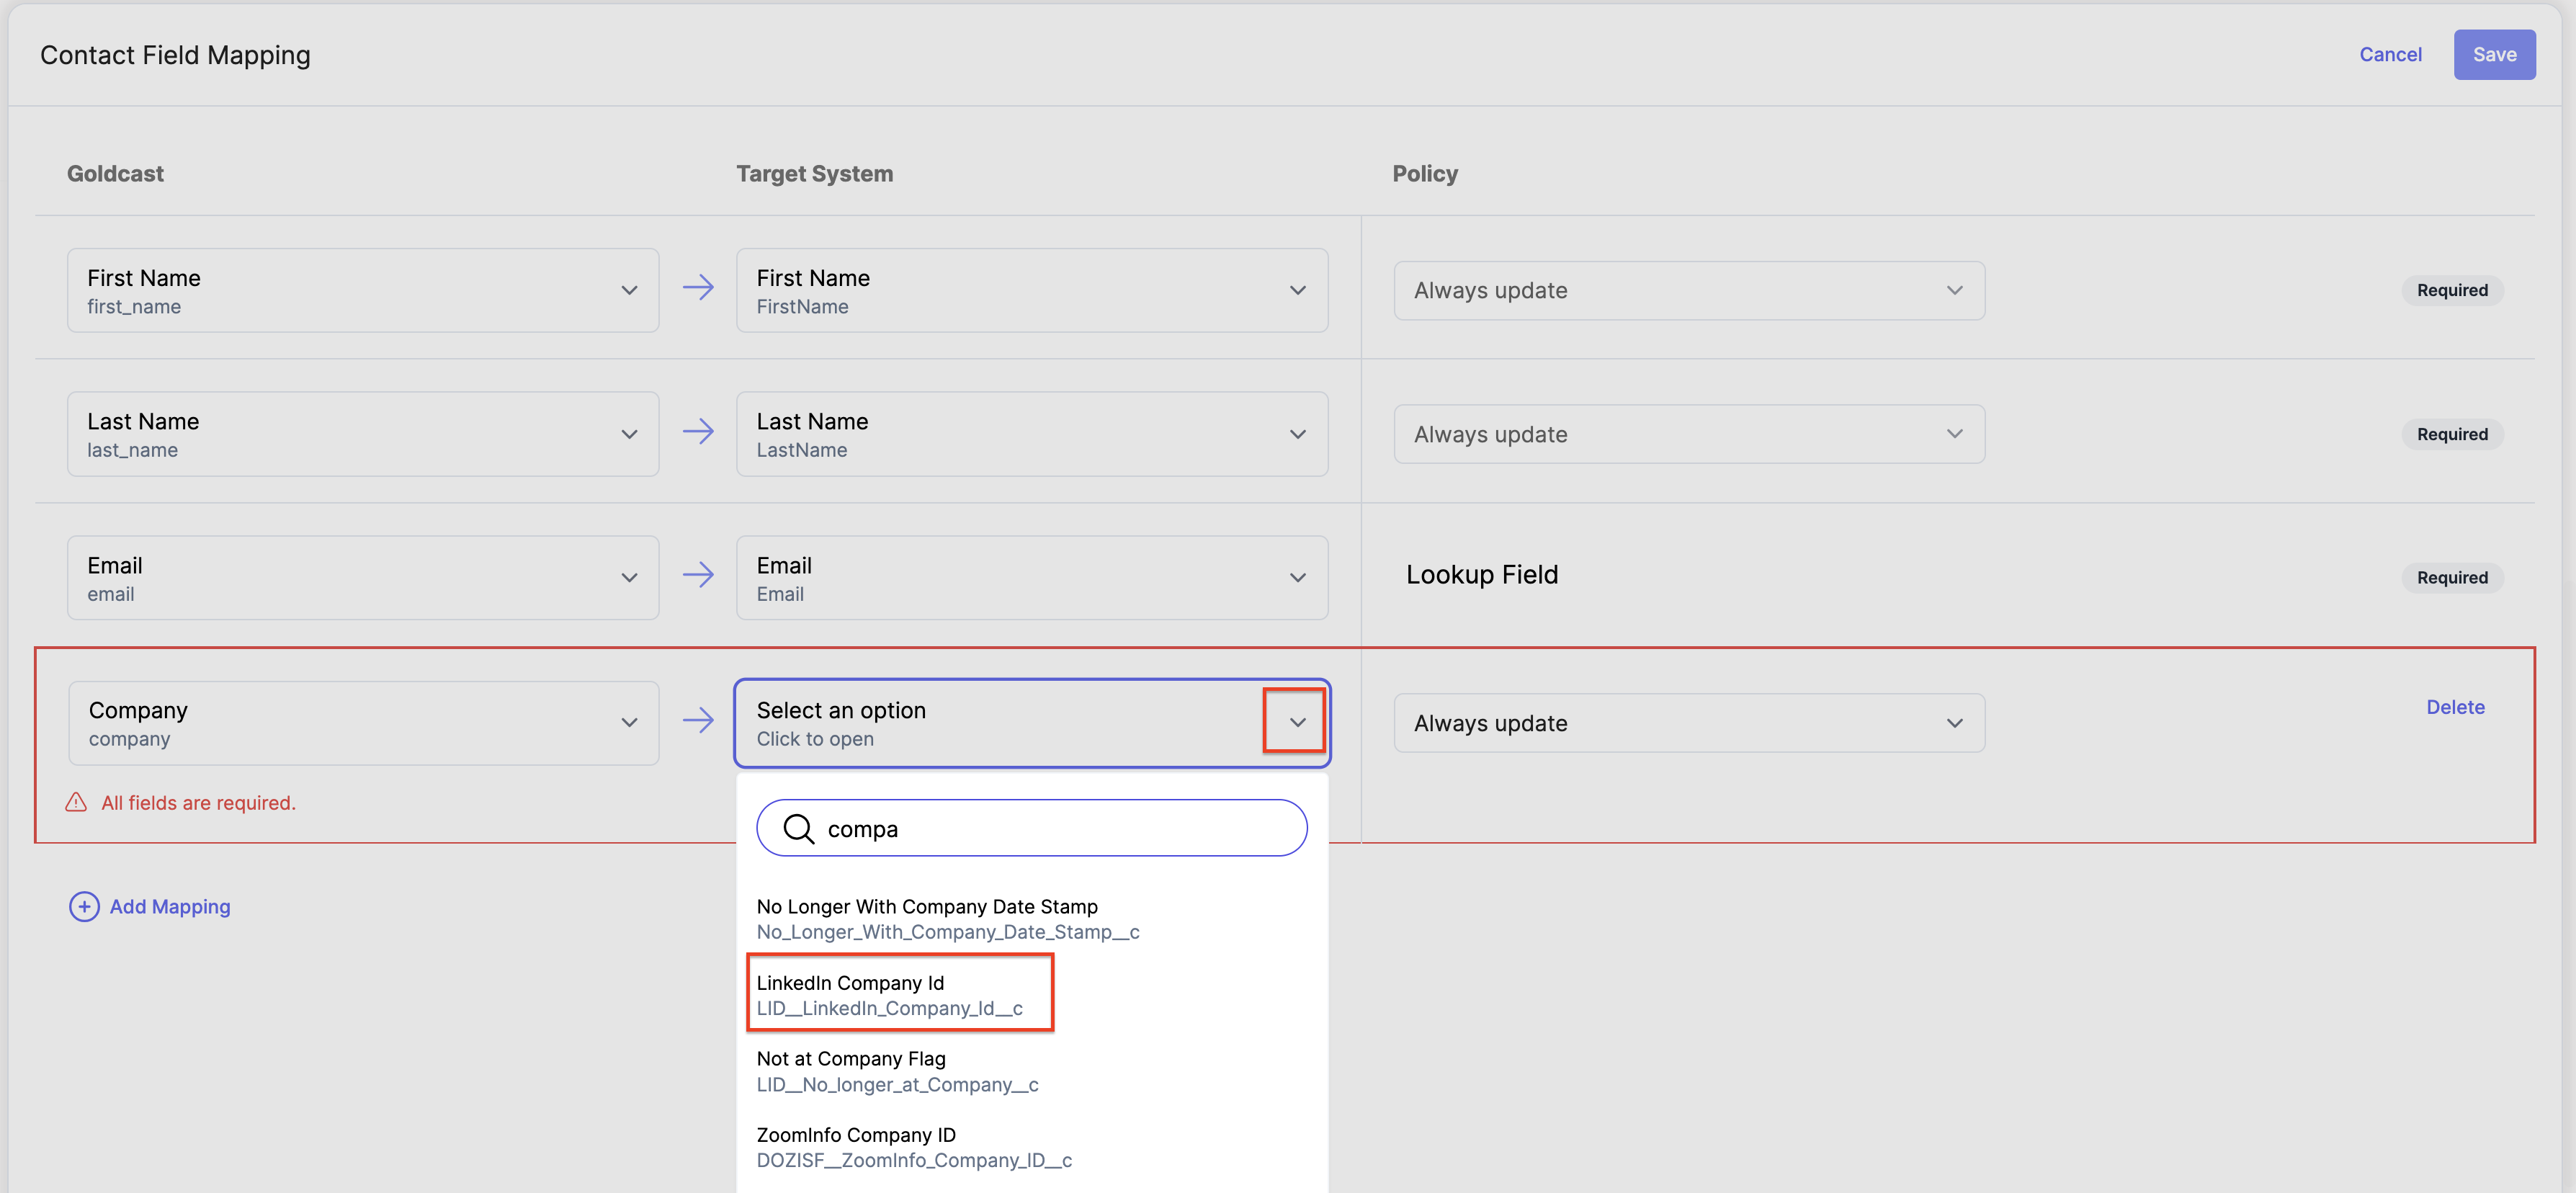
- To add a new mapping, click the Add Mapping button displayed at the bottom of your screen.

- Select your Field name in Goldcast from the first drop-down, for ex. Company.
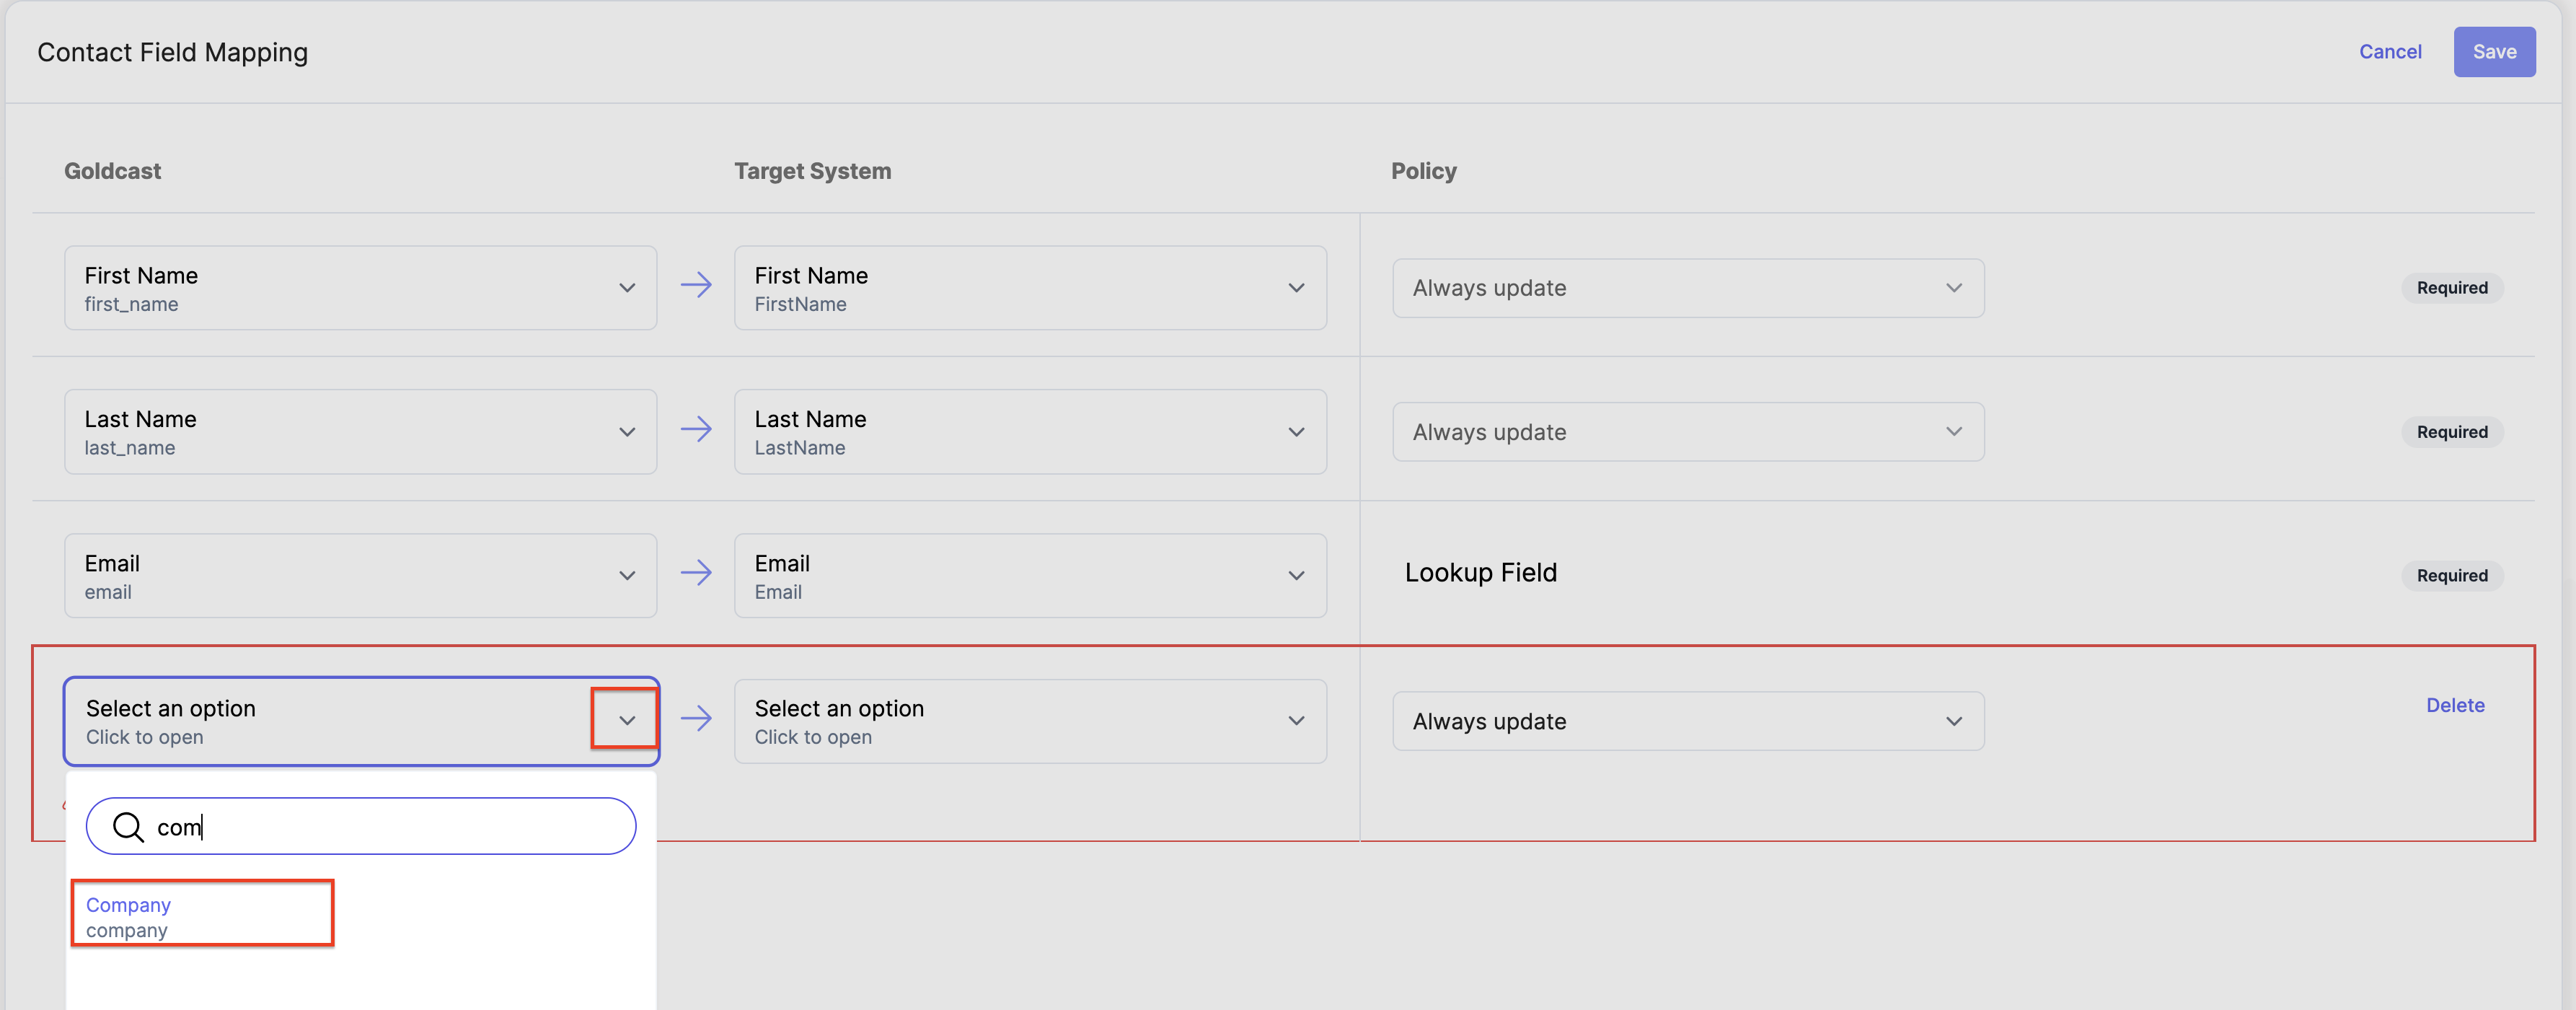
- Select the corresponding target Contact Field name in Salesforce from the Target System dropdown.
- Choose the update policy that seems appropriate according to your requirement for Contacts in Salesforce.
- Similarly, repeat this process for all the necessary Standard Fields in Goldcast for your Goldcast Registration Forms you want to map.
- Once done, click on Save to save the Contact Field Mapping for your Salesforce Integration, this will give you a green pop up with a success message Contact Field Mapping Created/Updated Successfully.
Configuring Campaign Member Field Mapping in your Goldcast org
Setup your new Campaign Member Field mapping from the record created on the screen. This will consist of selecting 3 components :
- Standard Fields in Goldcast will be collected from your Goldcast Registration Forms.
- Campaign Member Fields that will get updated in the target system i.e., Salesforce.
- Update Policy: This is the behavior in which our field mapping will sync data and update target Campaign Member fields in Salesforce.
- To add a new mapping, click the Add Mapping button displayed at the bottom of your screen.

- Select your Field name in Goldcast from the first drop-down, for ex. magic_link_url.
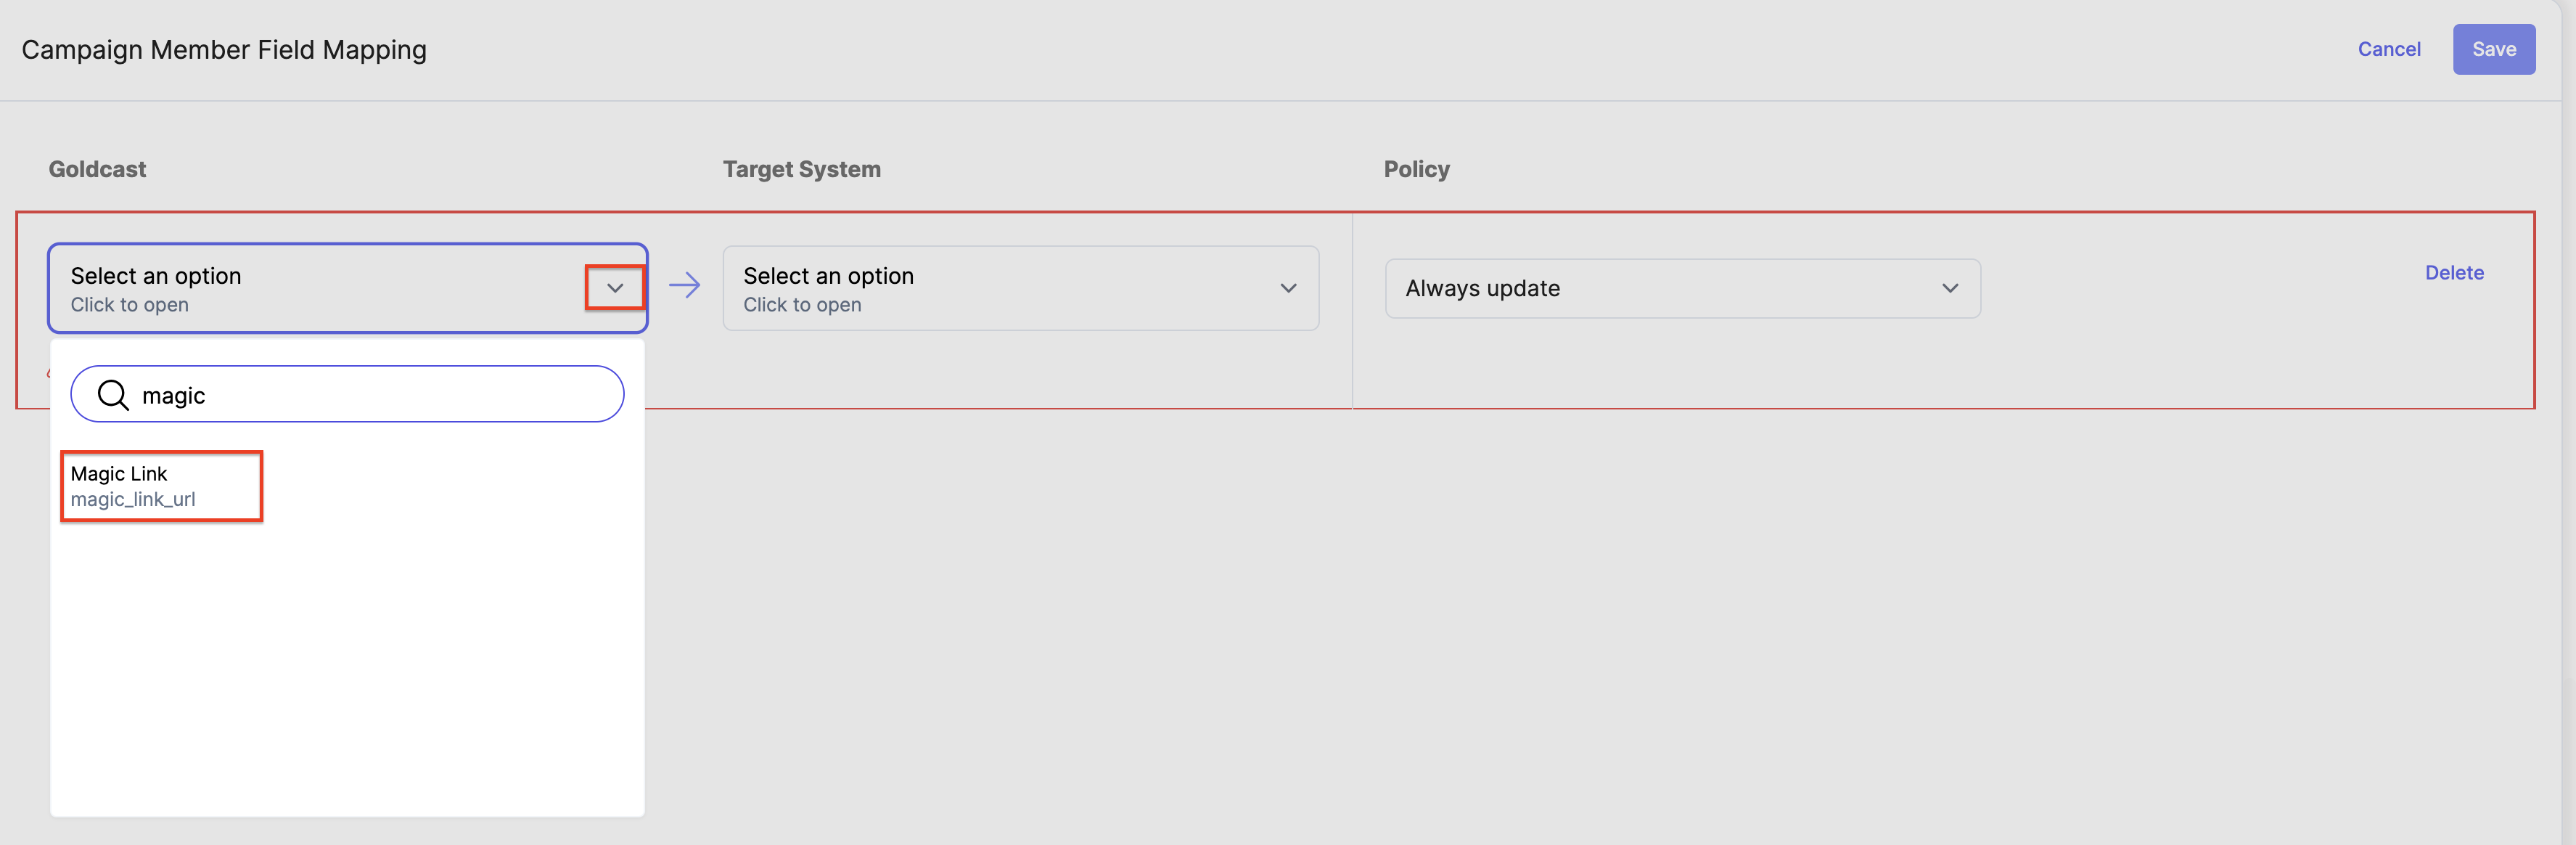
- Select the corresponding target Campaign Member Field name in Salesforce from the Target System dropdown.
- Choose the update policy that seems appropriate according to your requirement for Campaign Members in Salesforce.

- Similarly, repeat this process for all the necessary Standard Fields in Goldcast for your Goldcast Registration Forms you want to map.
- Once done, click on Save to save the Campaign Member Field Mapping for your Salesforce Integration, this will give you a green pop up with a success message Campaign Member Field Mapping Created/Updated Successfully.

Viewing mapped registration data in your Salesforce Sales Cloud
To see the Salesforce field mapping in action, you need to set up a form using our Form Builder. For instructions on how to set up a form, refer to Creating and Editing Registration Forms.
IMPORTANT: Make sure the Goldcast Standard Fields to be mapped to your Salesforce Lead, Contact, and Campaign Member fields are present in the Form(default form).
Once you have your form set up for the event and field mapping setup is done for the registrations to go through your forms, go to your respective Leads, Contacts, and Campaign Members and open each record to check respective mapped fields to see the results.
You can now map data like UTM parameters, Magic Link for your events, etc., to your fields in Salesforce.
List of Standard Fields in Goldcast
| UTM Hidden Field | |||
| UTM Hidden Field | |||
| UTM Hidden Field | |||
| UTM Hidden Field | |||
| UTM Hidden Field | |||
| UTM Hidden Field | |||
| UTM Hidden Field | |||
| UTM Region | utm_region | string | UTM Hidden Field |
|---|---|---|---|
Important Notes:
- By default, the Country form field in Goldcast has Country Name to Country mapping.
The country name is displayed in the form when a user selects it. However, while syncing this value, it syncs as Country Code. Make sure the field in your target system is configured to accommodate Country. If you want the country name to be synced, you must change it manually in the Goldcast form in the Field's data section. - UTM Tracking Fields should be passed through your Registration Form URL to capture the data and then passed to your target system.
- The Calendar Invite URL field is more than 500 characters, so choose your target field accordingly.
- QR Code URL field is only applicable for field events.