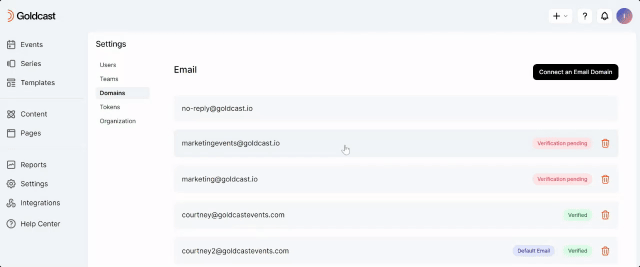
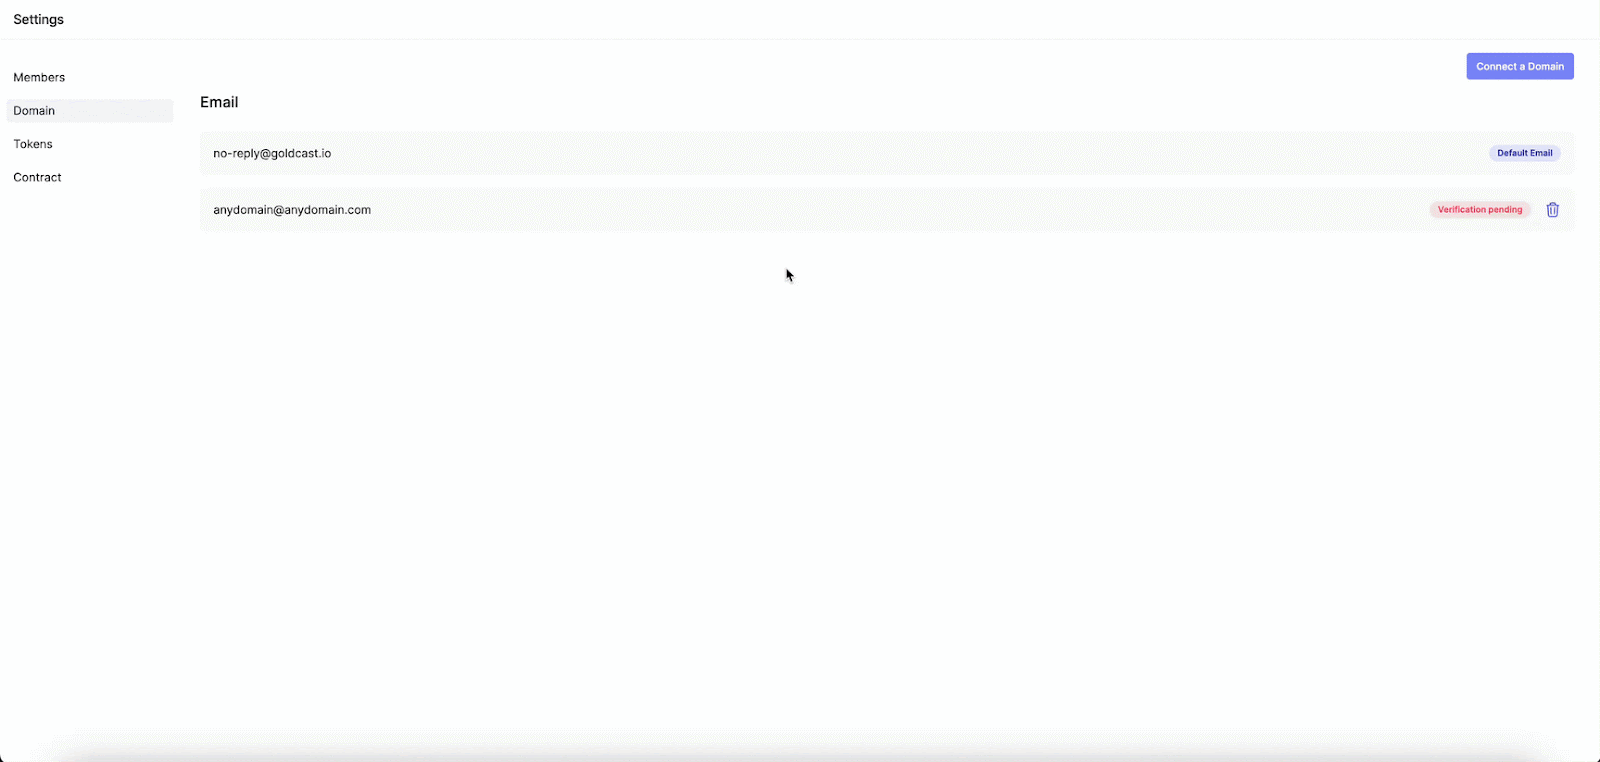
By default, emails sent from the Goldcast platform use the domain no-reply@goldcast.io. This is also the reply-to address for emails sent to event registrants.
However, if you prefer to provide registrants with a more branded experience, you can use any email address from your domain to send registration/reminder notifications for all your events. This would also set the reply-to address to your custom email address as well, so if attendees respond to an email, organizers can monitor those email responses.
How to set up a custom email domain in Goldcast
Step 1: Go to Settings
- Log in to Goldcast Studio and click Settings on the left sidebar.
- Click Domains and click the Connect an Email Domain button.
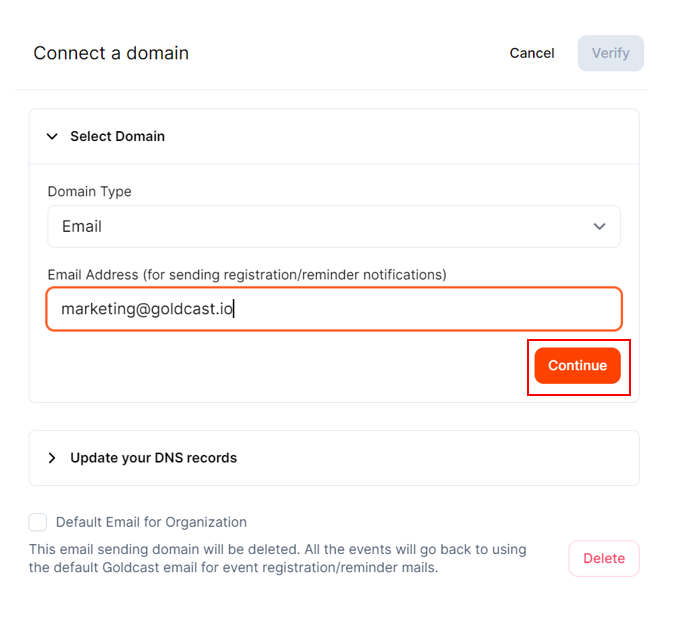
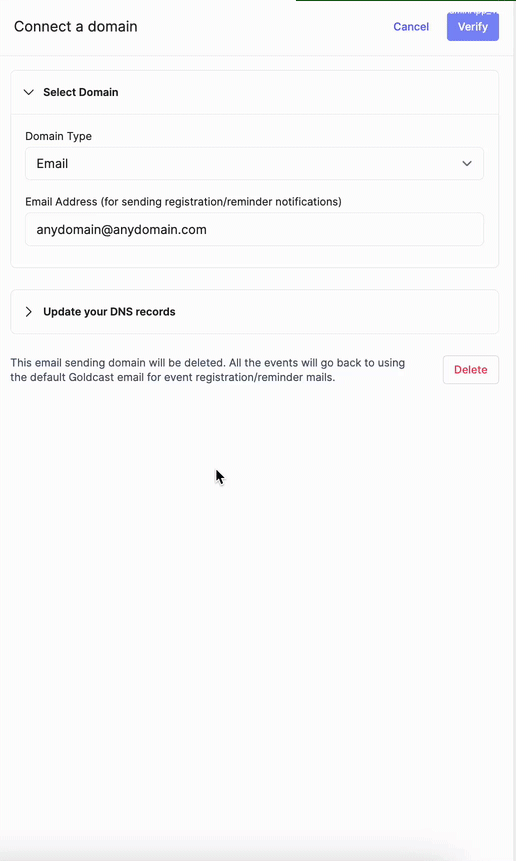
Step 2: Select Domain
- Enter the email address of the custom domain (example@yourcompany.com)
- Ensure the address has been entered correctly and click Continue.
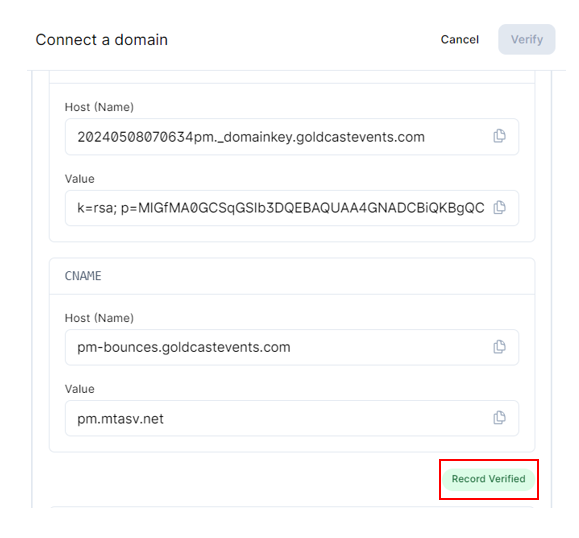
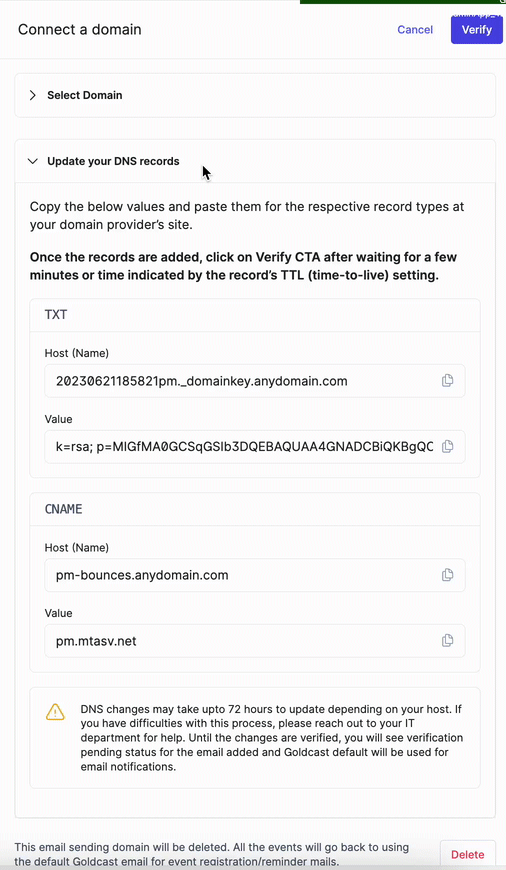
Step 3: Update your DNS Records
After you click Continue, you will see DNS records on the screen. Copy and paste these values to your domain's DNS records. Ensure that the DNS records are added/updated correctly for your DNS provider. The verification status for the set email domain will display as pending & event notifications will continue to use the default Goldcast mail until your DNS is verified.
The following links provide further instructions for adding DNS records to specific platforms:
Step 4: Verify Email Sending Domain
Once the DNS records are updated, you'll need to wait for a few minutes or the time indicated by the record’s TTL (time-to-live) setting before clicking the Verify button. This varies based on the DNS providers. After clicking Verify, if the records were correctly set in your DNS provider settings, the verification will be successful, and you will see the Record Verified status.
Step 5: Set the custom email address as the default
Once the email domain is verified, click on it and select the checkbox to make it the Default Email for Organization.
Heads Up! Once the custom domain is verified, it will NOT be set as the default sender until you select the above checkbox. So, make sure to complete this step to make the custom domain the default email address for Goldcast emails.
Once you complete all the above steps, Goldcast will send all event notifications using the custom email address.
FAQs & Troubleshooting
1. The status says “Verification Pending.” How do I resolve it?
After clicking Verify, you will see a warning if the DNS updates have not yet been processed or are missing. In this case, please check if your DNS providers' TXT and CNAME records are updated correctly and then click Verify again after waiting a few minutes.
At any point, to navigate back to the domain list view, use the cancel button on the top right. Click on the connected email to view the DNS record values.
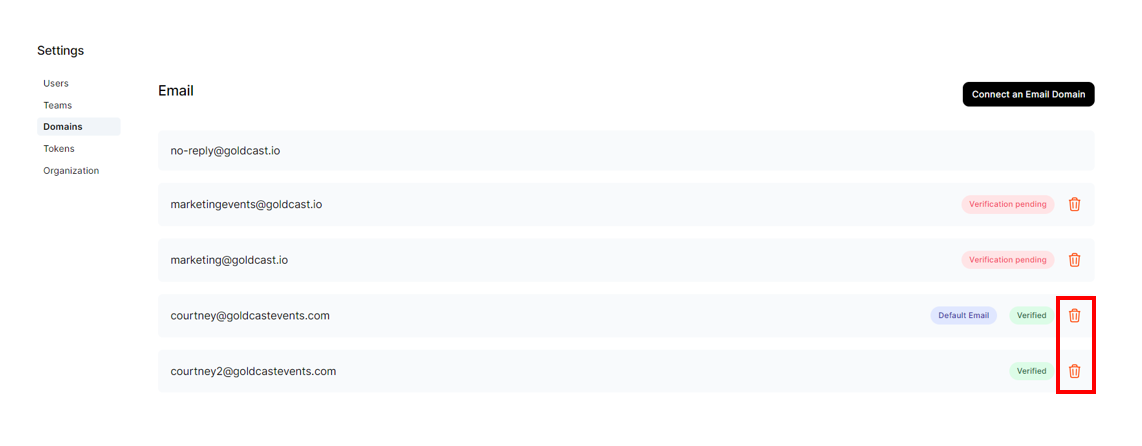
2. How do I delete a custom email domain?
To delete a previously added custom email domain, click the Delete icon on the record and confirm your changes. Once deleted, all events will return to using the default Goldcast email (noreply@goldcast.io).
3. How many custom email domains can I add?
Currently, we support only one custom email domain for every Goldcast organization. However, if you have multiple team workspaces in your Goldcast organization, you can set up one custom email domain for each team workspace.
4. How do I stop receiving email responses to my calendar invites in Gmail and Outlook?
If you want to stop receiving RSVP response emails after sending calendar invitations, you can adjust your settings in both Google Calendar (Gmail) and Microsoft Outlook:
- For Gmail (Google Calendar):
You can turn off email notifications for event responses so they no longer clutter your inbox.
Follow this guide: How to turn off RSVP responses from Google Calendar - For Microsoft Outlook:
You can disable email notifications for event responses in your Outlook settings.
Learn how here: How do I turn off Outlook calendar emails for event responses