| Plan Availability | Starter | Pro | Premium | Enterprise |
 |
 |
|
|
For customers with contracts starting March 2024 or later, feature availability is based on your pricing tier. If interested, contact your CSM or our Sales Team to discuss pricing options.
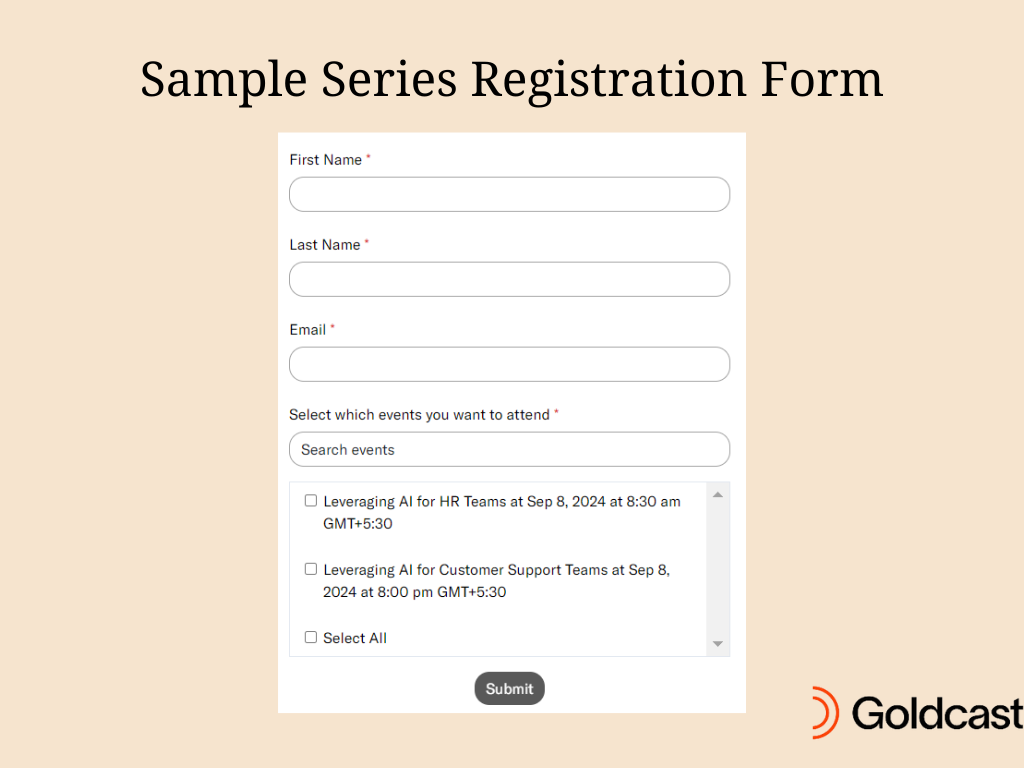
All events in a series share a common registration form. Attendees can register for one, many or all of the events by submitting the registration form only once. As the registration form is shared, you cannot edit the registration form for individual events.
Note: Currently, we do not support embedding a third-party registration form for series. You'll have to use the default Goldcast form to capture series registrations.
By default, the series registration form includes a standard Event List Select Box component that dynamically populates depending on the number of events you’ve included in the series.
This article explains how to customize this checklist and the rest of the series registration form.
How to edit the series registration form
Follow these steps to edit a series registration form:
- Login to Goldcast Studio using your credentials.
- Click the hamburger icon on the top left and select Series.
- Choose your preferred Series from the list.
- Navigate to Registration → Page & Form using the left sidebar.
- Click the Edit button in the Registration Form section, then use the Form Builder to set up the form according to your requirements.

Editing the events checklist
By default, the series registration form automatically includes a checklist of all events in the series. The checklist is in the following format:
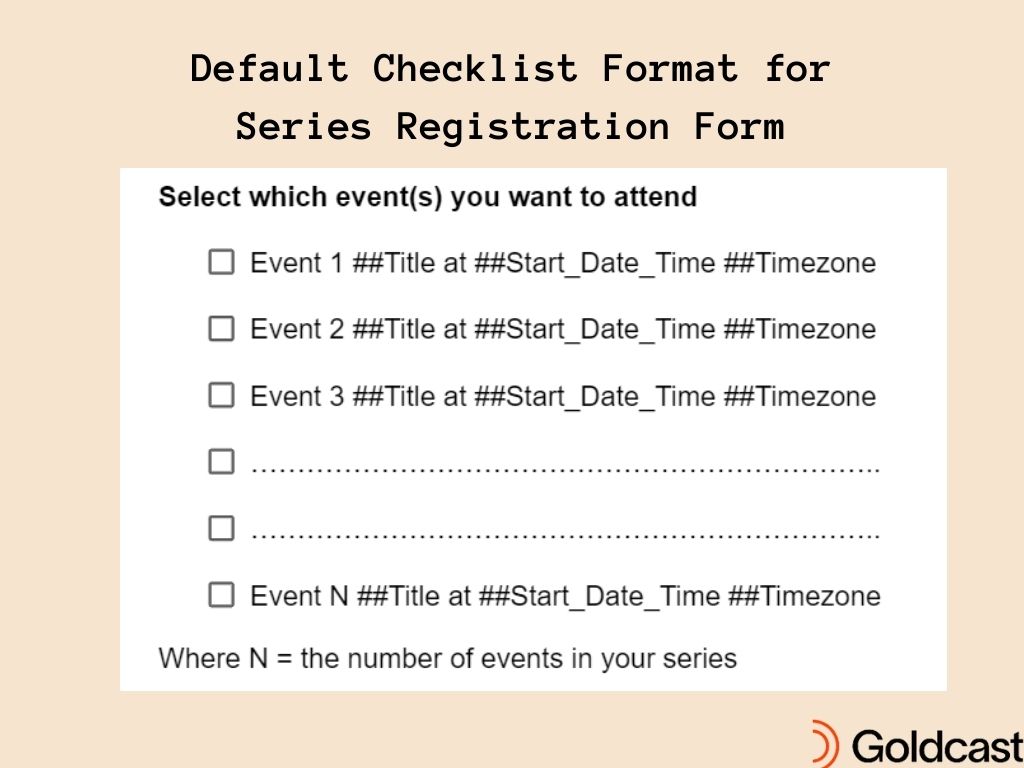
If you’re satisfied with this setup, you don’t have to do anything to this section of the form. You can continue editing the rest of the form.
However, Goldcast also offers the flexibility to customize the event checklist displayed on the series registration form. For example, you might not want to show the timezone, or display just the date without the event title (for repeating events), etc.
You can make these changes with the help of the standard fields in the Form Builder. Here’s how you can do it:
- Open your Series in Goldcast Studio, and navigate to Registration → Page & Form using the left sidebar.
- Click the Edit button in the Registration Form section to open the Registration Form Builder.
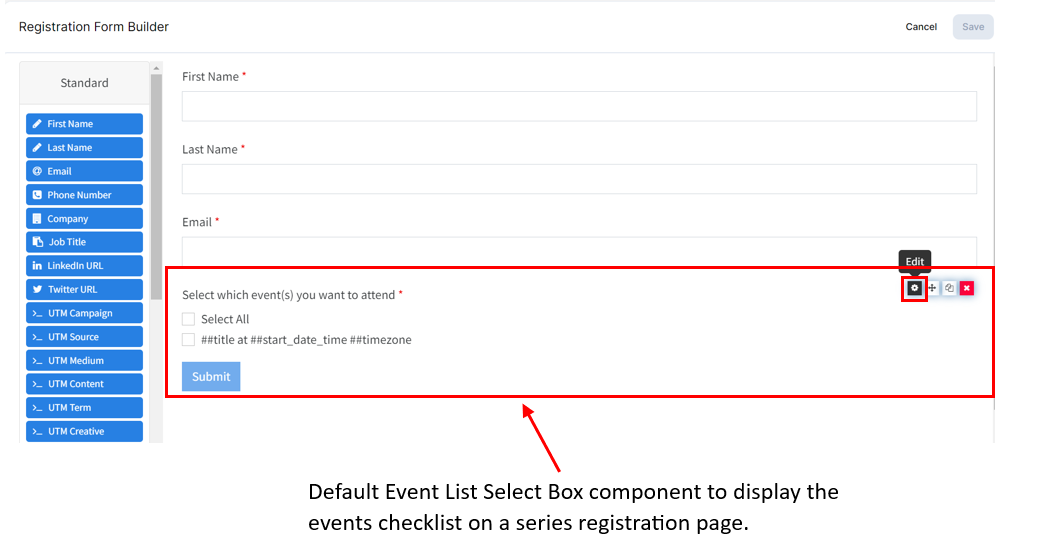
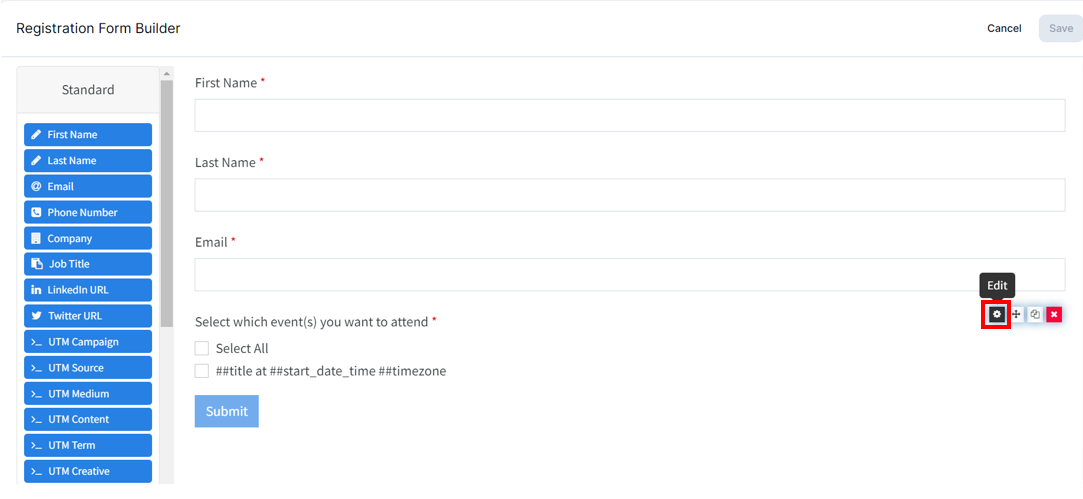
- By default, the registration form includes the Event List Select Box component to display the event checklist on the form. This component allows users to register for multiple events by selecting the checkboxes next to the event’s title or date.
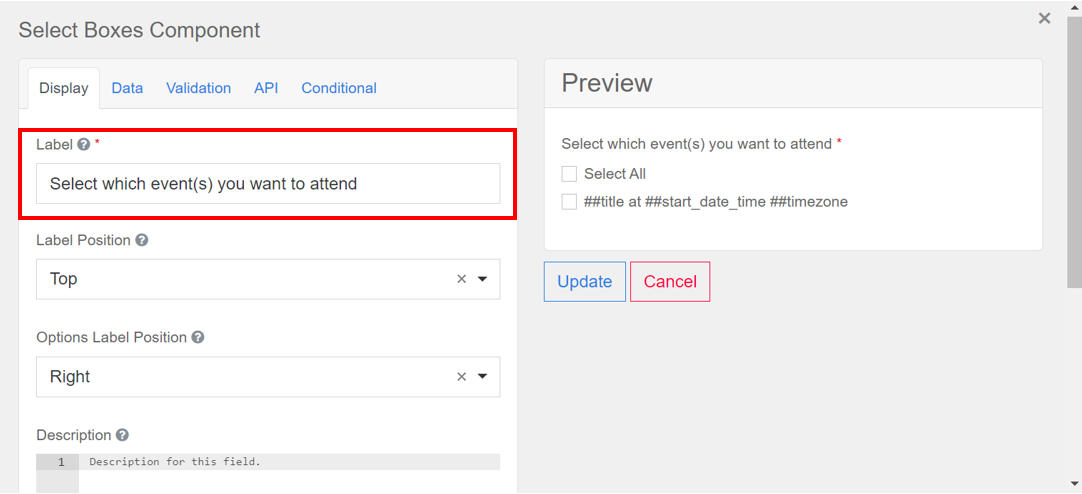
- To modify the values displayed in the checklist, click the Edit icon to its right.
- Use the Label field to change the text displayed at the top of the checklist.
Note: You can view the changes in the Preview panel on the right.
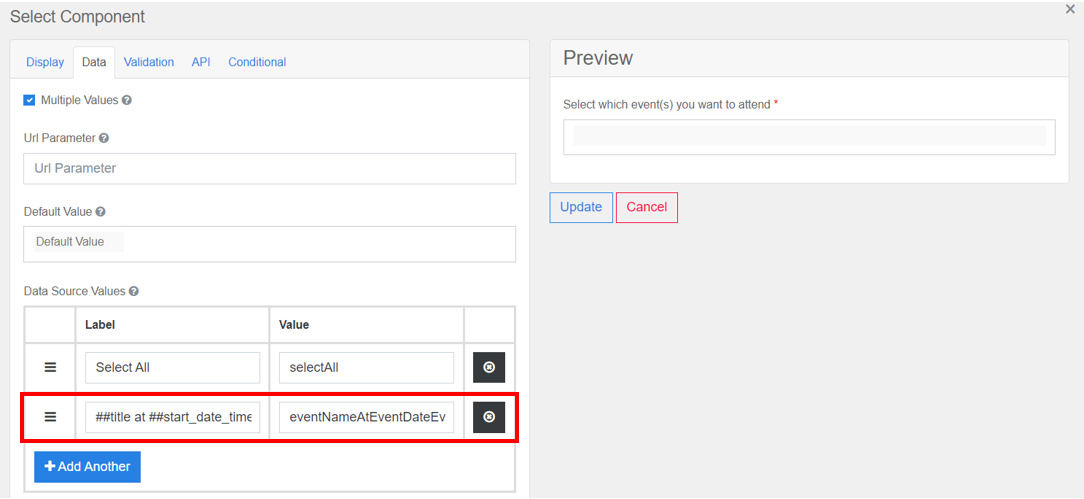
- Navigate to Data → Values to modify the format of your select box labels.
- You’ll see that there is an existing row with Label as ##title at ##start_date_time ##timezone. This row represents the format of the event options in the series registration form. This row will be duplicated for each event in your series, and the merge tags will be replaced with event information when your registration page loads, so you should not have more than one row like this.
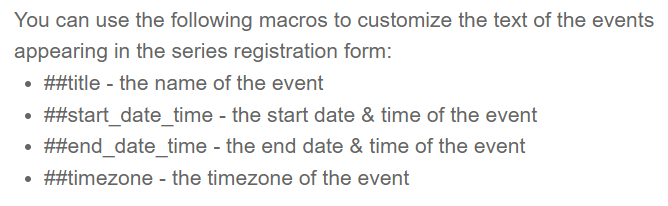
- Use the supported merge tags to change the label and customize how events are formatted on your event list component.
- Click Update to save the changes.
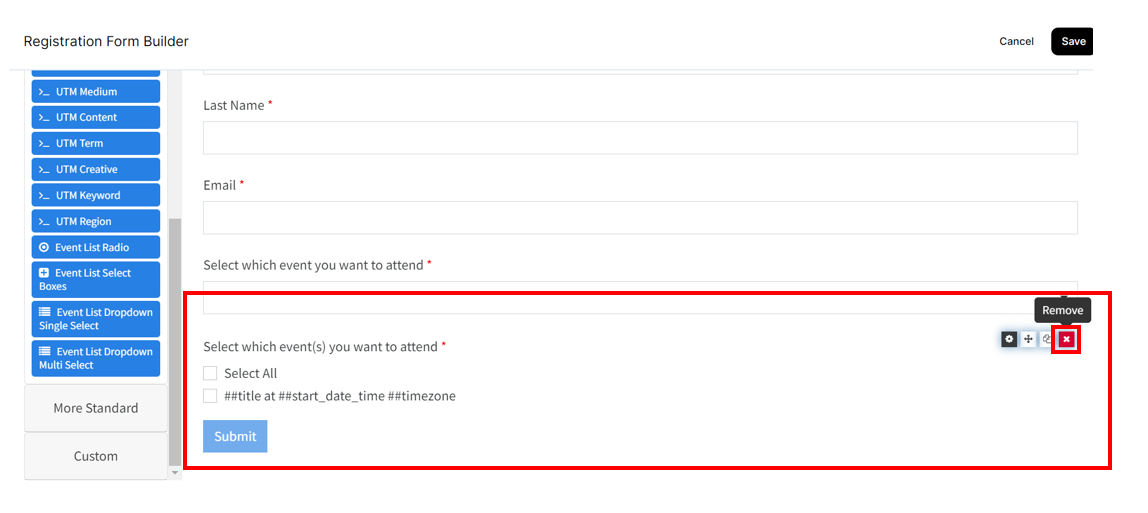
- Besides the standard Event List Select Box component, Goldcast also offers three additional components for displaying the list of events on the form. You can drag and drop one of the following components from the left sidebar onto the Registration Form on the right.
- Event List Radio: Use this component when you want users to register for only one event in the series at a time.
- Event List Dropdown Single Select: This component displays the events in the series via a dropdown. Users can select and register for only one event at a time.
- Event List Dropdown Multi-Select: This component displays the events in the series via a dropdown. Users can select and register for multiple events.
Note: You can use only one Event List component at a time. If you want to replace the existing one with another, remove the current component first by clicking the red remove icon to its right.
- Click Save on the top right.
Editing the rest of the form
In addition to the series checklist, you can edit and customize the other fields to collect the required information from attendees. If you’ve previously set up an event registration form, you would be familiar with the Form Builder. To learn more about registration form setup, refer to Creating and Editing Registration Forms in Goldcast.
Embed a series registration form on your webpage
Goldcast also allows you to embed the series registration form on your website or other external web pages. For more information, check the Series Form Embed Example in Adding Your Goldcast Form to an External Registration Page.
FAQs
1. Is including merge tags (macros) in the event list components mandatory?
Yes. For the series registration form to work correctly, you must include the supported merge tags (macros) in one row on the Data → Values field of the event list component. However, it’s not necessary to include them all. For example, having only the ##title or ##start_date_time is sufficient for the form to pass the correct values during registration.
2. Can I manually add the values for each item in the checklist components?
We recommend not adding manual values for individual items in the checklist components, as it can cause errors during registration.
3. Are there any fixed values for the Event List components?
When using any of the Event List components, make sure:
- The Property Name of the component is, by default, set to seriesEventList. Do not alter this value; it must be spelled the same for the series registration form to work correctly.
- By default, the value of the option to select all events is selectAll. However, the Label can be anything you like.
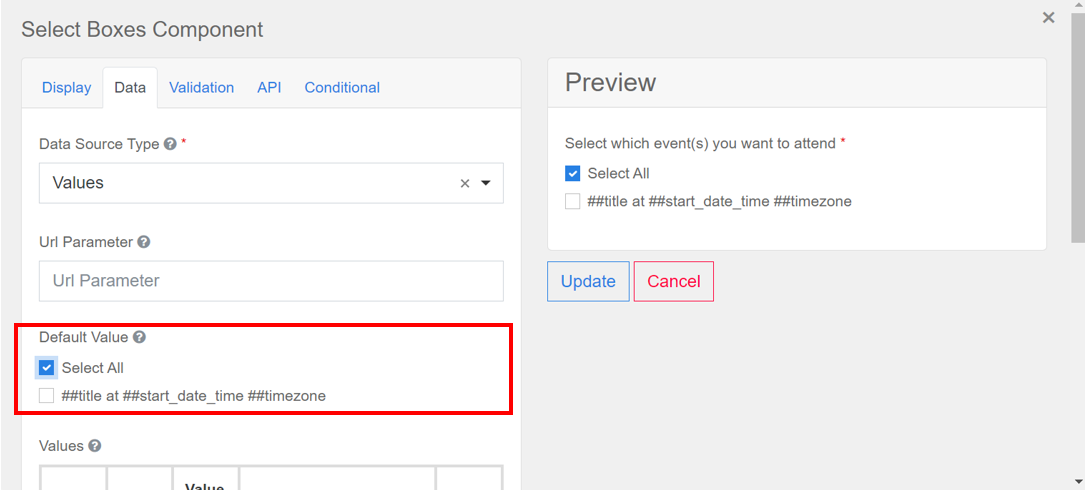
4. Can I have the Select All option pre-selected on the form?
Yes. To do this, navigate to the Event List component you’ve added to the form and click the Edit icon. Navigate to Data → Default Value and check the Select All option.
5. Can I embed a Marketo or HubSpot registration form in a series?
Currently, we support only using Goldcast registration forms for series.