Goldcast uses a versatile page builder to help you design and style your event hubs to match your branding requirements. Whether you’re a novice or a pro web designer, this article provides in-depth instructions on using blocks in the page builder to create and customize your event hub.
How to access the page builder
To access the page editor:
- Log into Goldcast Studio and click Pages on the left sidebar.
- From the Pages list, select and open your preferred page.
- Click the Edit button in the Page Design section to navigate to the Editor.

Heads up! When you create the page using the Page Builder, the right side of the screen will show a preview of the page in real-time.
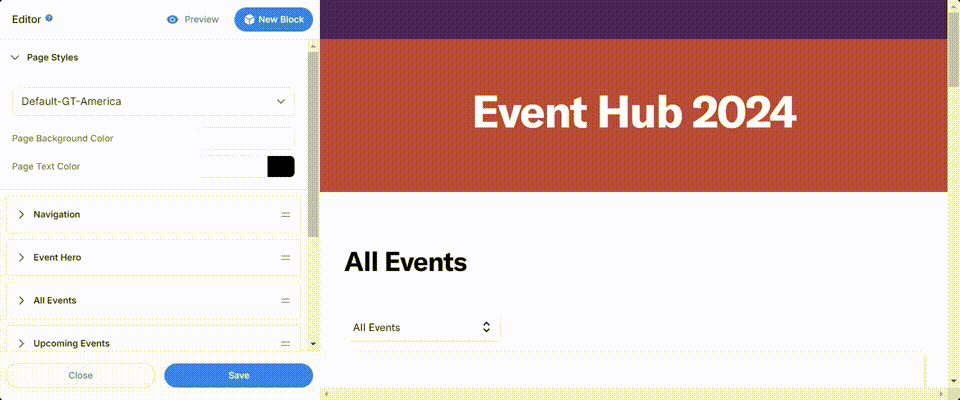
Page Style tab
Click the Styles tab on the left menu to set the:
- Page font (Select standard web or custom web fonts or upload a custom font file ( .ttf/ .otf/ .woff/ .woff2).
- Page background color
- Page text color
You can also modify the style of each block on the page individually, which will override the page settings.
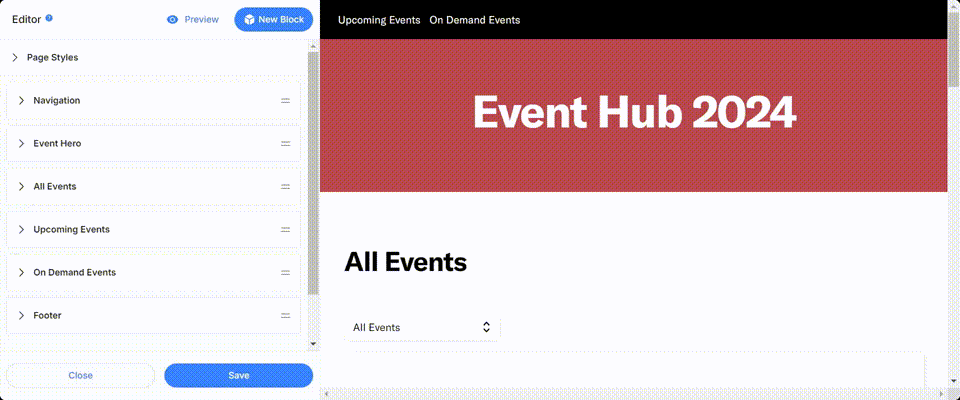
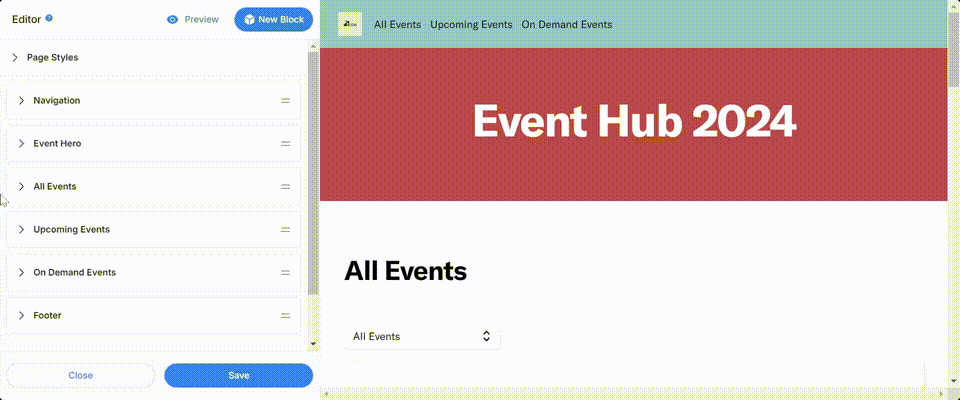
Navigation
The navigation block controls what typically sits at the top of the hub page. It can contain your logo and links to the various sections on the page. You can style the background and font theme on the nav bar by editing the Block style.
- Logo: You can upload a company logo or small image to display at the top left corner of the navigation bar. You may also choose to delete the image and have no logo display.
-
Links: Each section on the page can be linked in the navigation bar. You can change what each section is called in your menu by changing the name of each field. You can hide or show each section in the navigation bar by clicking the eye icon
next to each section.
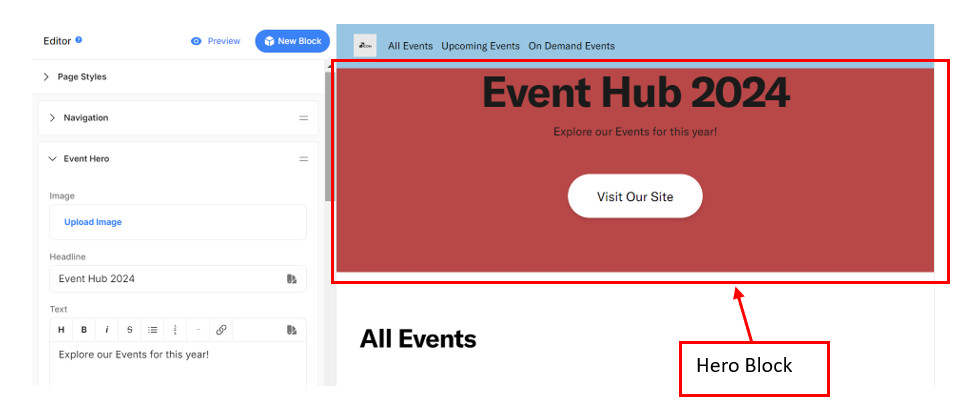
Hero
This block allows you to add a title to the page and typically style the header section using different font weights and background colors or images. You will find options to customize this section under block style. It also allows you to add custom CTAs with links. Click on the Button style to control the theme for your CTAs.
All events
This block displays:
- upcoming, non-test events (And)
- past events that are available in on-demand mode
When users click on the Register CTA, they will be redirected to the registration page of the respective event.
Once this block is added, the event list in the page editor will automatically show up-to-date data of upcoming (non-test) events and on-demand events. However, by default, the show toggle is disabled for all events. Organizers must manually enable the show icon for specific events to reflect in the block.
By default, the block won’t show any events. You can choose which events you want to display in the block using the Events List selector.
- Click the Edit icon to open the list.
- Click the eye icon
- Click the eye icon
- You can use the search bar to search events by name.
- Click the checkmark
in the top right corner when you’ve selected your events.
The event info displayed includes the items below and is automatically pulled from the events you have created in Goldcast.
 Note: You cannot edit the following information:
- Event Title
- Event date and timezone - each page visitor will see this in their local timezone
🌍 Heads-up on Date & Time Formatting
Dates and times shown in the All Events block follow the International Date & Time Formatting set for the selected event. Each page visitor sees the schedule in their own local timezone, with translated month names and familiar formats. For example, 20 June 2025 – 13:00 BST or 2025年6月20日 13:00 JST.
💡 See also: International Date & Time Formatting in Goldcast
- Event Description
- Event location, if applicable
- Register CTA, which opens the event’s registration page on a new tab
The image displayed for each event is the social media thumbnail set in your branding settings. If this is blank, the hero/landing image will be shown here.
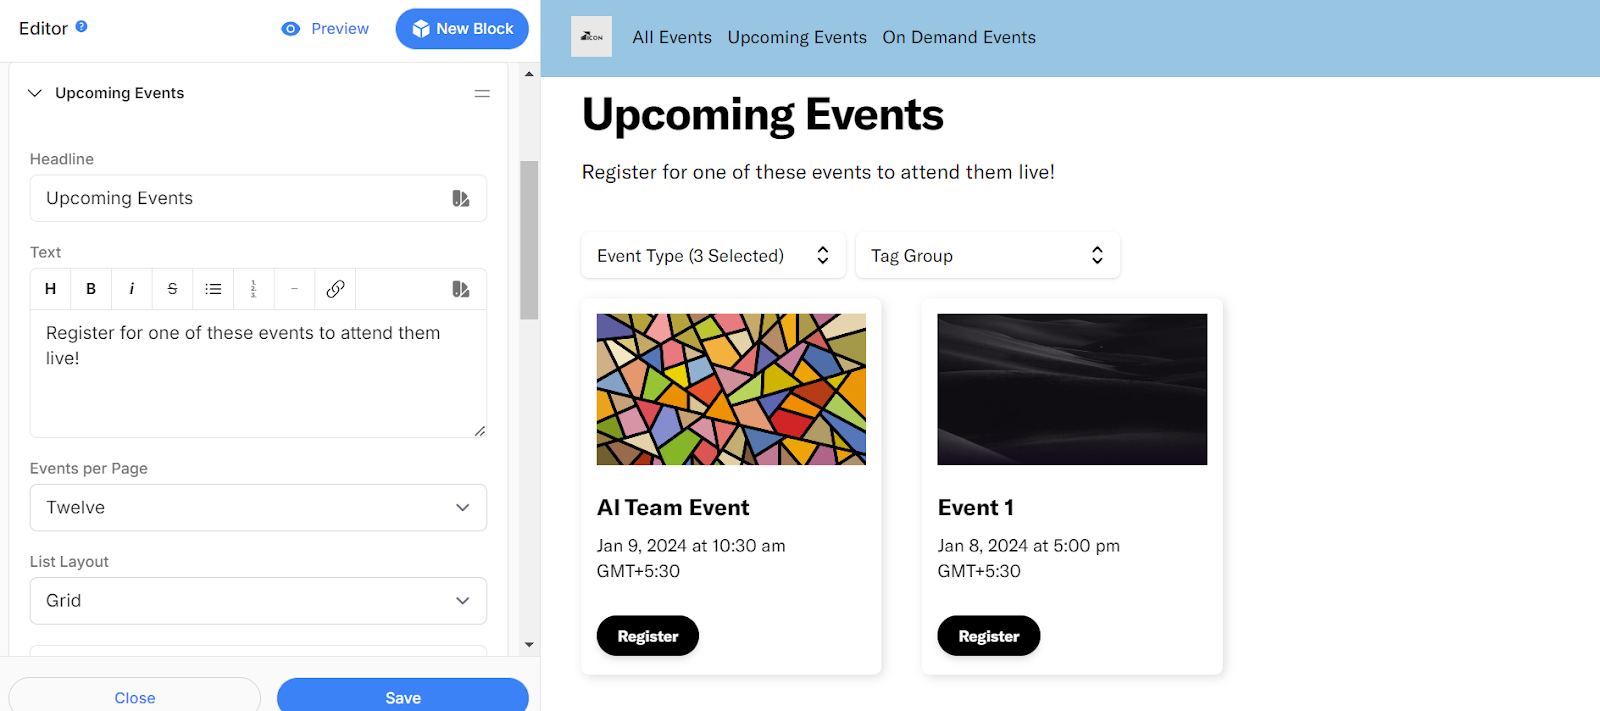
Upcoming events
This block displays upcoming, non-test events on your hub page.
Once this block is added, the event list in the page editor will automatically show up-to-date data of upcoming (non-test) events. By default, the block won’t show any events. You can choose which events to display in the block using the Events List selector. You must manually enable the show icon for specific events to reflect in the block.
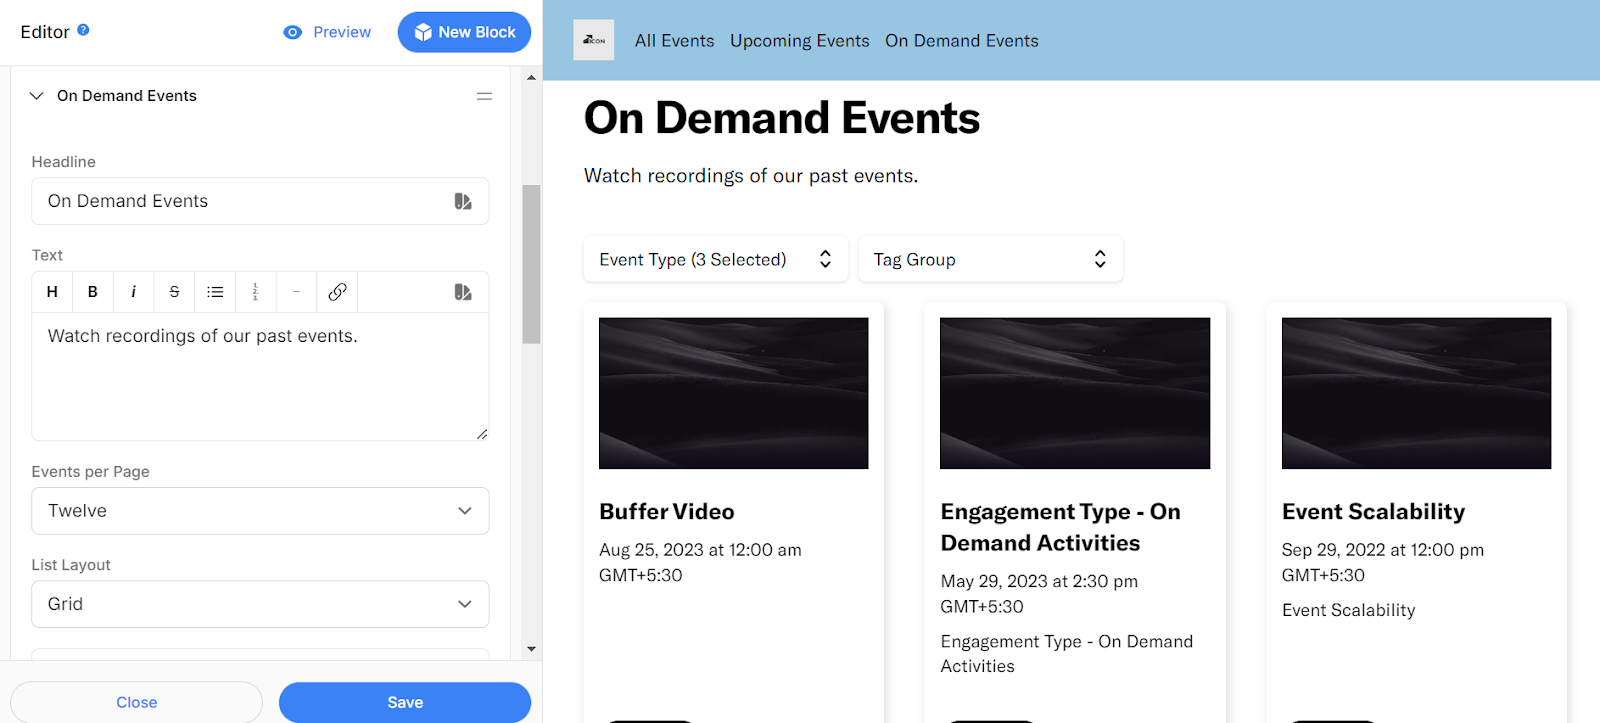
On-demand events
This block displays past events that are in on-demand mode on your hub. When users click the Register CTA, they must complete the registration form to view the event’s recording.
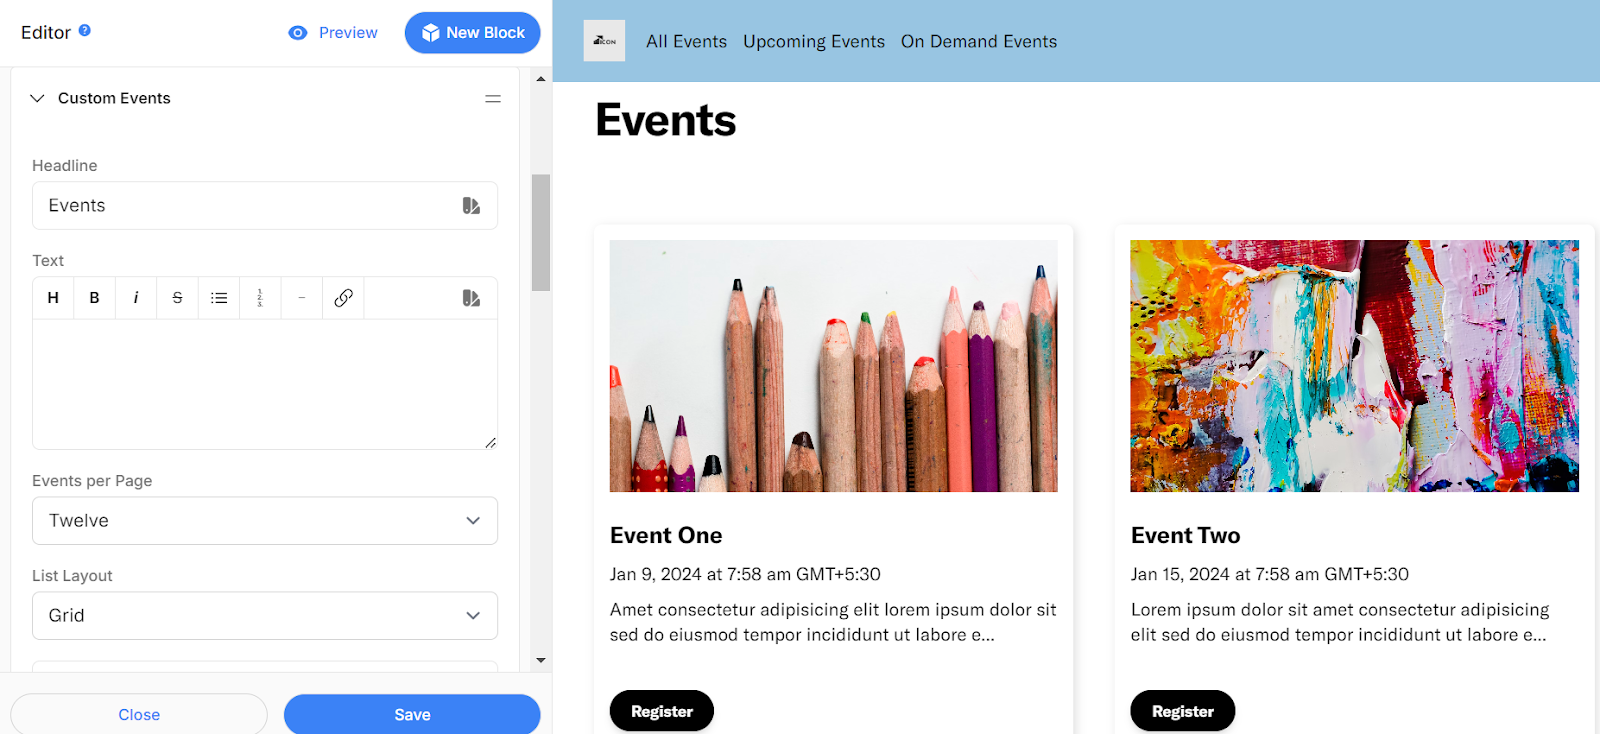
Custom events
This block allows you to showcase external events not built in Goldcast on your event hub. Please feel free to delete or hide this block as needed. You'll need to manually add the details of each event you want to display in this section. To add more events in the section, click Add Event.
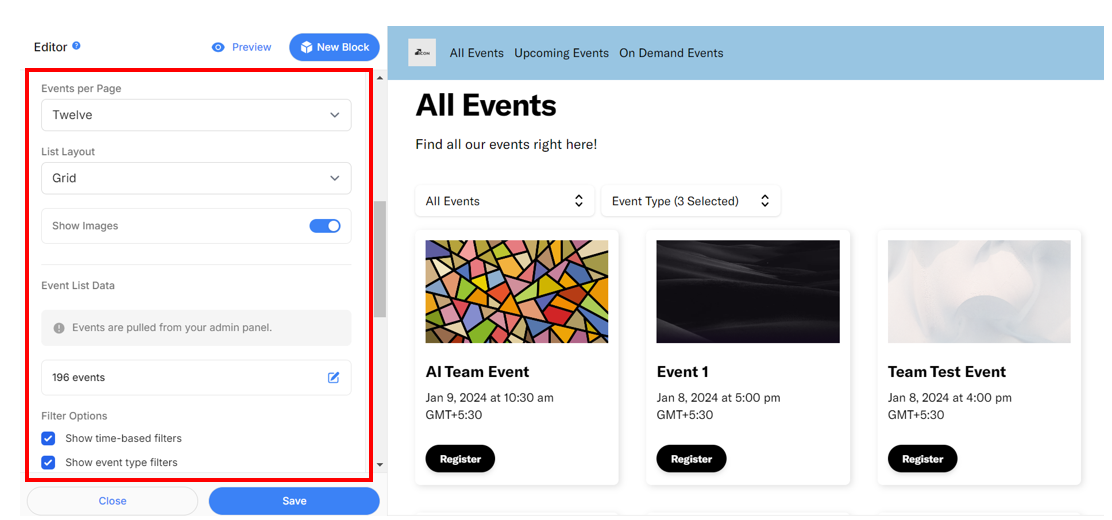
Event block customization
The page builder allows you to customize how you list events on your hub.
Note:
- Event filters are available only for the All Events, Upcoming Events, and Past Events blocks.
- The events per page and list layout settings are available to all four event blocks: All, Upcoming, Past, and Custom Events.
Event block customization settings:
1. Events per page
This setting controls the pagination of this section and allows you to set how many events you want to display per page.
2. List layout
This allows you to choose the grid or list option for the event lists. More styling options are available under Block, Card, and Button styles.
3. Event filters
Site visitors can filter events on the hub using the filters you’ve added to the page. To learn more about this feature, refer to our guide on Adding Filters to Your Hub Page.
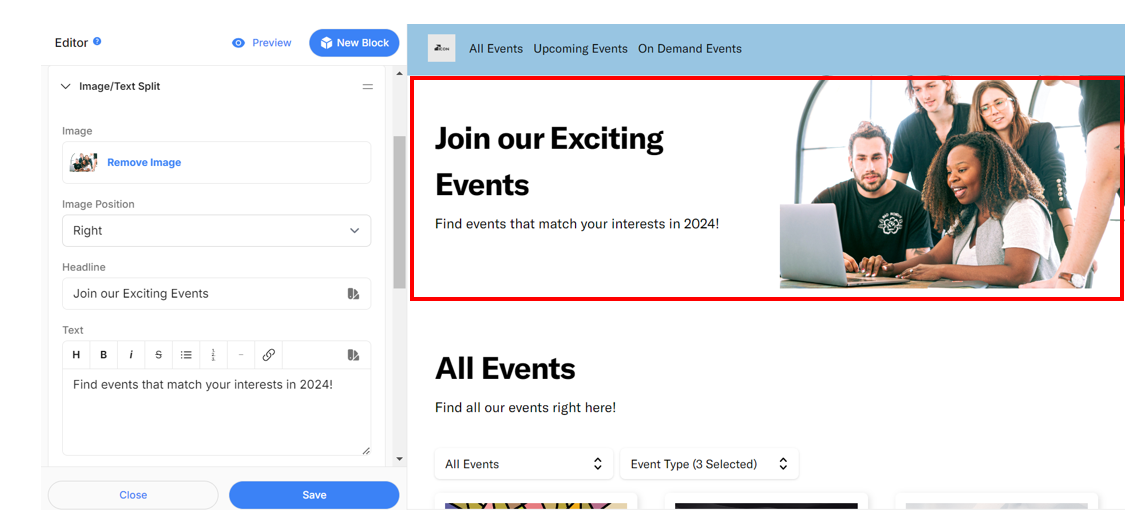
Text/image split
This block allows you to add an image on one half and text on the other half of a block. Click Upload Image and select a file from your computer. Then, choose either Right or Left as the image position.
Add a headline and/or text to the opposite side of the block by entering text into the Headline and Text fields.
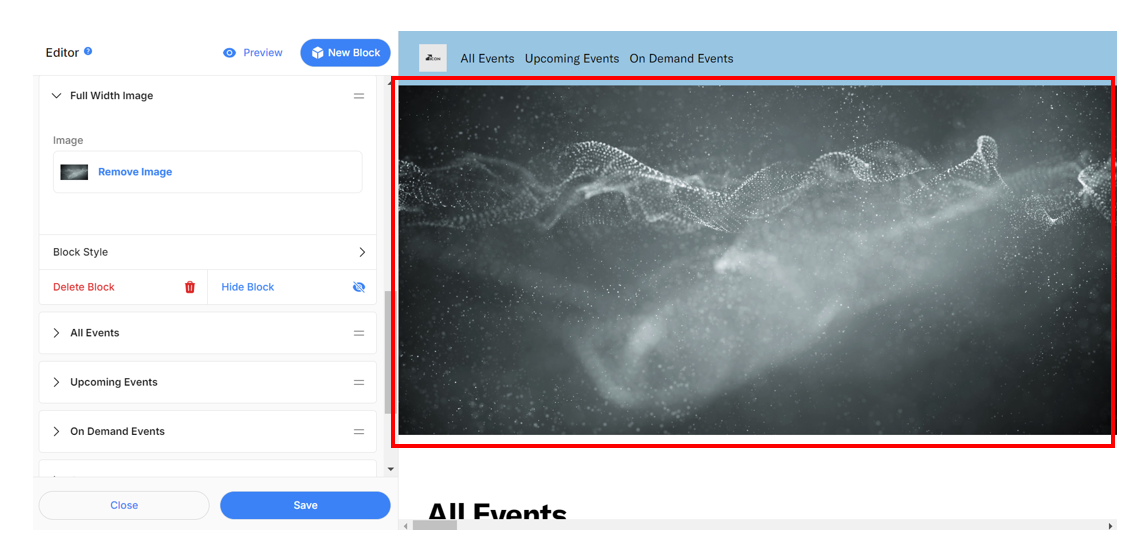
Full-width image
Add an image across the entire width of your page. Click Upload Image and select a file from your computer.
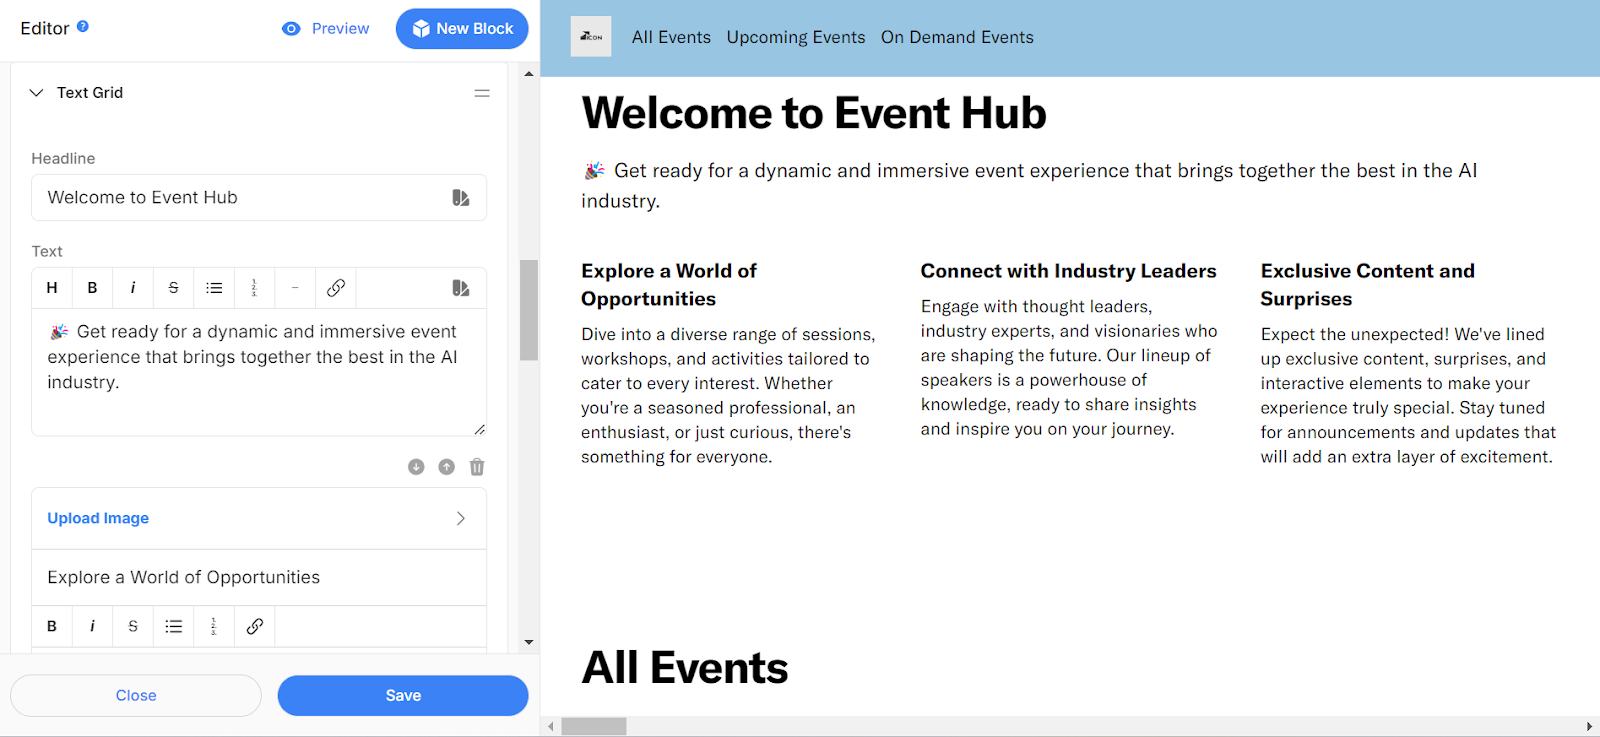
Text grid
The text grid is a versatile block. You can use it to display a text grid with images, text, or only images. Change the block's name by editing the text in the Headline field. You may add additional text underneath the headline in the Text field.
In each section of the grid, you can:
- Upload an image
- Enter a headline
- Enter text
You can change the order of the sections using the arrows on the right side. Delete a section by clicking the trash can icon next to that section.
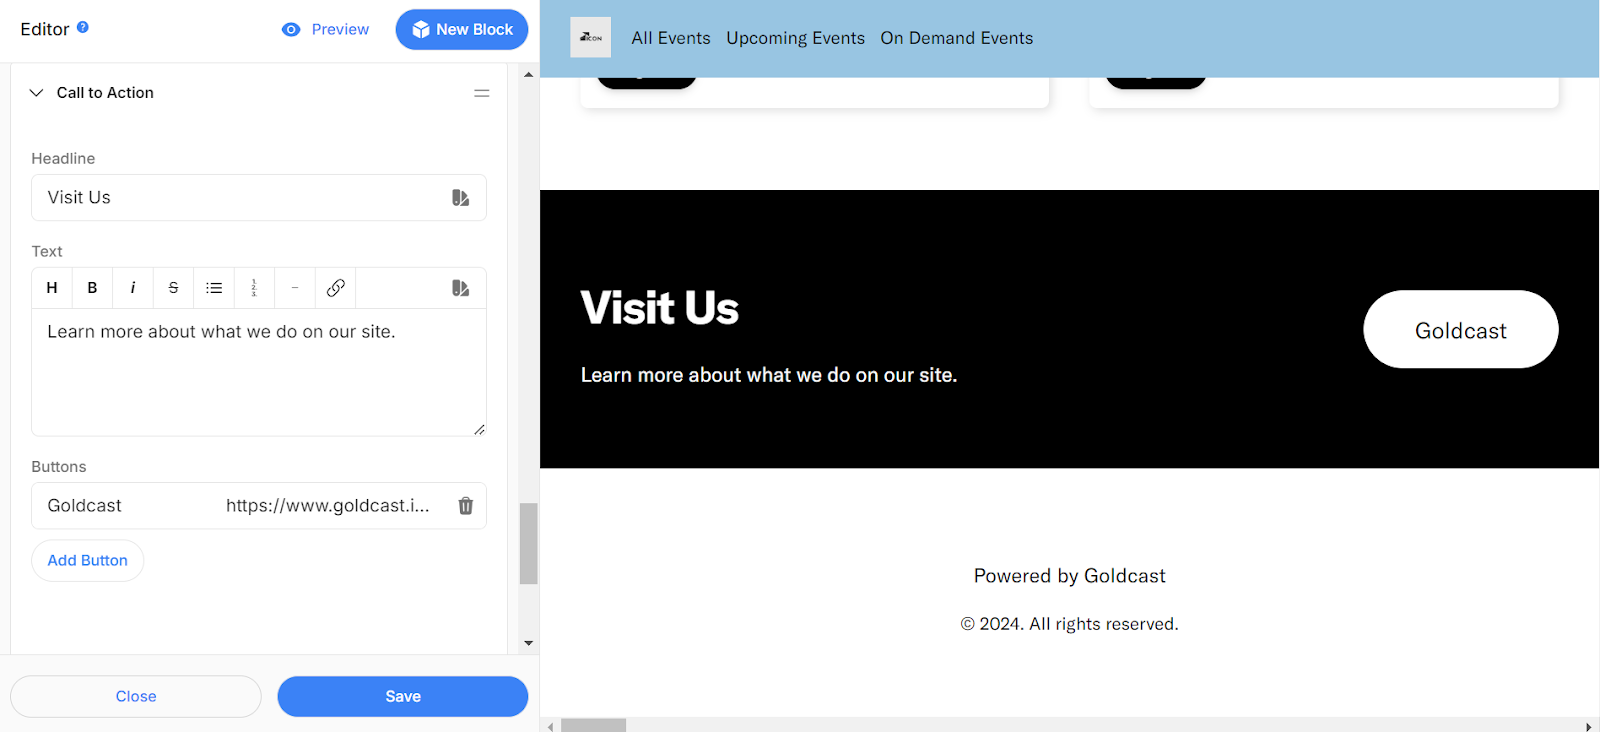
Call to action
The call to action block lets you add a custom CTA button to your event hub. You can customize this block with the following:
- A headline
- Text description
- CTA buttons
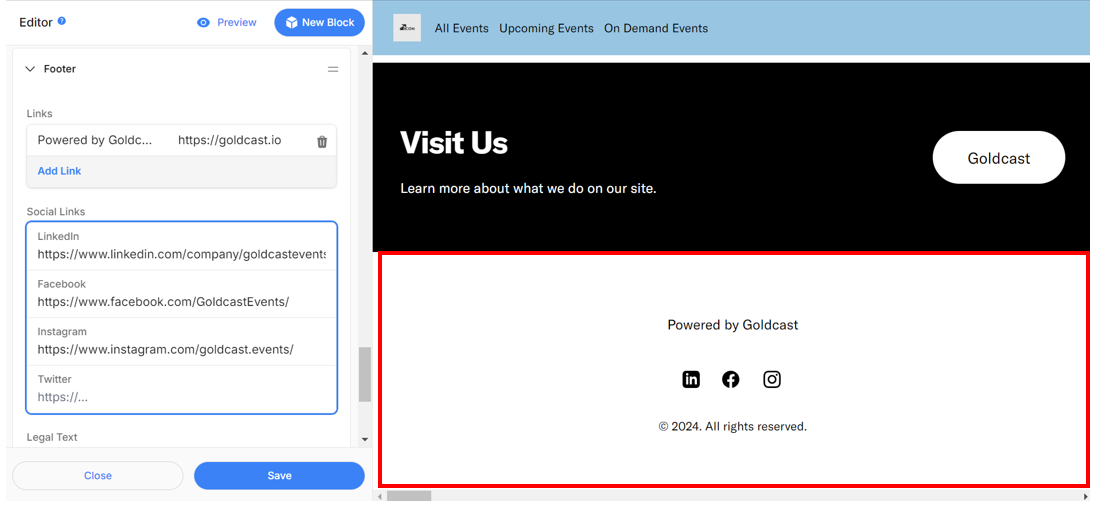
Footer
The footer typically sits at the bottom of a page. For example, you can add links to other web pages, like your company's page.
To do this, click Add Link in the Links section. Then, type the text you'd like to display on the page in the field New Item. In the following field, add your web address. Make sure to include "https://www." in front of it. You can change the order of the links using the arrows on the right. You can delete a link by clicking the trash can icon.
You can also add links to your company's LinkedIn, Facebook, Instagram, and X( formerly Twitter). Remember to add "https://www." in front of the address. If you prefer any of these to be hidden, delete the URL in that section. The icon will automatically be hidden from the page.
You can add or edit any additional legal text in the Legal Text section at the bottom.