Table of Contents
| Plan Availability | Starter | Pro | Premium | Enterprise |
 |
Add-on | Add-on | Add-on |
For customers with contracts starting March 2024 or later, feature availability is based on your pricing tier. If interested, contact your CSM or our Sales Team to discuss pricing options.
The check-in process sets the tone for an unforgettable field event experience. A smooth, efficient check-in delivers a great guest experience and kick-starts the event on the right note.
Attendee journey on event day
At Goldcast's Field Events, we've reimagined the check-in process for in-person events. We've eliminated printed guest lists, paper badges, and long lines. Our streamlined process only requires guests to scan their unique QR code (which they would have received via email) to check in without going through the hassles of downloading extra apps on their devices.

Here's a walk-through of the guest experience on event day.
Step 1
Guests arrive at the venue, which is mentioned in the registration and reminder emails and calendar invites sent from Goldcast.
Step 2
Attendees scan their unique QR code on the self-check-in device set up at the venue.
Step 3
If event registrants don't have their QR codes, the check-in staff can assist them by manually completing the check-in process via the check-in website. The staff can also use this site to handle any on-spot registrations or to add guest notes about each attendee. After checking in, attendees proceed to the event space to enjoy the event.
Self Check-in
Goldcast offers a Self Check-in Site for in-person events. You can open this site on a tablet/smartphone/QR code reader at the venue, so that attendees can complete the check-in by themselves, thereby freeing up the time of the check-in staff.
Follow these steps to facilitate self check-in for attendees at your upcoming field event:
- Log into Goldcast Studio and open your preferred in-person event.
- Copy the URL of the Self Check-in Site from the left panel.

- Open this URL on the dedicated iPad/tablet/smartphone at the venue.
- Registrants with QR codes can walk up to the device, click the Check-In button on the screen, show their QR code, and complete the check-in process.

- Once their QR codes are scanned, guests will see the “Check-in Successful” message. They can then proceed to the event space.
Best practices for hassle-free attendee self check-in
Here are a few tips to consider:
- Ensure that your pre-event emails (registration, calendar invites, and reminders) include the attendee QR code, location, and time.
- Use the location block to embed Google Maps on the registration page, making it convenient for attendees to find directions to the venue.
- Attendees can find their unique QR code in the pre-event emails or the calendar invite.
- Communicate to attendees to download and save a copy of their unique QR code on their mobiles so they can quickly scan it at the venue. This will be especially helpful if the venue's internet connection is poor or unstable, making it hard to retrieve the code from their email inboxes.
- Set up the self check-in device in a clearly visible and easily accessible location. Use clear signage to guide attendees to this spot.
- If needed, you can even set up multiple self check-in devices to minimize wait times.
- Ensure that you've turned on the requisite camera and other device permissions to enable the scanning of the QR codes.
Check-in Site Overview
Goldcast's Check-in Site for field events makes it easy for the check-in staff to handle the check-in process at the venue:
- If a registrant doesn't have their QR code on hand, the staff can use the check-in website to search/filter attendees by name, email, or company and manually check them in.
- This site also allows the check-in staff to check in people via their unique QR codes if needed.
- The check-in site works even with poor internet connectivity. Even if the connection is spotty, you can continue checking in people without any interruptions or delays. Once connectivity is restored, the website syncs attendance data once connectivity is restored.
- It updates in real-time and gives the event organizers and check-in staff a quick glimpse of the number of attendees who have checked in and those who have yet to turn up. It also has up-to-date information on new on-spot registrations.
- The check-in site syncs attendance data to your CRM or MAP, provided you have enabled these integrations in the Goldcast Studio.
How to use the check-in site?
Using the check-in website is intuitive and user-friendly. Here's a run-through of its different features and functionalities:
Open the check-in site
- Log in to Goldcast Studio and open your preferred field event.
- Click the Check-in Site quick link on the left navigation panel.

- You can also access the site via the magic link shared with the check-in staff.
Check-in attendees manually
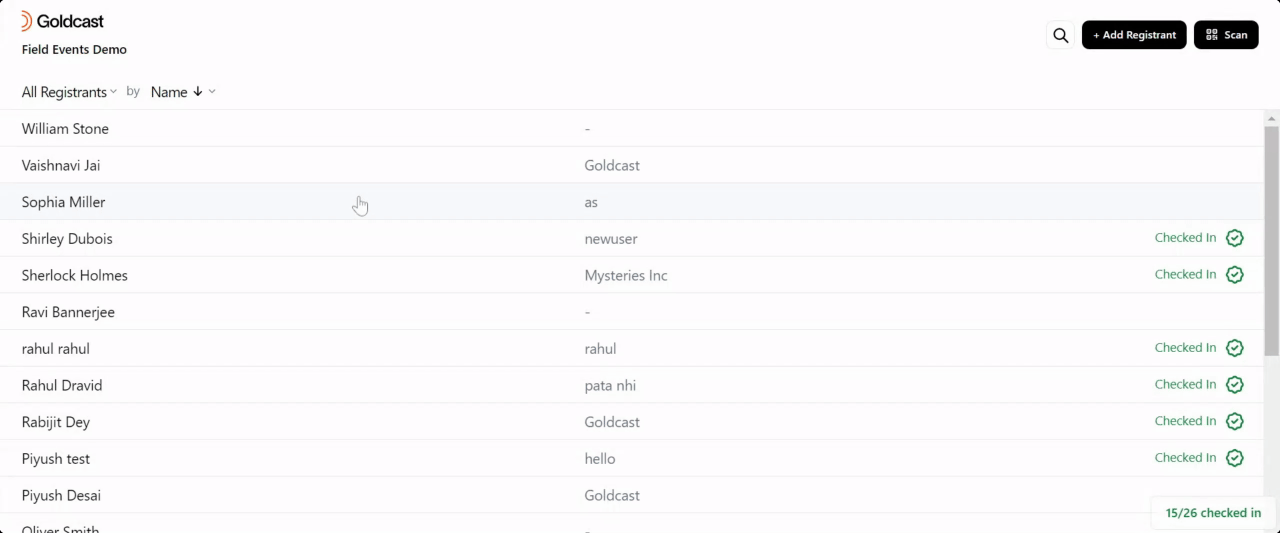
Sometimes, attendees might have registered for the event but will not have the QR code at hand. In this case, you can check them in manually.
On the check-in site, click the attendee you want to check in manually. You can also use the Search bar at the top-right to search for attendees using their name, email or company. Click on the attendee's profile and click the Check In button to complete the process manually.
Scan QR code to check-in
If necessary, the check-in staff can also use the Scan button at the top right of the check-in site to scan registrant QR codes to complete the check-in process.
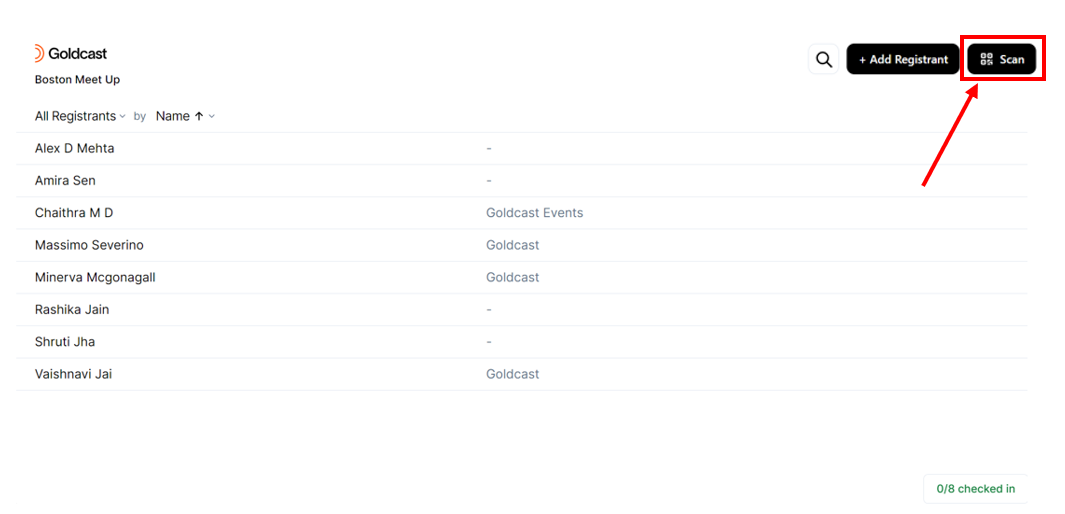
Heads up! Instruct the check-in team to turn on the requisite camera and other device permissions to enable the scanning of QR codes.
Undo check-in
If you've accidentally marked check-in for an attendee, you can reverse the action by following these steps:
- On the check-in website, select the attendee for whom you want to reverse attendance. Use the search/filter buttons to search for a specific attendee.
- Click the undo check-in button to reverse the check-in.
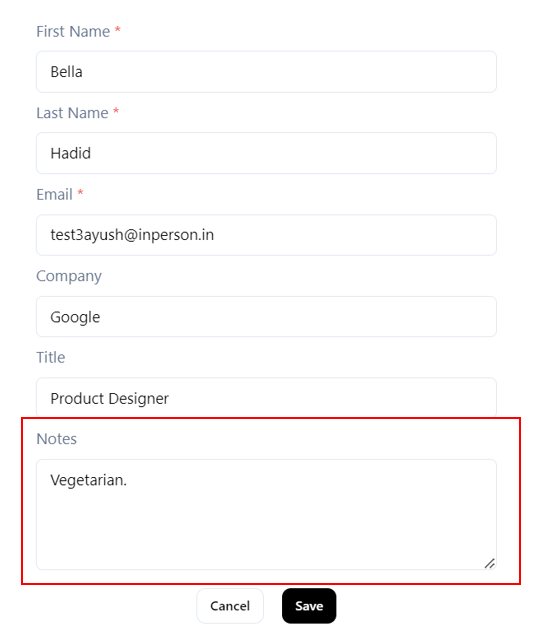
Register On-Site and Check-in
If you have walk-in (unregistered) guests on venue day, you can register and check them in instantly via the check-in website.
- Click the +Add Registrant button on the check-in site.
- Enter the details of the guest
- Mandatory: First Name, Last Name, and Email
- Optional: Company, Title, and Notes
- Click Register & Check-In.

View and edit registrant details
On the check-in page, you can click on a registrant's name to view and edit the information collected during registration.
Note: If you’re using external forms for registration, only the fields that have synced to Goldcast will be displayed here.
Adding attendee notes
When checking in registrants at the venue, feel free to utilize the Notes field (a standard Goldcast field). This field allows you to record any guest preferences or additional notes regarding each registrant. Please note that there is a maximum character limit of 255 characters for this field.
You can synchronize the information collected via these fields with your integrated systems, such as CRMs and MAPs, through field mapping. This process ensures that all relevant data gathered during the check-in is transferred to your systems efficiently, enhancing your overall event management experience.
Heads up! Ensure that you have set up field mapping to sync the data collected in the Notes field to your connected integrations. Check here for step-by-step instructions on setting up the field mapping for the Notes field.
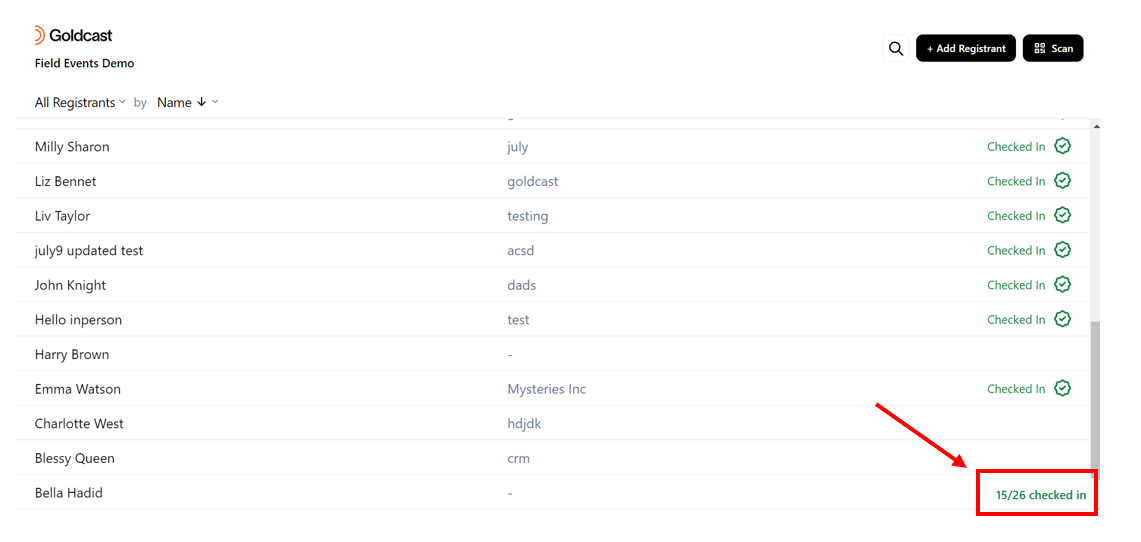
View check-in status
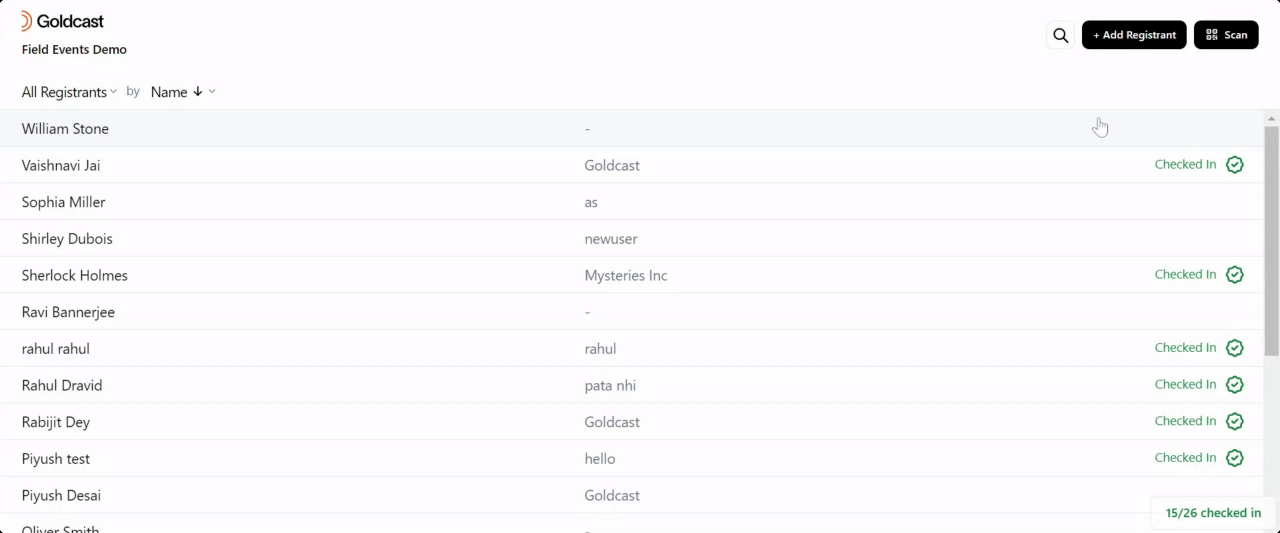
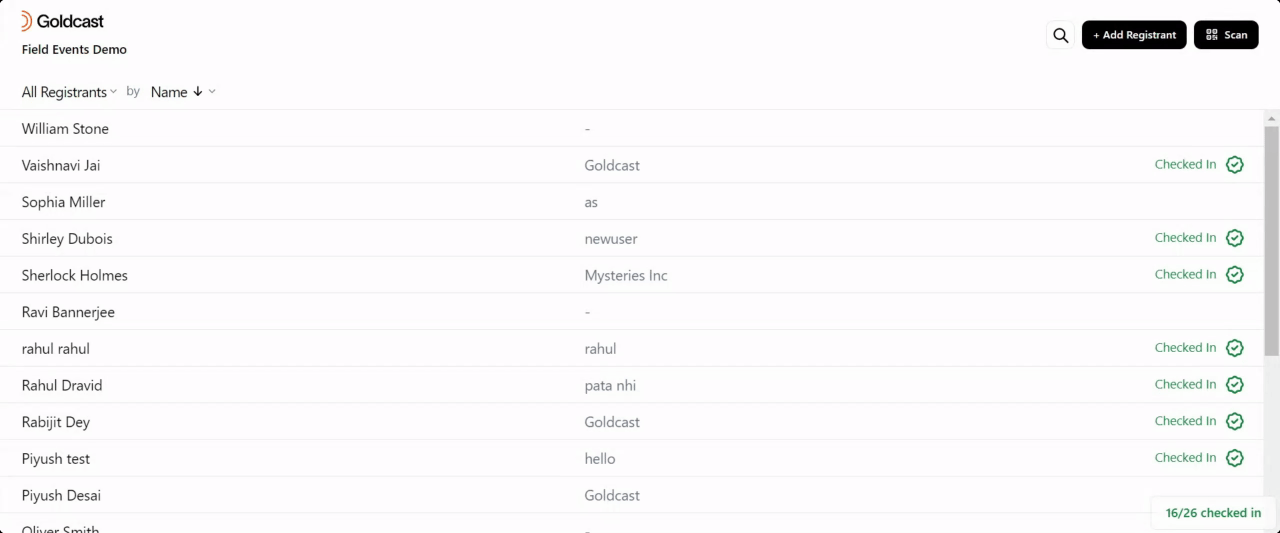
The check-in counter on the bottom right displays real-time updates of the number of guests who have checked in.
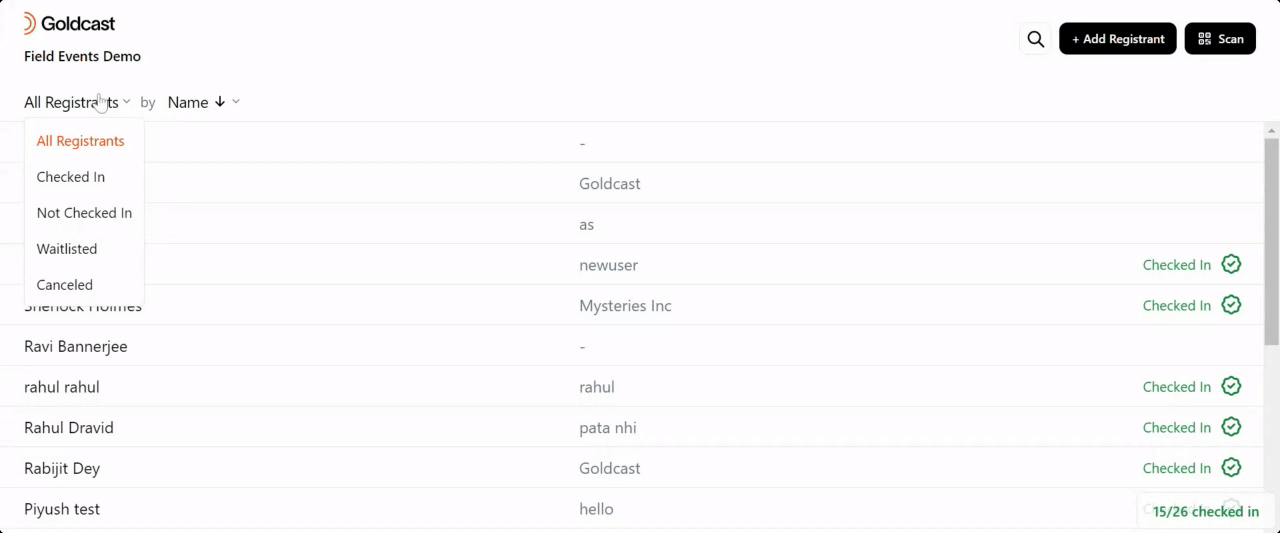
Filter attendee list
Click the All Registrants filter on the top-left to filter registrants based on their check-in status, such as Checked In, Not Checked In, Waitlisted, Canceled, and All Registrants.
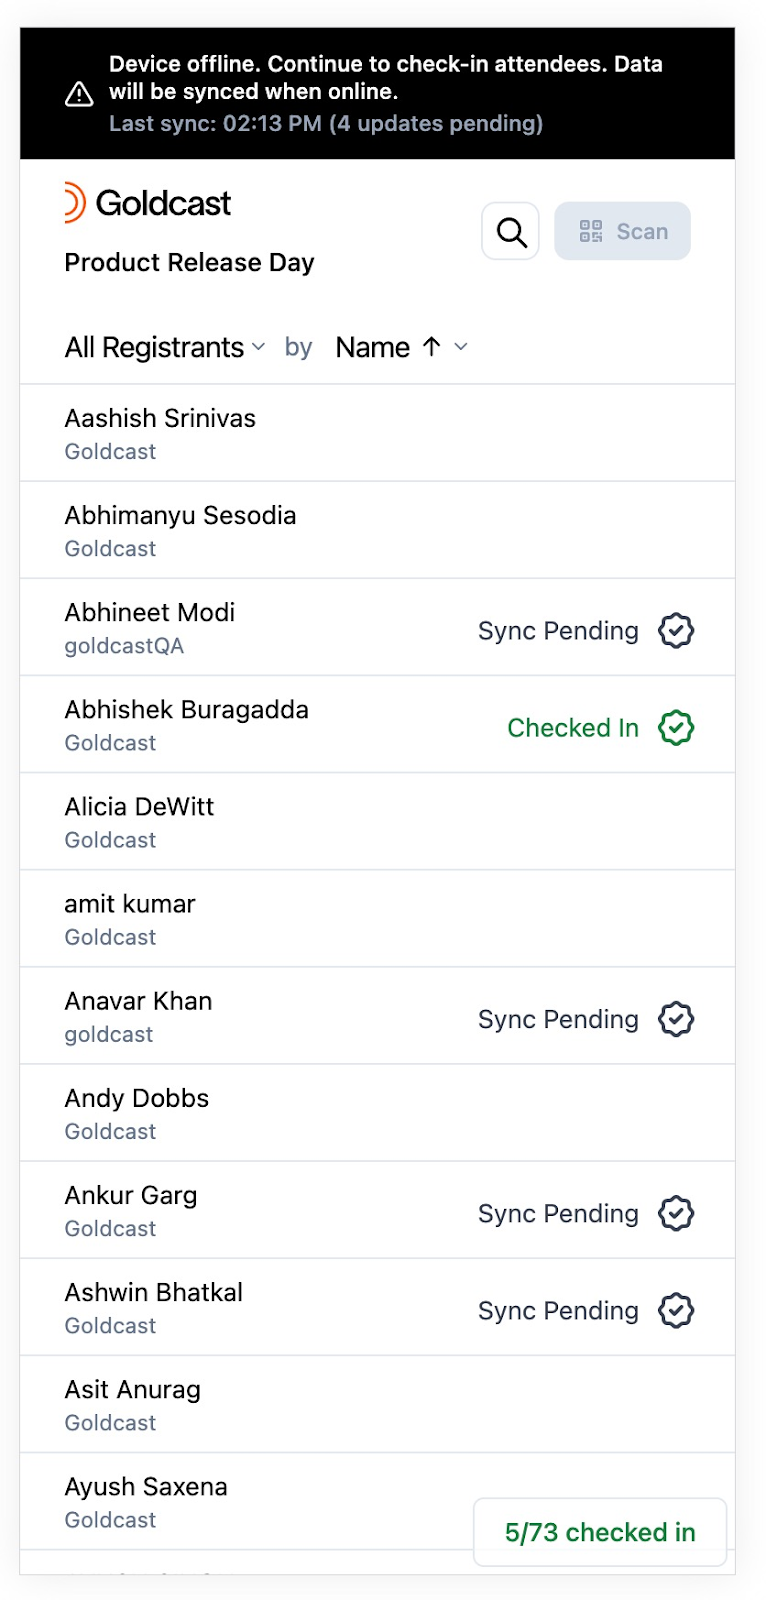
Offline check-in
Goldcast allows you to continue checking in guests even if your internet connection is unstable or temporarily interrupted. In this scenario, the check-in site will display an alert at the top indicating the device'syou're offline status. However, the site is still usable, and you can continue marking guest attendance.
A few points to note about using the check-in website with poor/no internet connectivity:
- You need stable internet connectivity to load the site initially and pull up the guest list. So, if your event venue is offsite or in a remote location with spotty internet connectivity, we highly recommend opening the check-in site on your device before you reach the venue.
- You can note the Sync Pending status against guests you checked while offline. These won't sync to the devices of other check-in staff in real time. They get updated only when the internet connection is restored. At this point, all pending syncs occur automatically and instantly.
- Do not close the check-in site prematurely when you have unsynced guests or while offline. This might result in a permanent loss of guest attendance data.
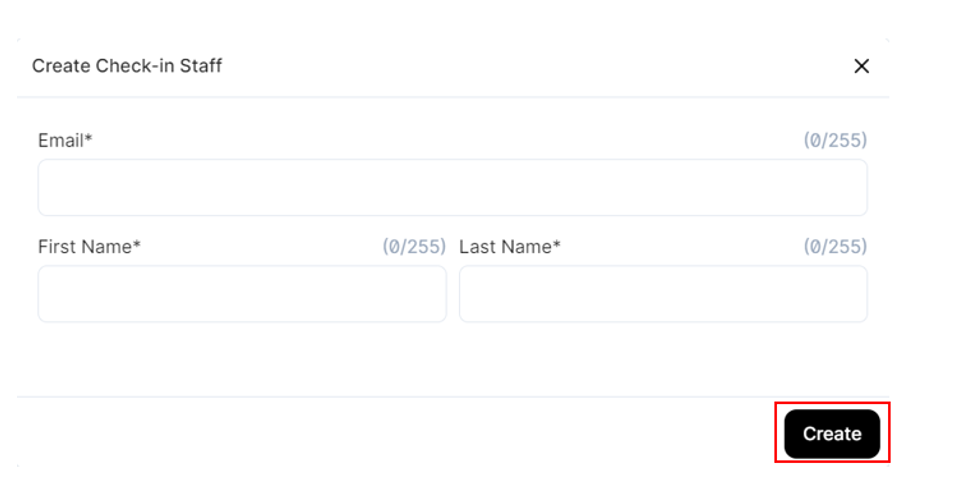
Add check-in staff
Check-in staff are the people who manage attendee check-in for your field event. Here's how you can add check-in staff for your event:
- Login to Goldcast Studio using your credentials.
- Select your preferred in-person event from the Events list.
- Navigate to Program → Check-in Staff using the left navigation panel and click the New Check-In Staff button.

- Click Create.
Each check-in staff receives a dedicated magic link to access the event's check-in site.
Note:
- You can add anyone as check-in staff. Check-in staff do NOT have to be Goldcast users.
- This magic link is not restricted to a single user. If you prefer, all your check-in staff can use the same link.
Checklist for training check-in staff
We recommend a quick training session before the event so check-in staff can get familiar with the process. You can print this checklist and keep it handy.