The Goldcast platform allows users to upload custom buffer videos, which are a great way to personalize your event stage when no sessions are actively taking place.
When will the buffer video play?
Once a buffer video has been uploaded, it will play on a loop:
- Before the official start time of your event
- Once your event has ended
- During any breaks, you have built into your agenda (see below)
Uploading a Buffer Video
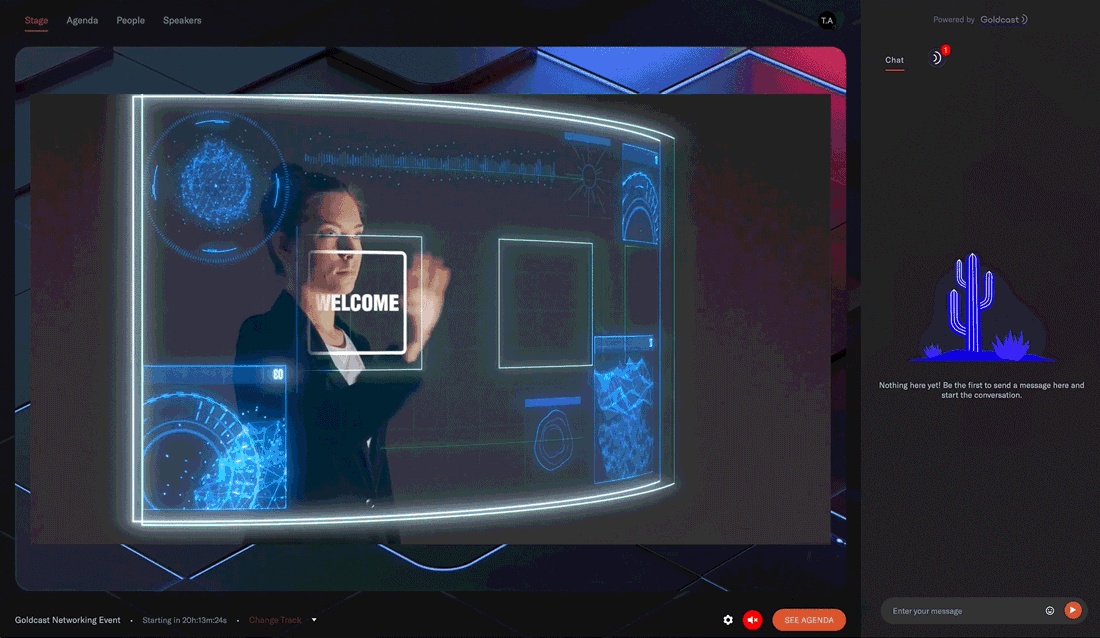
If you upload a buffer video, this video will play on loop, greeting attendees as they wait for the show to start. The looping video could be a hype video for the event, an instructional video, or just a cool DJ playing music to make things lively!
To upload a buffer video:
For Events
- Log in to Goldcast Studio, and use the Events tab to open the webinar to which you want to add the buffer video.
- From the webinar dashboard, click the Look & Feel tab on the left of the screen.

- Scroll to the Stage section and expand the Buffer Video section.

- Click +Select Video.

- This opens the Goldcast video library, where you can view different video sources in your Goldcast account, such as:
- Manual Uploads: This category includes videos that you have personally uploaded for live or pre-recorded sessions, as well as any buffer videos you may have added.
- Event recordings: This section contains your past Goldcast events and webinars.
- Recording Studio (Beta): This category includes recordings you have created using Goldcast's Recording Studio.
- You can either upload a new buffer video by clicking + Upload Video or select a video you’ve previously used from your video list.

- Click Save in the popup window.
- Click Save in the upper right corner of your screen to publish your changes to your event.

For Webinars
- Log in to Goldcast Studio, and use the Events tab to open the event to which you want to add the buffer video.
- From the event dashboard, click the
 Paintbrush icon on the top right and click Event Stage.
- Expand the Stage section and scroll to the Buffer Video section.
- Click +Select Video.
- This opens the Goldcast video library, where you can view different video sources in your Goldcast account, such as:
- Manual Uploads: This category includes videos that you have personally uploaded for live or pre-recorded sessions, as well as any buffer videos you may have added.
- Event recordings: This section contains your past Goldcast events and webinars.
- Recording Studio (Beta): This category includes recordings you have created using Goldcast's Recording Studio.
- You can either upload a new buffer video by clicking + Upload Video or select a video you’ve previously used from your video list.
- Click Save in the popup window.
- Click Save in the upper right corner of your screen to publish your changes to your event.
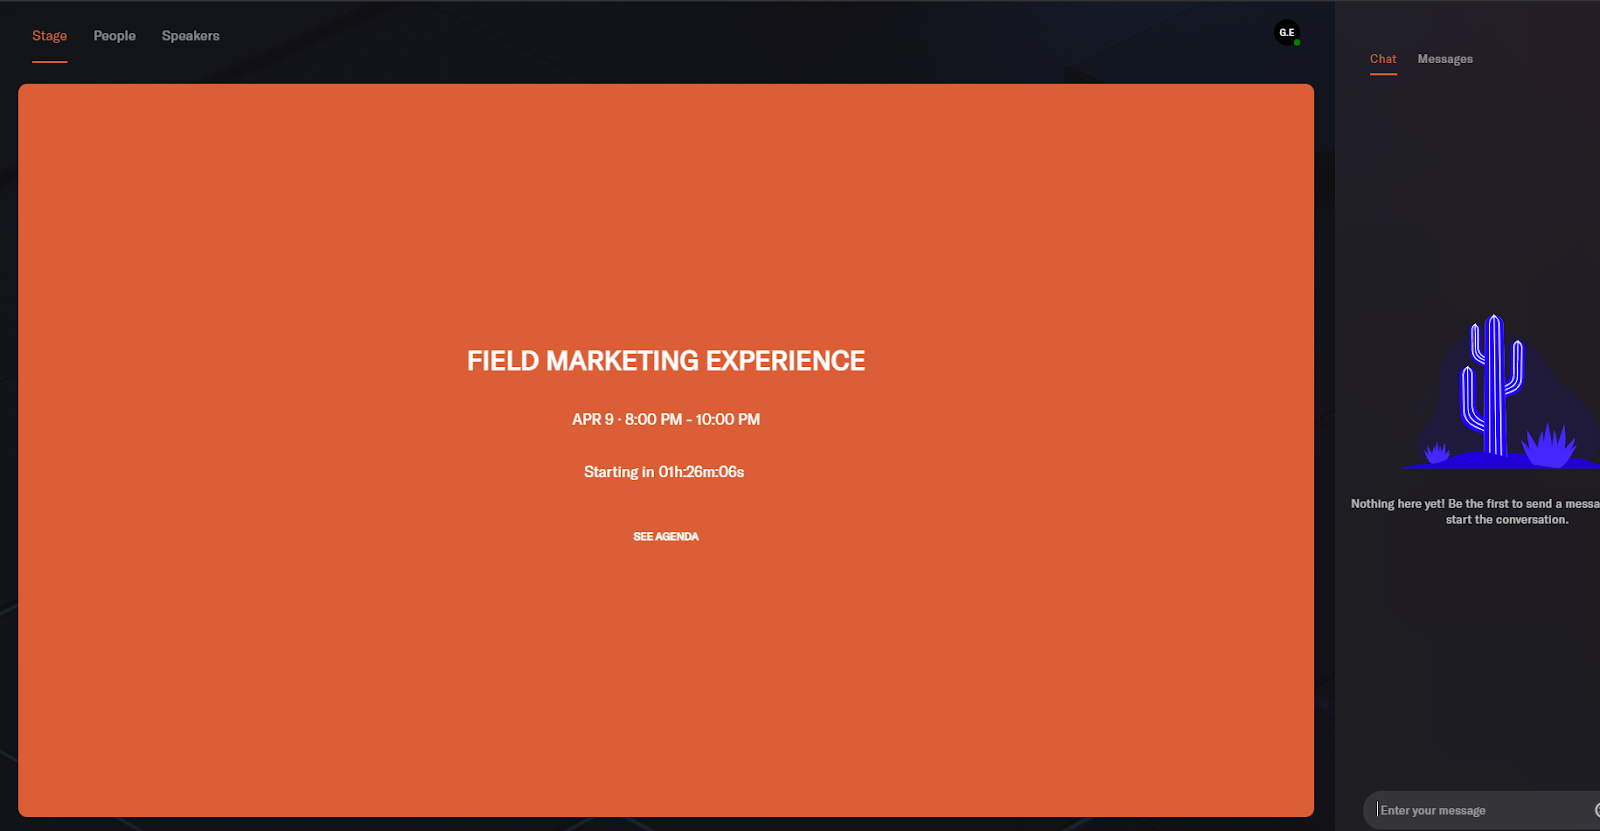
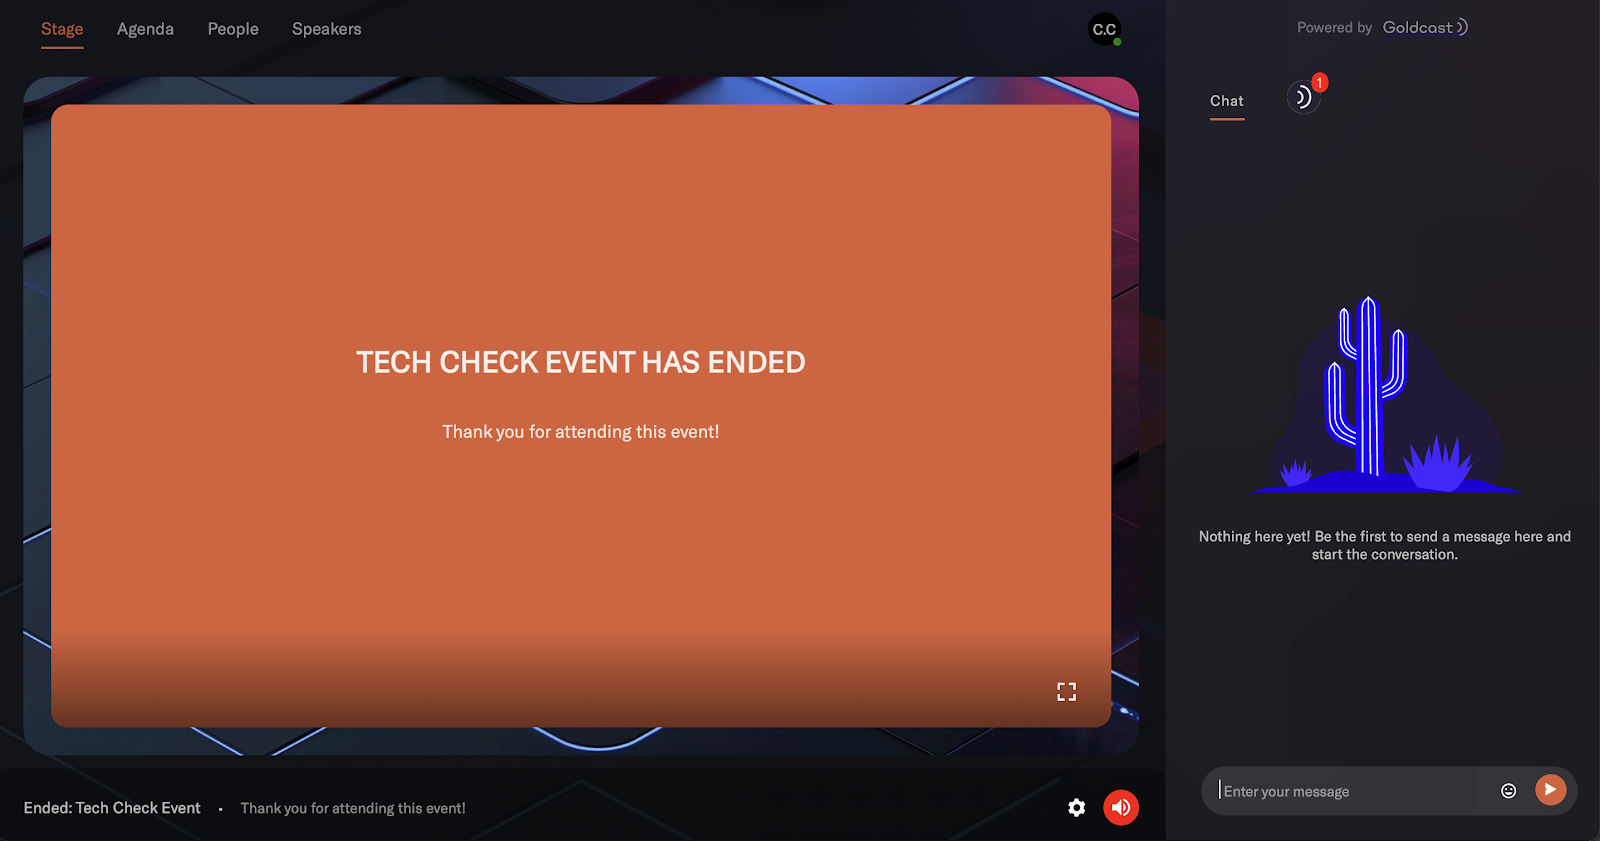
The Default Empty Stage
Should you choose not to upload a buffer video, the Goldcast default slide will appear on stage. Prior to your first session begins, the slide will include the event title and a countdown to the start of the event:
At the end of the event, attendees will see this message:
And during any breaks, the slide looks like this:
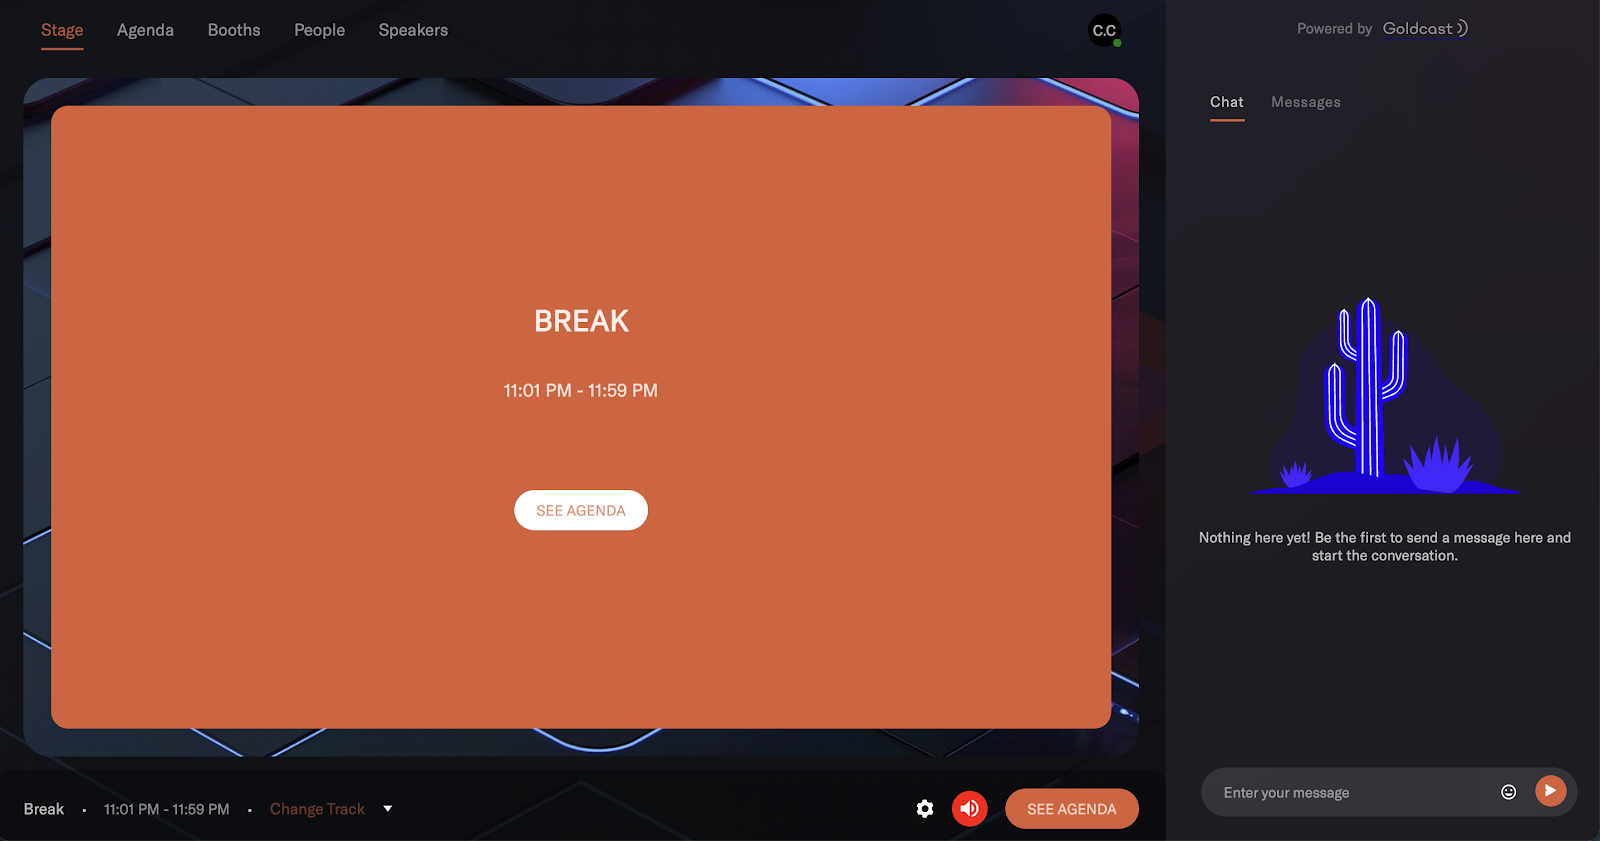
The color of this screen is the “screensaver color” selected on your event Look & Feel section.
Pro Tips
Follow these tips to set a great buffer video:
- There is no minimum or maximum time required for this video, but it is suggested that it be at least 2 minutes long.
- If you don't have a video but a different type of image you'd like to be seen on the main stage, convert that JPEG into an MP4 file and upload it here.
- If you change your mind and would like a different loop video to show at the end of the event, you can edit the loop video in your studio app. However, if attendees are already inside the event, they must refresh their screen to see the new loop video.