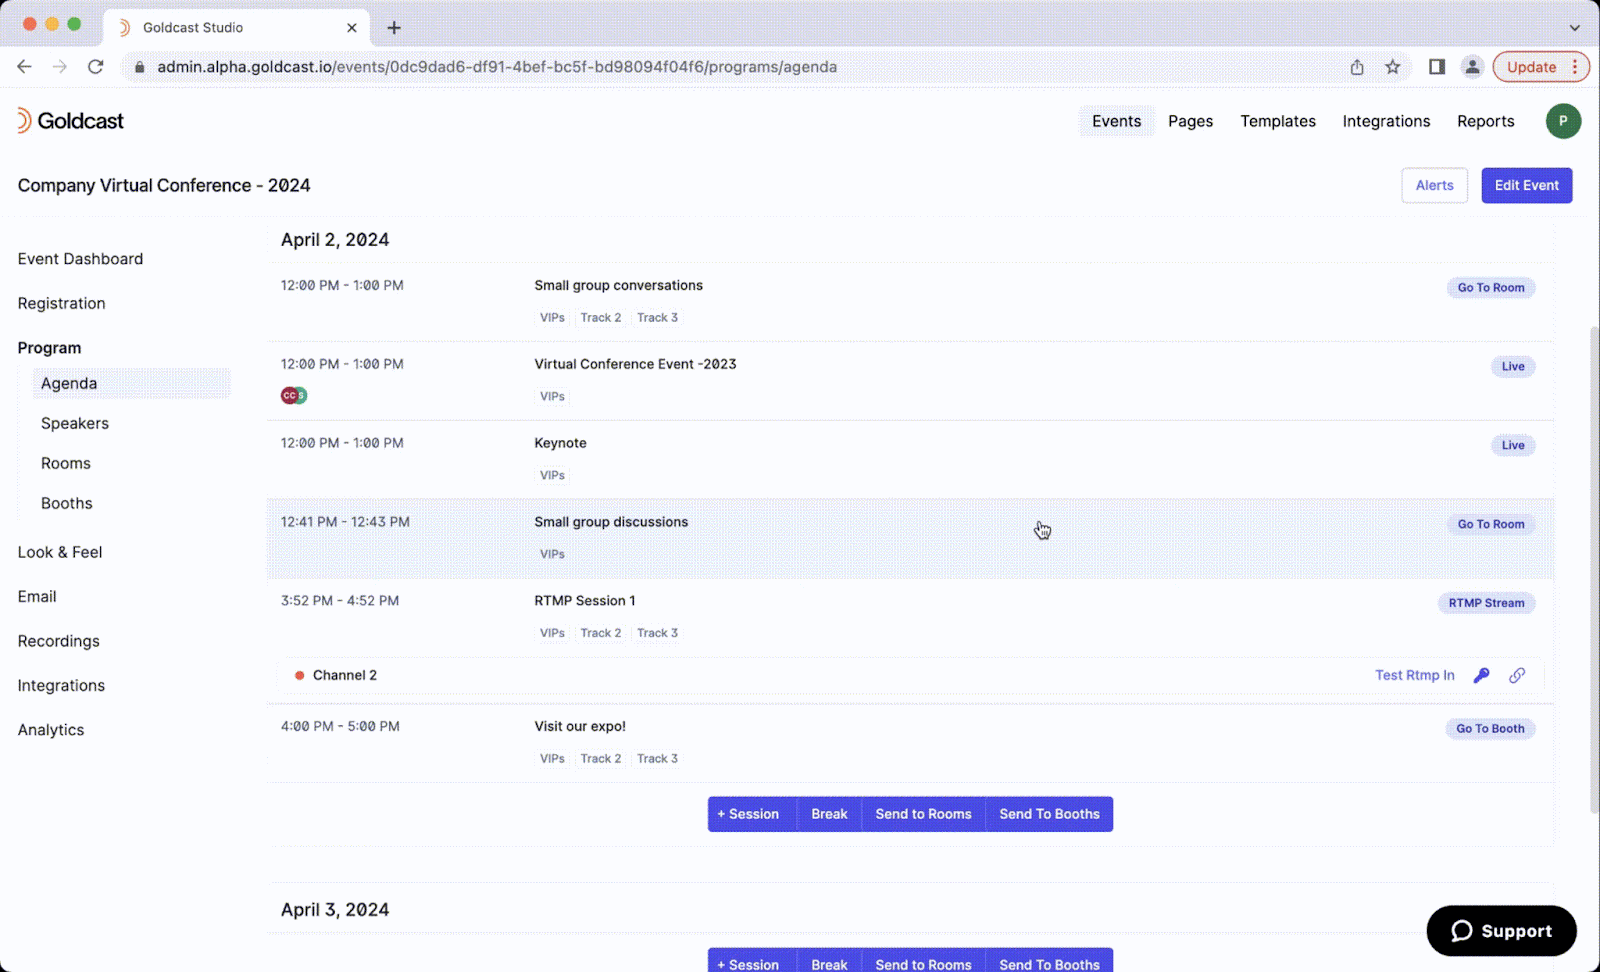
Your event agenda is made up of sessions that will appear on the Stage of your event and can be used for live broadcasting, pre-recorded videos, RTMP streams or a mixture of all three. Add an item to your agenda for panels, keynote speakers, presentations, and other similar program events.
During your event, you can also create specific blocks of time for attendees to visit Booths and Rooms or schedule a Break period.
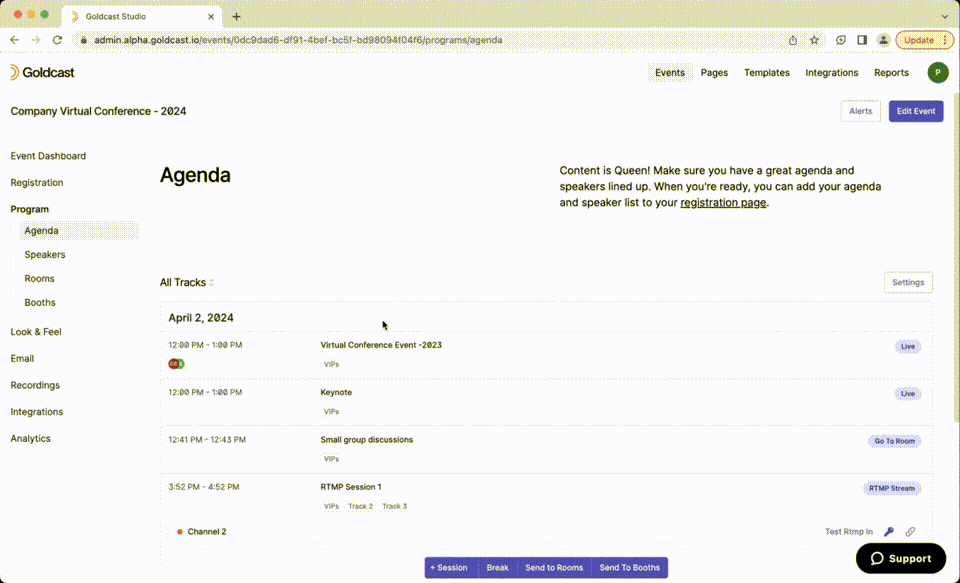
Follow these steps to manage your event agenda
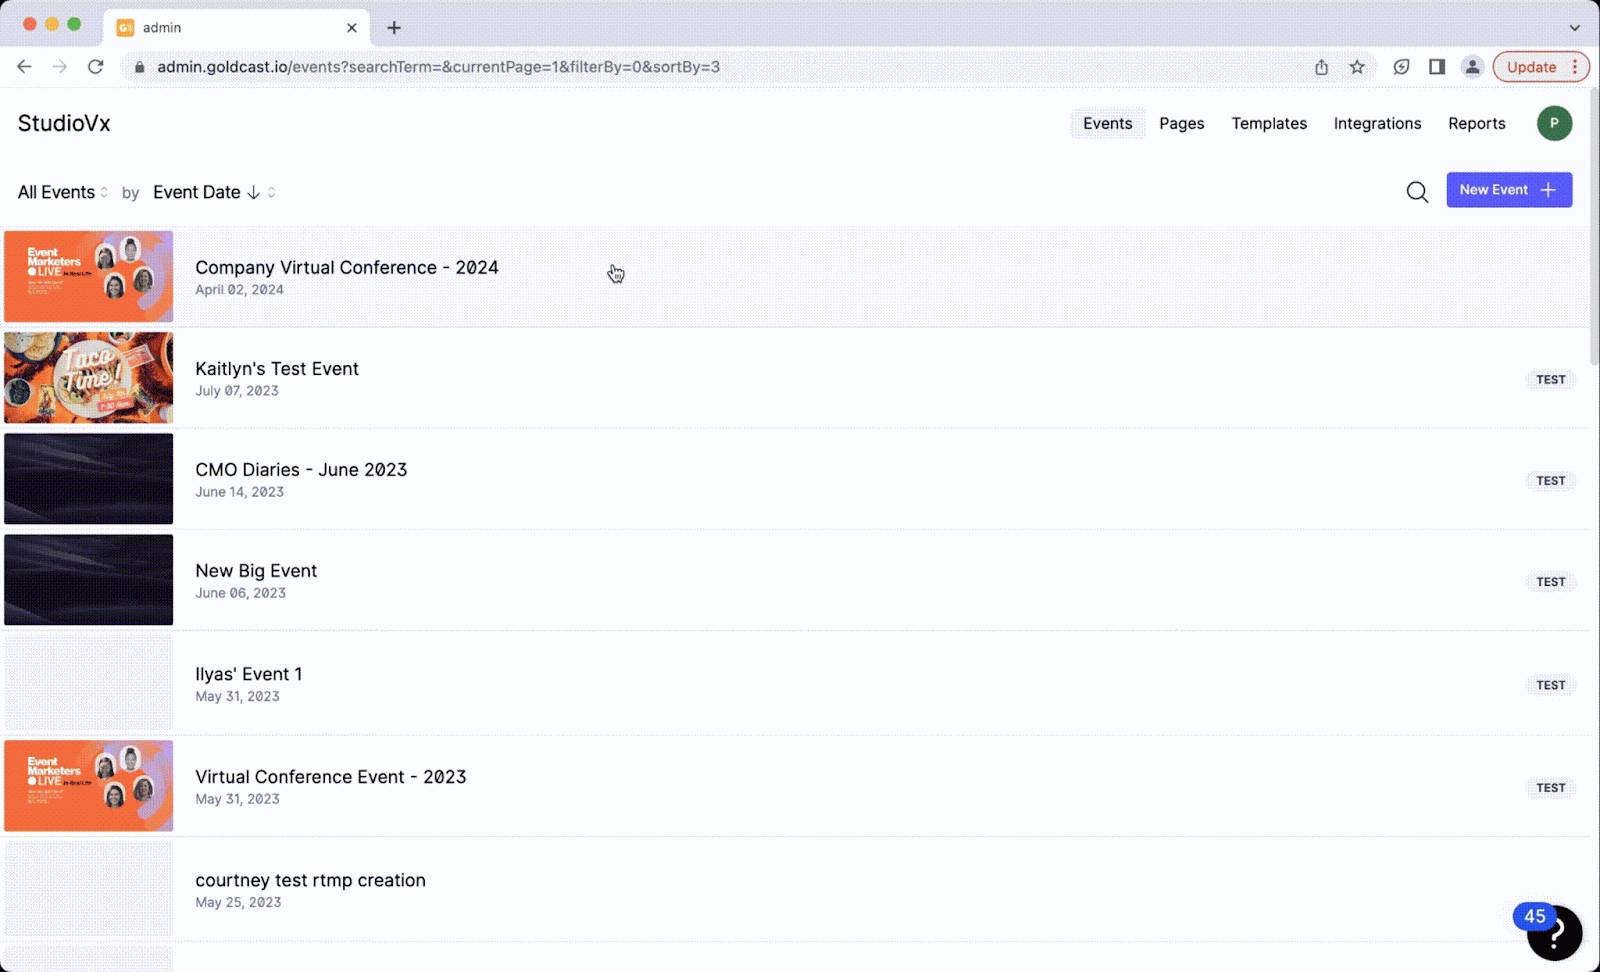
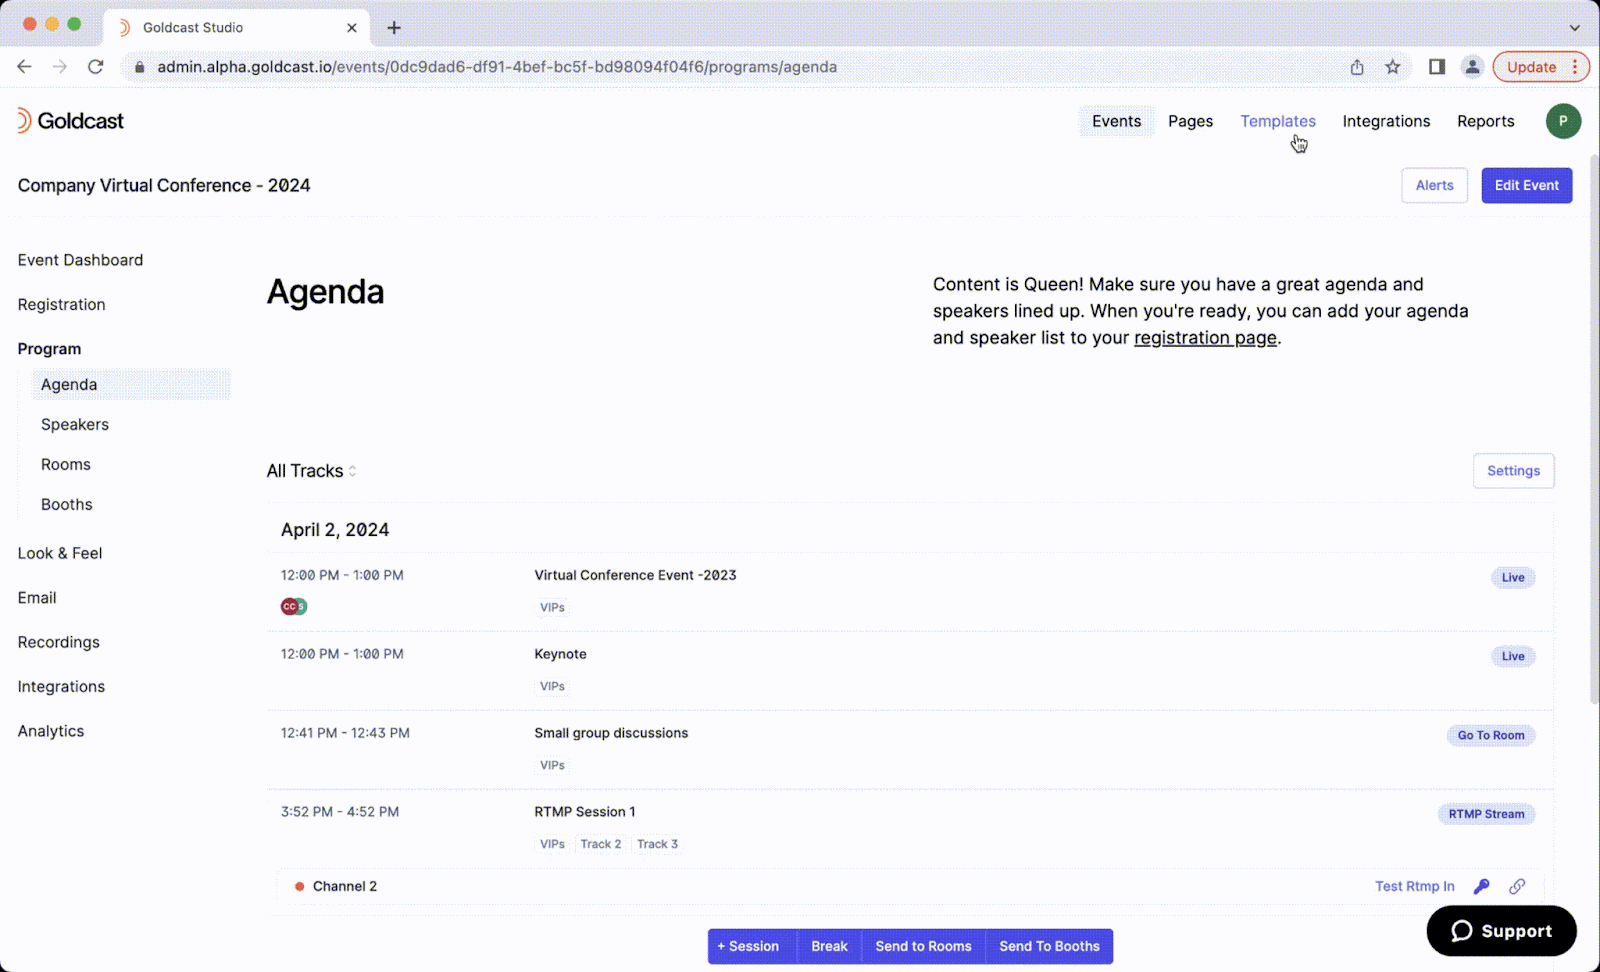
- Log in to Goldcast Studio with your credentials and select the Events tab on the left sidebar to get a list of all your events.
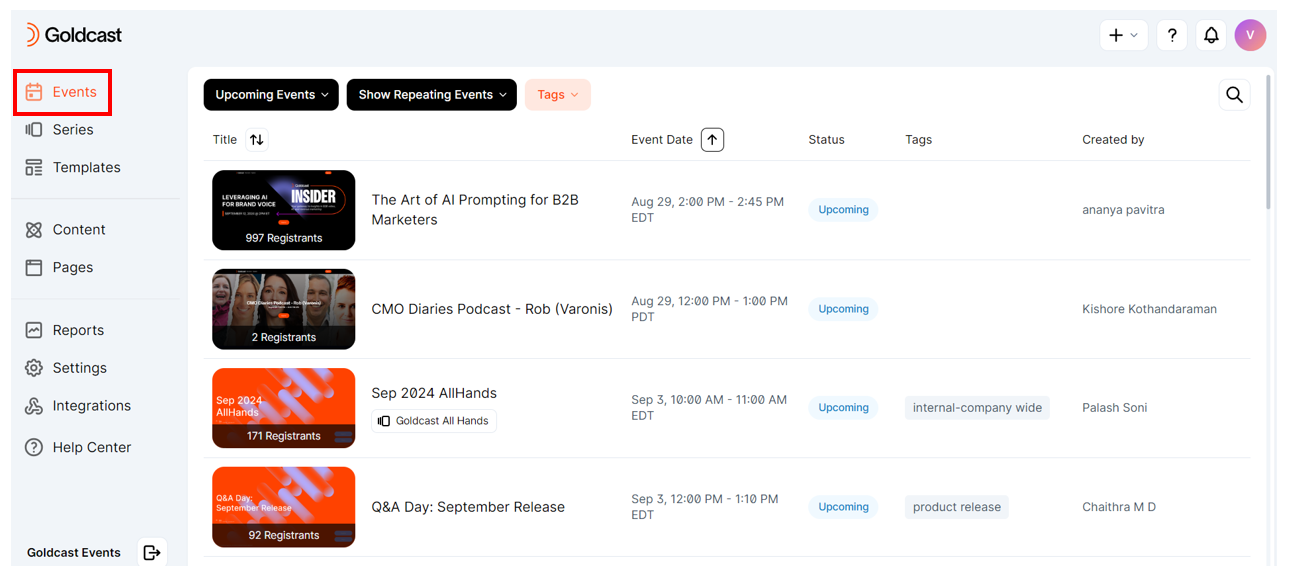
- From the Events list, click the event you want to edit.
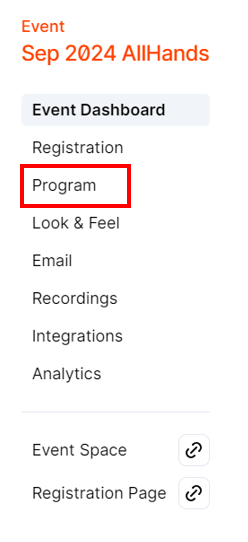
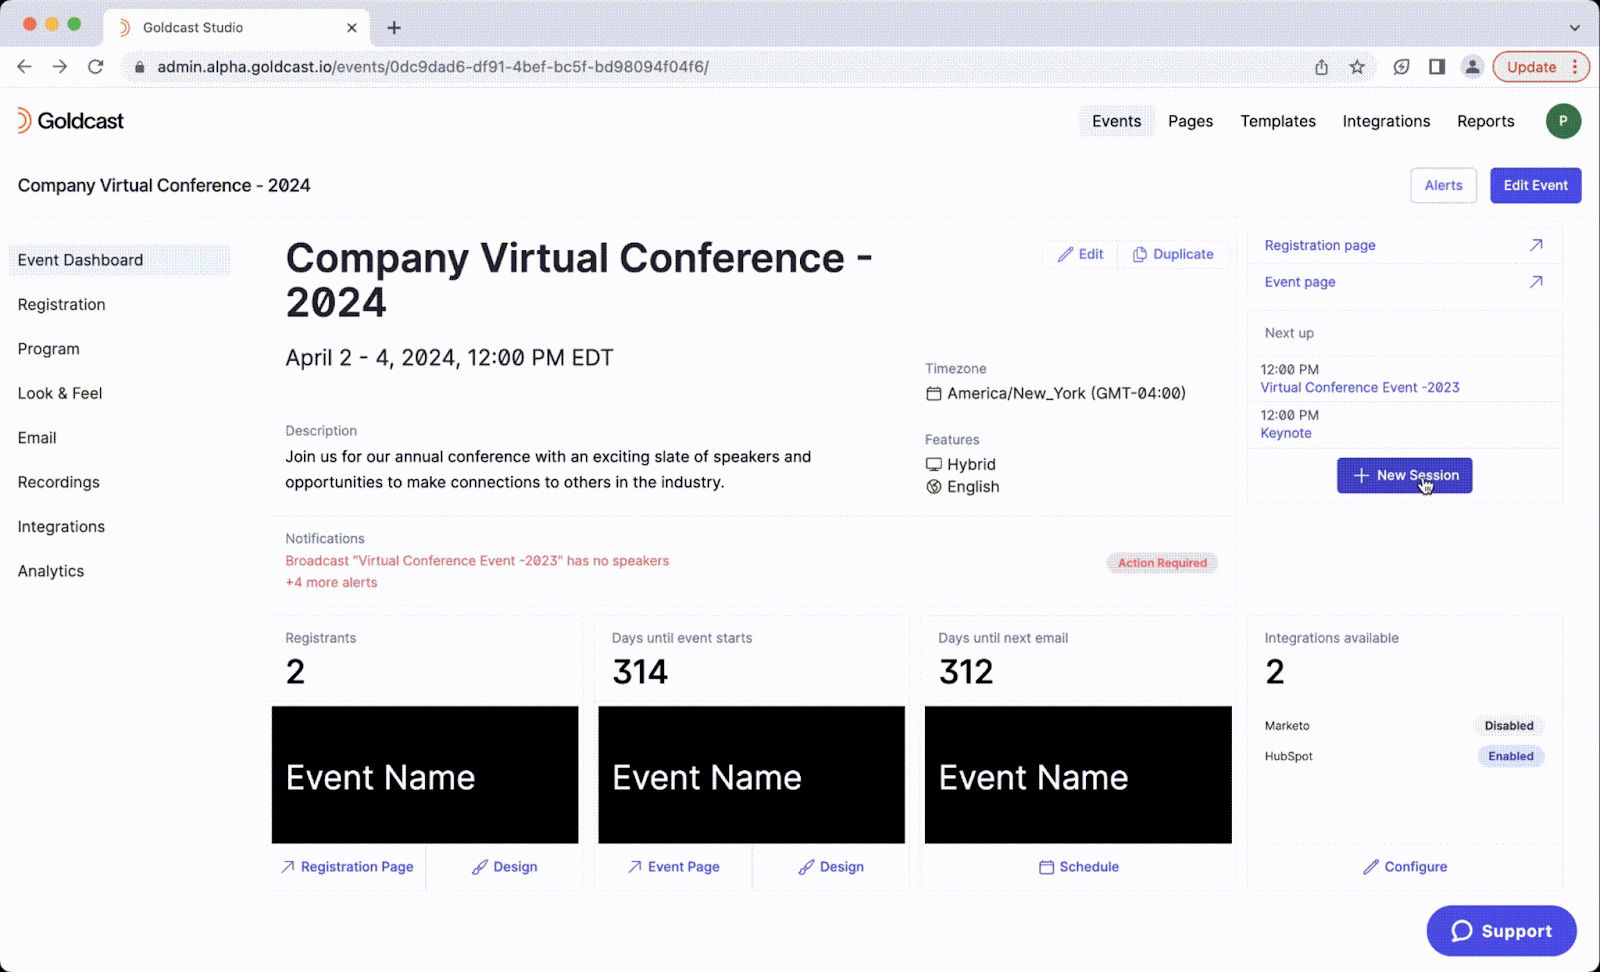
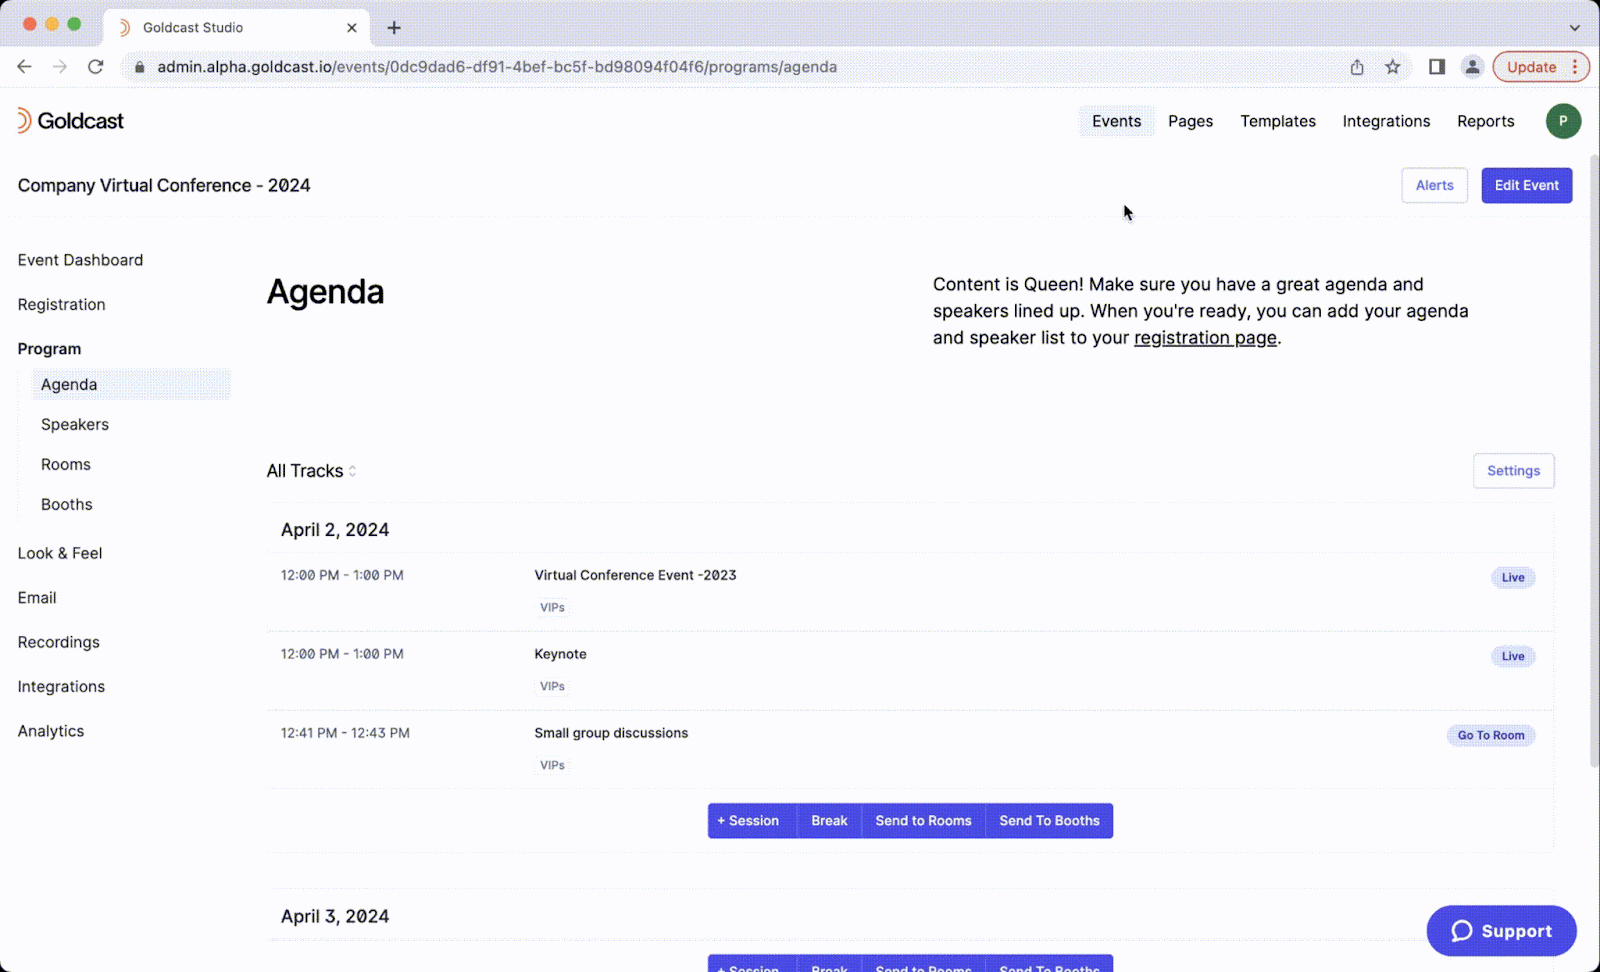
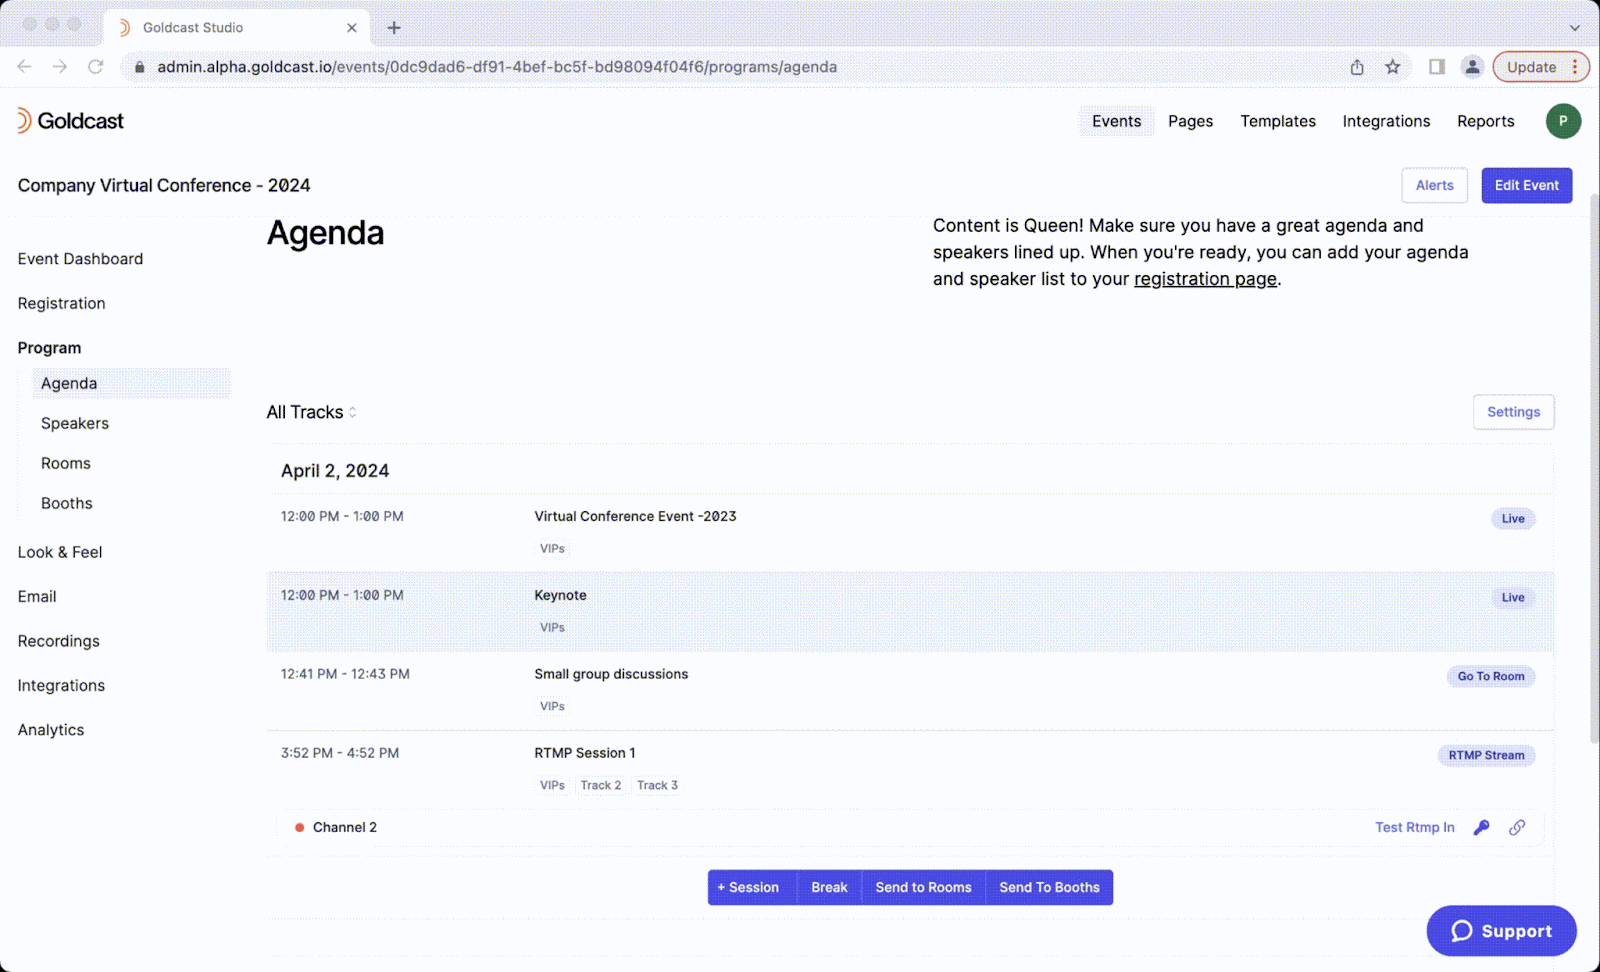
- Once you're on the event dashboard, click Program on the menu on the left panel and navigate to the Agenda section.
Session Types
Live
Live sessions are what we typically think of when it comes to online events. This session type allows users to stream live videos and communicate with audiences in real time. Additionally you may also incorporate slide and pre-recorded videos during a Live session.
Pre-recorded
Pre-recorded sessions are made up entirely of pre-recorded content and do not allow for live video or on-stage audience interaction. The advantage to this session type is that it allows you to upload and schedule when content is played during your event, creating the illusion of a live event without you actually having to have speakers present live. Your attendees will still have the ability to chat, submit questions, and respond to polls in the engagement panel, if you choose to enable this.
RTMP - Streaming into Goldcast from another platform
RTMP streaming should be used if your event is being hosted somewhere other than the Goldcast platform (i.e. Facebook, YouTube, in-person) but you would still like to provide virtual attendees with an interactive experience.
Creating Sessions
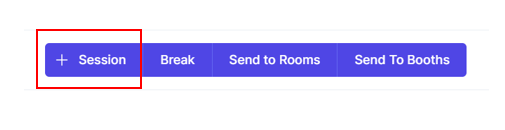
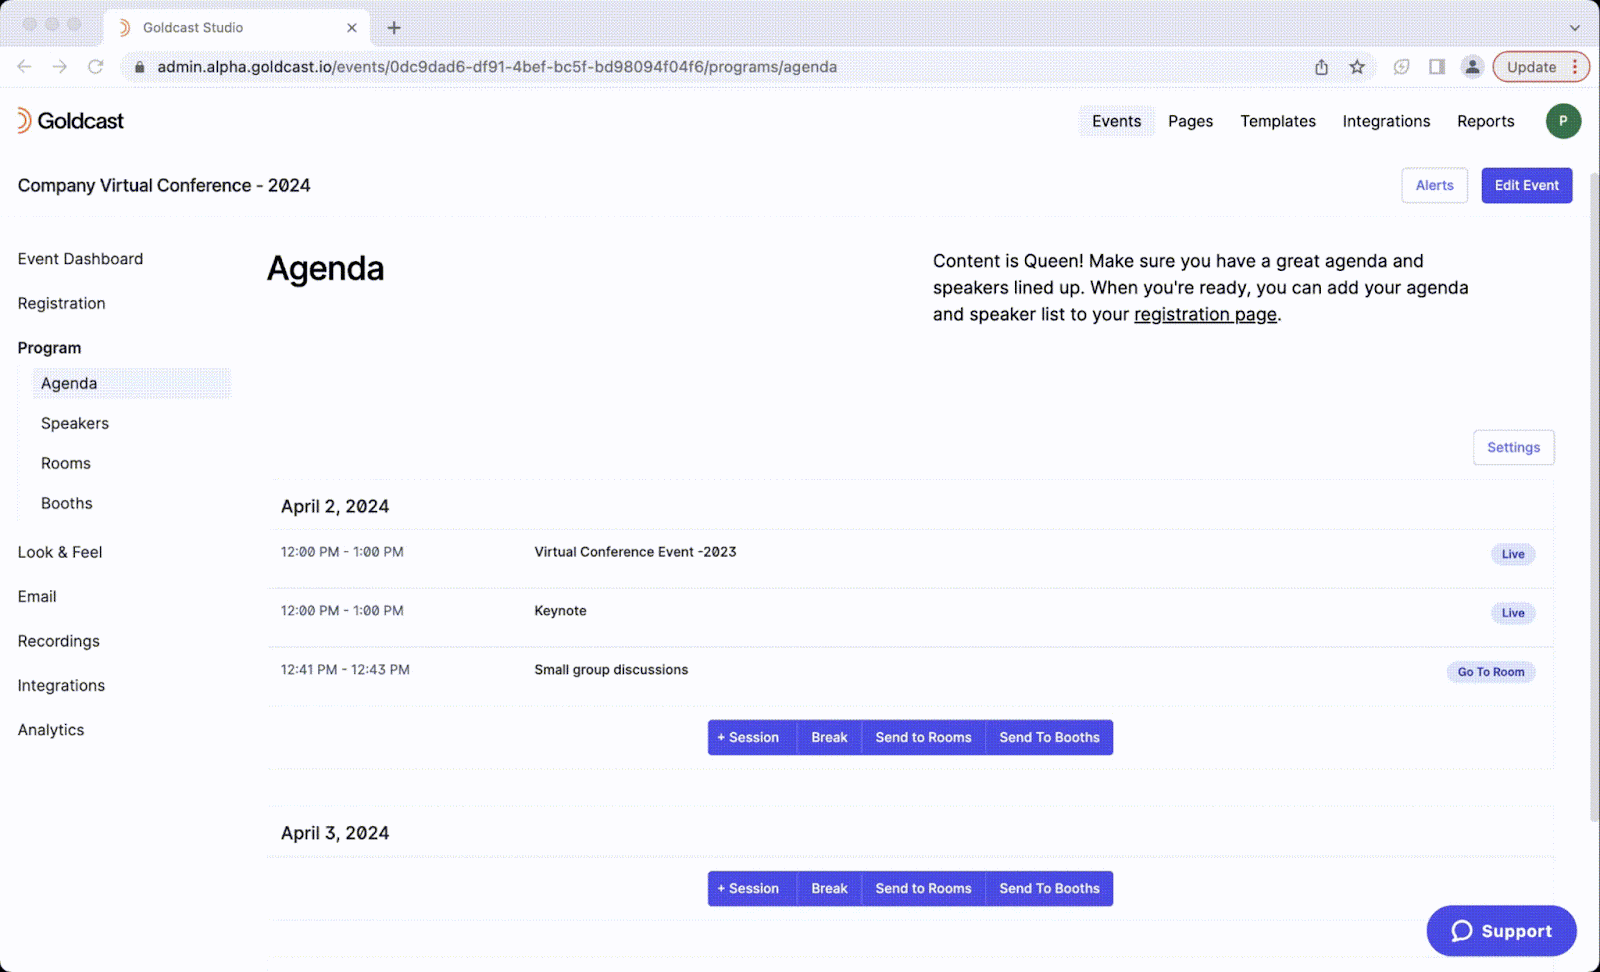
If you created a multi-session event, your Agenda will not have any items by default. To add a session, click the +Session button in the center of the screen. If your event is a multi-day event, you can click the +Session button underneath the day the session will take place.
If you created a single session event, your Agenda will be pre-populated with one session that matches the event details you entered during creation, including the name of the session and the start and end time of the session. This session is a Live session by default, but you can change it to pre-recorded or RTMP. See below for more details on editing a session.
To create a new session:
- Log in to Goldcast Studio with your credentials and select the Events tab to get a list of all your events.
- From the Events list, click the event you want to edit.
- Click Program on the menu on the left panel and navigate to the Agenda section.

- Click the +Session button.
- Select the type of session you’d like to create: Live, Pre-recorded, or RTMP
- Enter a session title, start time, and end time (Note that the session time must fall during the event’s start and end time).
- For RTMP Sessions you must select an RTMP channel. If you’ve previously created channels for this event, you can select one from the dropdown. If you have no channels, you can add one by entering the channel name and clicking Save to the right. Once the channel is successfully saved, you can continue editing your session.
- Click Create.
You can also access your event agenda from the Event Dashboard by clicking + New Session on the right side of the screen.
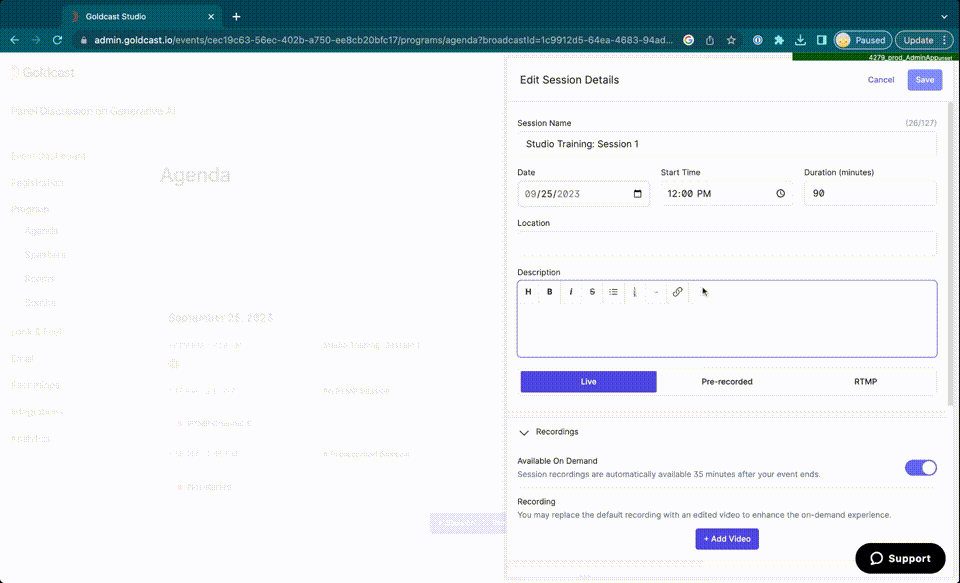
Entering Session Details and Configuring your Session
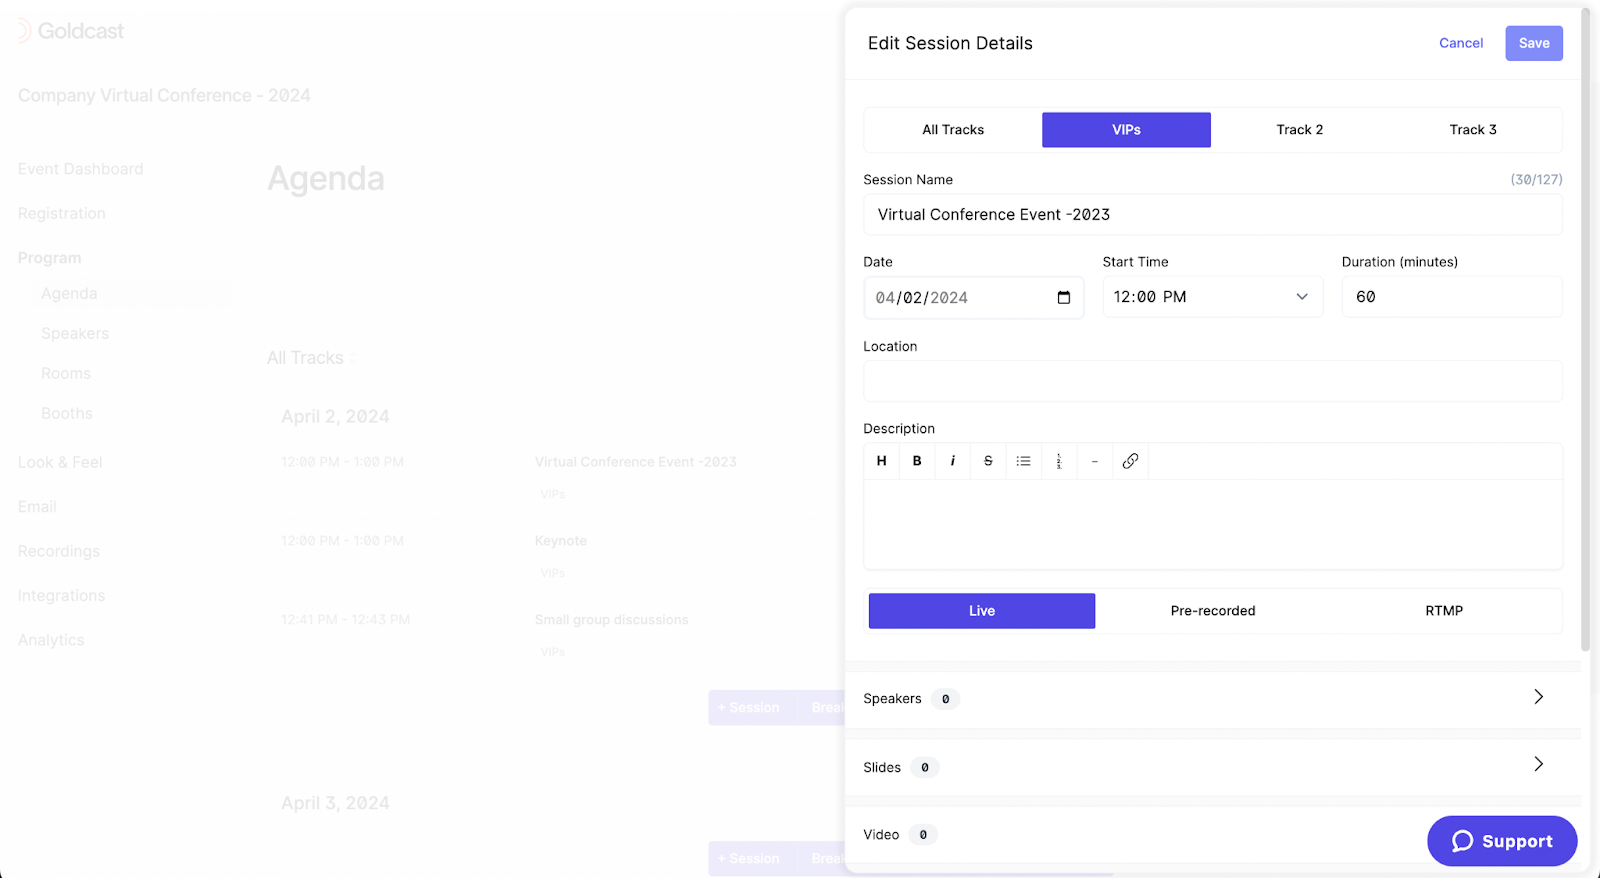
To edit session details, click on the session name in the Agenda list.
Tracks
If your event has multiple tracks, you can select which track(s) this session should appear on. To add tracks, click the Settings button above your agenda.
Learn more about setting up tracks.
Session Details
Edit session details including the name, date, start time, duration, and description. Note that the session time must fall during the event’s start and end time.
Session Type
To change the session type:
- Scroll to the session type row, which lists Live, Pre-recorded, and RTMP
- Click the session type.
- Click Save in the top right corner of the window.
RTMP Channel
For RTMP sessions, your selected channel will appear here. You can change the channel from options in the dropdown, or create a new channel by selecting “create channel” in the dropdown, entering the channel name, and clicking Save.
Learn more about setting up RTMP sessions.
Run of Show
Click here to learn more.
Goldcast’s Run of Show (ROS) helps you plan, organize, and execute your live events seamlessly. Toggle on the Run of Show option. Once enabled, you’ll see a new Run of Show tab in your event.

Speakers
All session types include speakers. In this section, you can add a new speaker, or select a speaker you’ve previously added to this event.
To add a new speaker:
- Open the Speakers section by clicking the arrow on the right side.
- Click +New Speaker.
- Enter the speaker’s headshot, email, name, title, company, bio, LinkedIn and X (formerly Twitter).
- If you enter the email address of a person who has been a speaker at your events previously, their info will auto-populate.
- Click Save.
To select a speaker you’ve already added to this event:
- Click Select Speaker.
- Select a speaker from the list and click Save.
- Click Save in the upper right corner of the drawer.
Slides
For live sessions, you can upload files of slides your speakers can share during the session.
To add slides:
- Open the Slides section by clicking the arrow on the right side.
- Click +Add Slide.
- To upload a new file, click + Upload Files, locate the file and click Open, then Upload.
- Select the file(s) you’d like to use from the list (they will be highlighted in purple).
- From this window, you can also edit a file’s name, preview the file, or delete the file
- Click Save.
Video
For Live or Pre-recorded sessions, you can upload video files to play during the session.
In a Live session, an organizer must manually click Play on the video to start it.
In a Pre-recorded session, all videos will play automatically in the order they are uploaded when the session time begins.
Learn more about suggested video lengths for pre-recorded sessions.
To add videos:
- Open the Videos section by clicking the arrow on the right side.
- Click +Add Video.
- To upload a new file, click + Upload Video, locate the file and click Open, then Upload.
- Once the file is uploaded, it will be in Processing state. It takes approximately 4x the length of the video for Goldcast to fully process a video. Videos will only be able to be played in an event after they have been successfully processed. (Processing will happen in the background - so you can save your session and edit other event details or navigate away from Goldcast during that time).
- Select the file(s) you’d like to use from the list (they will be highlighted in purple).
- From this window, you can also edit a file’s name, preview the file, download the file, or delete the file.
- Click Save.
Engagement Options
Use engagement options to add opportunities to engage with your session attendees.
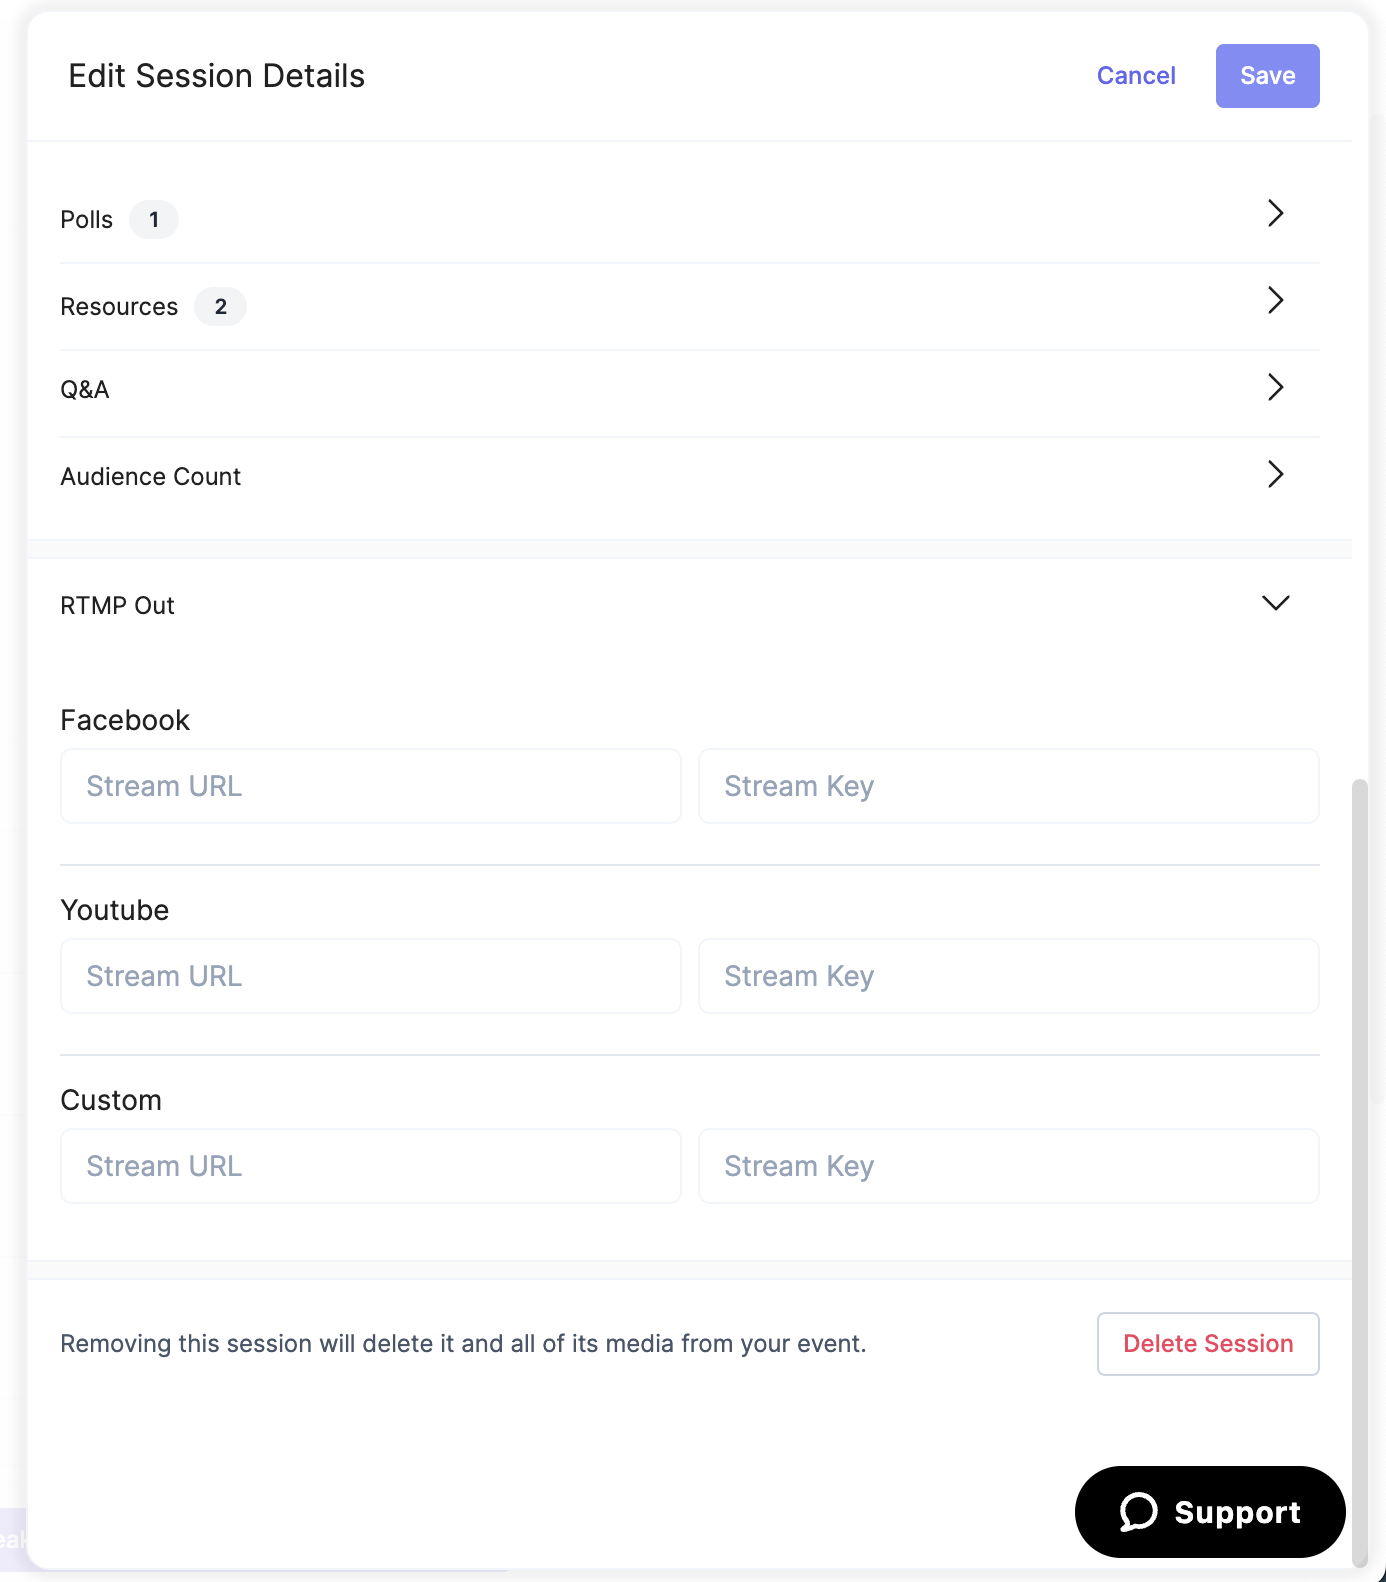
Polls
Create a poll or ask a question to get real-time feedback from your audience during your session. During the event, the poll can be shared to the stage and will also appear in the event engagement panel on the right side of the screen.
To create a poll:
- Open the Polls section by clicking the arrow on the right side.
- Click +New Poll.
- Type your question in the Question field.
- Click +Add Option to add an answer option. Add as many answer options as needed.
- Check the box next to “Allow multi-selection” if you would like to enable your attendees to select more than one answer option at a time.
- Click Save.
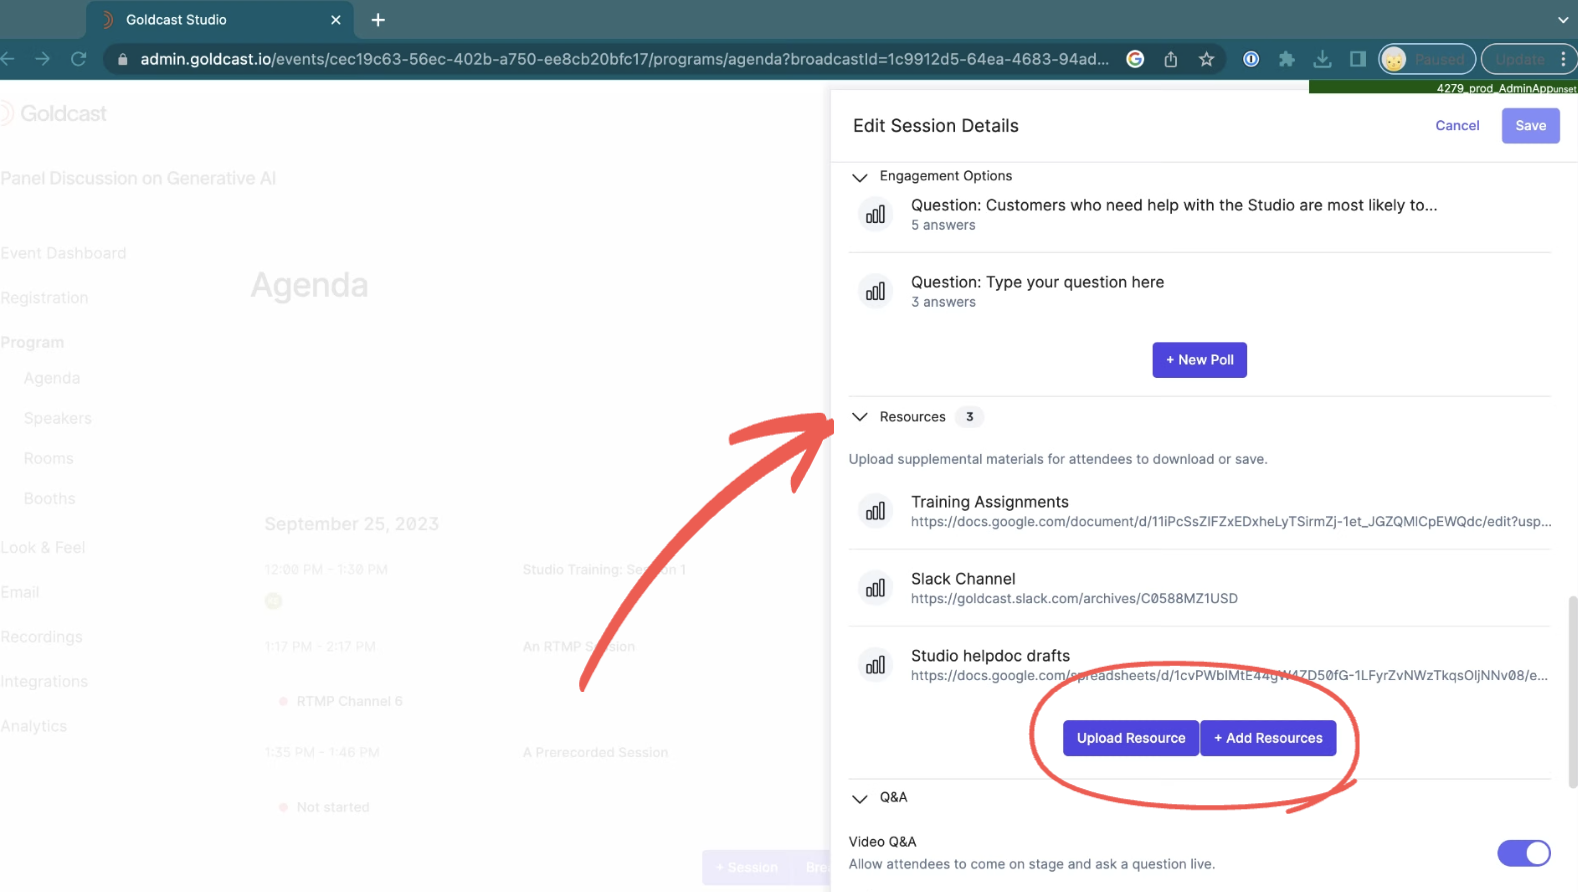
Resources
Upload supplemental materials for attendees to download or save. These can be URLs or files.
To add a resource:
- Open the Resources section by clicking the arrow on the right side.
- To upload a document, click Upload Resource and select your file, give the document a name, and click Save.
- To add a URL, click + Add Resource, and enter the name of your resource and the URL, including https://www.
- Click Save.
- To remove a resource, click on the resource in the list and click Remove.
Q&A
In the Q&A section, you can decide if you’d like to allow your attendees to interact with speakers.
Text Q&A allows attendees to submit questions in the Q&A section on the right side of the Stage.
Video Q&A allows attendees to “raise their hand” and be invited to come on stage live to ask their question on video.
Each option is enabled by default. To disable these options:
- Open the Q&A section by clicking the arrow on the right side.
- Turn off the toggle next to Text Q&A and/or Video Q&A.
- Click Save in the upper right corner of the window.
Audience Count
Audience count allows you to select who can see the number of people watching the session.
By default, organizers, speakers, and attendees can all see the number of people watching. To hide this number:
- Open the Audience Count section by clicking the arrow on the right side.
- Turn off the toggle next to Speakers & Organizers and/or Attendees.
- Click Save in the upper right corner of the window.
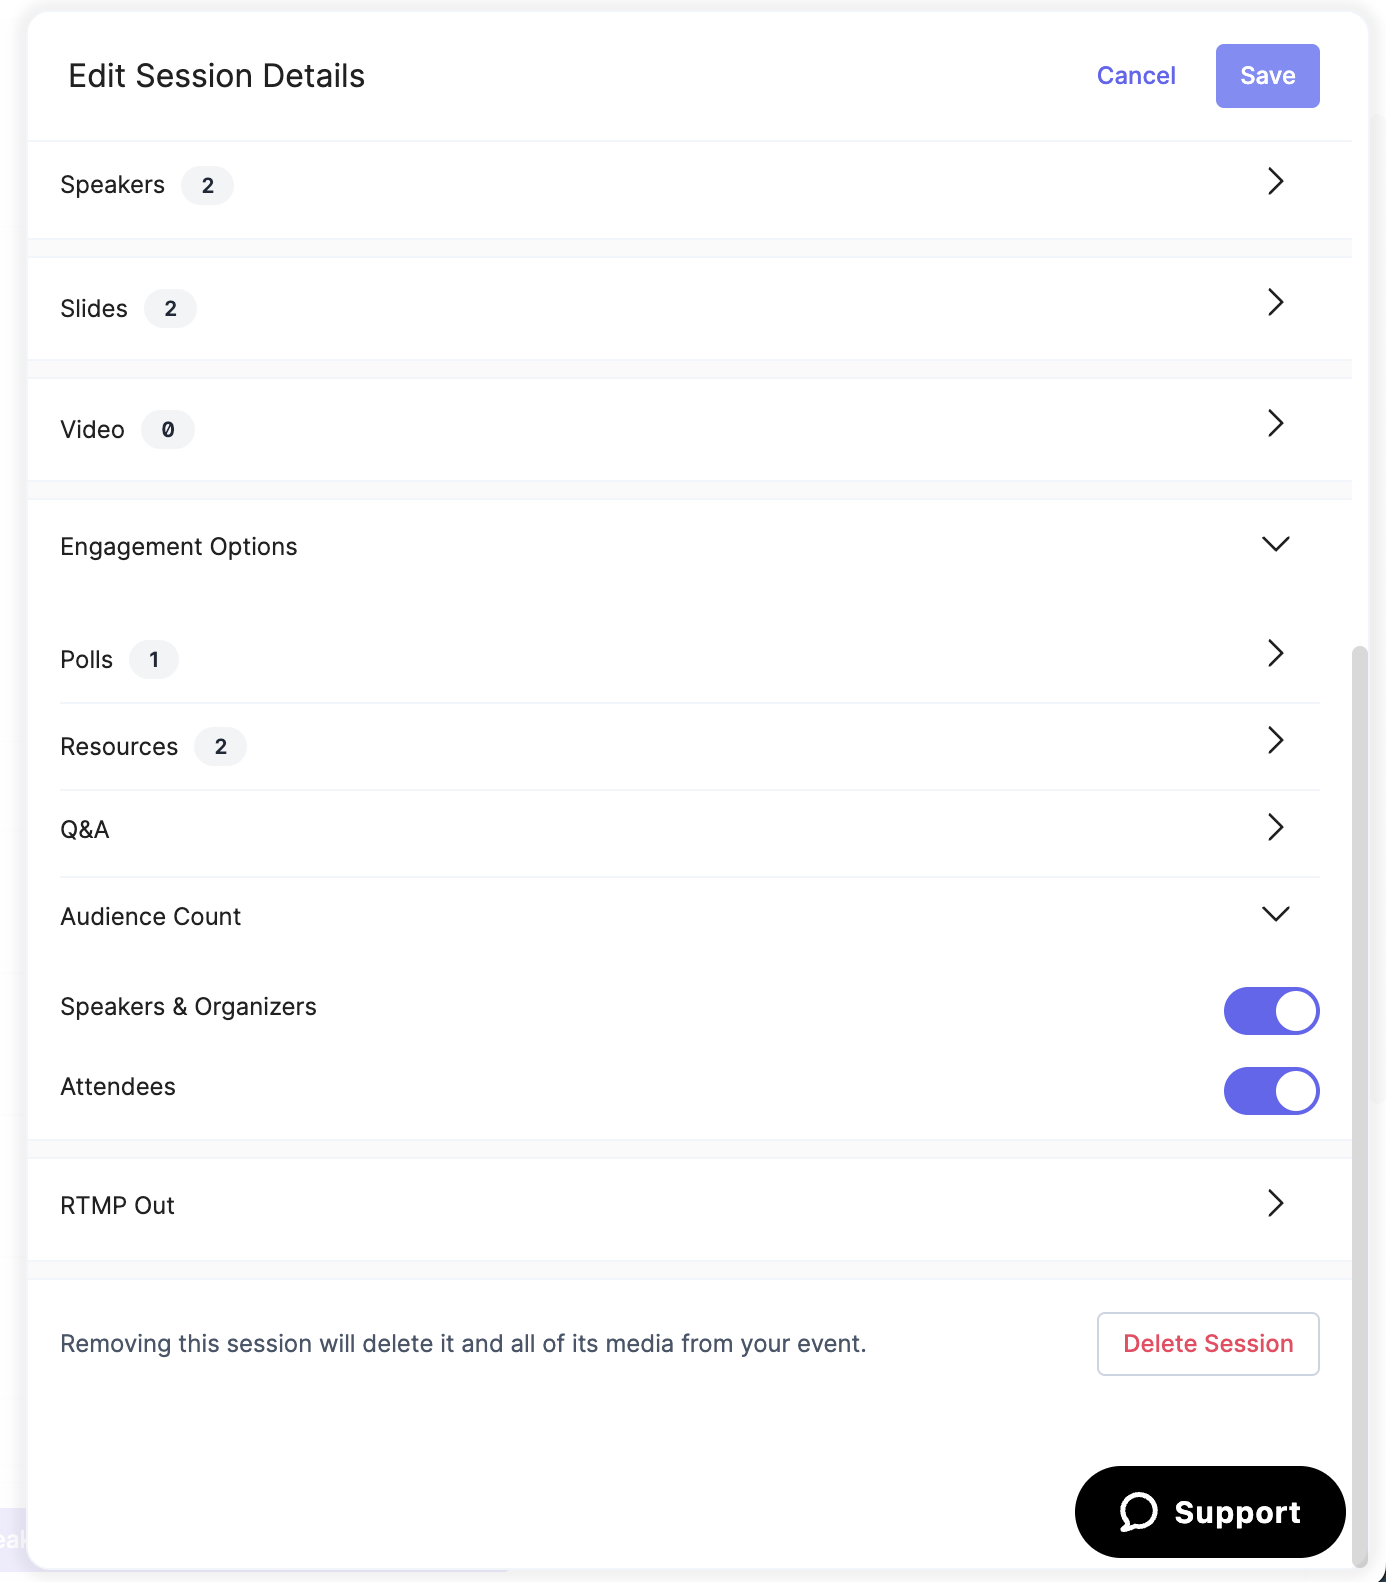
RTMP Out
Using RTMP Out, you can set up streaming from the Goldcast platform to other platforms, like Facebook, YouTube, and LinkedIn.
To enable a stream:
- Open the RTMP Out section by clicking the arrow on the right side.
- Retrieve your Stream URL and Stream Key from your other platform and enter them in the corresponding fields.
- Click Save in the upper right corner of the window.
Learn more about how to stream Goldcast out to other platforms.
Once you have configured all of your session settings, make sure to click the Save button in the upper right corner of the window.
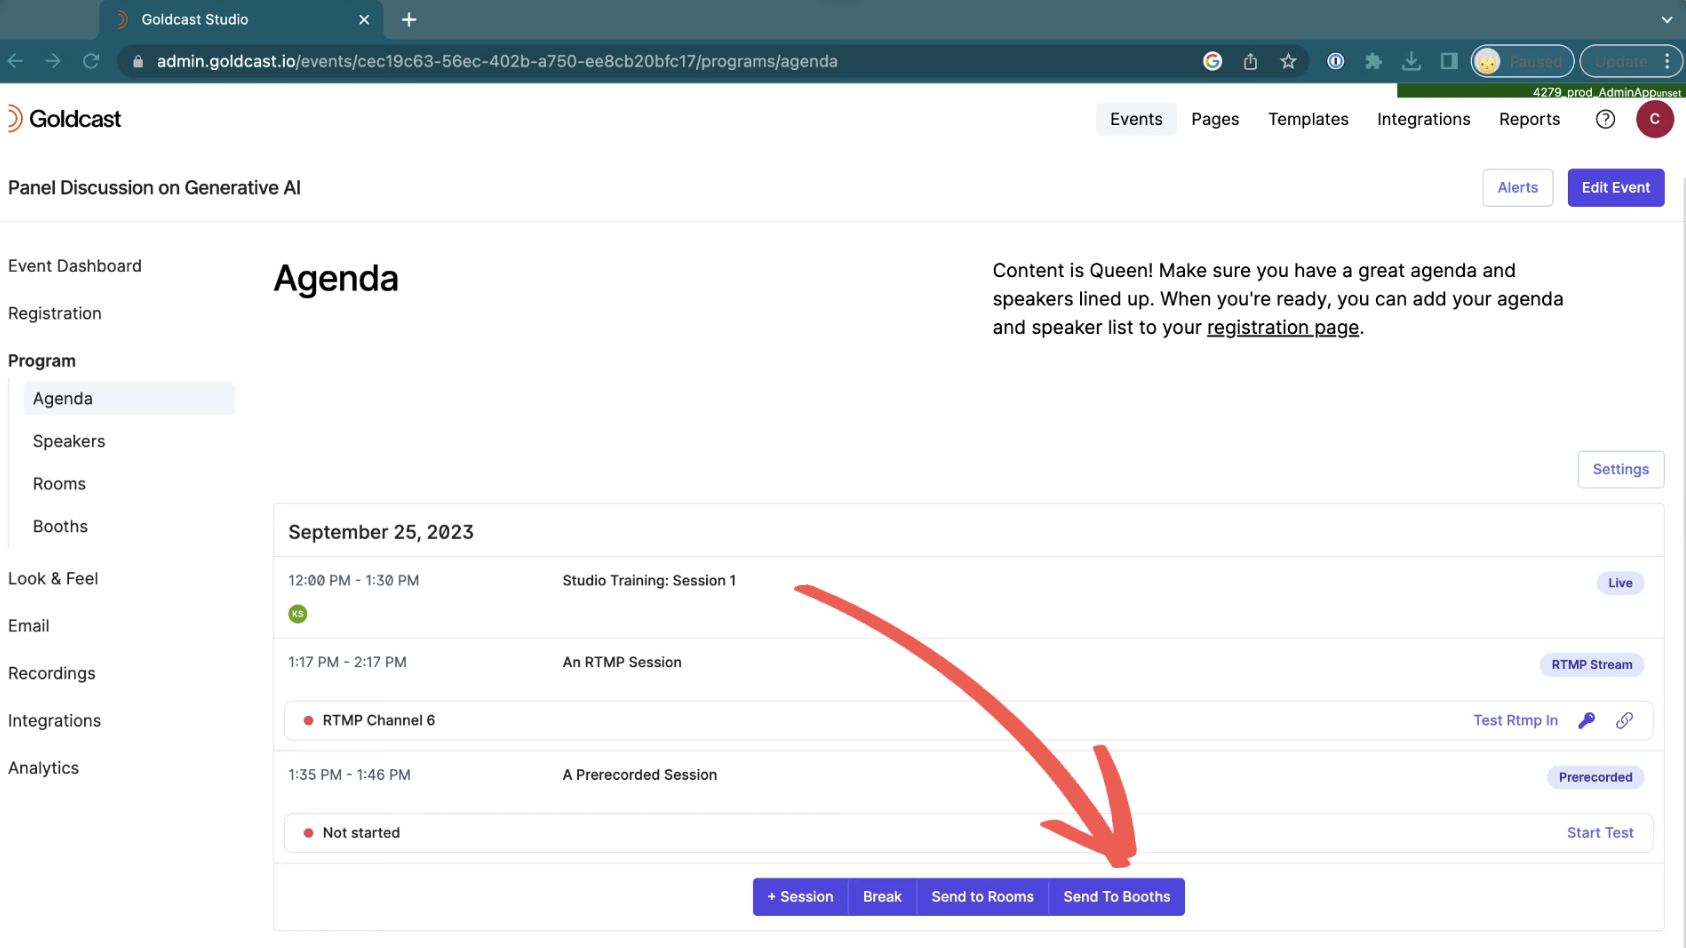
Rooms
In addition to sessions, you may wish to add one or more Rooms to your event. Rooms provide guests with the opportunity to network and connect with one another and/or your staff and speakers during your event. They can be set up so that they are available for guests to pop in and out of throughout your event or allotted a specific timeframe in your agenda.
To add a specific time in your Agenda for your attendees to visit Rooms:
- First, your Rooms must be created. Learn more about creating and setting up Rooms.
- Navigate to the Program > Agenda section on the menu on the left side of your event
- Click Send to Rooms
- Add an agenda item title, start time and end time. A description is optional.
- Click Add Room Block
Learn more about setting up Rooms.
Booths
Booths are versatile and can be used for a number of purposes such as showcasing event sponsors and relevant organizations, uploading on-demand content, and widgets.
To add a specific time in your Agenda for your attendees to visit Booths:
- First, your Booths must be created. Learn more about setting up Booths.
- Navigate to the Program > Agenda section on the menu on the left side of your event.
- Click Send to Booths.
- Add an agenda item title, start time and end time. A description is optional.
- Click Add Booth Block.
Learn more about creating Booths.
Breaks
If your event lasts several hours, we suggest adding a Break Period to your agenda to allow your guests to pause and regroup.
To add a specific time to your Agenda for a Break:
- Navigate to the Program > Agenda section on the menu on the left side of your event.
- Click Break.
- Add an agenda item title, start time and end time. A description is optional.
- Click Add Break.
During the Break, if your event has a buffer video, it will play on stage. If your event does not have a buffer video, a slide will appear on stage letting attendees know a Break is in progress.