Table of Contents
| Plan Availability | Starter | Pro | Premium | Enterprise |
 |
 |
|
|
For customers with contracts starting March 2024 or later, feature availability is based on your pricing tier. If interested, contact your CSM or our Sales Team to discuss pricing options.
The Tracks feature is a useful tool for scheduling events with multiple concurrent sessions. It allows you to host multiple sessions or stages that take place simultaneously. For instance, you can set up distinct tracks for different teams within your audience, such as Track 1 for the Product Team, Track 2 for Marketing, Track 3 for Support, and so on. Another example is segmenting based on attendee profiles, like customers, non-customers, and employees. This allows for a more tailored and engaging event experience.
How do tracks work?
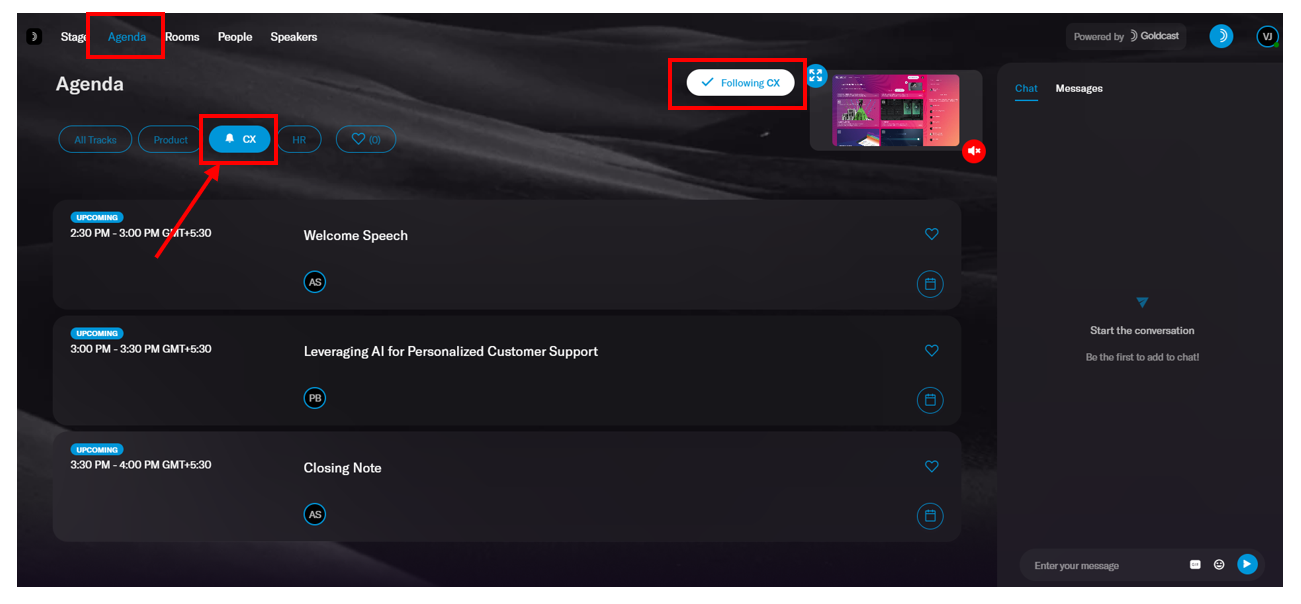
Each track has multiple sessions. Attendees can choose their preferred track in the agenda. A bell icon in the Agenda tab highlights the current track the attendee is on.
By default, registrants are automatically enrolled in the first (default) track if you haven't included track selection in the registration form.
When one session in a track ends, attendees are automatically redirected to the next one in the same track, eliminating the need to manually search for sessions of their choice. However, if attendees prefer, they can switch to sessions on different tracks at any time during the event using the Agenda tab in the Event space.
Heads Up! As always, organizers and speakers in a multi-track event are not automatically redirected to the next session in the track. They must manually move between sessions.
When to use tracks?
Often, event organizers assume that tracks are primarily used to categorize sessions. However, tracks in Goldcast have a more technical purpose. The primary objective of tracks is to host multiple sessions simultaneously. Tracks are an excellent choice if your event has varying agendas for different target audiences or sessions that overlap (co-occur).
How to create a track
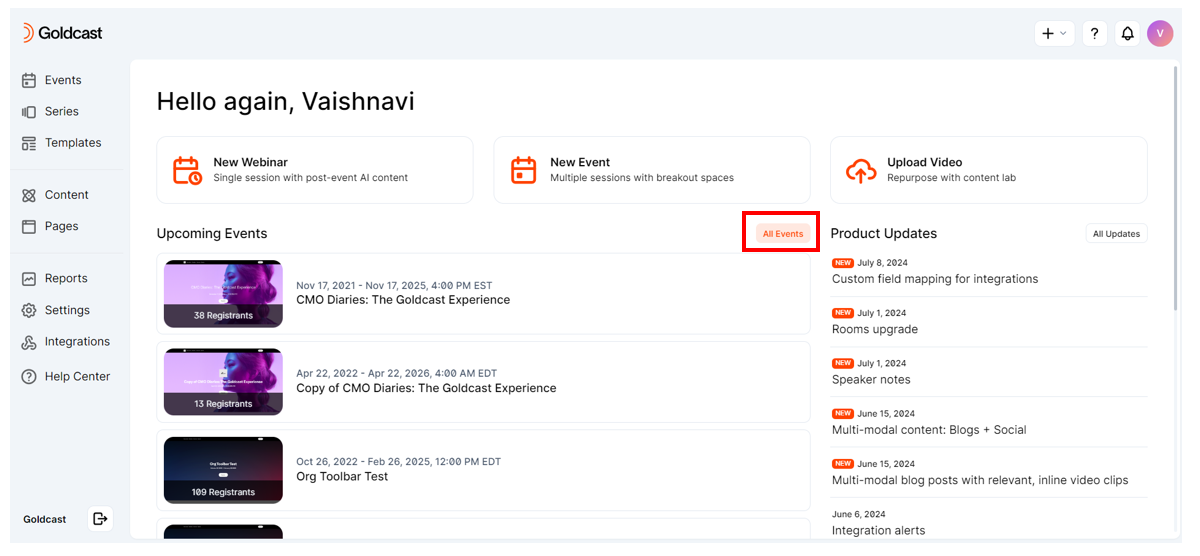
- Log into Goldcast Studio, click the All Events button and open your preferred event.
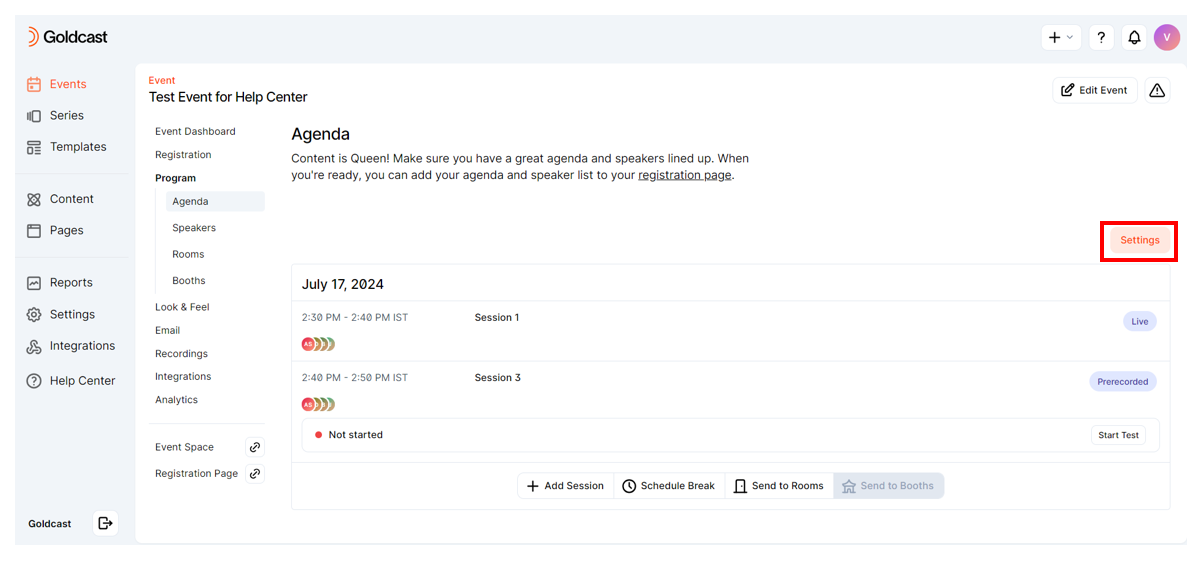
- Navigate to Program → Agenda using the left sidebar.
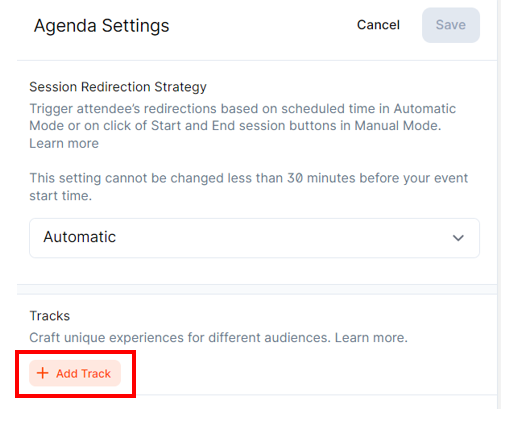
- Click the Settings button on the right.
- In the Agenda Settings drawer, click the + Add Tracks button. You can add as many tracks as required.
- Click directly on the default track’s name to rename it.
- Click the Reorder Tracks button, and drag and drop tracks as required. The order of tracks in the Studio will match how it appears in the Event space.
Heads Up! The first track in this list will be the default track for attendees.
- To delete a track, click the trash can icon next to it.
Note: You cannot delete a track with sessions added to it. To do so, remove the sessions assigned to the track and then delete it.
- Click Save.
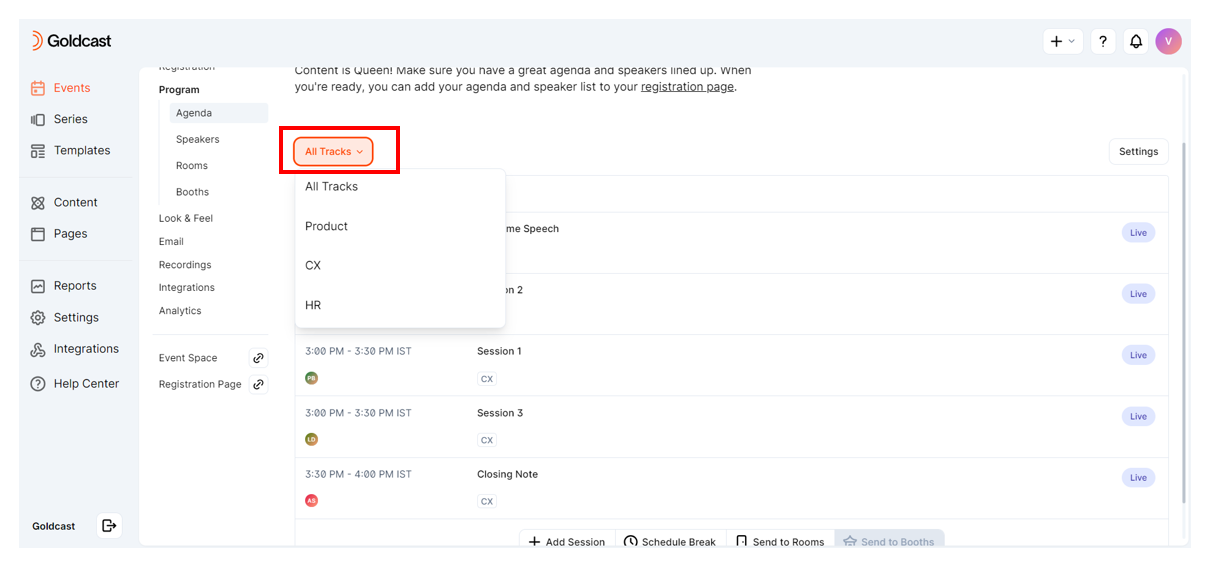
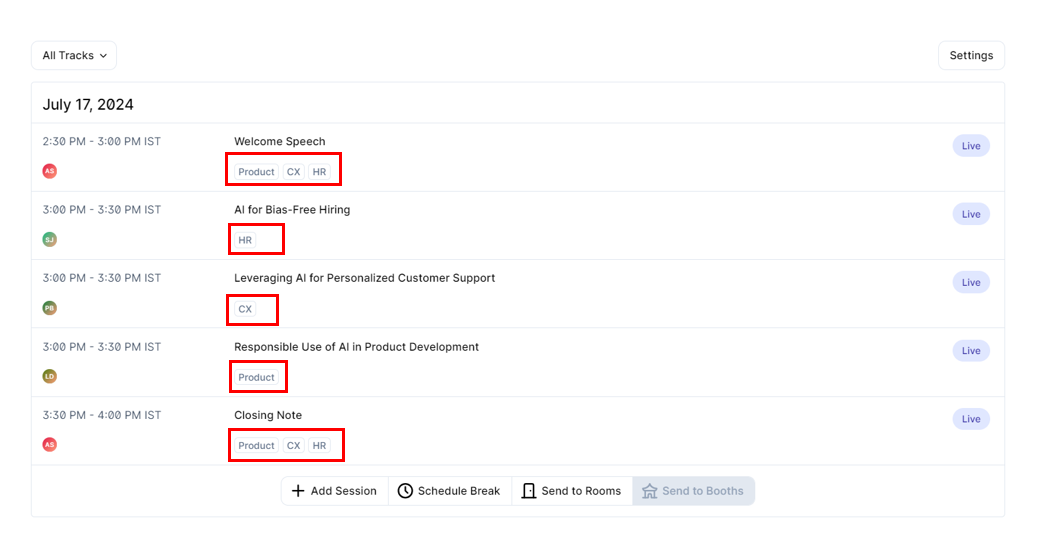
Once you’ve created tracks, you’ll see the All Tracks filter at the top of the agenda. Click this dropdown to view one track at a time or all tracks.
Mapping sessions to tracks
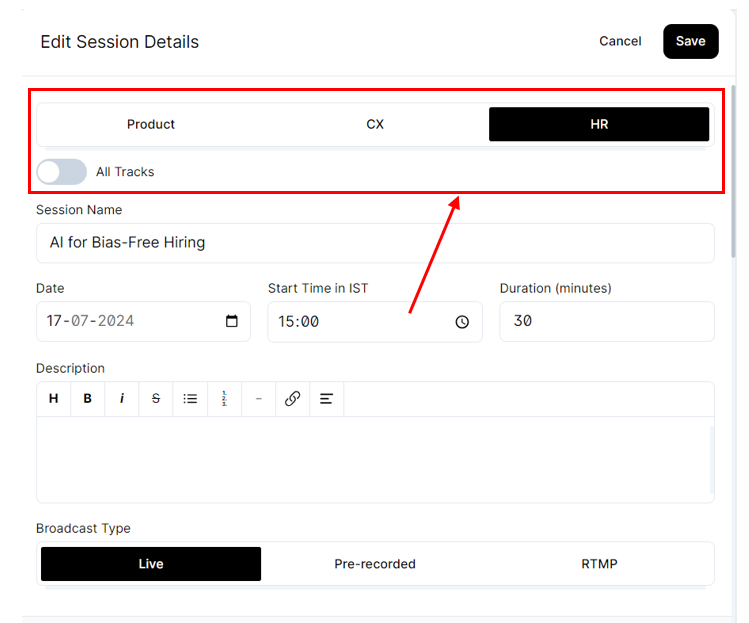
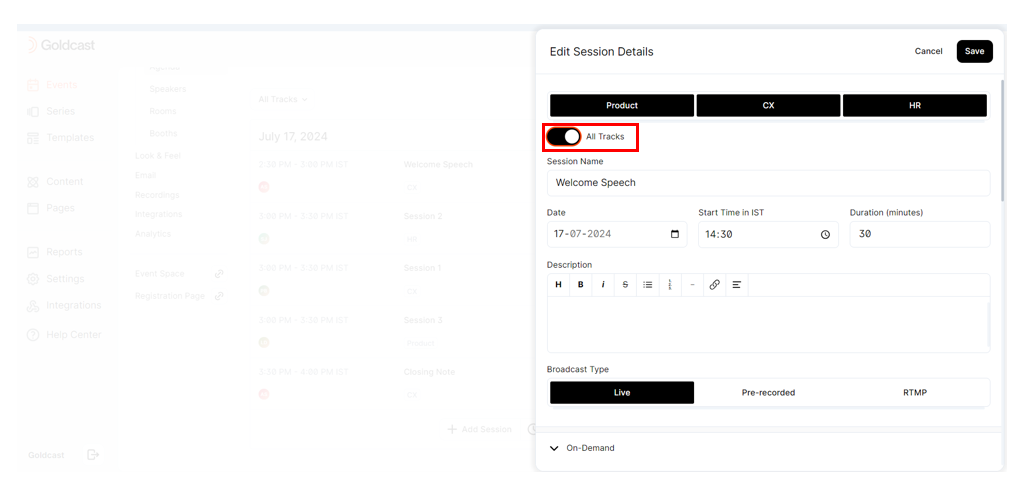
You can assign tracks while creating or editing a session. You can see the option to select a track at the top of the Edit Session details window.
You can add a session to one or more tracks.
Once you add a session to a track, the track name will be visible in the agenda.
Points to know
#1: Default track assignment
Once you create tracks in your event, Goldcast automatically assigns all existing sessions to the first track (the default track). You can change this by clicking on the session and using the Edit Session details window to assign it to another track. As always, organizers and speakers in a multi-track event are not automatically redirected to the next session on
#2: Sessions can be assigned to one, many, or all tracks
To assign a session to all tracks, turn on the All Tracks toggle in the Edit Session details window.
#3: All sessions must be assigned to at least one track
If your event has tracks, then all sessions are, by default, assigned to the first track. No session can be left without being assigned to at least one track.
#4: Track assignments are reflected in real-time in the event space
Any changes you make to the track assignments are updated in real time in the Event space.
Best practices
Here are a few tips to help you get the most out of the tracks feature:
Tip #1
If you plan to host a multi-track event, it’s good practice to create tracks before adding sessions.
Tip #2
Assign common sessions to all tracks. The exceptions to this rule are concurrent sessions (that happen at the same time) or sessions dedicated to only a specific set of audiences. Let’s explain this with an example. Consider the following agenda, which has four tracks.
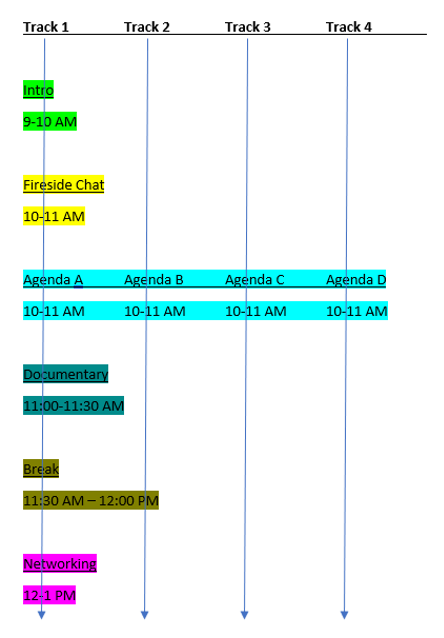
This is an incorrect format as only Track 1 has a full agenda, while Tracks 2, 3, and 4 have incomplete agendas. If an attendee is in Tracks 2 to 4 at any other time (apart from 10 to 11 am), they will not be able to view the sessions happening in Track 1 until they proactively switch to Track 1. This is not an optimal experience for attendees. This can be overcome by assigning common (or non-concurrent sessions) to all tracks, as shown below.
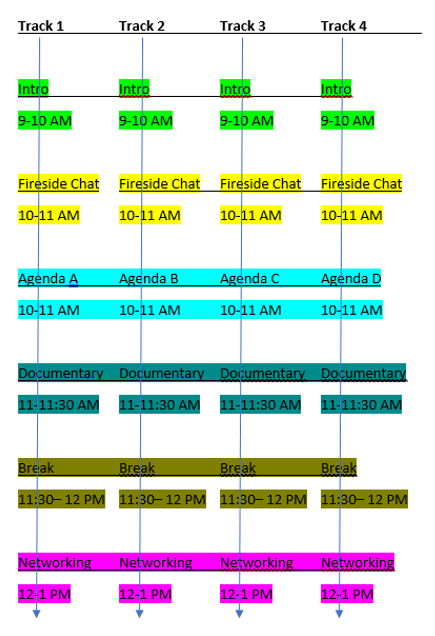
In this example, it makes sense to assign the Intro, Fireside chat, Documentary, Break, and Networking sessions to all tracks, as they’re common for all audiences.
Tip #3
You can restrict a track to a specific audience. In some scenarios, you might want a track dedicated to a particular group, such as your customers or employees. For more information, refer to this guide on restricting a track to a specific audience. Alternatively, attendees can self-select their preferred track during registration. To do this, refer to how to add track selection to your registration form.
FAQs & Troubleshooting
1. Will attendees on a track get notified of sessions going live on other tracks?
Yes, when multiple sessions go live simultaneously on different tracks, a notification pops up on the Agenda tab. Attendees can either:
- Stay in the current session until it ends. In this case, Goldcast automatically redirects the attendee to the next session in the current track after the current one ends.
- Expand the notification on the Agenda tab to see the list of live sessions in other tracks and proactively join a different session based on their interests.
2. Can attendees join sessions in any tracks?
Yes, attendees can switch to sessions in any track (except restricted tracks) using the Agenda tab. They're not limited to attending sessions in their default track.