With Bulk Upload, you can register hundreds or thousands of attendees for your event in one go. First, set up the event registration form, add registrant details in the Sample CSV template available in Studio, and upload it. Goldcast will bulk-register all registrants on your list and generate a unique magic link (event access link) for each attendee.
This feature is useful when organizing internal events, such as company-wide all-hands meetings, where you need to register all employees, or external events, like product demos, where you want to register all existing customers.
This step-by-step guide will walk you through importing multiple registrants for your events in Goldcast Studio.
Things to know
Here are a few pointers to help you successfully upload registrants in bulk:
#1: Use the sample template
Goldcast allows you to import registrants in bulk by uploading a CSV file to the Studio.
For Events
To download the sample CSV template: Open your preferred event, navigate to Registration → Registrants → Add → Upload Bulk Registrants and click Download .CSV template. Edit this template to include registrant information.
For Webinars
To download the sample CSV template: Open your preferred webinar, navigate to Registration → Registrants → Add → Upload Bulk Registrants and click Download .CSV template. Edit this template to include registrant information.


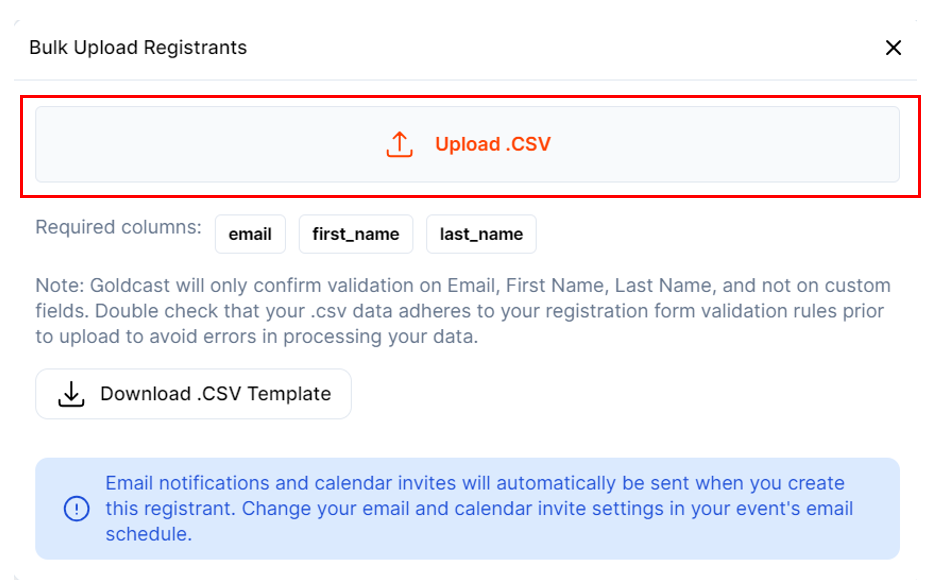
#2: Do not leave the three mandatory fields blank
Every row in the CSV file must include data for the following three required fields: Email, First Name, and Last Name. These fields cannot be left blank, as Goldcast uses this data to generate the unique magic link for each registrant.
#3: Avoid spaces for emails
When entering emails in the template file, ensure there is no space before or after them in the cell.
#4: Include other fields as needed
In addition to the three required fields, you can include other fields on your event registration form. Ensure that the column headers in the CSV file match the field names on your Goldcast registration form. If your registration form has additional mandatory fields, such as Company, Job Title, etc., please note that when bulk uploading registrants, these fields can be left empty if necessary.
How to bulk upload registrants
To register attendees using bulk registration:
- Login to Goldcast Studio and open your preferred event/webinar.
- Navigate to Registration → Registrants using the left sidebar.
Note: For webinars, use the tabs on the top of the page. - Click Add and select Upload Bulk Registrants.
- Click Upload .CSV.
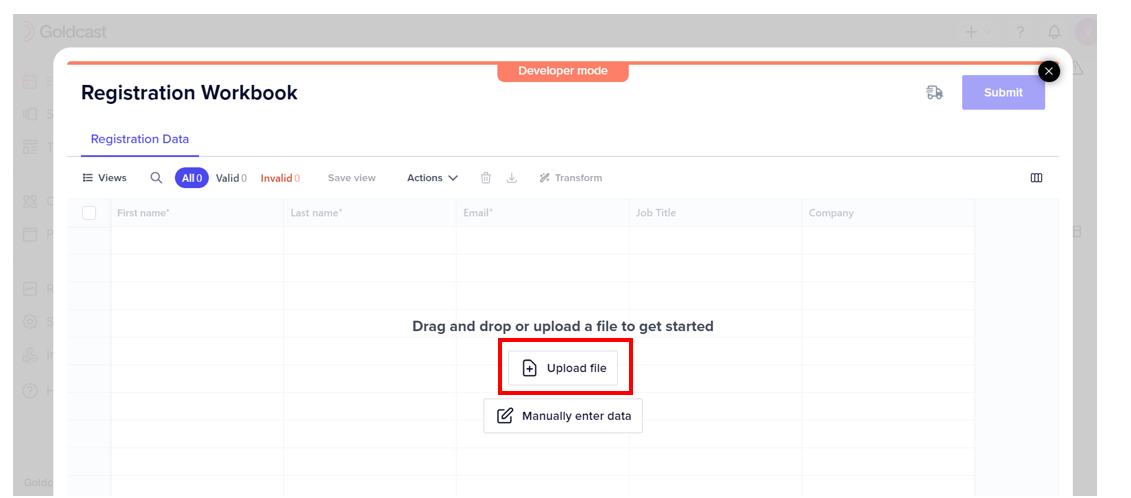
- Drag and drop or upload a file. Alternatively, click Manually Enter Data to enter registrant details here.
- Once the data extraction from your uploaded CSV file is complete, you’ll be taken to a screen to review and confirm each mapping choice.
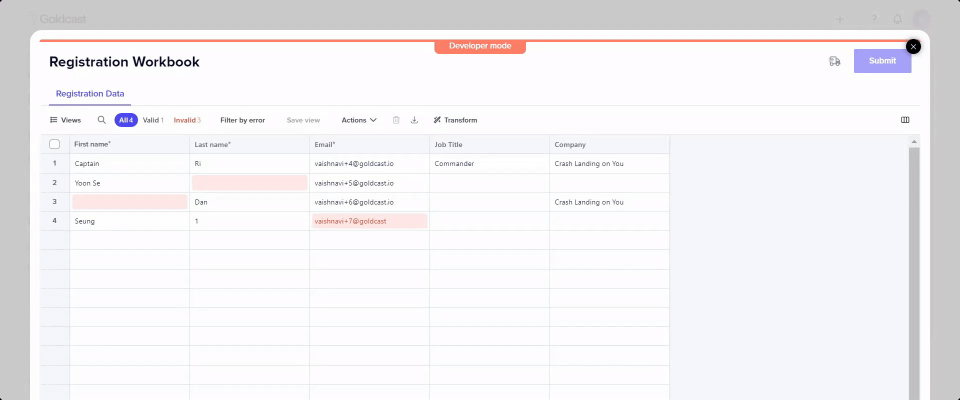
- You can preview the uploaded data and make any changes if required.
Note: It’s mandatory to map the three required fields (Email, First Name and Last Name).
- Click the down arrow next to the Destination Fields to rematch the incoming fields in your uploaded CSV with another field in your registration form.
- You can also exclude non-mandatory columns from mapping by clicking the X icon next to it in the Destination Fields column.
- Once you’ve made the necessary changes and previewed the data, click Continue.
- If there are any errors in data entry, those fields will be marked in red. If you hover over it, you will see the error description. You must fix all errors to proceed. If mandatory data is missing, include them in the CSV file and reupload.
- Once done, click Submit and click Confirm.

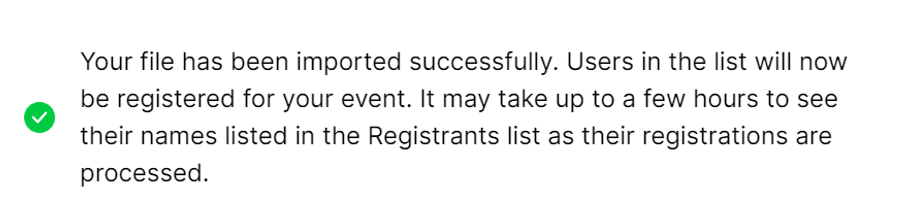
Watch out for the message that indicates the successful completion of the bulk upload process.

What happens next
If you have the registration email enabled, each uploaded registrant will receive the registration confirmation link (that includes the magic link) once they’ve been processed and added to the registrant list.
Heads Up! It might take two or more hours for Goldcast to complete processing the bulk uploaded registrants. Check back later and refresh the Registrant list to see the newly added registrants.
