Follow these steps to send an email to a smaller group of your event registrants:
- Log in to Goldcast Studio with your credentials and open your preferred event.
- Click Registration in the menu on the left of the screen, then click Registrants. This displays the list of registrants for your events (which includes event organizers, speakers, sponsors, and attendees).
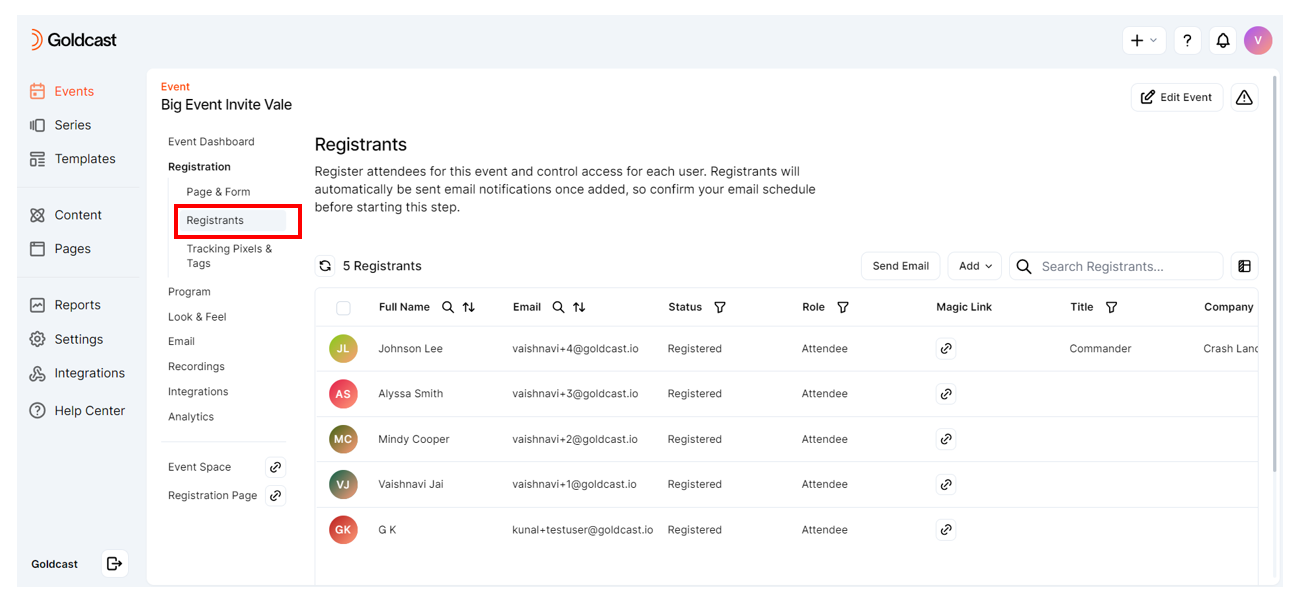
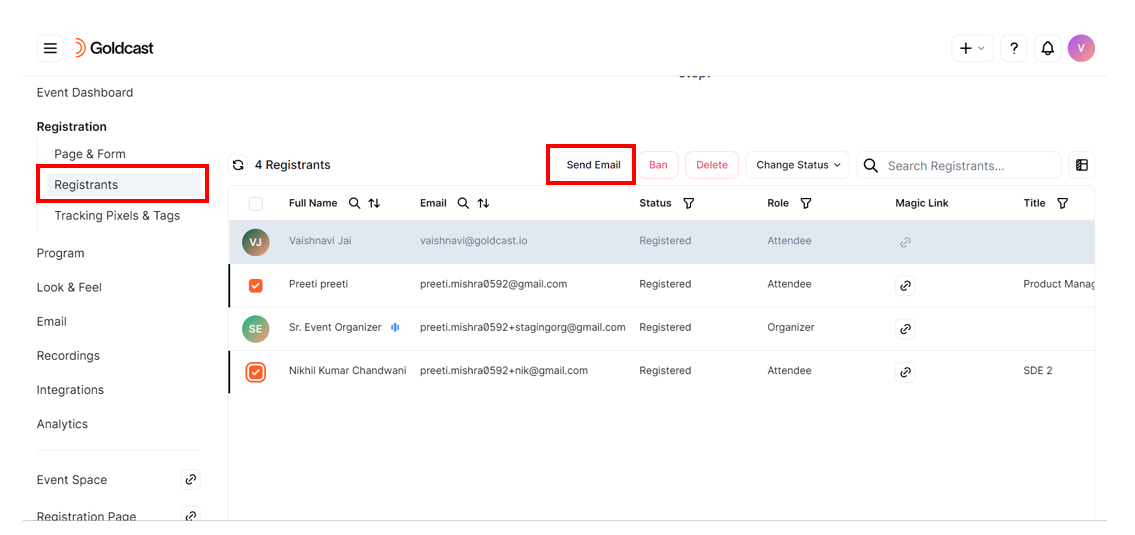
- Select registrants by clicking their user image or initials. You can also use the Search Registrants search bar to find registrants.
- Click Send Email.
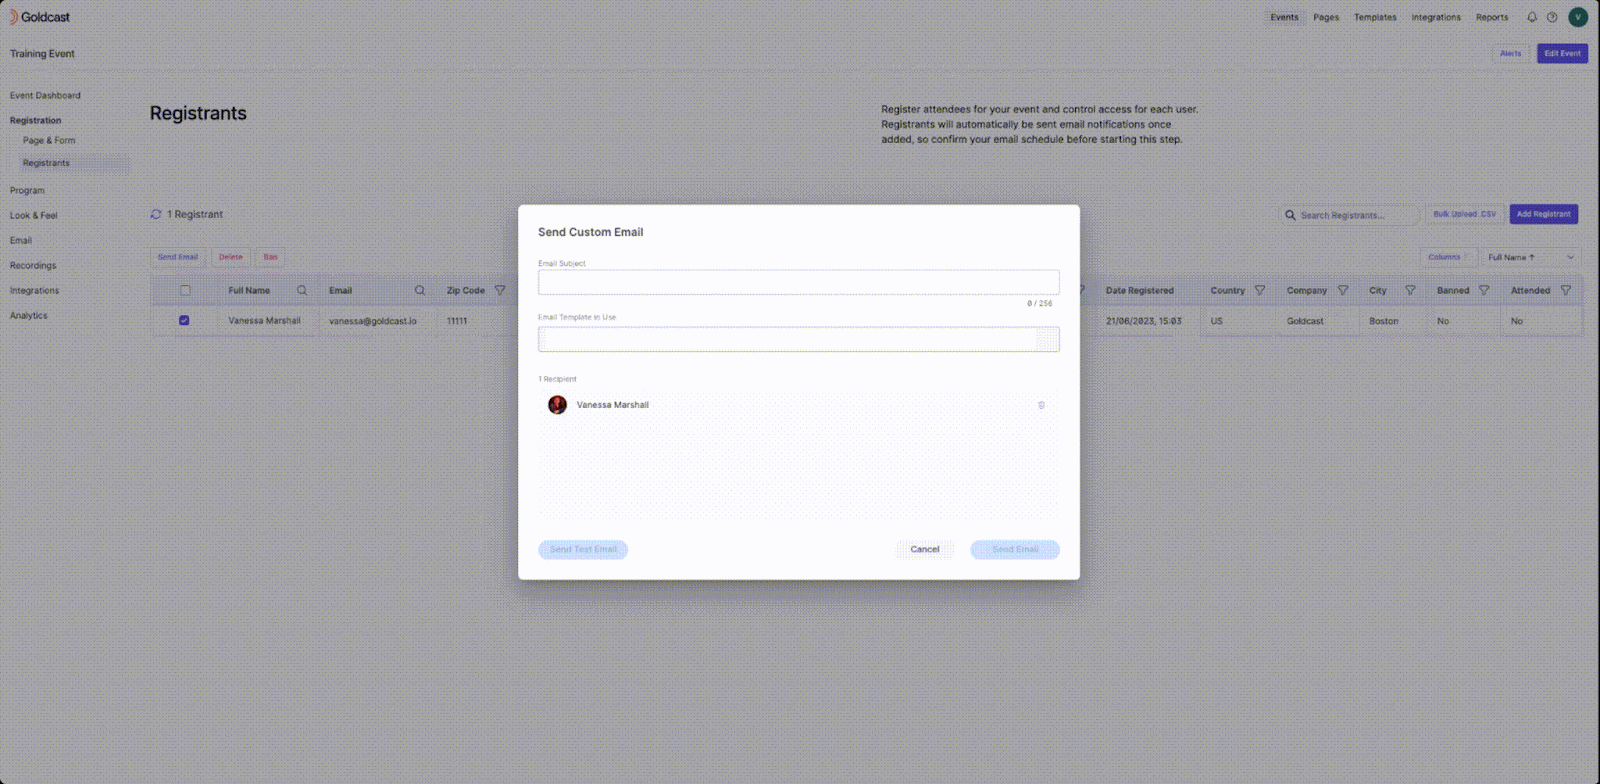
- This opens the Send Custom Email window.
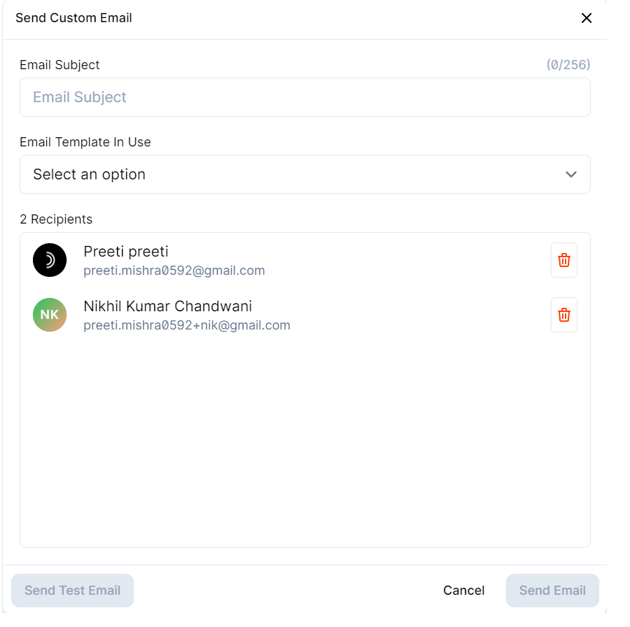
- In the Email Subject text box, enter the subject of your choice.
- From the Template dropdown list, select the required template. (The template must be created in the Email Templates section of your event.) For more information on how to create an email template, see Creating an Email Template.
- Review the list of registrants who will receive this email and delete any registrants if needed.
- Before sending an email to event registrants, it is good practice to send a test email. Click Send Test Email to test if the email is working correctly.
- In the Send Test Email window, enter the recipient's email address in the Email Address text box.
- Click the Add people icon to add multiple registrants.
- Click Send.
- If the test email works correctly, click Send Email.
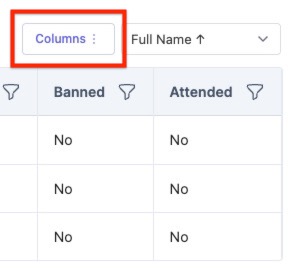
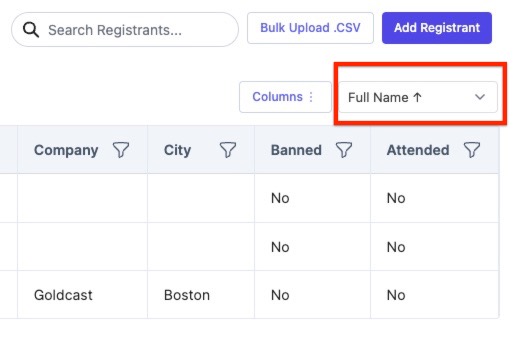
You can search, sort, and filter your Registrants list to help you select a smaller group of registrants to send to - for example, only those who have attended your event. You can sort your Registrants list by clicking the Sort by dropdown.
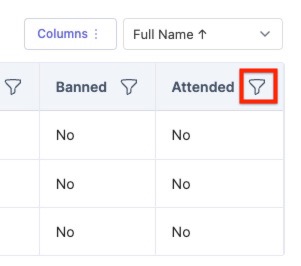
You can filter this list by any column by clicking the filter icon next to that column.
To select which columns you'd like to view, click Columns and then select from the dropdown the columns you'd like.
Some of the basic column options you will see include:
- Full Name
- User Magic Link
- Entered - A user has Entered the event if they have clicked their magic link and clicked the Enter Event button at any time.
- Attended - A user has Attended the event if they have clicked their magic link and clicked the Enter Event button during the time the event is live.