Adding filters to event hub pages offers the following benefits:
- Enhances the event experience by helping the right audience find the right content. Your audience can narrow down and find specific events that match their interests.
- Event marketers can create a more user-friendly and engaging experience for their audience. Marketers can use pre-applied filters on a page to highlight specific event content that aligns with their marketing goal.
Goldcast allows you to add multiple filters or combine filters using Event Tags to filter events according to type, date, and other customized criteria. This article explains how to add default and customized filters to enhance the user experience on your event hub.
Types of filters
Goldcast offers three filter types in the page builder for the All Events, Upcoming Events, and Past Events blocks.
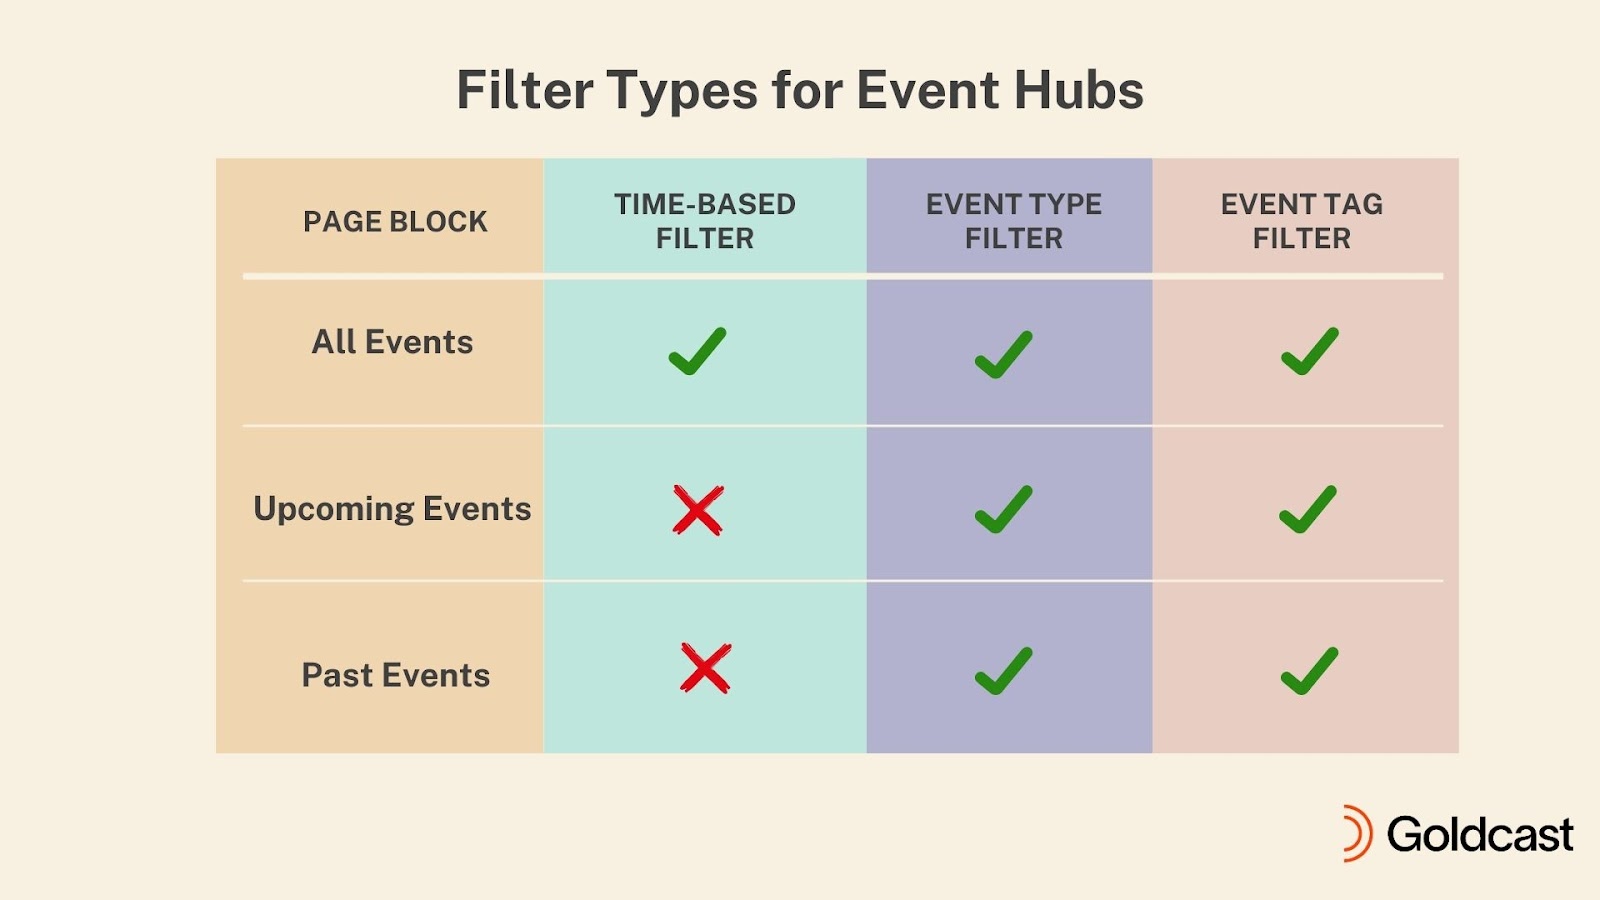
1. Time-based filter
 Note: This filter is only available for the All Events block.
This filter allows site visitors to filter events based on whether the event is:
- Upcoming (set to happen at a future date) or
- Past (finished event that’s available in on-demand mode)
When an event listed on the hub page is over, it will automatically move from Upcoming to Past. You don’t have to perform any further manual action. By default, the upcoming events option is selected in the filter so users can view upcoming events quickly.
This filter lists events in the following chronological order in each of these options:
- All events - Displays all events ordered by event start date; those farthest in the future appear first.
- Upcoming - Ordered by event start date, those happening nearest in the future to those farthest.
- On-demand - Events that ended most recently appear first, followed by the older ones.
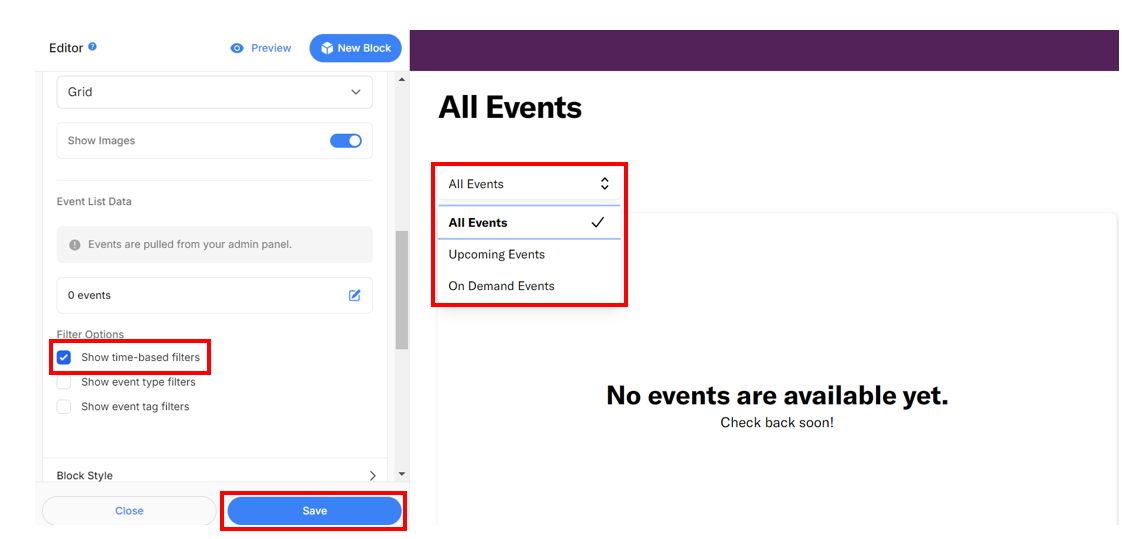
Follow these steps to add the time-based filter:
- Select your preferred event block and navigate to the Filter Options section.
- Select the Show time-based filters checkbox. By default, the upcoming events option is selected. Site visitors can choose a specific event type as per their requirements.
- Click Save.
2. Event type filter
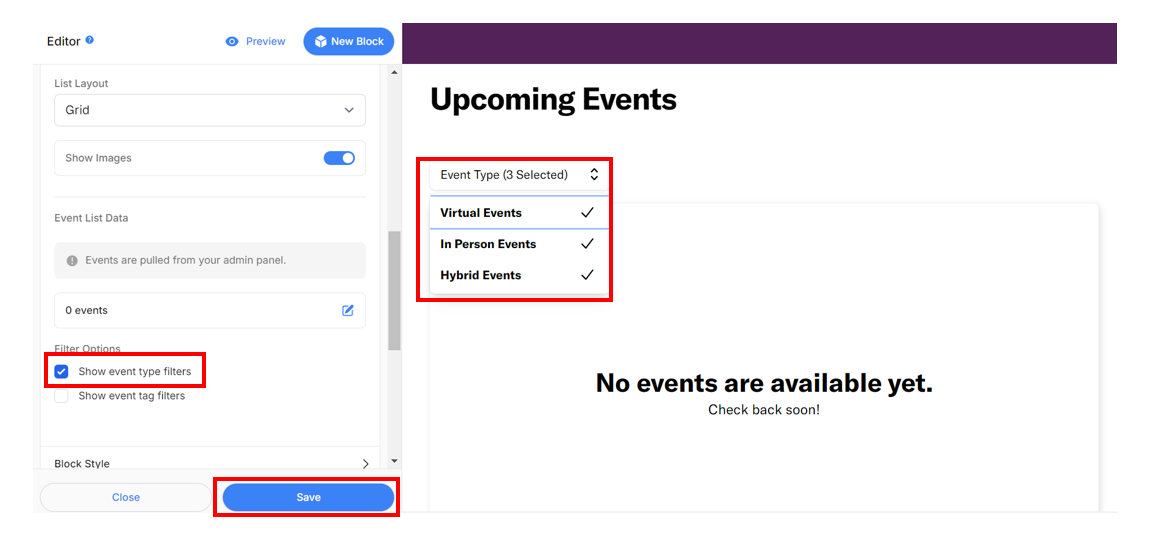
This filter allows site visitors to filter the events listed on the hub based on their type.
- Virtual
- In-person (Field)
- Hybrid
Note: This filter is available for all three event blocks: All, Upcoming, and Past.
Follow these steps to add the event type filter:
- Select your preferred event block and navigate to the Filter Options section.
- Select the Show event type filters checkbox. By default, all three event types are selected. Site visitors can choose a specific event type as per their requirements.
- Click Save.
3. Event tag filter
This filter is also available for all three event blocks: All, Upcoming, and Past. It allows page visitors to filter events based on event tags you created in the Tag Library in Goldcast Studio. This is a versatile filter that you can customize for each hub page to suit your specific requirements.
You can group many tags and add them to a tag filter. For example, suppose you’ve tagged your events according to location, like the US, Canada, EMEA, and Asia Pacific. In that case, you can create a tag group Location and a corresponding event filter, making it easy for your audience to select events specific to their geographic location.
You can add multiple event tag filters to a block. For example, you can create a filter for location, another for event topics, another for filtering events based on speakers, etc.
Follow these steps to add an event tag filter:
- Click the Show Event Tag Filters checkbox.
- Provide a name for the tag group. This is the name that will be displayed on the hub.
- Select the tags you want to add to this group by clicking the eye icon
. To select all tags, click the eye icon
- You can use the search bar to find specific tags.
- Use the edit icon
to create a tag alias.
Note: The tag alias is ideal for customers who host hubs in various languages or those with different names for tags internally and externally. If you wish to use the original tag name instead of the alias, all you have to do is clear the alias and save the changes. The filter will now display the original tag name.
The tag alias is visible only in the particular block on the hub page. They do not impact the original tags in your Tag Library in Goldcast Studio. Also, the tag alias you create applies only to that specific block. You can create different aliases for different event blocks.
- Once done, click the checkmark
in the top right corner to save your changes.
- Repeat these steps to create the next event tag filter.
How do filters work? Important points to know
- By default, the All Events block has the time-based filter enabled. You can turn it off if you don’t require it.
- Time-based and event-type filters operate cumulatively (using the AND operator). When selected, these filters display the events that meet both these conditions. For example, if a visitor selects upcoming events in the time-based filter and in-person events in the event-type filter, they will be shown a list of all upcoming in-person events.
- However, event-tag filters work using the OR operator. For example, if a visitor chooses the USA in the location tag filter and marketing in the department tag filter, they will be shown a list of all events with either US or marketing tags.
- Continuing with the above example, applying all these four filters will display all upcoming in-person events with marketing or US tags.
- Note that you can select multiple tags within the same filter group. For example, within the location tag, you can choose both USA and Latin America.
- There can be an overlap in the tags used in different event tag filters. This means you can use the same tag in multiple event tag filters if it fits your use case.
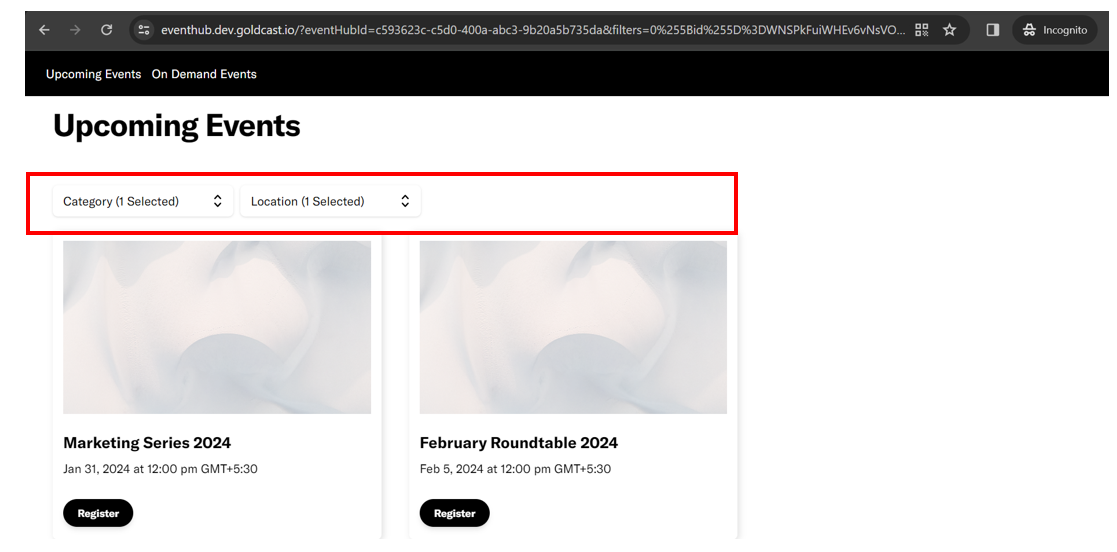
Sharing the hub page URL with pre-applied filters
There might be scenarios where you want to share only specific events on your hub page with a particular audience group. For example, if you host events in multiple languages to audiences in different regions, it makes sense to show events hosted in your target audience’s language.
In this case, you can pre-apply the required filters on the page and share the hub page URL with appended parameters. When prospective visitors click this link, the page automatically loads the pre-filtered view.
Here’s an example of a page URL with filters applied.
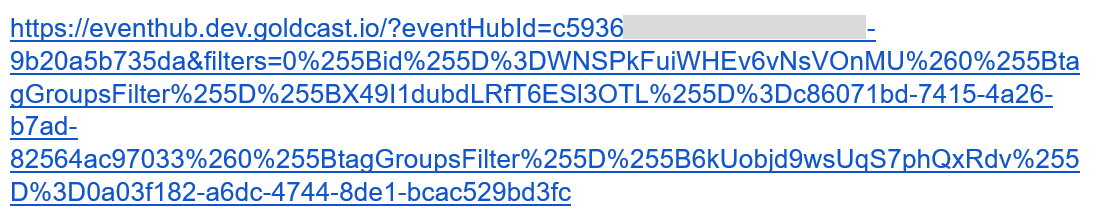
Clicking on this link takes your audience to the event hub with pre-applied filters, listing only specific events according to your filtering criteria.