Goldcast offers a variety of video production tools, such as speaker name cards, onstage images, scrolling tickers, on-stage messages, and global announcements, to customize the look and feel of the event stage. These elements make your events more interactive and engaging while matching your event's theme and design styles.
On this page, we'll walk you through the different video production elements you can add to your Goldcast events, including:
Name Card
Name Cards display the speaker’s name and information in colors that match your event’s branding.
To enable name cards:
- Log into Goldcast Studio using your credentials, navigate to the Events tab, and select the event you want to edit.
- Navigate to the Look & Feel section using the left sidebar.
- Expand the Engagement & Communication section on the right.
- Expand the Name Cards section and turn on the toggle.
You can further customize the appearance of the name cards via the following options:
- Set the Card Type as Rounded or Rectangular using the dropdown list.
- If you want to display the Speaker’s Title and Company under their Name, enable the Show Speaker Title & Company toggle.
- You can also reverse the colors of the Name Card by enabling the Reverse Gradient Colors toggle.

Logo
Organizers and speakers can share an image, such as company or sponsor logos, on stage during the event.
Follow these steps to upload on-stage images to your event:
- Log into Goldcast Studio, navigate to the Events tab, and select the event you want to edit.
- Navigate to the Look & Feel section using the left sidebar.
- Expand the Engagement & Communication section on the right.
- Expand the Onstage images or logos section, and click Upload Image.
Things to know
- Goldcast captures logos shared onstage in the event recording.
- You can upload more than one image. Repeat the steps above to upload another image.
- Make sure the images/logos you upload follow these specifications:
- Must be a square (1:1 aspect ratio) with a maximum of 1600 x 1600 px
- Supported file formats: JPEG or PNG
How to share an image onstage
Follow these steps to publish the uploaded logo (or image) on stage:
- Use your magic link to open the event landing page.
- Click Enter Backstage to join the backstage of your session.
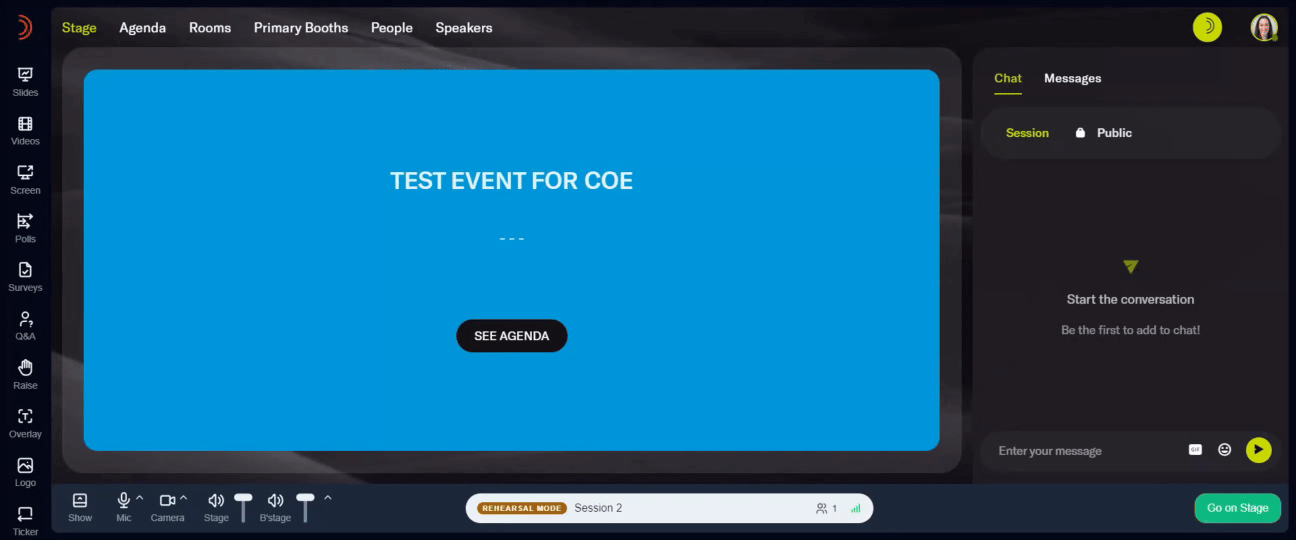
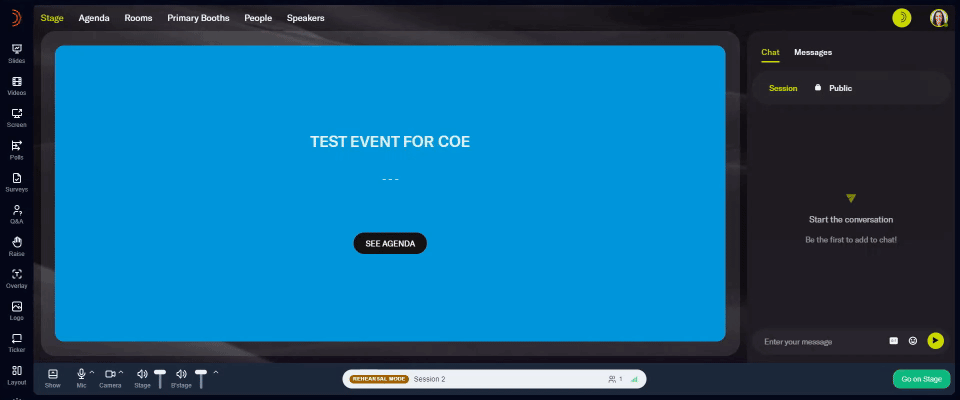
- Click Logo on the left-side panel. You can see the images you uploaded in Goldcast Studio here.
- If you’ve added more than one image, select the Share button corresponding to the image you want to share on stage.
- Select the position where you want to share the image onstage.
- Click the
icon to the top-right of the image onstage to stop sharing it.
Heads Up! You can share only one image at a time. If you’re sharing a Full Screen image, you must Stop Sharing the image to reveal the other stage elements, such as speaker videos, shared PPTs, etc.

Overlay
Organizers can post a message or announcement to the stage via overlay.
Heads Up: ONLY organizers can publish messages on stage and NOT speakers.
- Use your magic link to open the event landing page.
- Click Enter Backstage to join the backstage of your session.
- Click Overlay on the left-side panel.
- Type the message you want to publish on stage in the Message text field.
- Click Share Banner to publish it on stage.
- To remove the message from the stage, click the Stop Sharing button at the bottom right of the stage. Alternatively, click the Stop Banner checkbox in the left panel.
Heads Up! When you share a banner, attendees can still hear stage audio, including the speakers. Therefore, it is important to mute the speakers if you do not want any audio to be heard while the banner is being displayed on the stage.
Ticker
Organizers can create and publish scrolling ticker messages on stage. You can use this ticker to share announcements, links to external surveys, or any other URLs during the event. Only attendees viewing the session stage where you publish the ticker can see the scrolling ticker message.
Note: The ticker background is a gradient of the button background color; The font color matches the button font color on your event space.
Heads Up: ONLY event producers can publish tickers and NOT speakers.
Follow these steps to publish a scrolling ticker on stage:
- Use your magic link to open the event landing page.
- Click Enter Backstage to join the backstage of your session.
- Click Ticker on the left-side panel.
- Type the scrolling message you’d like to publish on stage in the Message text field.
-
Optional: You can also enter a URL to make the ticker a clickable link.
Heads Up: While adding a link, make sure to include the complete URL, starting with https://www
- Click Share Ticker to publish it on stage.
- To remove the ticker from the stage, click the Stop Sharing button at the bottom right of the stage. Alternatively, click the Stop Ticker button in the left panel.
Note: Scrolling tickers are NOT captured in session recordings.
Global Announcement
Goldcast also allows you to post an announcement to all attendees, regardless of where they are in the event. This scrolling message appears across the top of the event in all sessions, rooms, booths, etc.
Heads Up: ONLY event producers can make a global announcement and NOT speakers.
Follow these steps to publish a scrolling announcement to the whole event:
- Once in the Events Space, click your profile icon in the top right corner.
- Click Make an Announcement, and select the Create button.
- Enter your announcement in the Enter Message text field.
- Optional: You can turn your announcement into a clickable link by entering a URL in the text field.
- Click Launch to publish your announcement across the event.
- To unpublish, click the Stop Sharing button in the top right corner. You can also go to Profile → Make an announcement and click the Stop button to remove the announcement from the stage.
Note: Scrolling announcements are NOT captured in session recordings. These messages have a 50-character limit.
FAQs
How do I track ticker analytics (like the number of clicks)?
We currently don't track the number of clicks on tickers. However, you can capture the clicks by adding a UTM parameter to the link you add to the ticker. For more information, refer to UTM Parameters in Goldcast.