| Plan Availability | Starter | Pro | Premium | Enterprise |
 |
 |
|
|
For customers with contracts starting March 2024 or later, feature availability is based on your pricing tier. If interested, contact your CSM or our Sales Team to discuss pricing options.
Goldcast supports embedding HubSpot forms in place of our native registration form. This article will walk you through this process.
Step 1: Create your HubSpot form and copy the embed code
 Note: For detailed instructions on styling your HubSpot form, we recommend checking HubSpot's documentation on how to set up and style a HubSpot form to share on external sites like Goldcast.
Create a HubSpot form to capture the required details from event registrants. Once you’ve created and saved the form, the next step is to copy its embed code.
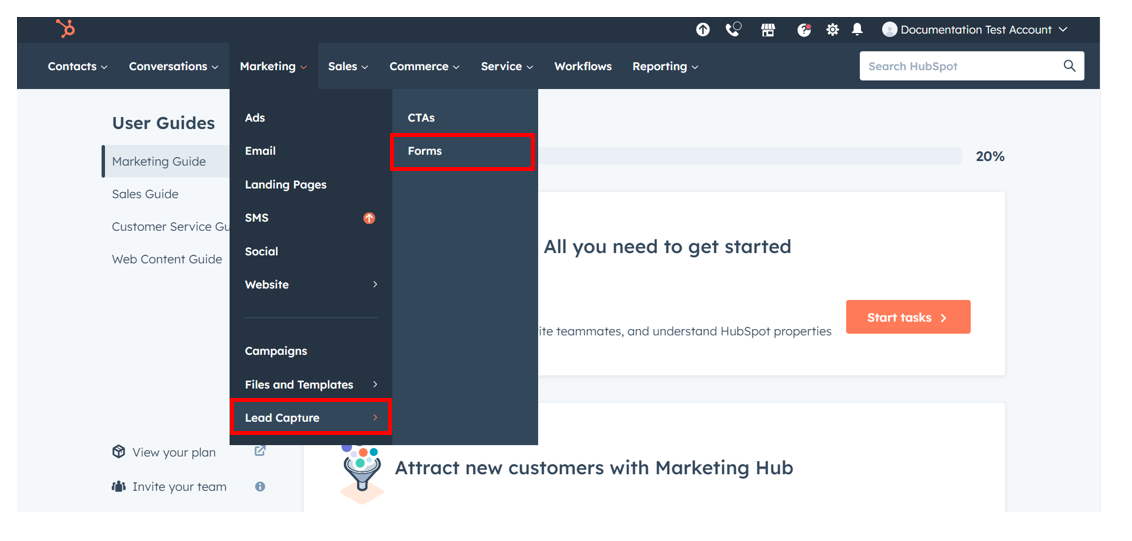
- Log in to your HubSpot account and navigate to the Forms section (Marketing → Lead Capture → Forms).
- Select the form you want to embed on the Goldcast registration page.
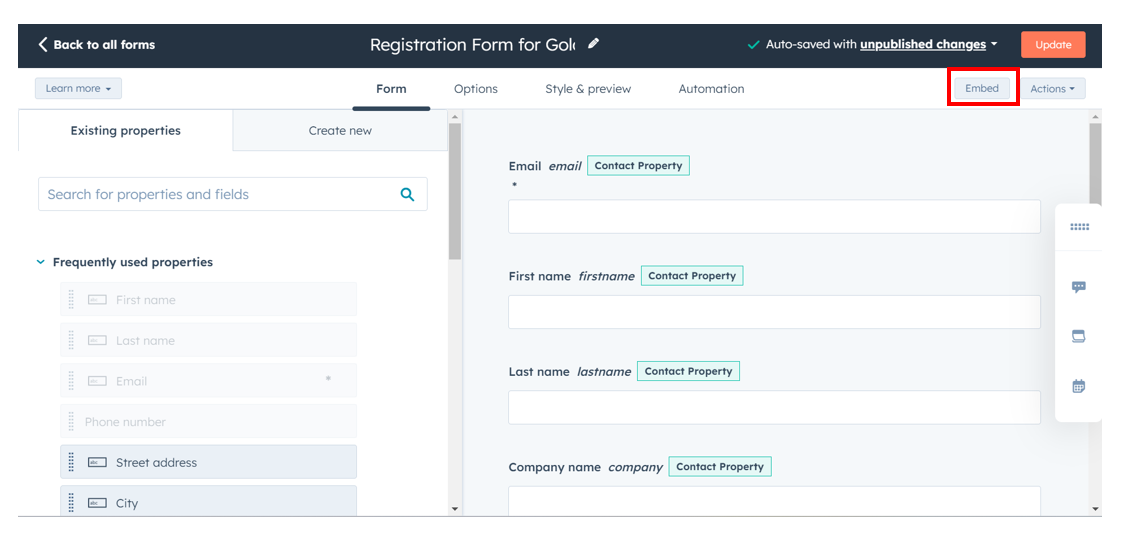
- Click the Edit Form button and click the Embed button on the top right.
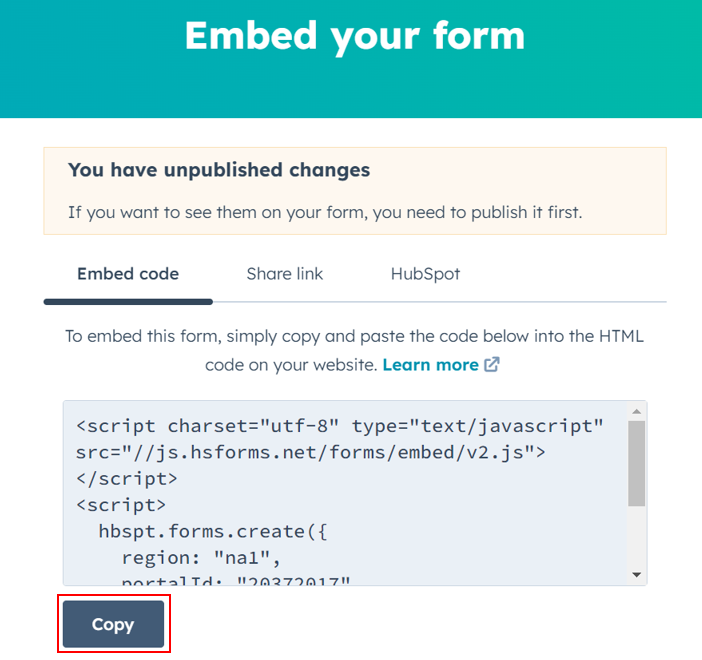
- Select Embed Code and click Copy to copy the code to the clipboard.
- Paste the code in Notepad or any other word-processing software, and keep it handy.
Alternatively, you can copy the embed code by clicking the Actions button next to the form and selecting the Share option. This opens the Embed your Form popup. Copy and paste the embed code in Notepad or other word-processing software.
Step 2: Paste the embed code in the Goldcast Registration Page Builder
After copying the embed code in HubSpot, follow these steps:
- Login to Goldcast Studio and select your preferred event.
- Navigate to Registration → Page & Form using the left sidebar.
- Click the Edit button in the Registration Page section.
- Click the arrow next to the Registration block.
- In the Form Type dropdown, select HubSpot.
- In the HubSpot Snippet field, paste the embed code you copied in the previous step.
- Click Apply.
- Select if you want to make the form Popup or Embedded.
- Click Save. You can preview the HubSpot form on the right side of the page.
Note: After applying your embed snippet, click the Save button in the builders' footer to deploy your HubSpot form to your live registration page.
Step 3: Test the HubSpot form
Follow these steps to check if the embedded HubSpot form works as intended:
- In the Page Editor, click the arrow next to the Hero section and click the Register button in the preview pane. Alternatively, you can click the Register CTA in the navigation bar if you’ve included it.
- Verify if clicking the Register button opens the HubSpot form.
- The next step is to create event registrants in Goldcast using HubSpot workflows.
- Once done, test that registrations from the HubSpot form are reflected in your Goldcast event in the Registrants tab.
You’ve now successfully embedded your HubSpot form in your Goldcast event and set it up to sync registrations from HubSpot to Goldcast.
FAQs & Troubleshooting
1. How to customize the registration success message that registrants see?
If you’ve embedded a HubSpot form, you can customize the Thank You message or page redirect option directly in HubSpot. To learn more, refer to HubSpot’s documentation on Setting Up and Styling Forms.
2. How to edit the HubSpot embed code?
Follow these steps to make any changes to the embedded code:
- Navigate to Registration → Page & Form using the left sidebar.
- Click the Edit button in the Registration Page section.
- In the HubSpot Snippet field, click Edit. Make your required changes and click Apply.
- Click the Save button in the builders' footer.