Overview
If you'd like to collect event registrations via a Splash page, you can pass those registrations to your Goldcast event directly using an HTTP Request.
Collect the Event ID and Form ID from your Goldcast Event
- Login to Goldcast Studio, click the hamburger icon on the top left, select Events and choose your preferred event.
- Once you're in the event dashboard, click Integrations on the left sidebar.
- Scroll to the About this Event section, and click the copy icon next to the Form ID and Event ID.
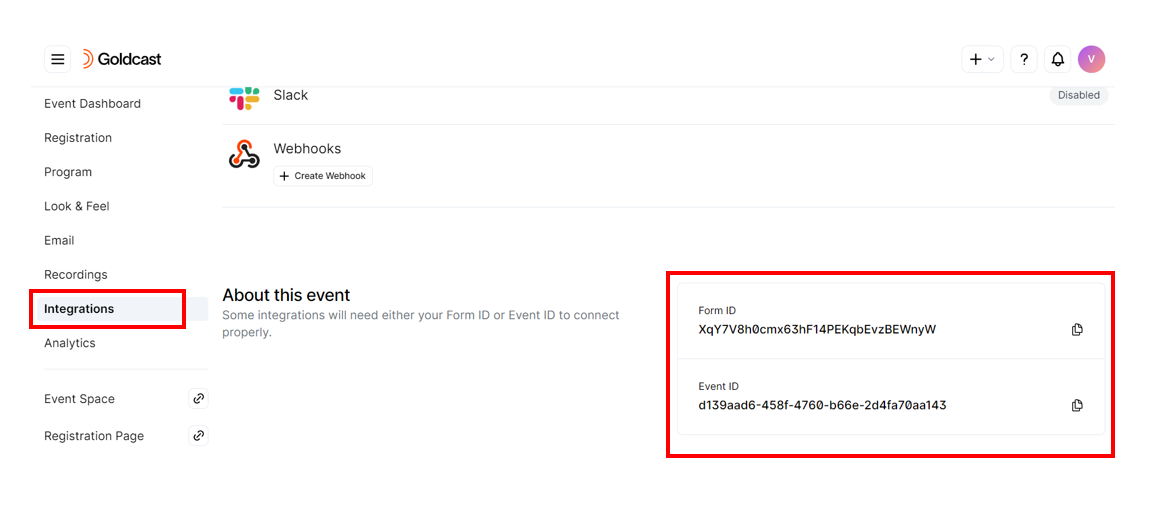
Make sure to paste and save the Form ID and Event ID in Notepad or any other word-processing software, as both these fields are required for a successful registration post.
Add an "HTTP Request" Integration to your Splash Event
Within the Settings of the event, navigate to the Integrations tab.
Add an HTTP Request Integration to your Event Level Integration.
Configure The HTTP Request
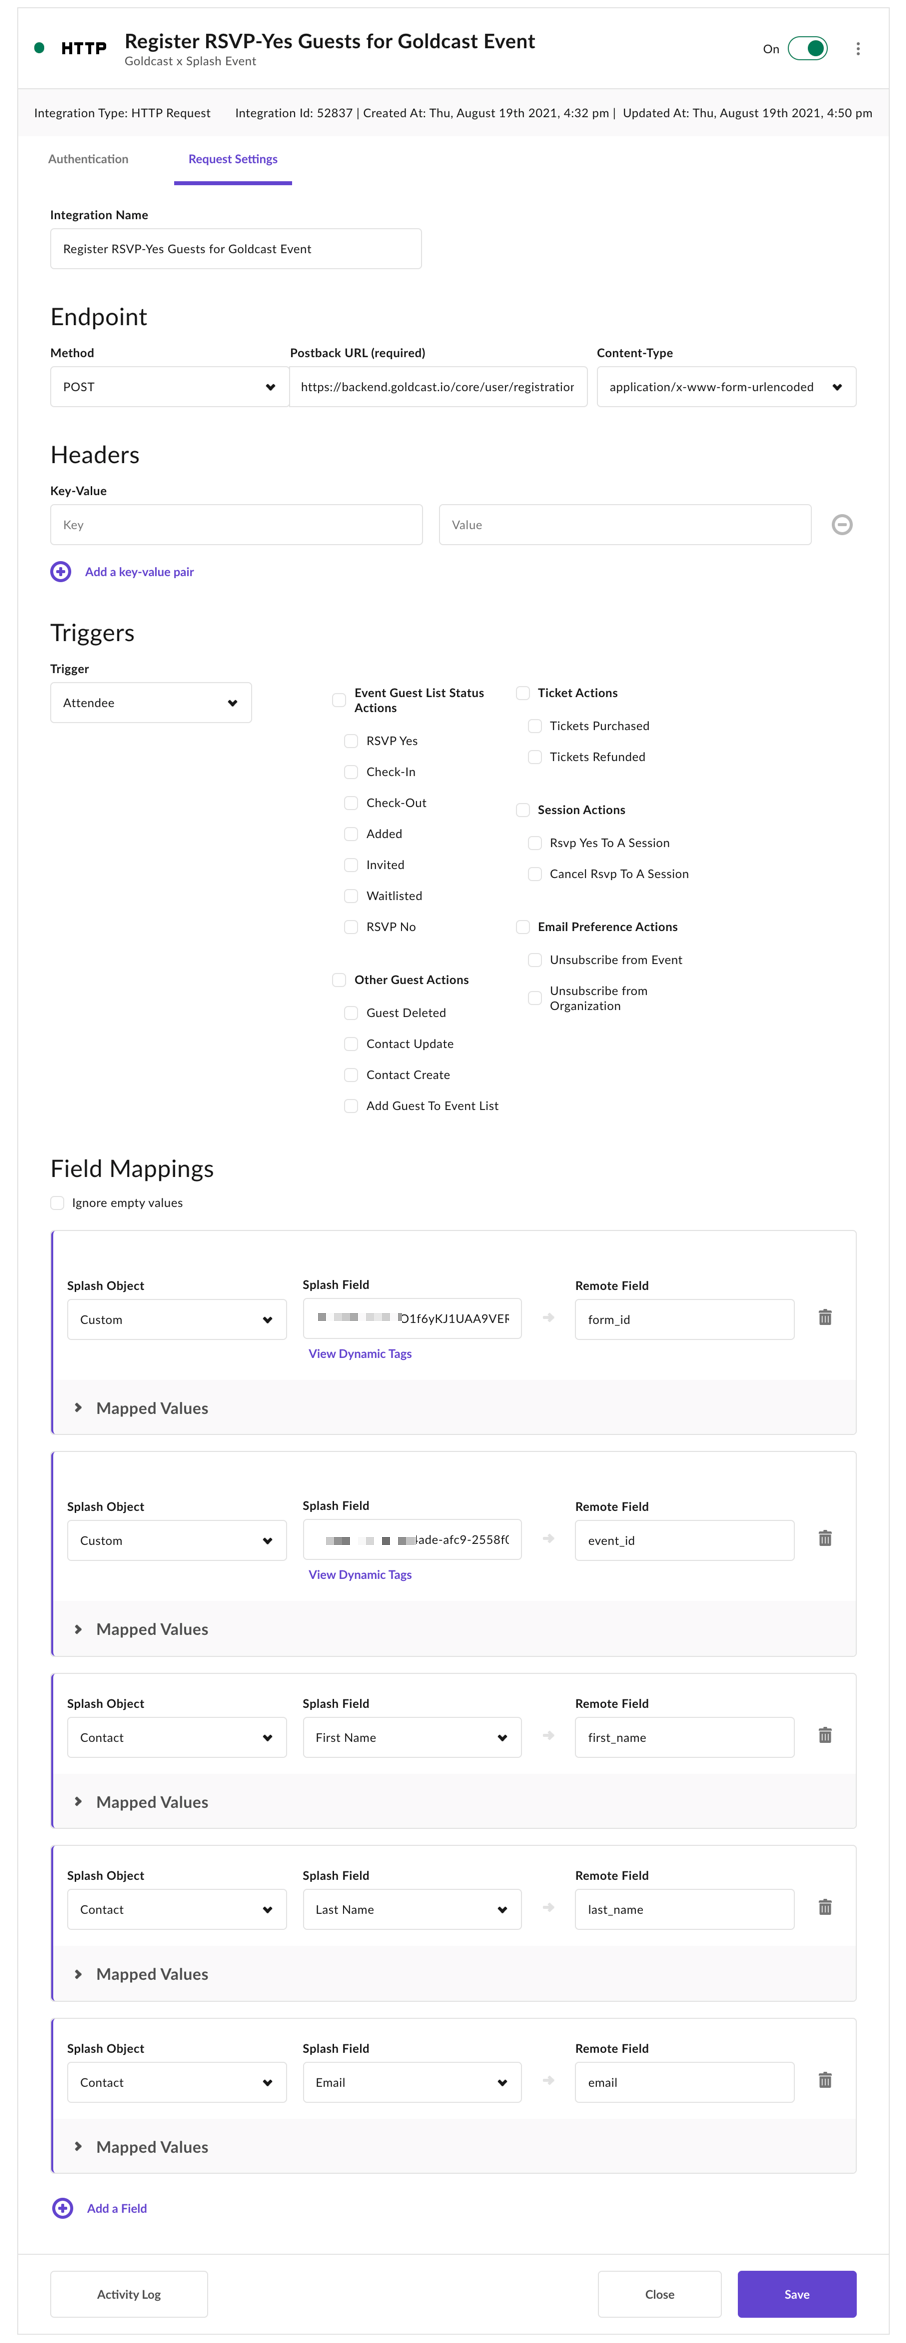
Within the HTTP Request integration, navigate to the Request Settings page. On the Authentication page, leave the Authentication Type as 'No Authentication'.
Change the name of the 'HTTP Request' to something meaningful like 'Register RSVP-Yes Guests for Goldcast Event.'
Endpoint
Leave the HTTP method as POST and send the Postback URL to the following address:
https://backend.goldcast.io/core/user/registration/
Set the content type to application/x-www-form-urlencoded.
Headers
No headers are needed.
Triggers
Keep the Trigger as Attendee and check RSVP Yes as the Action.
Field Mappings
Map fields from your form to the form post field names below. Please take note of the required fields. Ensure you include the appropriate Event ID and Form ID values as a 'Custom' type Splash Object.
|
first_name required |
First Name of the Goldcast Event User |
|
last_name required |
Last Name of the Goldcast Event User |
|
email required |
Email Address of the Goldcast Event User |
|
event_id required |
Event ID of the Goldcast Event |
|
form_id required |
Form ID of the Goldcast Event |
| company | Company Name of Goldcast Event User |
| title | Job Title of Goldcast Event User |
| linkedin_url | LinkedIn URL of Goldcast Event User |
Enable The 'HTTP Request' Integration
Once your integration is fully configured and saved, be sure to 'Enable' the integration.

For more details on configuring Splash HTTP Request Integrations, check out Splash's HTTP Request Integration Guide.