| Plan Availability | Starter | Pro | Premium | Enterprise |
| Add-on |  |
 |
 |
For customers with contracts starting March 2024 or later, feature availability is based on your pricing tier. If interested, contact your CSM or our Sales Team to discuss pricing options.
The Wistia Integration streamlines the process of uploading your Goldcast recordings by enabling automatic transfer to a designated Project within Wistia's platform.
Prerequisites
Goldcast
- Event Organizer access to your instance of Goldcast.
Wistia
- A Wistia account with API Token settings access.
Connecting a Goldcast Org to a Wistia Account
 Note: Before beginning the Wistia integration process, we recommend logging into your Goldcast instance and Wistia account to avoid having to do so later in the setup process.
Installing the Wistia Integration
- From the Goldcast Marketplace page, click on the "Learn More" link on the Wistia tile.
- Select the "Install This App" button to initiate the installation.
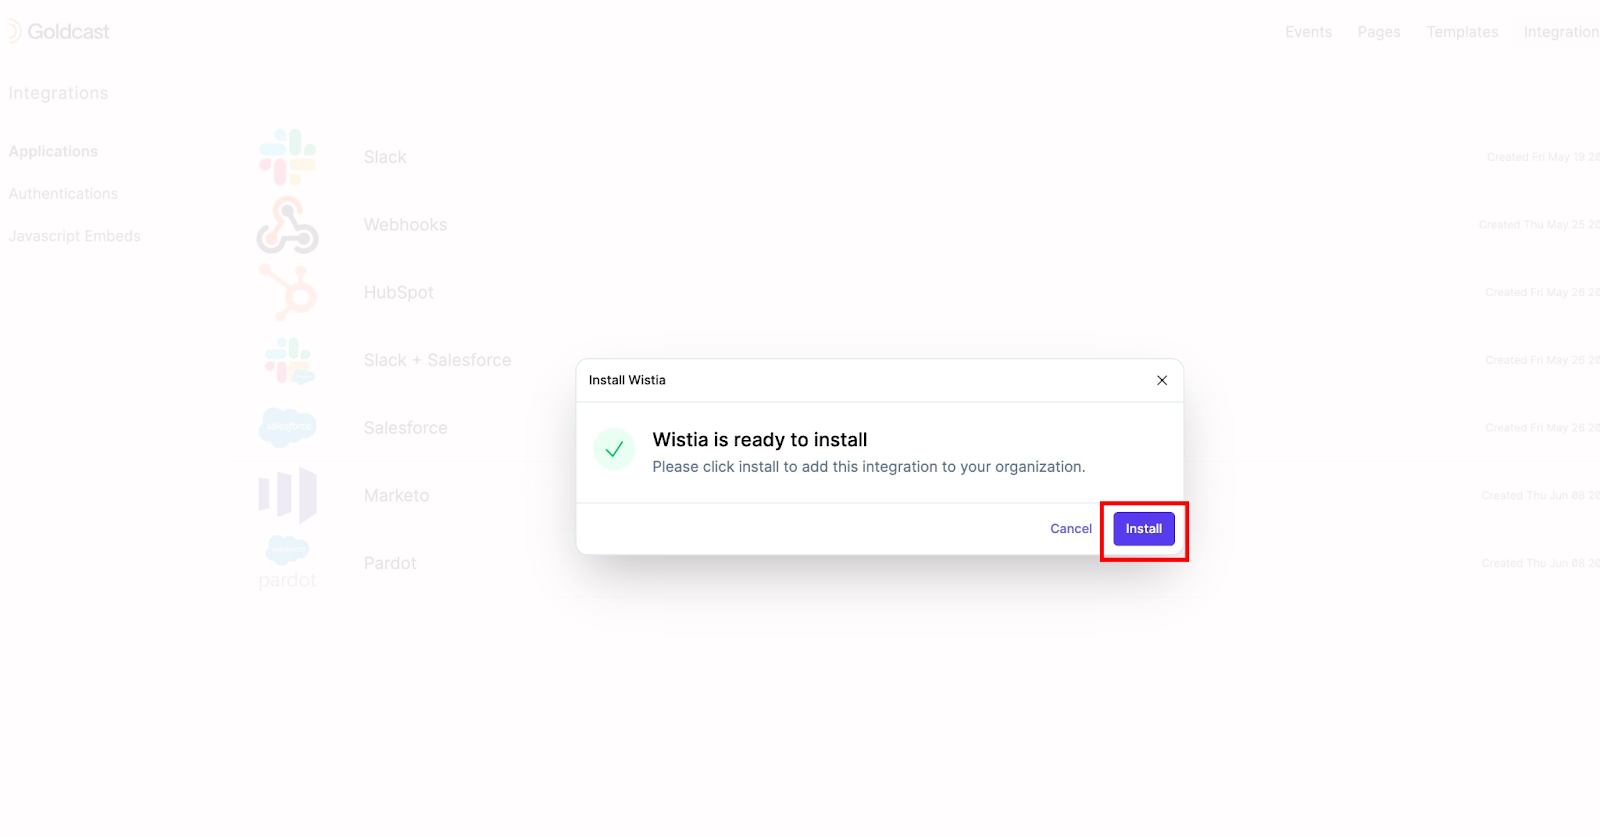
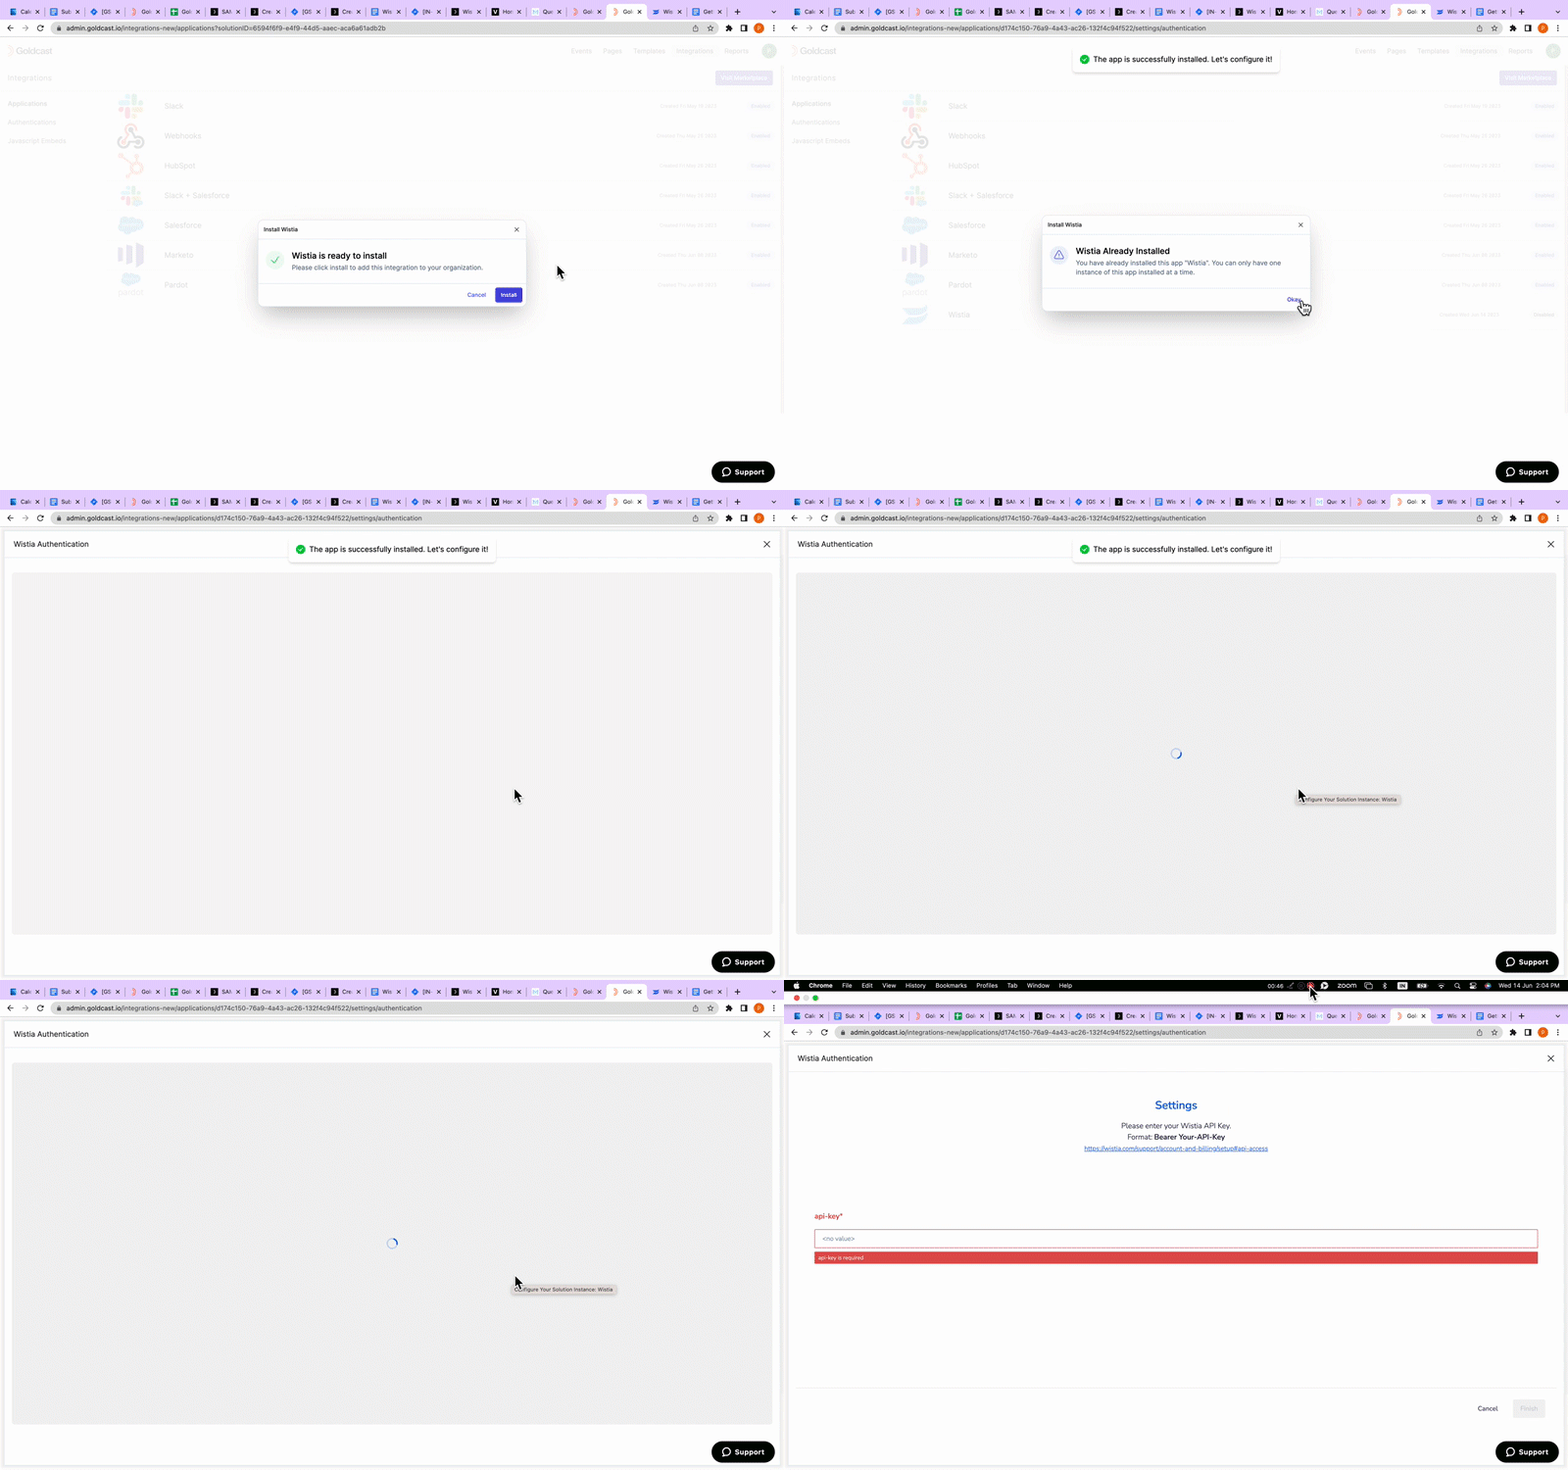
Upon clicking, you will be redirected to the Integrations page for your Goldcast Org, and a pop-up titled Install Wistia will appear. - Click the Install button to complete the installation.
- You will receive a confirmation pop-up for the installation, and then you will be redirected to a screen to authenticate your Wistia account.
Connecting Your Wistia Account
Before you connect your Wistia Account to Goldcast, please follow these steps to obtain your API Access Token key from your Wistia Account.
Open a browser tab and log in to your Wistia account. Make sure you keep your Goldcast browser tab open to continue the installation process later.
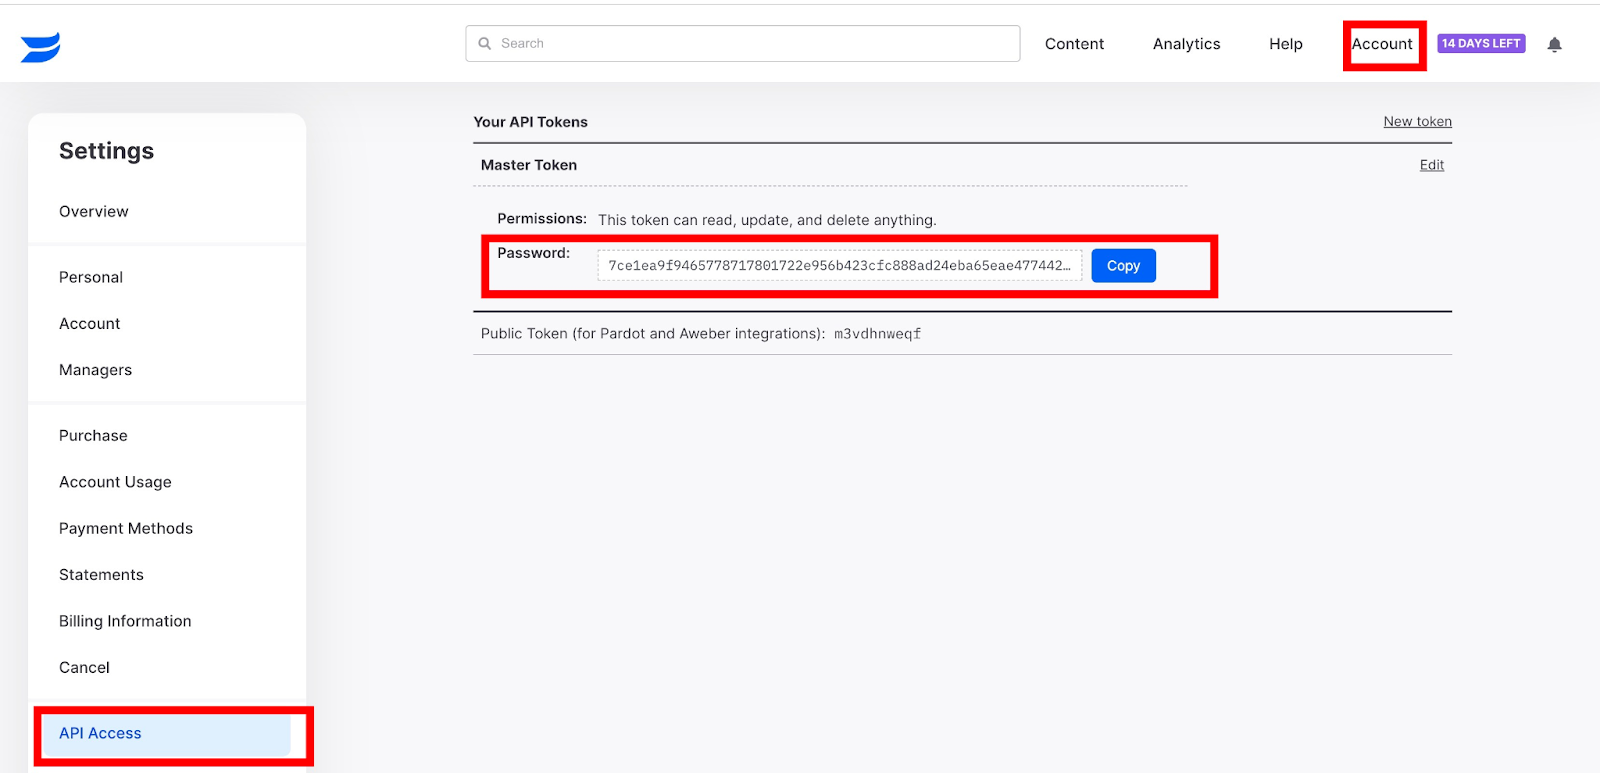
- In Wistia, navigate to the Account menu.
- Click on Settings to access your Wistia Settings. Scroll down on the left sidebar and click on API Access.
- Here, you will find a list of API tokens associated with your Wistia account. Look for the Master Token section.
- Copy the API Token Password displayed in the text box belonging to the Master Token.
- Switch back to the Goldcast browser tab.
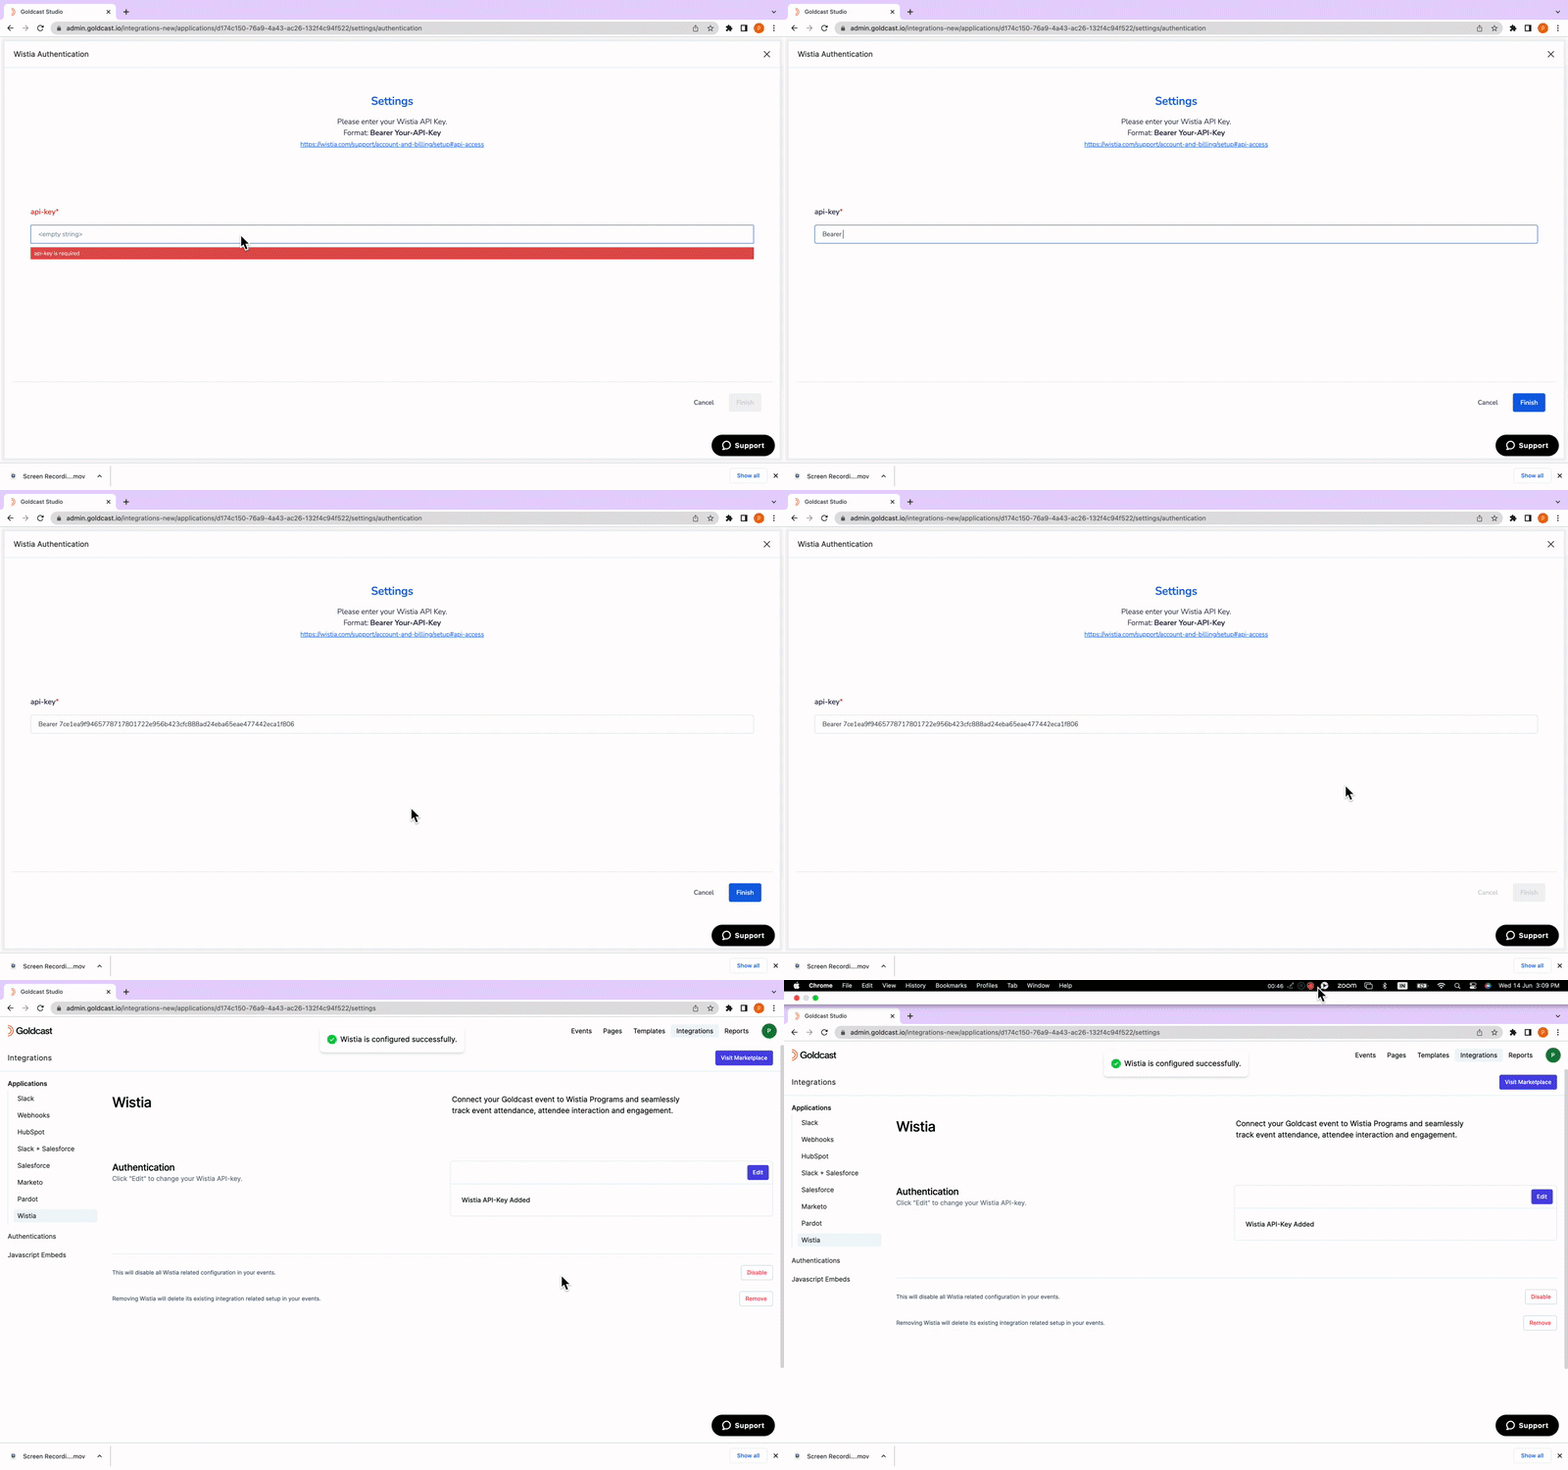
- In the designated field on your screen, enter the copied API Token Password in the following format: Bearer <space> ‘copied-token-key’.
Example: Bearer abcdefghijklmnopqrstuvwxyz1234567890
Note: Ensure the format is correct to ensure successful authentication. Include the "Bearer" prefix, a space, and the token you copied from Wistia.
- Click on the "Finish" button to complete the Integration Setup for Wistia in your Goldcast account.
- If the account connection is successful, a confirmation message will pop up, indicating that Wistia has been configured successfully.
By following the above steps, you can seamlessly integrate your Wistia Account with Goldcast.
Connecting Wistia Project to your event
To set up the Wistia integration for a specific event, please follow these steps:
-
Select the Event
Log in to Goldcast Studio with your credentials. Click the hamburger icon on the top left, and select the Events tab to get a list of all your events.
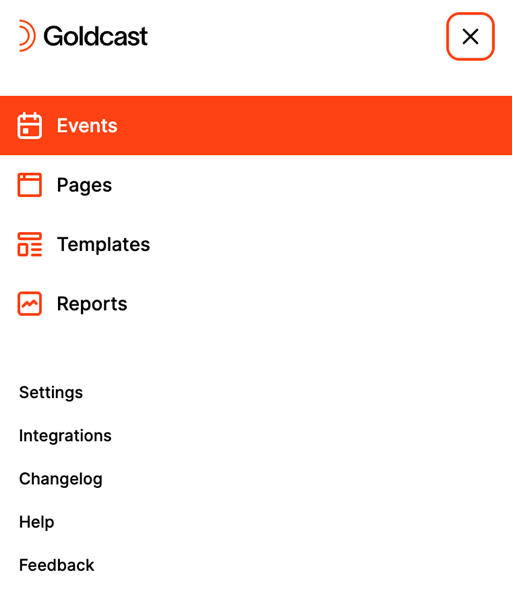
From the Events page, choose the event you want to set up the Wistia integration for. You'll be redirected to the Event Dashboard page. -
Access Integrations
Click on the Integrations option from the left-side panel. Alternatively, you can click on the Configure option in the Integrations available section within the Event dashboard.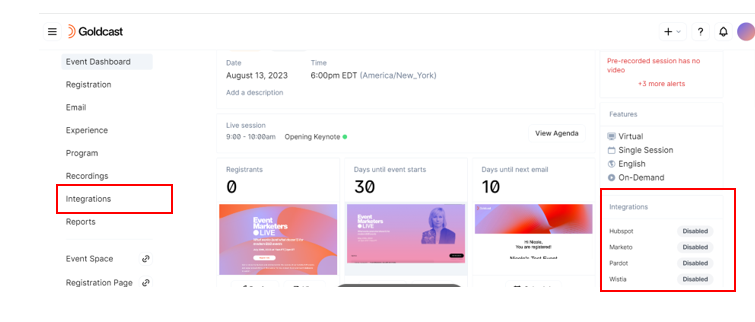
-
Navigate to Wistia
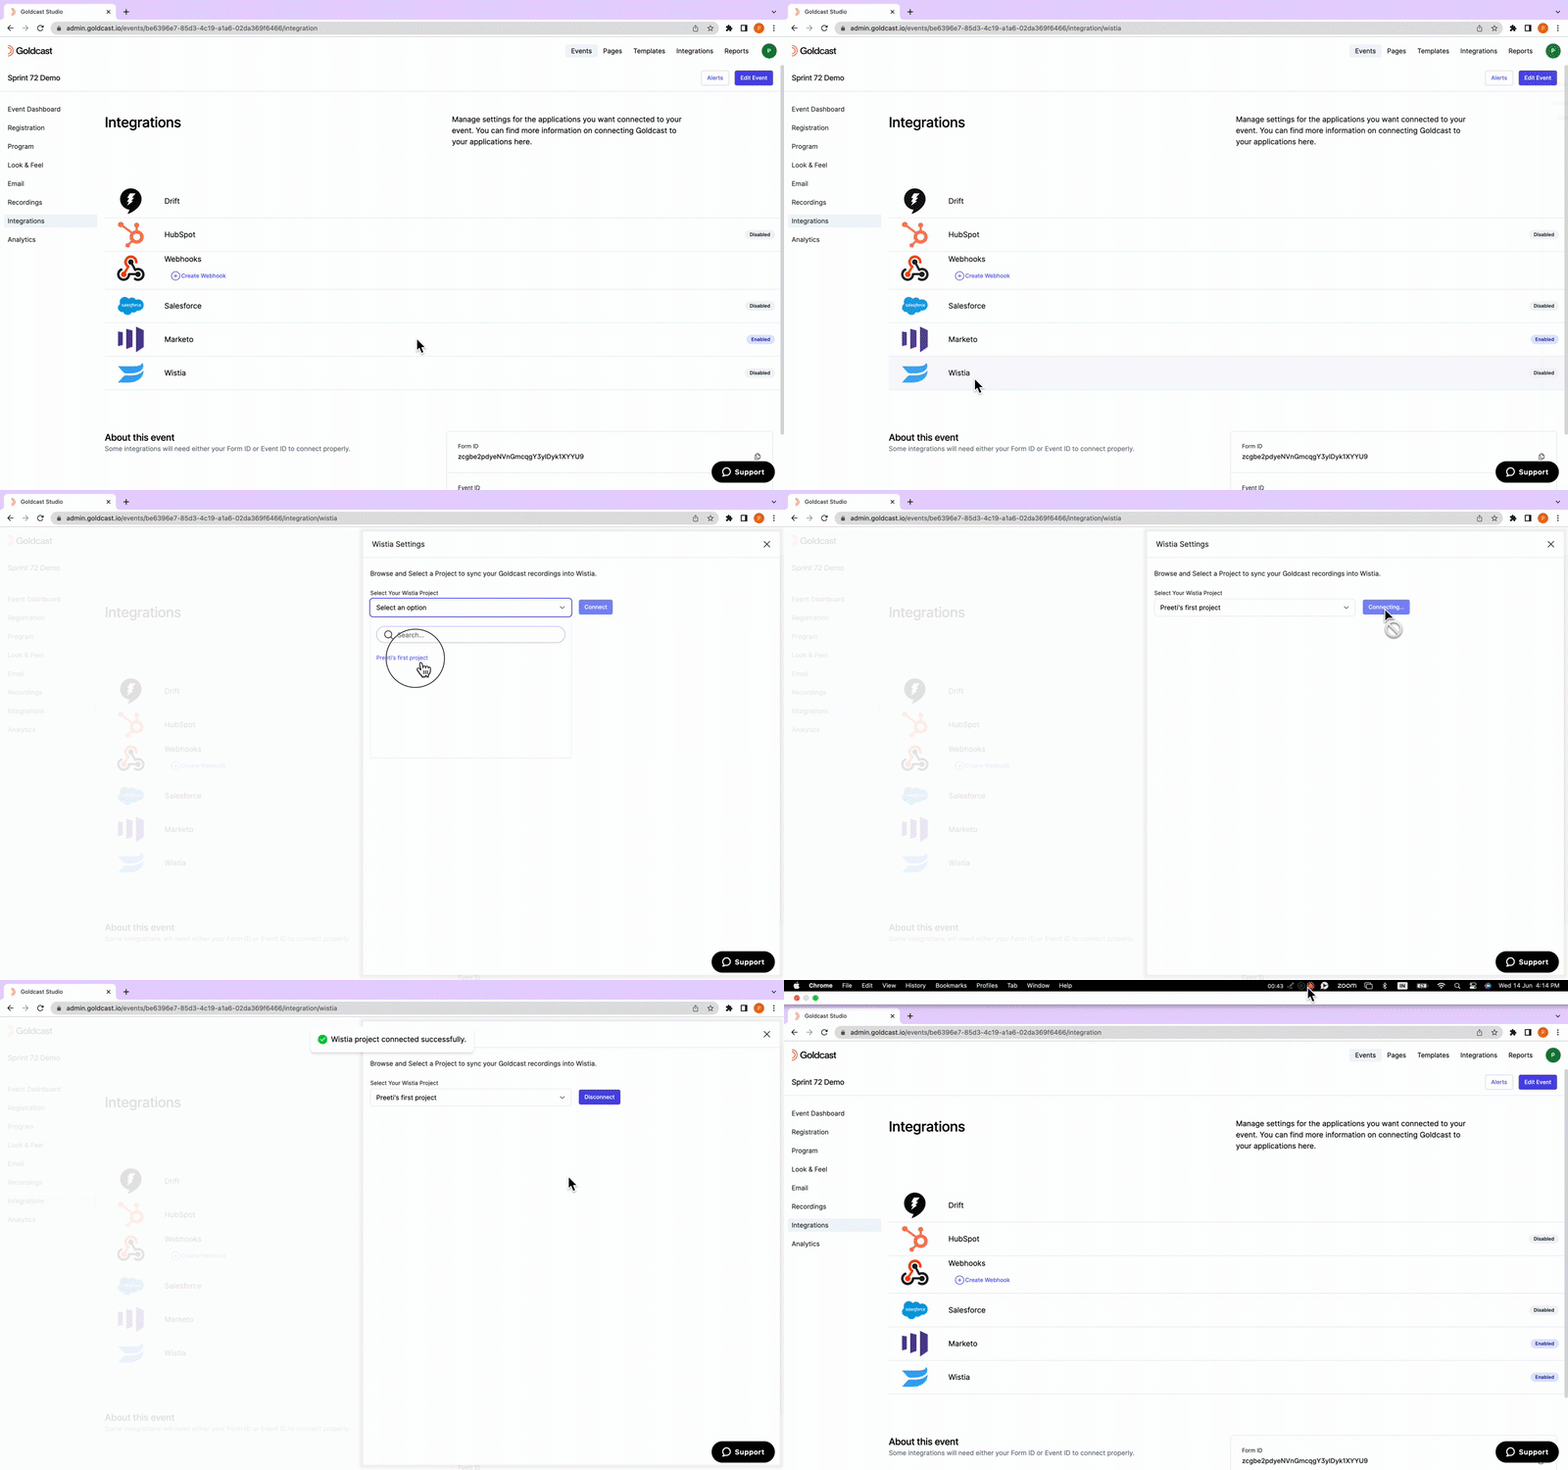
You will be redirected to the Integrations page. Locate and click on the Wistia integration. - Select Wistia Project
A drawer will appear from the right side of the screen, providing a dropdown menu. Use the dropdown to select the Wistia project where you want your event recordings to be synced.
 Please be aware that we only sync recordings to Wistia Projects and not channels. Additionally, we only sync Session Recordings. Ensure that you have Event Recordings turned on.
- Connect and Save
Once you have selected the desired project, click the Connect button, and then click Save to complete the process.
 When duplicating an event that has a Wistia project, the new event will not inherit any settings from the original event. If needed, you will need to configure Wistia for the new event separately, as if it were a new event.
By following the above steps, you can successfully set up the Wistia integration for your event.
Please note that the Wistia integration is specific to individual events, allowing you to tailor the synchronization of recordings based on your preferences and requirements.
Viewing Goldcast Event Recordings in Wistia
Once the Wistia Integration is successfully installed and connected to a Project, all session recordings from Goldcast Events will be automatically uploaded and synced to your selected Wistia Project.
Here's what you need to know about the automatic syncing process:
- Upcoming and Live Events:
Recordings will be automatically uploaded to all upcoming and live events that have valid recordings in their Library section within Goldcast, provided the Wistia Integration has been configured for the event.
- Patience Required:
If you don't immediately see your recordings in your Wistia project, please allow some time for the synchronization process to complete. The recordings should appear in your Wistia Project shortly.
The automatic syncing feature simplifies the upload and management of recordings, saving you time and effort in sharing your content through Wistia.
Disconnecting Wistia Integration
If you do not want a recording for a particular event or all events to be synced to your Wistia account, you have two options:
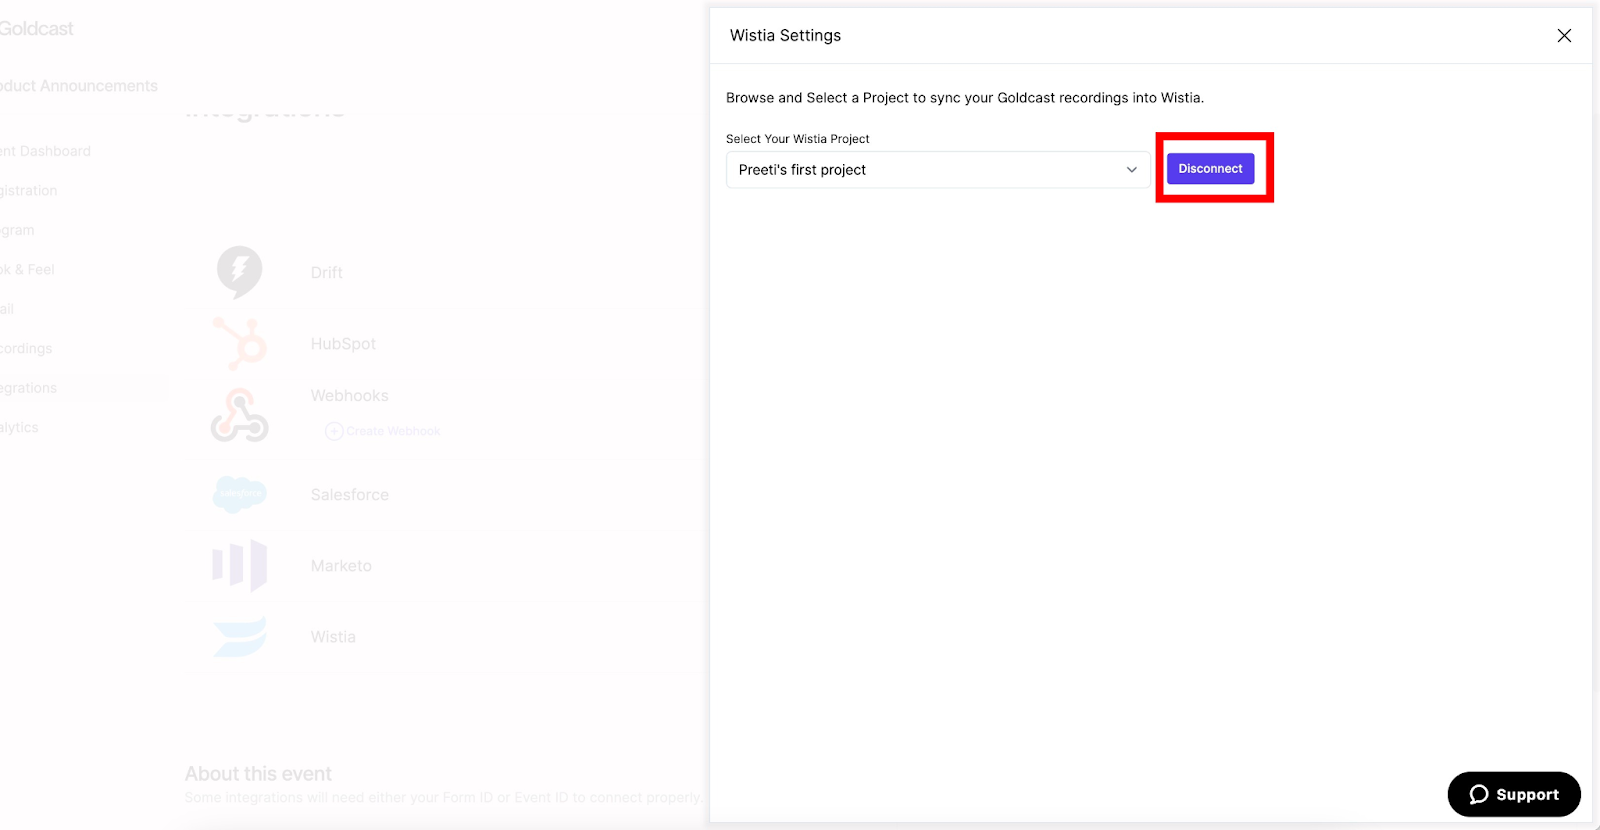
- Disconnect Project: You can disconnect the Project from the event-level setup, ensuring recordings are not synced for that specific event.
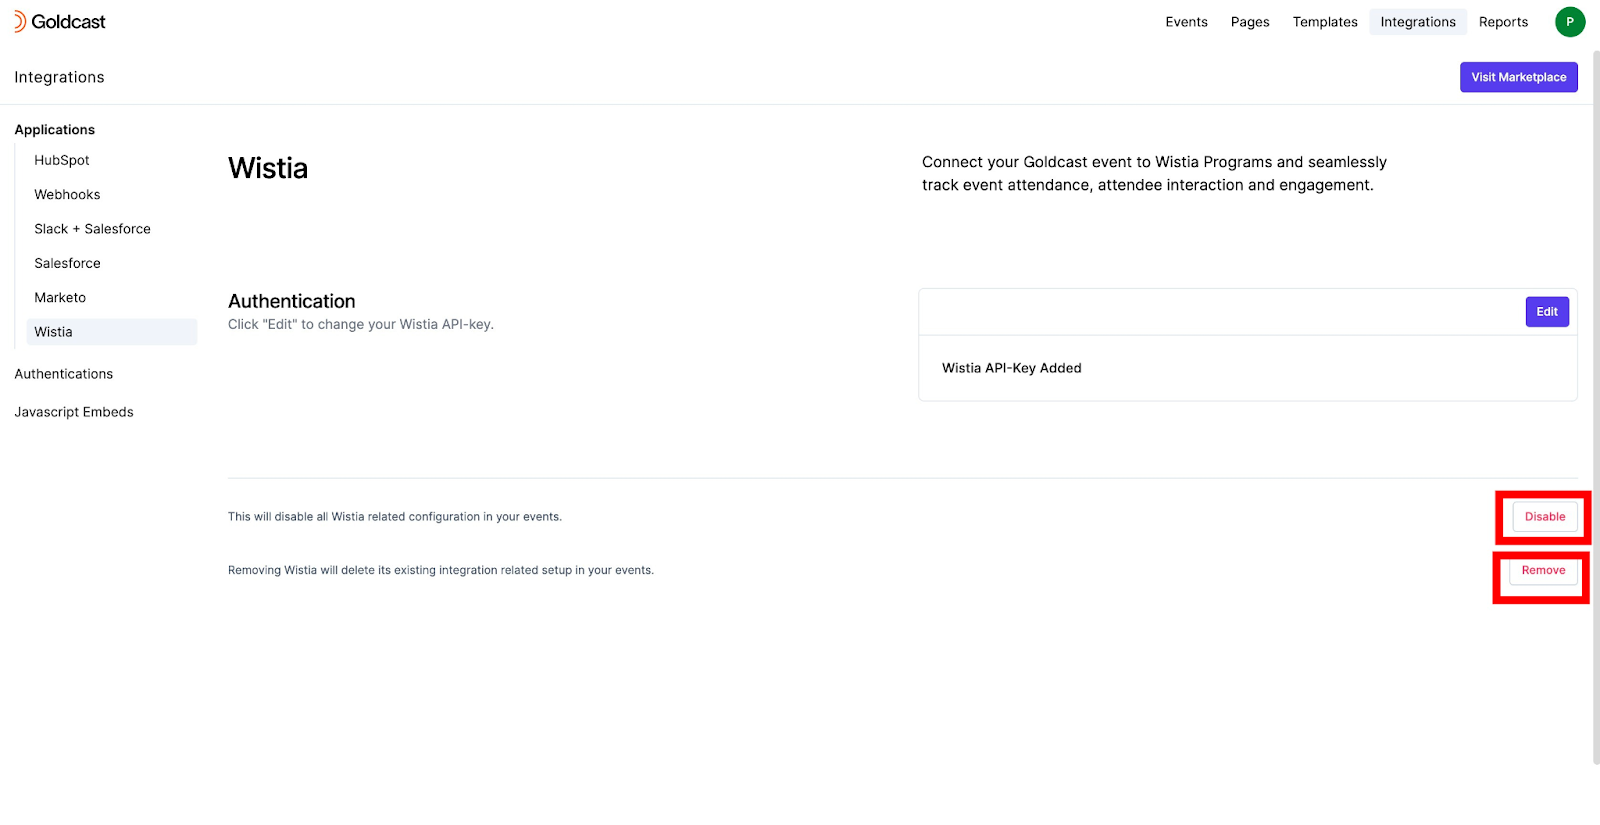
- Disable or Remove Integration: You can disable or remove the integration at a global level, preventing recordings from being synced to Wistia for all events.
If you need assistance or have questions, please reach out to our support team.
