Goldcast offers three different ways to collect registrations for your event:
Method 1: Via the native Goldcast Registration Page
Each Goldcast event or webinar has a unique registration page, which is managed in the Registration section of Goldcast Studio. To collect registrations via Goldcast's registration page, follow these steps:
For Events
Step 1: Build a Registration Form
- Log in to Goldcast Studio with your credentials, select the Events tab to get a list of all your events, and click the event for which you want to set up registration.
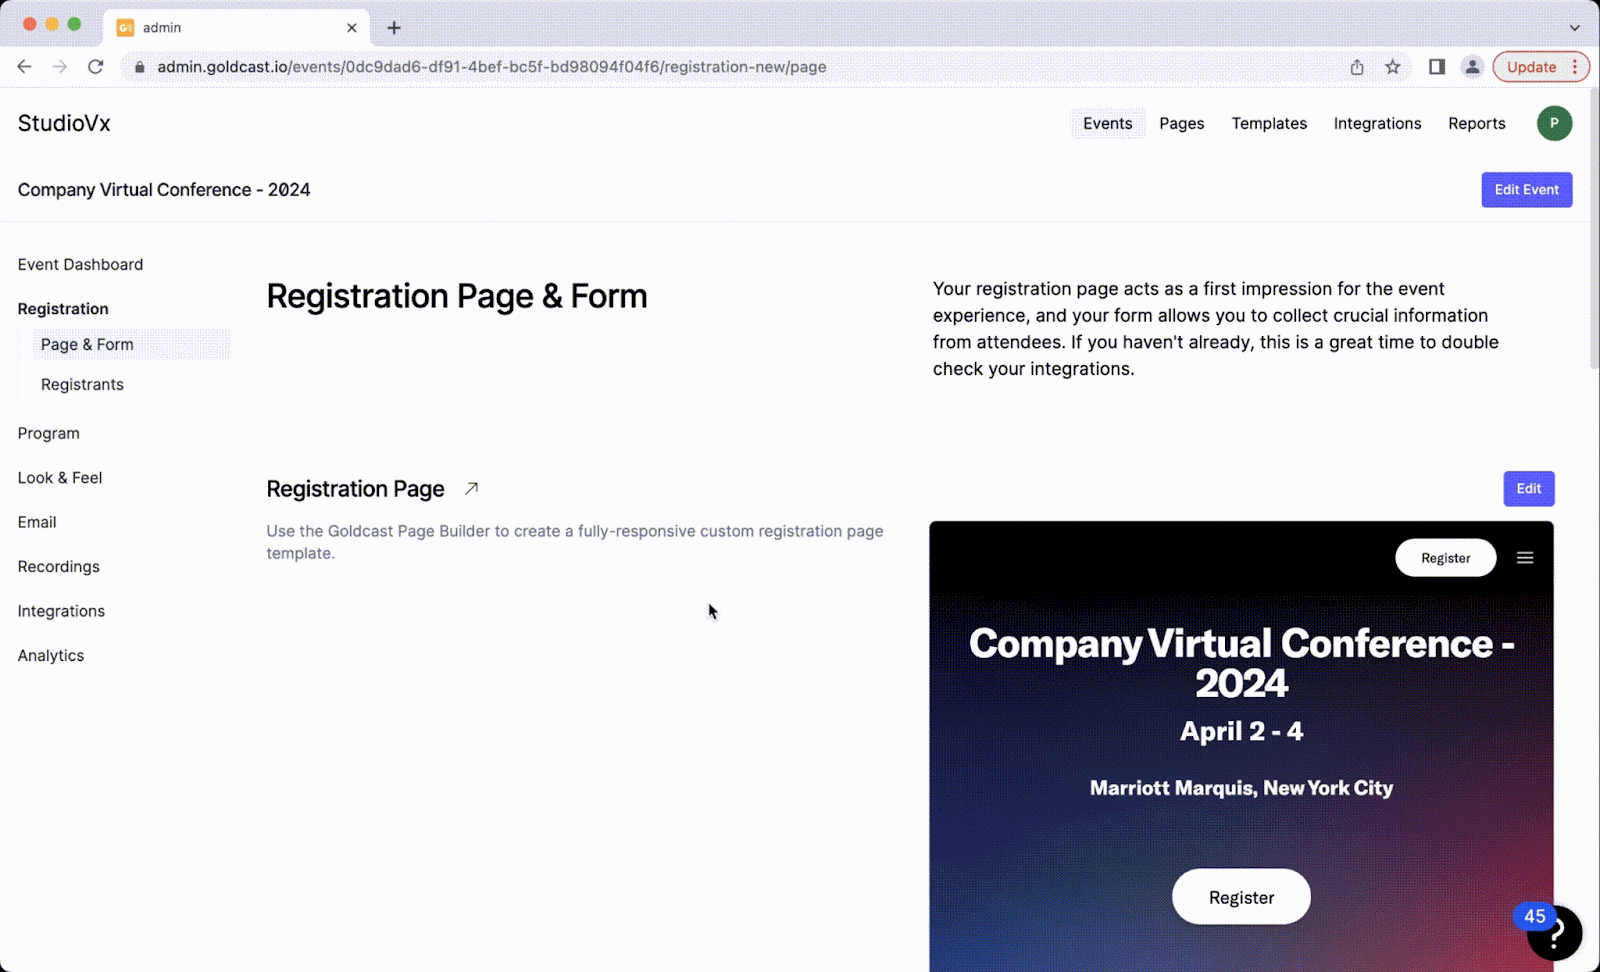
- Click Registration → Page & Form on the left sidebar.
- Scroll to the Registration Form section and click the Edit button.
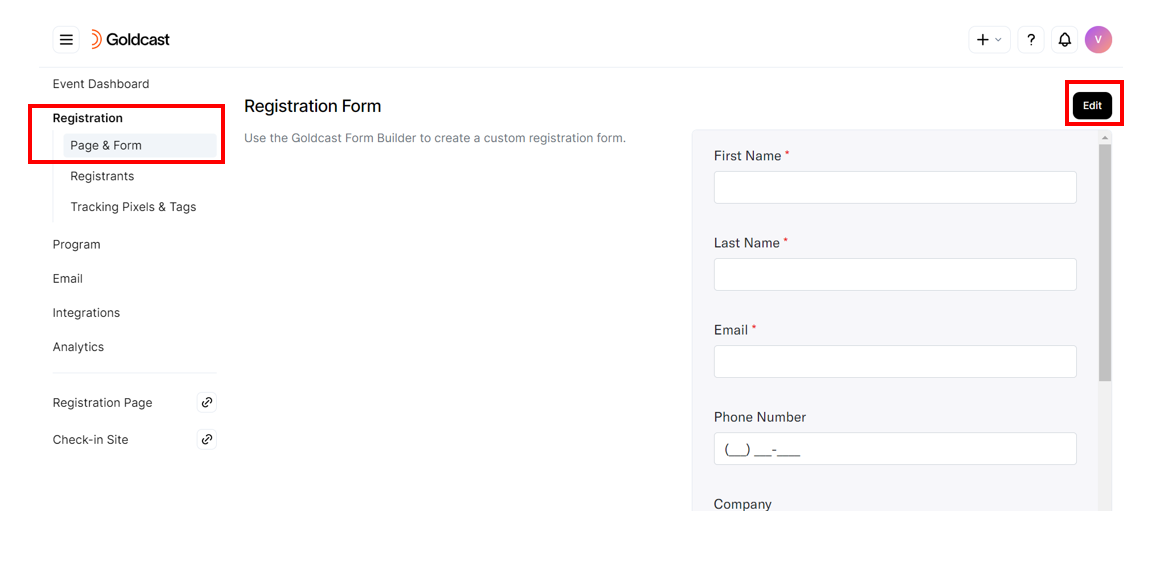
- This opens the Registration Form Builder. You can customize your form by adding, removing, and renaming fields, as required.
- Click Save.
Heads Up! Email, First Name, and Last Name are always required for a Goldcast registration form.
Based on your requirements, you can drag and drop additional fields from the left side panel.
For more information on setting up the Goldcast registration form, see Creating and Editing Registration Form.
Step 2: Set up the registration page
Once you've set up the registration form, the next step is to create your registration page:
- Log into Goldcast Studio and select the event you’d like to edit.
- Click Registration → Page & Form on the left sidebar.
- Scroll to the Registration Page section and click the Edit button.
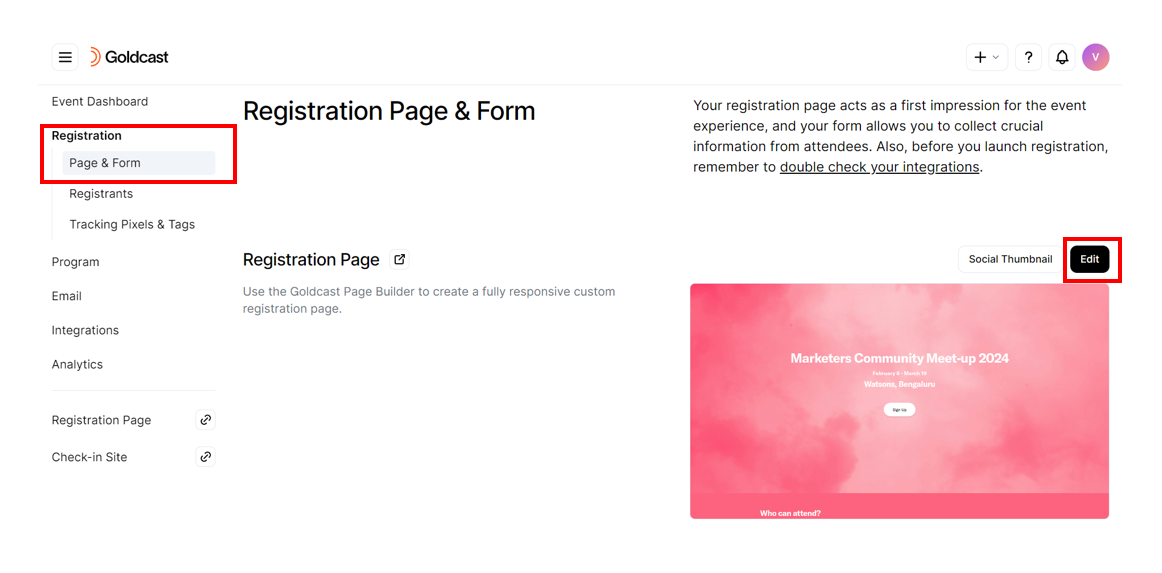
- This opens the Registration Page Builder.
- The default registration page already has added sections. You can customize it further by changing the fonts, colors, images, etc.
- Once you are on the Registration Page Builder, on the left side of the page, you will see the Editor. Here, you can see your page's blocks —add new blocks, edit, hide and remove blocks, and change the global page settings.
For more information, see Building a Goldcast Registration Page.
If you prefer to use Goldcast’s default registration page instead of the Page Builder:
- Click Registration → Page & Form on the left sidebar.
- Turn on the Use Basic registration page toggle located below the registration page preview.
- Click the Edit Default Reg Page button above the page preview.
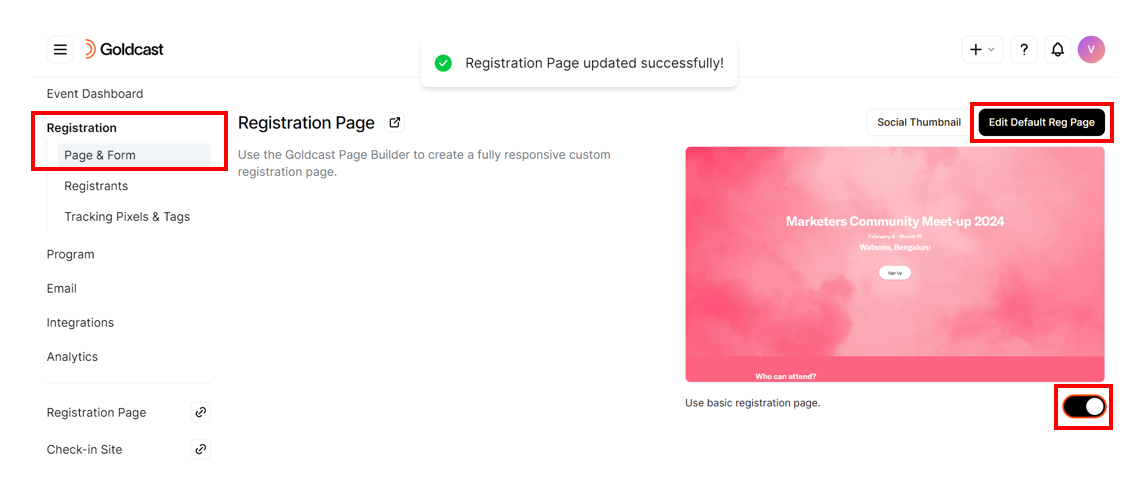
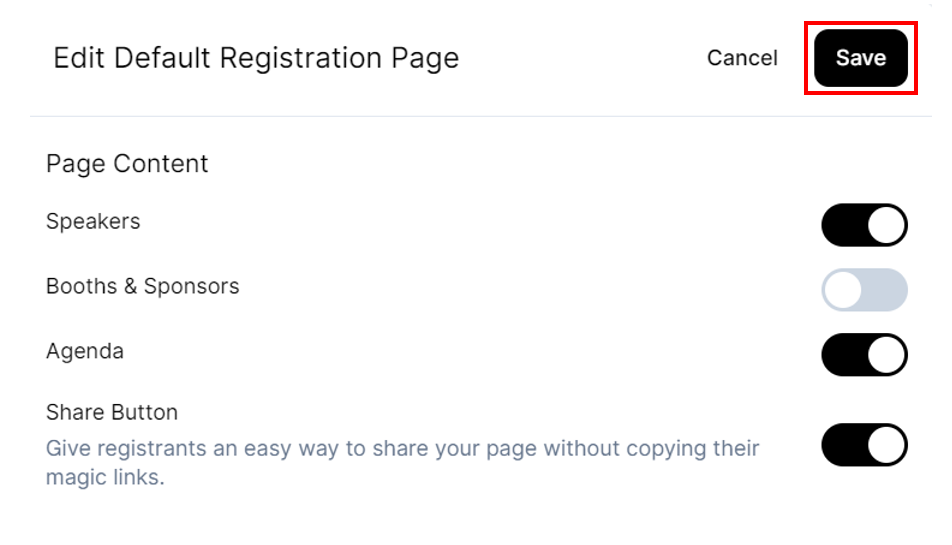
- As per your requirements, enable the Page Content toggles: Speakers, Booths & Sponsors, Agenda, and Share Button.
- Click Save.
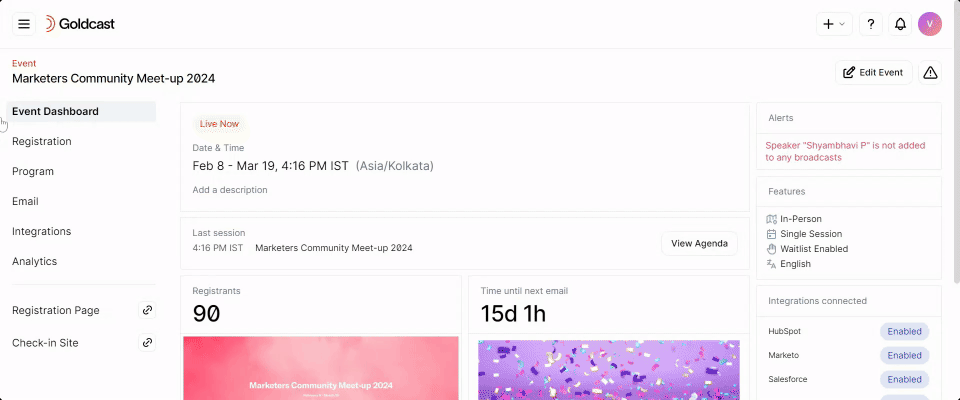
Once the registration page has been set up, click the Registration Page hyperlink to preview your page in your browser. This is the page you will share to invite people to register for your event.
You can also access the registration page link from the event menu on the left side of your screen.
For Webinars
Build a Registration Form
- Log in to Goldcast Studio with your credentials, use the Events tab to open your preferred webinar.
- Once on the webinar dashboard, navigate to Registration → Form using the tabs on the top and click the
 Edit Form button.
- This opens the Registration Form Builder. You can customize your form by adding, removing, and renaming fields, as required.
- Click Save.
Heads Up! Email, First Name, and Last Name are always required for a Goldcast registration form.
Based on your requirements, you can drag and drop additional fields from the left side panel. For more information on setting up the Goldcast registration form, see Creating and Editing Registration Form.
Set up the registration page
Once you've set up the registration form, the next step is to create your registration page:
- Log in to Goldcast Studio with your credentials, use the Events tab to open your preferred webinar.
- Once on the webinar dashboard, click the Registration tab on the top, and click the Registration Page button.

- This opens the Registration Page Builder.
- The default registration page already has added sections. You can customize it further by changing the fonts, colors, images, etc.
- Once you are on the Registration Page Builder, on the left side of the page, you will see the Editor. Here, you can see your page's blocks —add new blocks, edit, hide and remove blocks, and change the global page settings.
For more information, see Building a Goldcast Registration Page.
Once the registration page has been set up, click the View Page button in the Registration Page Builder to preview your page in your browser. This is the page you will share to invite people to register for your event.

You can also access the registration page link by clicking the Paintbrush icon on the top-right of the webinar's dashboard, and selecting Registration Page.

Heads up! Registrations via the native Goldcast registration page and form happen in real-time and the user will receive the registration confirmation email immediately (If enabled). So, make sure to schedule the required emails before sharing the registration page on socials and other channels.
Note: Registrations for Series and Repeating Events collected via the native Goldcast registration happen async and there might be delays of two or more hours for the system to process the registration.
***However, if the event happens in the next two hours, Goldcast will process the registration in real-time.
Method 2: Manual Registration
In addition to using the registration page and form, you can manually upload registrants to the event using Goldcast Studio.
Single Registration
To register one user at a time, follow the below steps:
For Events
- From the event dashboard, click Registration → Registrants on the left sidebar. This displays the Registrants Table for your event.
- Click the dropdown Add and select New Registrant.
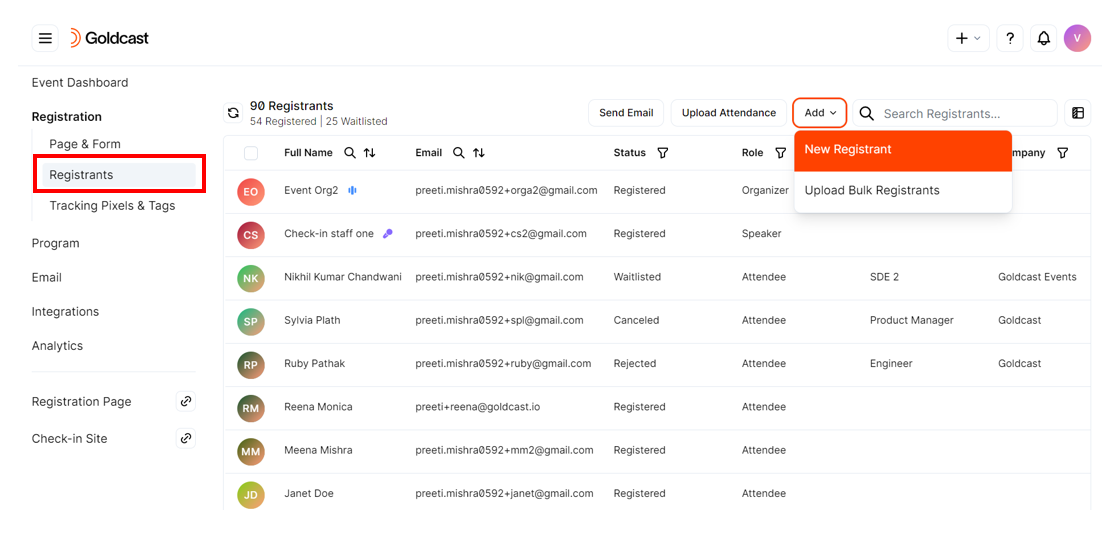
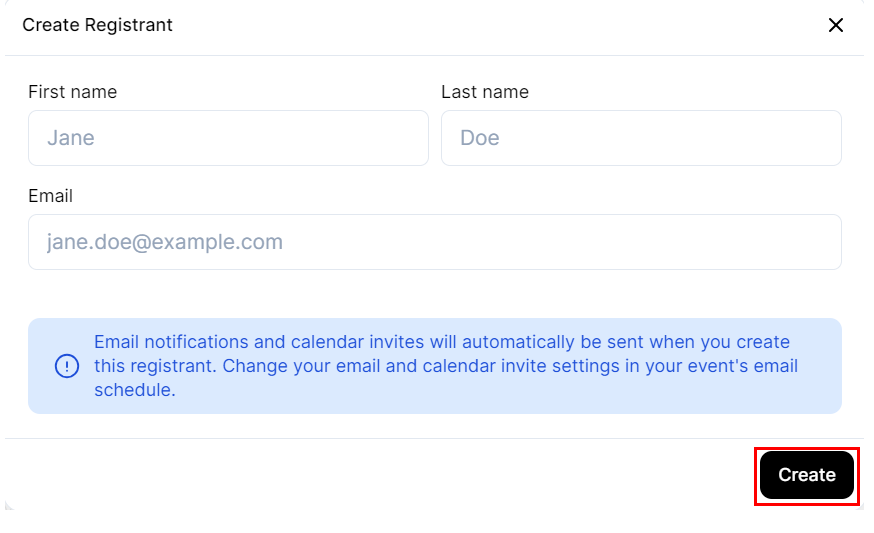
- This opens the Create Registrant window.
- Enter the registrant details: First Name, Last Name, Email.
- Click Create.
For Webinars
- From the webinar dashboard, click Registration → Registrants via the tabs on the top. This page displays the Registrants Table for your event.
- Click the dropdown Add and select New Registrant.

- This opens the Create Registrant window.
- Enter the registrant details: First Name, Last Name, Email.
- Click Create.
Heads Up! When you add a single registrant manually, Goldcast registers them for the event in real-time. If you have event email notifications and/or calendar invites set up for this event, they will receive them as soon as you click Create in the previous step. So, make sure to schedule the required emails before adding a registrant manually.
Bulk Registration
Bulk registration allows you to add multiple registrants in one go. It enables you to upload multiple emails at once rather than having to enter the information for each individual. For more information, check out this step-by-step guide on bulk uploading registrants.
Heads up! Goldcast processes bulk registrations async. This means, depending on the system load, it might take two or more hours for Goldcast to complete registering all the users on your bulk upload list. So, we highly recommend that you complete this process well ahead of time, so that attendees receive their magic links and calendar invites in time.
Method 3: External Platform Registration
If you'd like to collect event registrations using an external platform, you can pass those registrations to your Goldcast event directly using a form post via webhooks. This will allow you to import registrations created in another platform to your Goldcast event. Currently, we support form and webhook registrations for Salesforce, Hubspot, Marketo, Splash, Eloqua, and Zapier, among other platforms.
We recommend this method of registration for users who:
- Maintain their contacts lists on another platform.
- Plan on embedding a registration form from an external platform on their website.
See the linked help docs above for further instructions on setting up these registration methods.
Heads up! Goldcast processes registrations via external platforms async. This means, depending on the system load, it might take two or more hours for Goldcast to complete syncing the registrations from third-party platforms. So, we highly recommend that you complete this process well ahead of time, so that attendees receive their magic links and calendar invites in time.
Re-registration to Recover Event Links
We know how easy it is to lose track of your unique event login link (magic link) and scramble on event day to recover it. Or, if you are an event organizer, how tedious it is to manually re-send unique links to registrants who've reached out because they lost theirs.
Registrants can recover their event links on their own by resubmitting the registration form using the email they initially registered with. Re-registering will send another registration confirmation email containing an event link to their inbox.
Alternatively, an organizer can re-send the registration email containing the event link to a user by re-registering them with the manual single registration method described above in this doc.
Note: If a user re-registers with different user data, the new data submitted will not override the information provided on the initial form submission. This process is only a self-serve way to get another event link, not a way to update registration data.
Heads up! Re-registration is not supported through third-party registration methods. A user must fill out a Goldcast form to receive another registration email. Additionally, a user can only re-register a specific number of times, and there is a 5-minute cool-down period between re-registration attempts.