| Plan Availability | Starter | Pro | Premium | Enterprise |
| Only English |  |
|
|
For customers with contracts starting March 2024 or later, feature availability is based on your pricing tier. If interested, contact your CSM or our Sales Team to discuss pricing options.
Captions and subtitles make your events accessible to a broader audience. Goldcast offers speech-to-text captions and translated subtitles for all session types: live, pre-recorded, and RTMP.
- Captions display the speaker's words in the same language and might be helpful for people who are hard of hearing, deaf, or prefer to read along with speakers.
-
Subtitles translate these captions into different languages and can be helpful to those tuning in from different countries or who speak languages other than the speaker's.
Note: Captions work only when the speaker is speaking the primary language set for the event. For example, if the primary language of the event is set to English, and the speaker speaks Spanish, the captions won’t match.
Currently, Goldcast supports captions and subtitles for the following primary languages:
| Primary Language | Live Captions | Subtitle | Transcripts |
|---|---|---|---|
| English | Yes | Yes | Yes |
| German | Yes | Yes | Yes |
| Japanese | Yes | Yes | Yes |
| Korean | Yes | Yes | Yes |
| Spanish | Yes | Yes | Yes |
| Spanish (Mexico) | Yes | Yes | Yes |
| French | Yes | Yes | Yes |
| Portuguese (Brazilian) | Yes | Yes | Yes |
| Portuguese (European) | Yes | Yes | Yes |
| Polish | Yes | Yes | Yes |
| Chinese (Mandarin) | Yes | Yes | Yes |
| Chinese (Traditional) | Yes | Yes | Yes |
| Italian | Yes | Yes | Yes |
| Dutch | Yes | Yes | Yes |
| Russian | Yes | Yes | Yes |
| Turkish | Yes | Yes | Yes |
| Croatian | No | Yes | Yes |
| Thai | No | Yes | Yes |
| Vietnamese | No | Yes | Yes |
| Indonesian* | No | Yes* | No |
| Danish* | No | Yes* | No |
| Swedish* | No | Yes* | No |
| Norwegian* | No | Yes* | No |
| Finnish* | No | Yes* | No |
| Hungarian* | No | Yes* | No |
| Czech* | No | Yes* | No |
| Arabic* | No | Yes* | No |
Heads up! To access Indonesian, Danish, Swedish, Norwegian, Finnish, Hungarian, Czech, and Arabic subtitles, customers will need to reach out to Support and have this language turned on. Contact gc.support@cvent.com or hit the “?” in the admin panel to chat live.
Pro Tip: You can improve the accuracy of the captions by requesting specific words to be added to your organization's personal word bank. If you have a list of frequently used technical or industrial terms or differently spelled words like speaker names or organization titles, you can share it as a spreadsheet with our support team at gc.support@cvent.com. We will then add it to your organization's word bank to avoid misspelling these words in the captions.
Enable captions and translated subtitles
A few points to remember:
- Captions and subtitles MUST be enabled at least 10 minutes before your event starts.
- Sessions longer than 9 hours will not be recorded and cannot have captions enabled. Please contact your CSM for further assistance if you require captions for a session longer than 9 hours.
Follow these steps to enable captions and/or subtitles for an event or webinar:
For Events
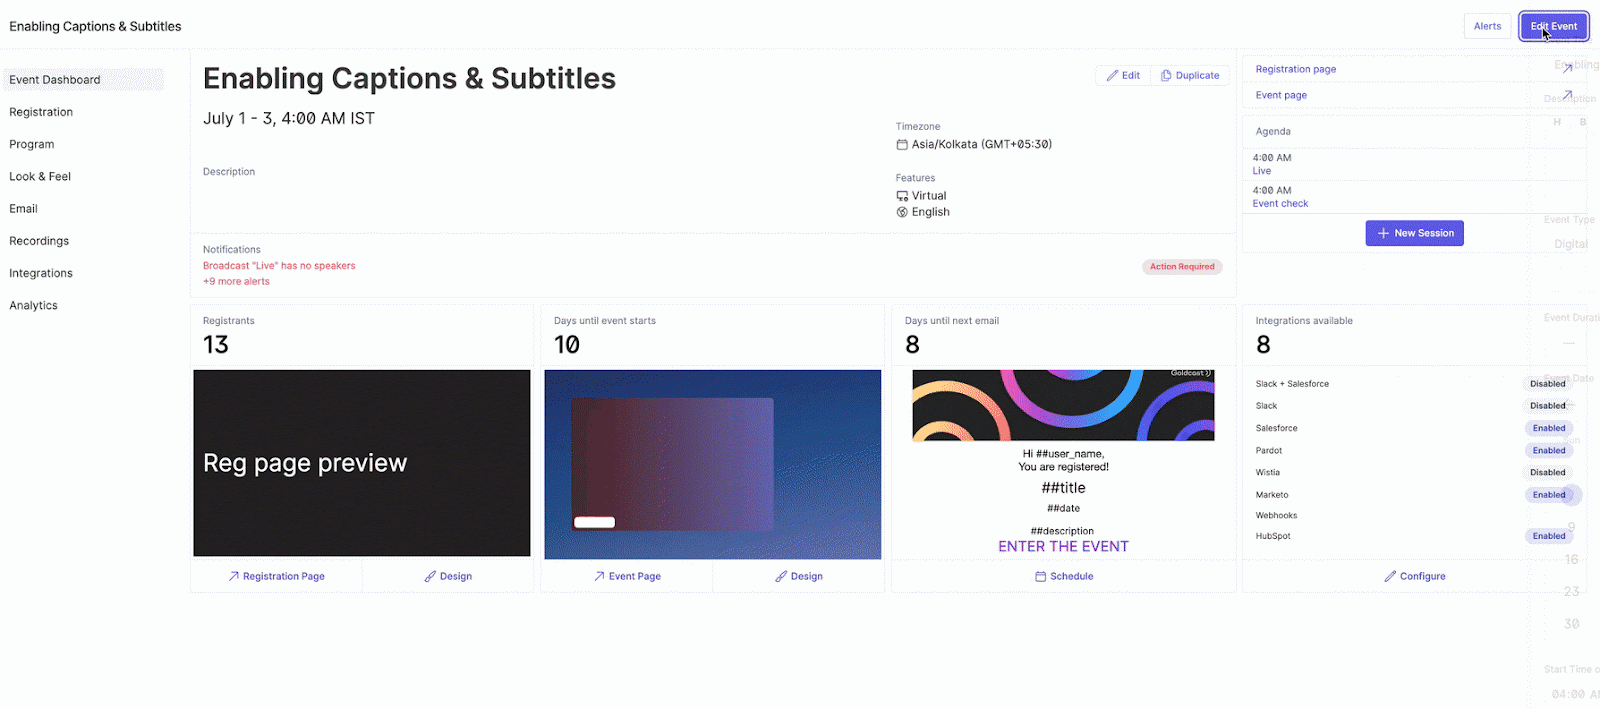
- Log in to Goldcast Studio with your credentials, and open your event using the Events tab.
- Click the Edit Event button in the top right corner of the Event dashboard.

- In the Primary Language dropdown, select the language the speakers will speak during your event. This language will be presented as speech-to-text captions on the event stage.

- Note that the primary language you select will also change the language of the event navigation bar, buttons, etc. For more information, check our help doc on Hosting an Event in Different Primary Languages.
- Turn on the toggle button for Captions.
- Once Captions are enabled, you will see the setting for Subtitles. You can turn on the toggle button for Subtitles (optional).

- Click Save.
For Webinars
- Log in to Goldcast Studio with your credentials, and open your webinar using the Events tab.
- Once on the webinar dashboard, click the Edit Event button in the top right corner.

- In the Primary Language dropdown, select the language the speakers will speak during your event. This language will be presented as speech-to-text captions on the event stage.

- Note that the primary language you select will also change the language of the event navigation bar, buttons, etc. For more information, check our help doc on Hosting an Event in Different Primary Languages.
- Turn on the toggle button for Captions.
- Once Captions are enabled, you will see the setting for Subtitles. You can turn on the toggle button for Subtitles (optional).

- Click Save.
How can attendees view captions and subtitles?
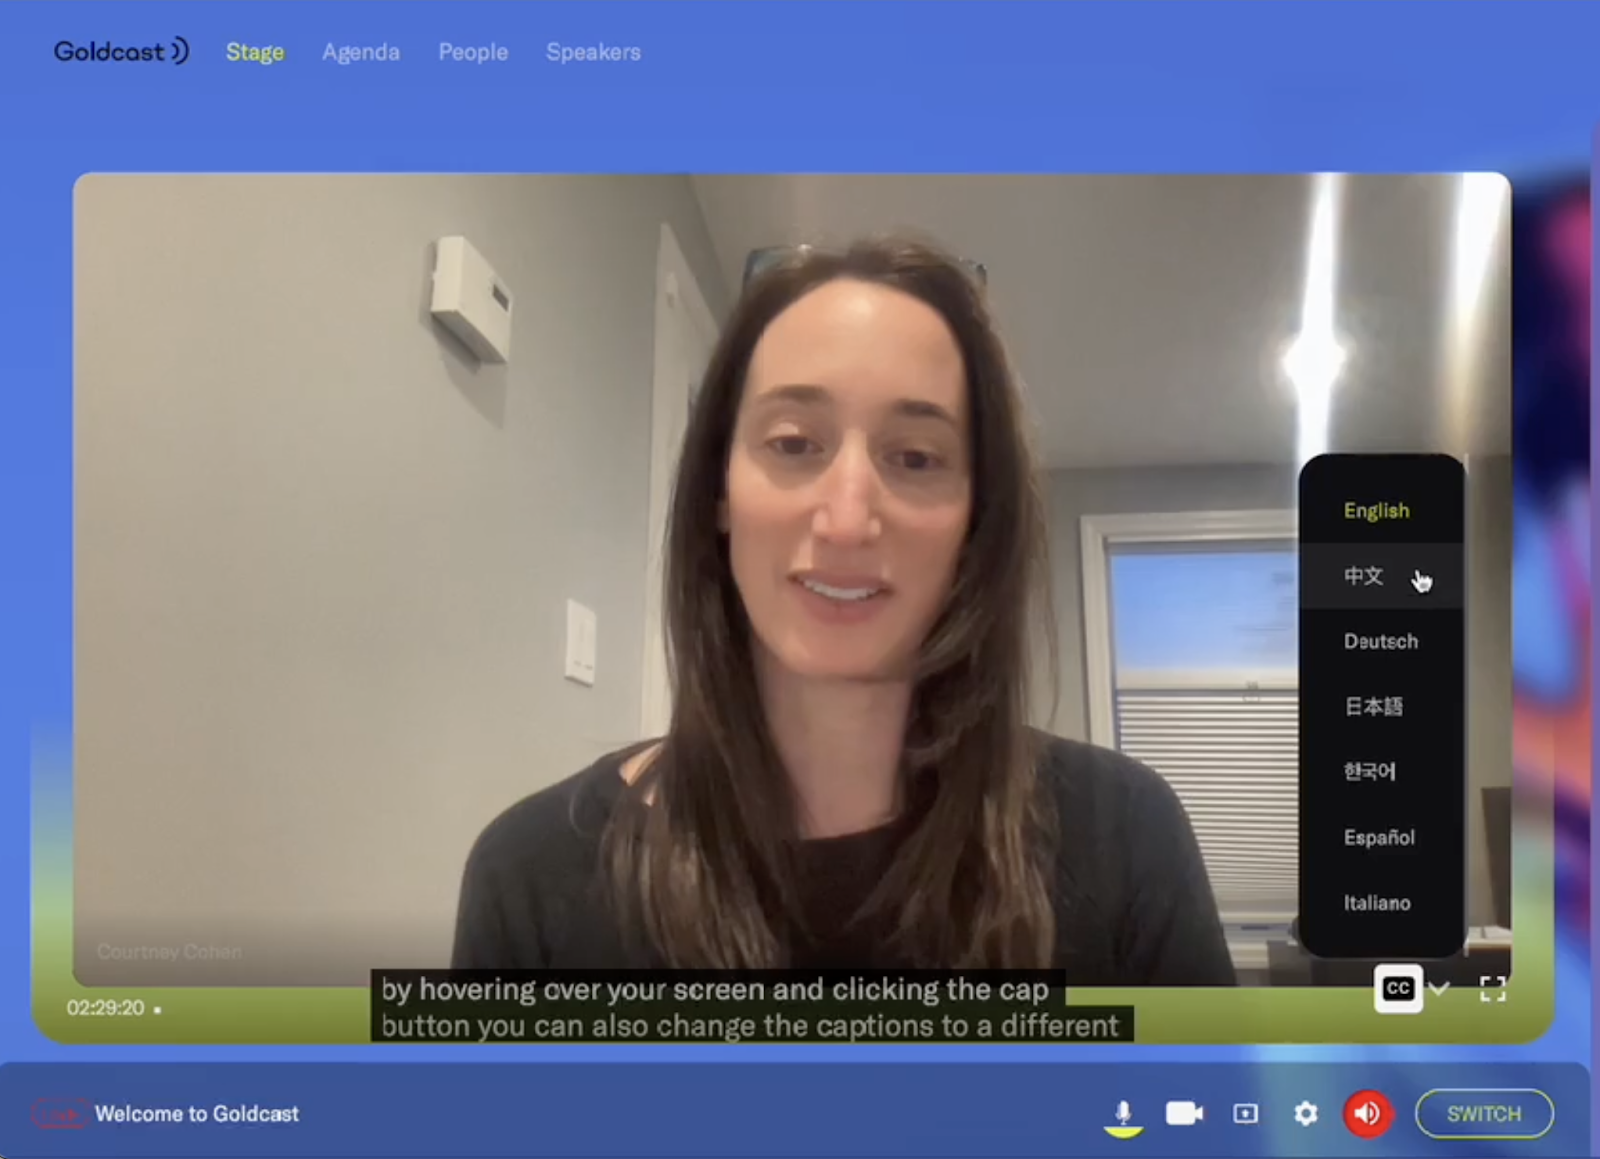
Once captions are enabled for your event, attendees can hover over the stage and click the CC button on the bottom of the screen to turn captions on and off.
If you have also enabled subtitles, attendees will see a dropdown in the CC button. They can click to see a list of supported languages and select the one they want to view subtitles.
Test captions and subtitles
To test captions and subtitles, you must create a new event and make it live. An event must be live to generate captions, with recordings turned on.
Enable captions in on-demand events
If you’ve enabled captions for your live event, they’re available for on-demand mode as well.
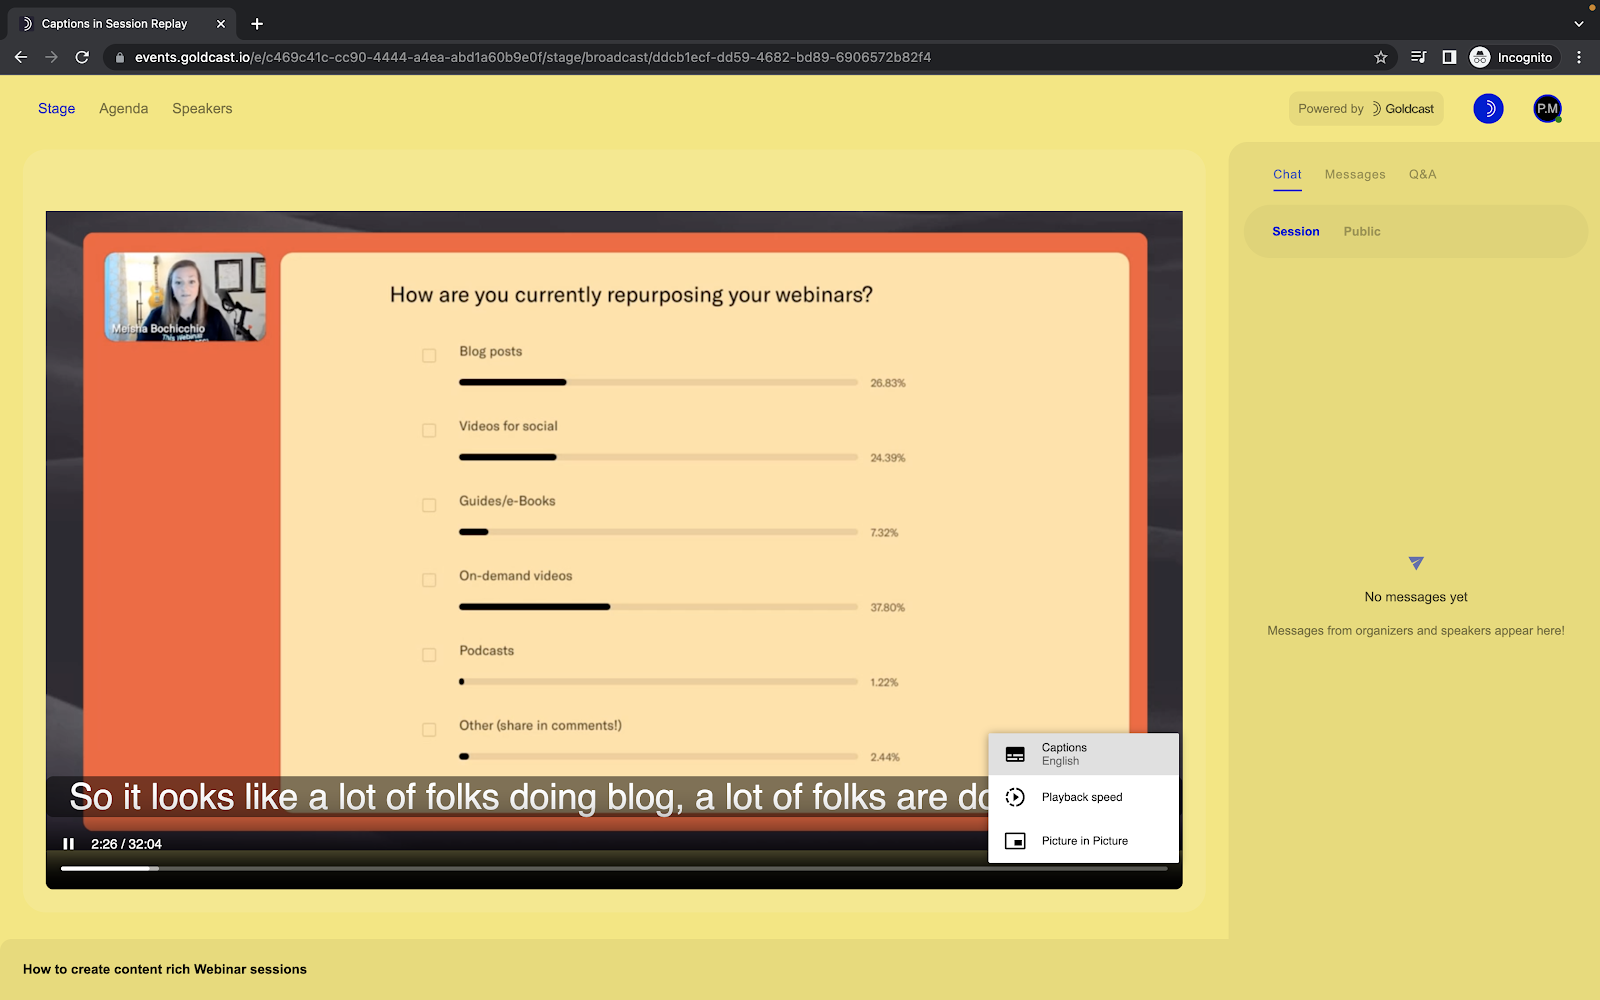
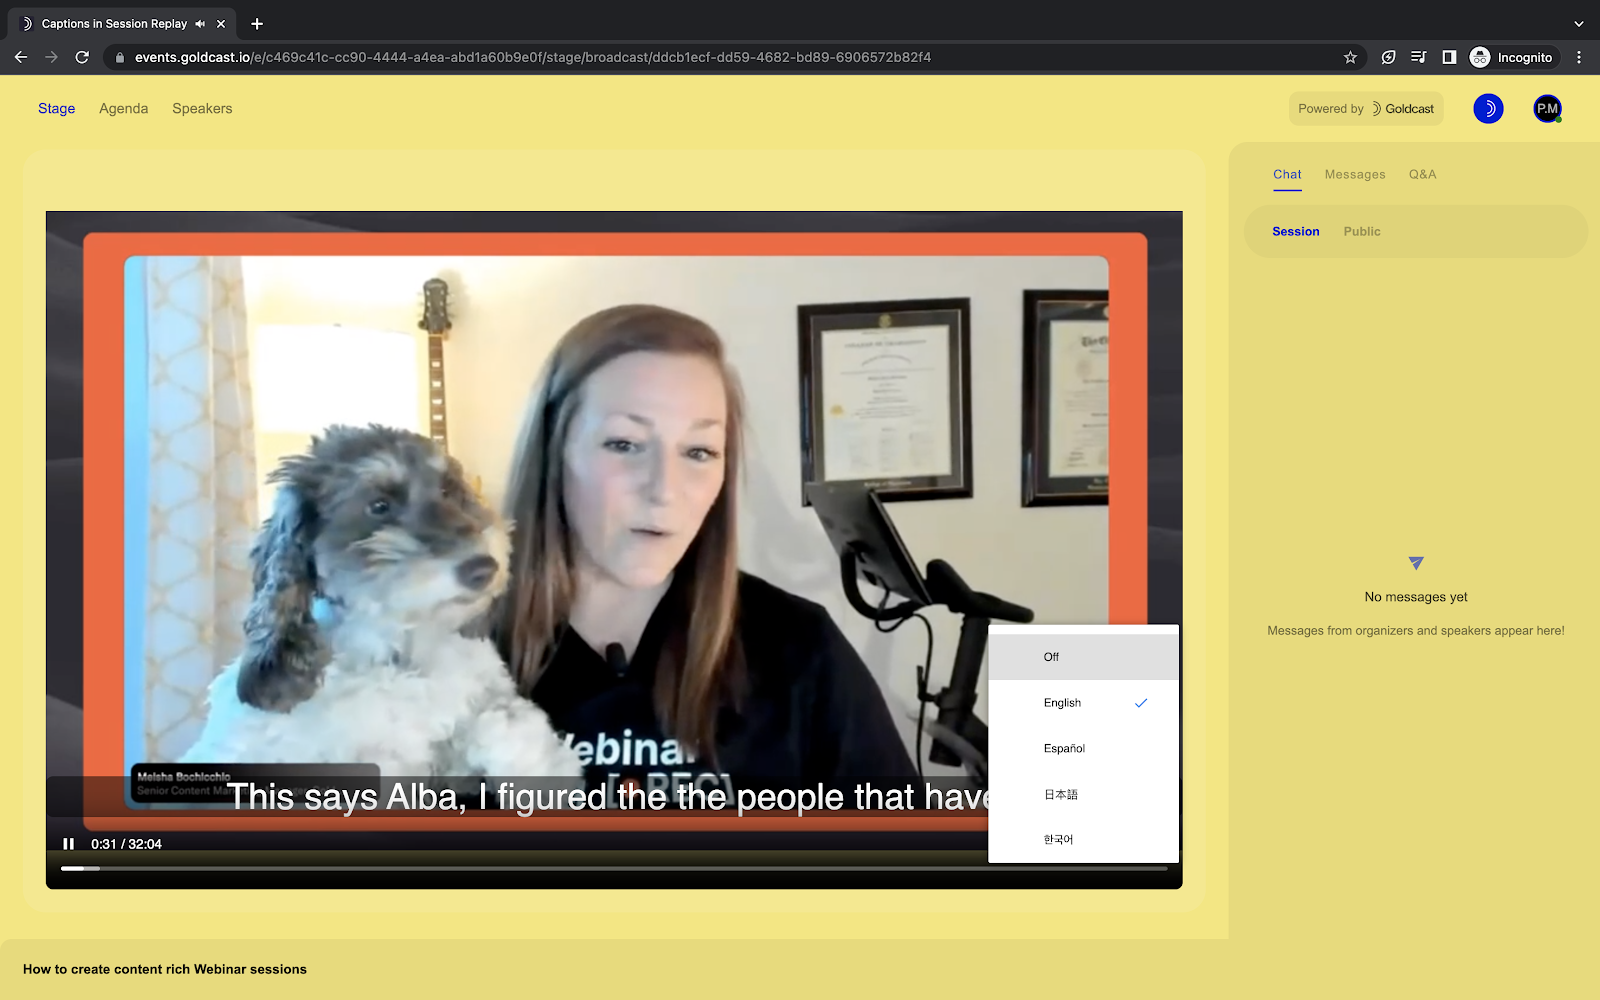
Attendees watching the session on-demand can hover on the stage and click on the kebab menu to enable captions. By default, the captions will be off, and users can select Captions and then select the language from the options.
To turn off captions, click Menu → Captions and click Off.
Download transcripts
If you have enabled captions for your event, you can download them as a transcript after the event.
Here’s how to do it:
- Log in to Goldcast Studio with your credentials.
- Click the Events tab on the left sidebar to get a list of all your events.
- From the Events list, click the event for which you want to download the transcript.
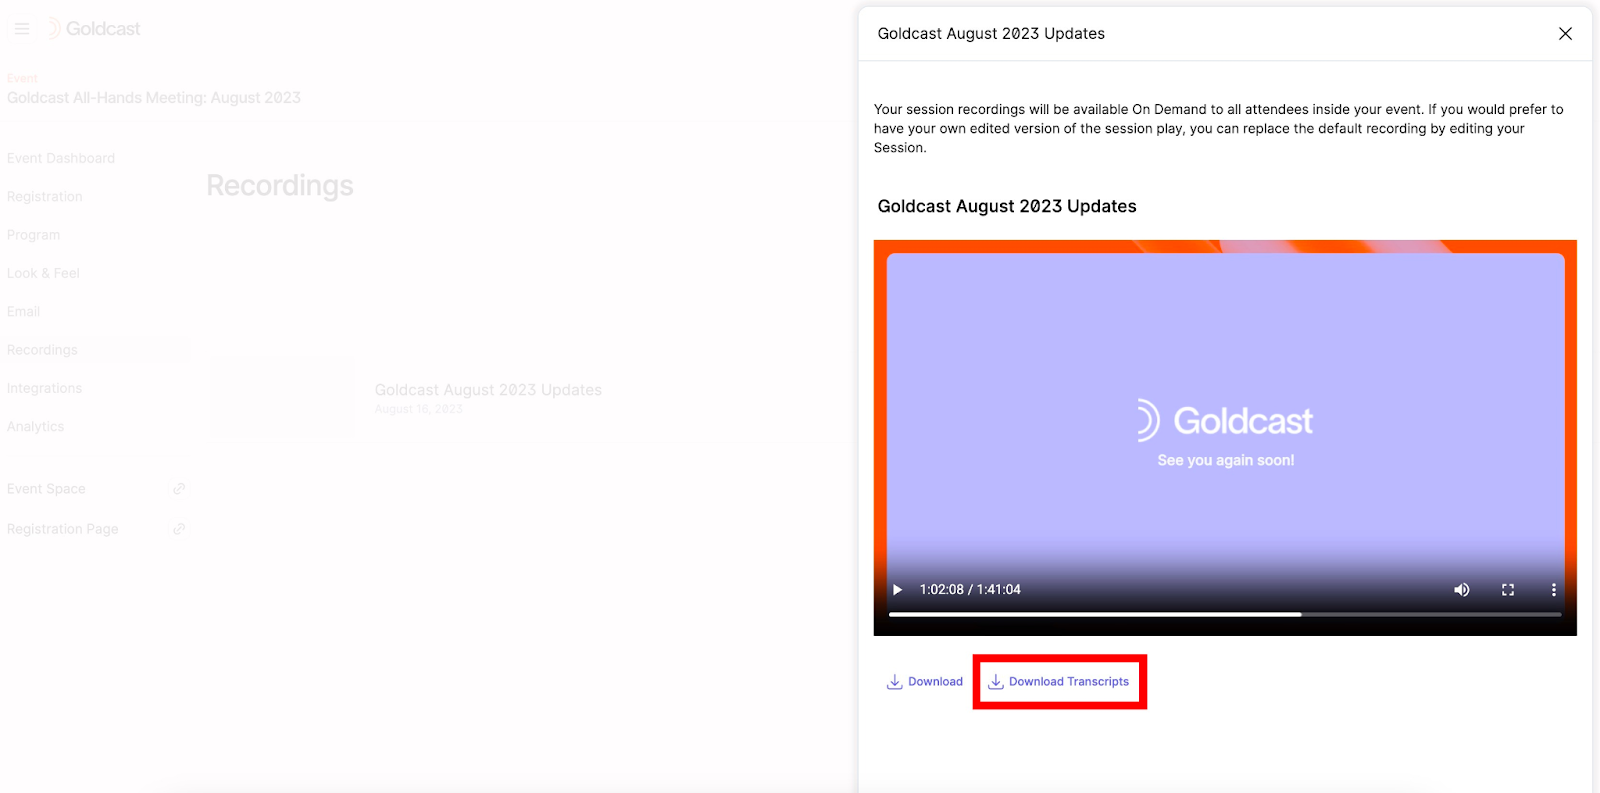
- Click Recordings on the left navigation menu. A list of recordings available for the event is displayed on the screen.
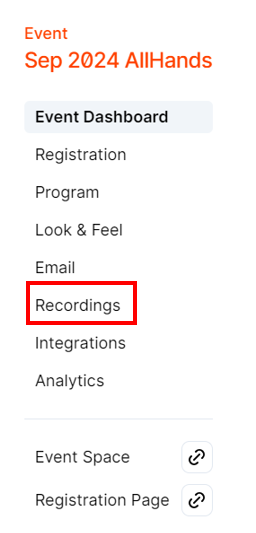
- Click the recording for which you want to download the transcript.
- Use the Download Transcripts button to download a zip file of transcripts in all supported languages.
Heads up! If you haven’t enabled captions for your event, you can create a support ticket for the Goldcast support team. Your CSM would be able to generate the transcript for you. Once the transcripts have been created, we will provide the link to download your transcripts as a zip file.
For more information, see our guide on Event and Room Recordings.
View downloaded transcripts
Goldcast downloads transcripts as .vtt files. Once downloaded, you can view and edit it in any text editor like Apple’s TextEdit or Microsoft’s Notepad. Alternatively, you can play it as a subtitle file in VLC or a similar player to watch the event recording video (MP4) with the transcripts as subtitles. Here’s how you can perform this action:
- Open the VLC media player, go to the Media tab, and click Open File to play the event recording mp4. For more help, check our guide on downloading event and room recordings.
- Next, go to the Subtitle menu and click Add Subtitle File. From the dialog box, select the corresponding transcript file (.vtt) in your preferred language to display it as captions/subtitles along with your event recording.
FAQs
Are captions and subtitles available in different dialects?
We don’t support different dialects for most languages (for example, King's English or Australian English). However, we do support multiple regional variants for a few languages: Spanish, Portuguese, and Chinese. Other dialects are not currently supported.