Overview
Single sign-on (SSO) allows employees to access internal company events with their enterprise login credentials. This hassle-free login process simplifies the event experience and can increase attendance rates.
Pro Tip: It's recommended that you get assistance from your IT team to set up the SSO integration app.
Setting Up SSO for an event
Step 1: To set up SSO for an event, organizers should let their CSM know which email domain should be allowed to access the event, who their identity provider is, and which event needs to allow SSO login.
Step 2: Once you have shared the above information, our support team will share a setup link, and you can complete the SSO integration process.
Step 3: After the above setup is completed, let your CSM know so that our team can complete the final steps and enable SSO login for your event.
Note: Currently, the SSO flow is enabled on a per-event basis. Please share all event names for which you want to enable this feature.
Steps for organizers once SSO is enabled
After the SSO feature is enabled for an event, organizers should bulk upload or manually add all the registrants. In order to have access to the event, each person must be added to the event as a registrant, even if they have valid SSO credentials. For more information about bulk importing registrants, see our guide on how to import registrants using bulk registration.
All registered users will receive a universal link which they will use to access the event. The SSO authentication ensures that only registered users with allowed domains are able to access the event.
For any registrant, if the email domain present is different than that which is allowed, they will not be able to access the event. Speakers of your event can also use the universal link to access the event by entering SSO credentials. Event organizers too can use the single sign on link but they need to be registered to the event prior.
Sharing the Universal Link with Registrants
Prepare the Email template
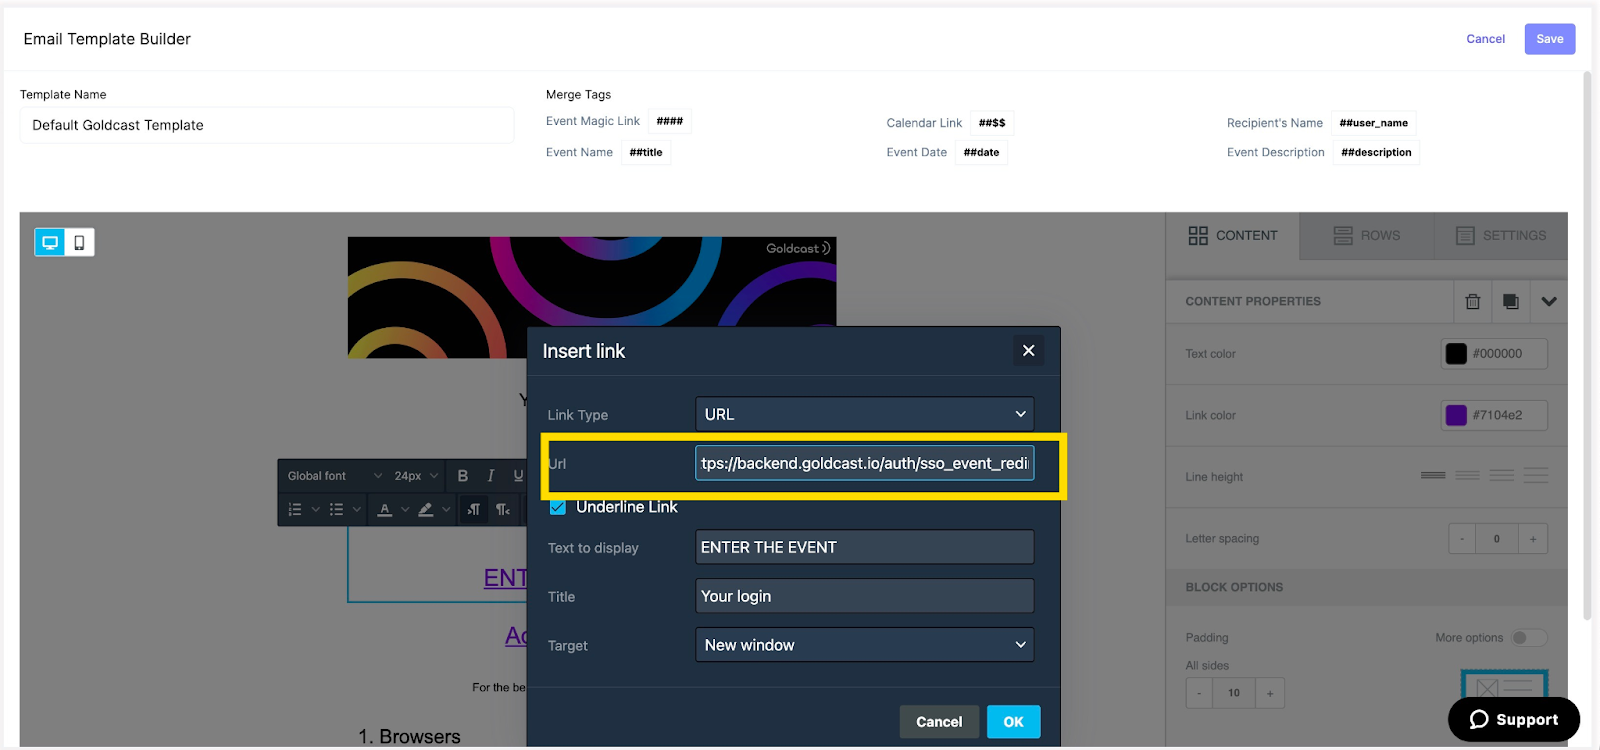
In the email templates you are using, you must use the macro #### to share the universal login link with registrants.
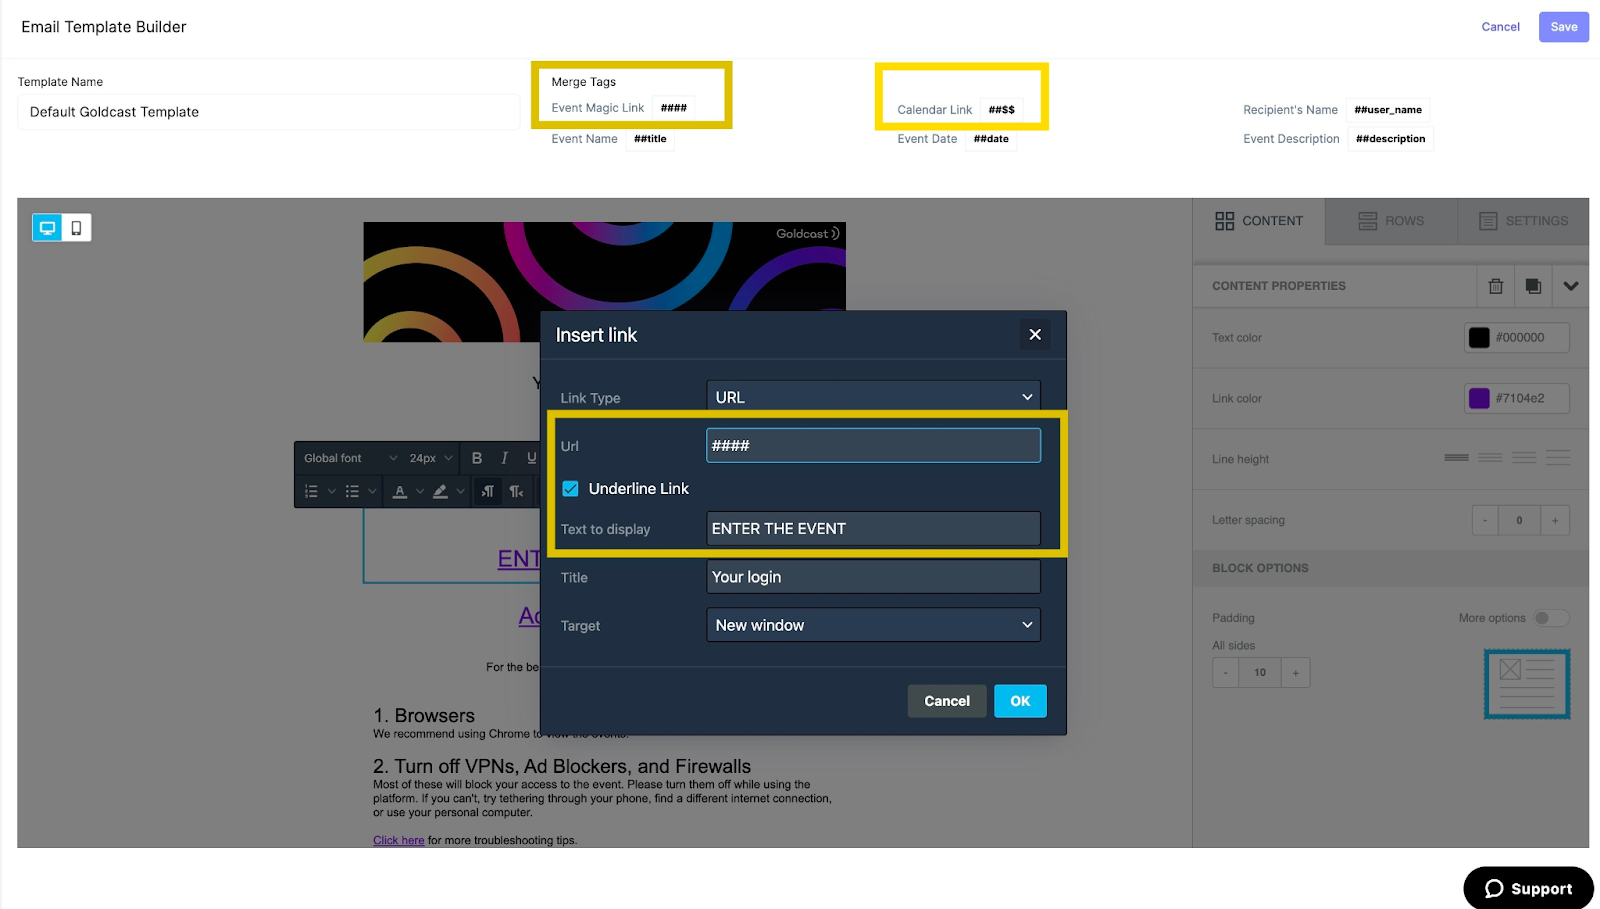
Instead of using the login link macro, you could also directly add the universal link in your template. Please let the Goldcast team know so that we can share the link with you since it's not exposed on the UI.
Keep this link handy so that in case any attendee during the event is facing any issue in finding the email/login link , you can share this universal link with them.
Note: This link can be shared with all users who have been registered, and they'll be able to access the event once their SSO credentials are authenticated. This link is not unique per attendee.
Once the template is ready, you can share the universal link in one of the following ways:
- Option 1: In the Emails section, turn on the Registration Confirmation email and select the template with the above-mentioned changes. This ensures that all registrants receiving the calendar invite, confirmation, and reminder emails have access to the universal link and NOT the magic link, which is unique per registrant.
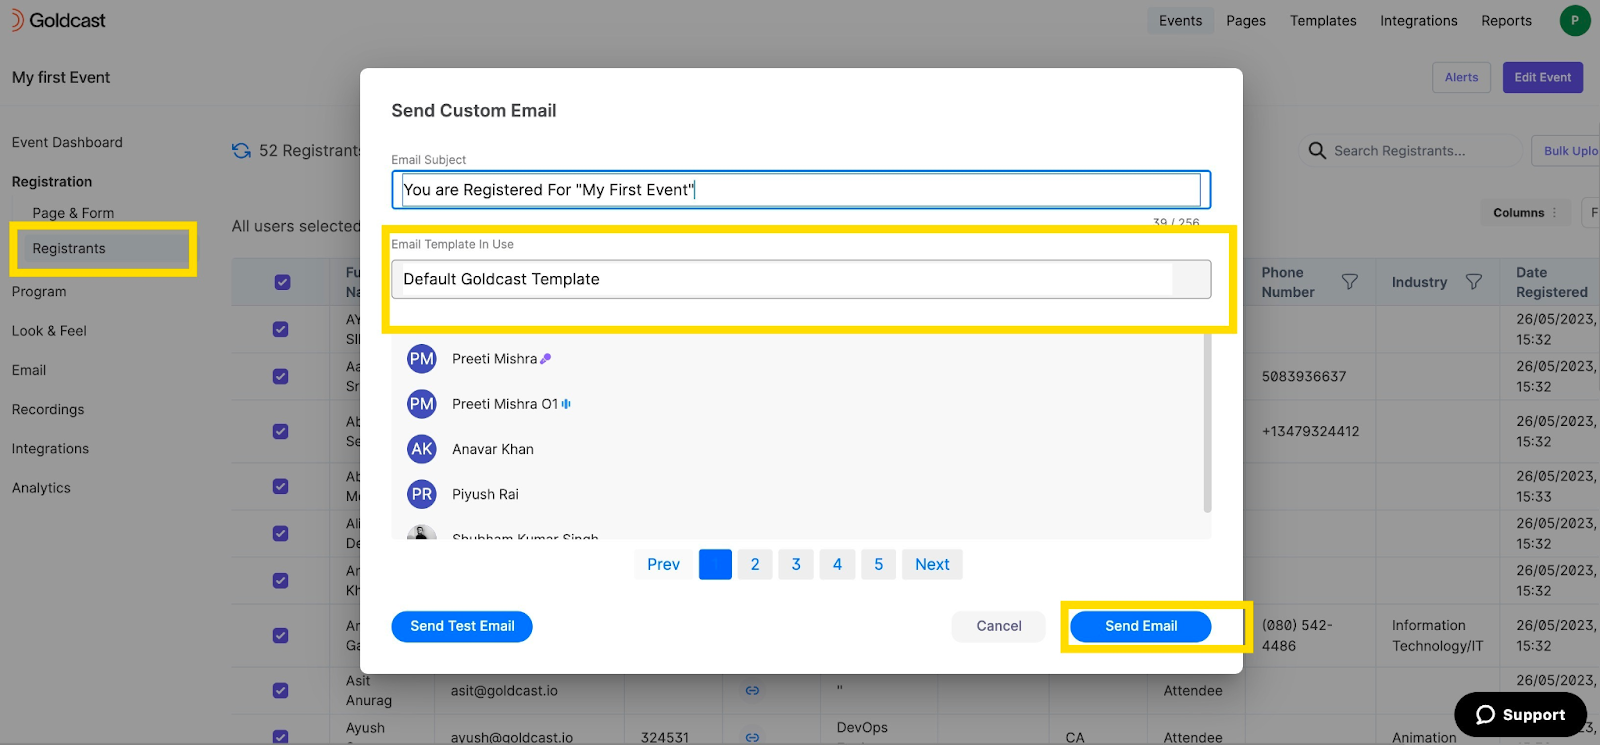
- Option 2: You can also choose to Turn OFF Email schedules and trigger the emails manually from the Registrants Tab or Send Custom Email tab. From the Registrants tab, select all or limited registrants and click on Send Email, selecting the correct email template.
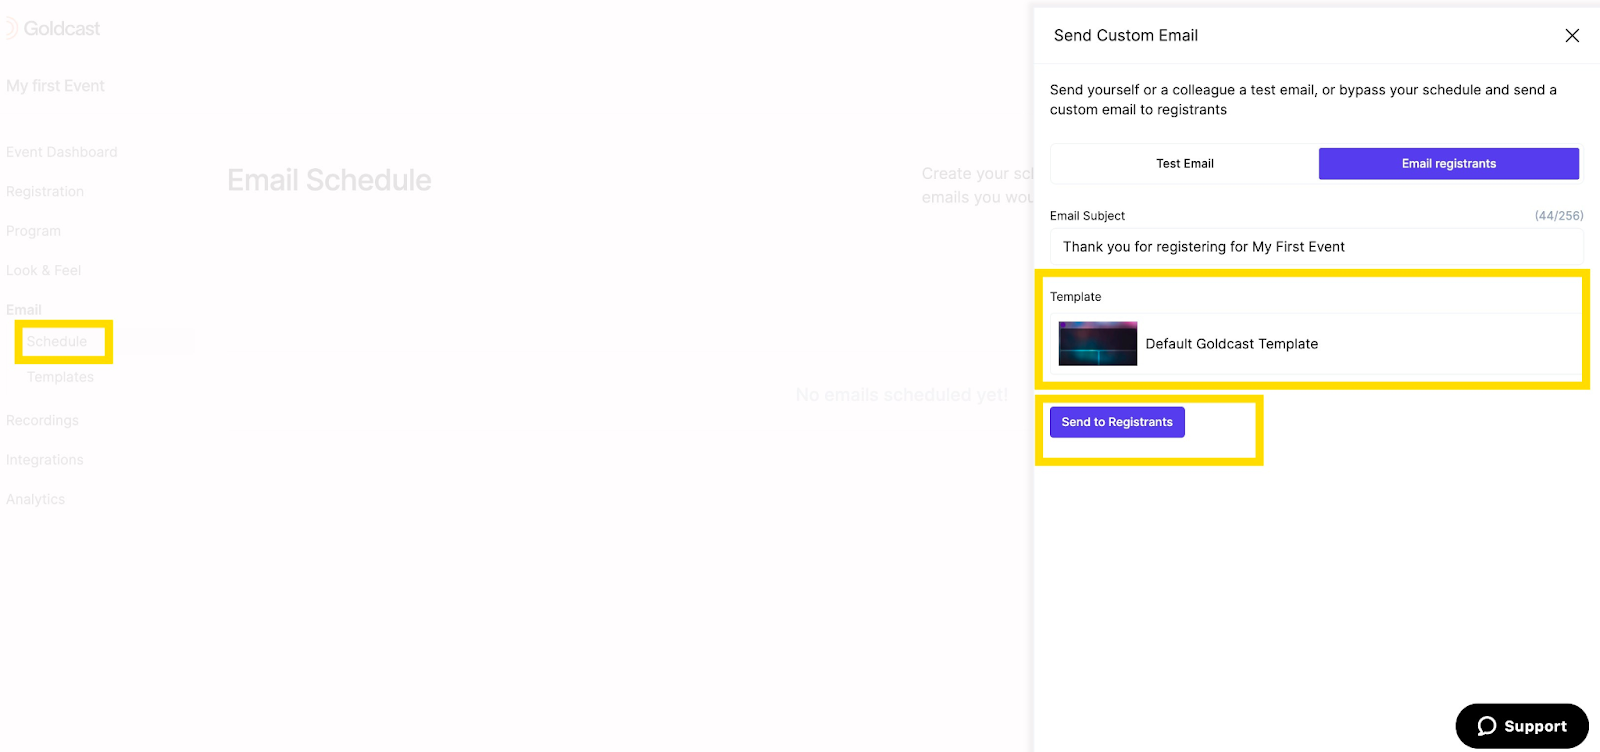
From the Emails tab, click on Send Custom Emails, select the email template and click on Send to Registered Email Addresses.
Attendee Experience when SSO is enabled
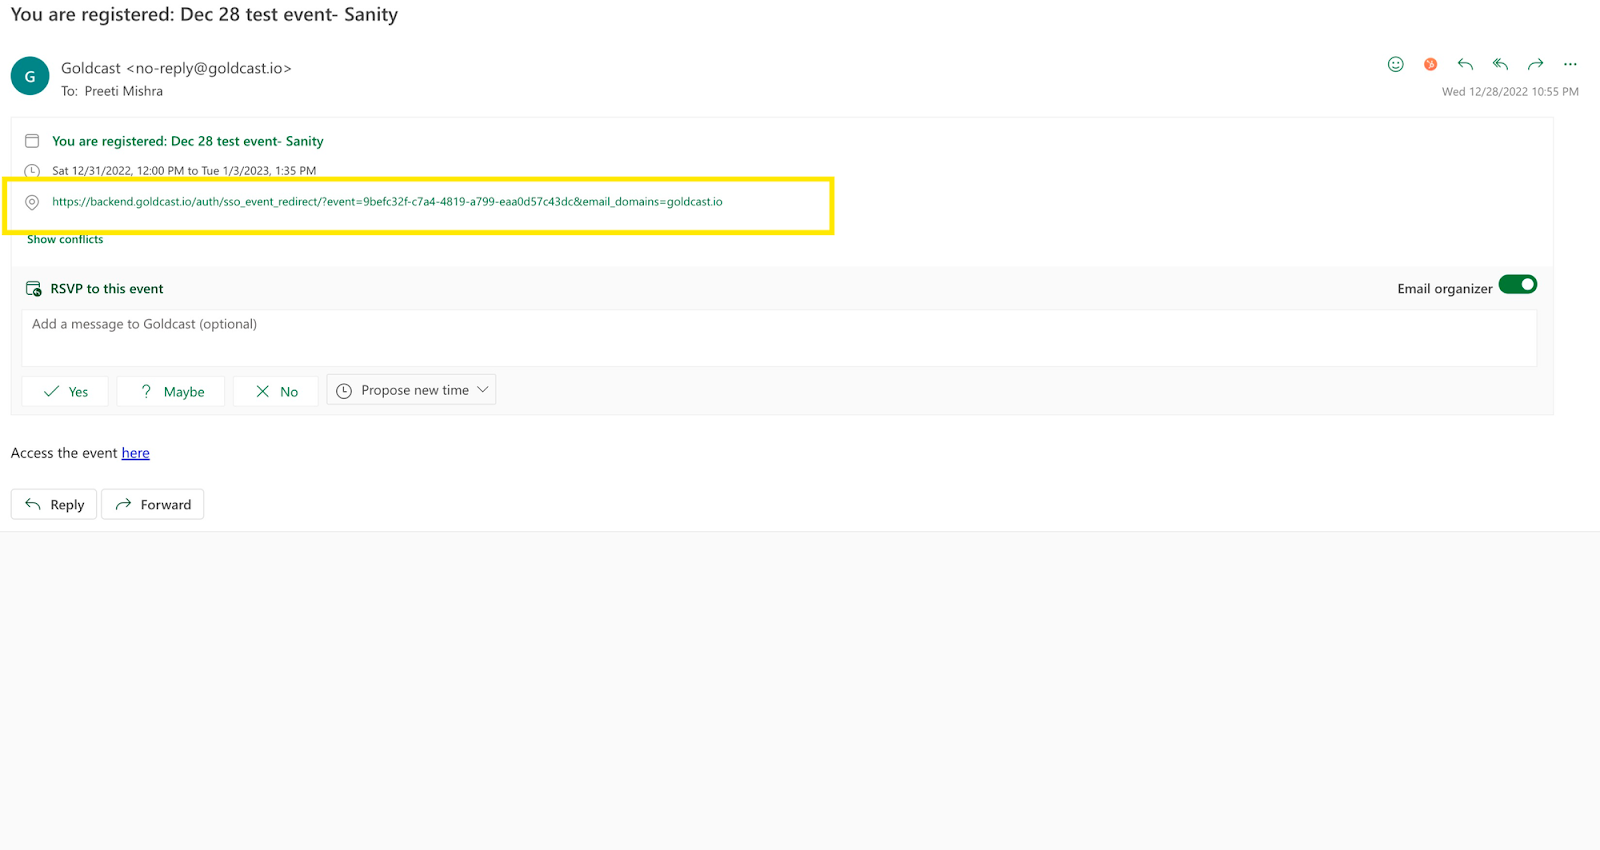
Registered users will receive an email containing the universal link, which will redirect them to the SSO provider for authentication before they're permitted to the event.
-
When Registrants click on the link, it will redirect them to the SSO page of your organization as per the Identity Provider and they can enter their enterprise credentials. See the flow with Okta as an example below. Calendar invite, if enabled for events, also includes the generic event link.
-
Once the SSO credentials are validated, the user will land on the event landing page & registered users will be able to access the event.
Heads up! If a user is not registered for the event but has valid SSO credentials, they'll be redirected to the Event Landing page. However, upon clicking Enter Event, they'll see a message indicating they do not have access to the event.
Things to know
- If you wish to disable SSO login for any event, please contact the Goldcast support team. Once disabled, if any user tries to use the universal link (which might have been previously shared), they will see an error page.
- In the Goldcast Studio, under the Registrants tab for your event, you can find and copy the magic link for each registrant. This link is unique per attendee and is not the same as the universal link, which prompts SSO login credentials before entering the event. So be cautious when copying this link since it will be different for each attendee. It is recommended to be used in case the universal link shared for your event has any issues.
- When you duplicate any event that has SSO enabled, the duplicated event also has SSO login enabled.