| Plan Availability | Starter | Pro | Premium | Enterprise |
 |
Add-on | Add-on | Add-on |
For customers with contracts starting March 2024 or later, feature availability is based on your pricing tier. If interested, contact your CSM or our Sales Team to discuss pricing options.
If this is your first time creating a field event in Goldcast? Check out our guide on Getting Started With Field Events in Goldcast for a quick overview of how this feature works.
How to create a field event
- Log in to Goldcast Studio using your credentials.
- Click the down arrow next to the + icon on the top-right of the screen and choose New Event.
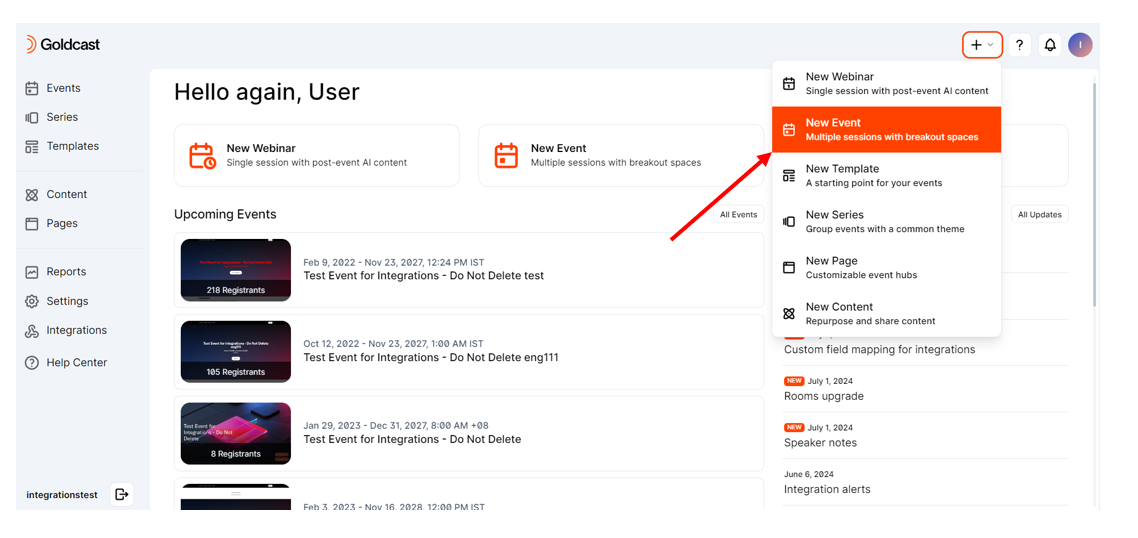
- This opens the New Event pop-up. Fill in the event details, such as Title and Date, and select preferred Template.
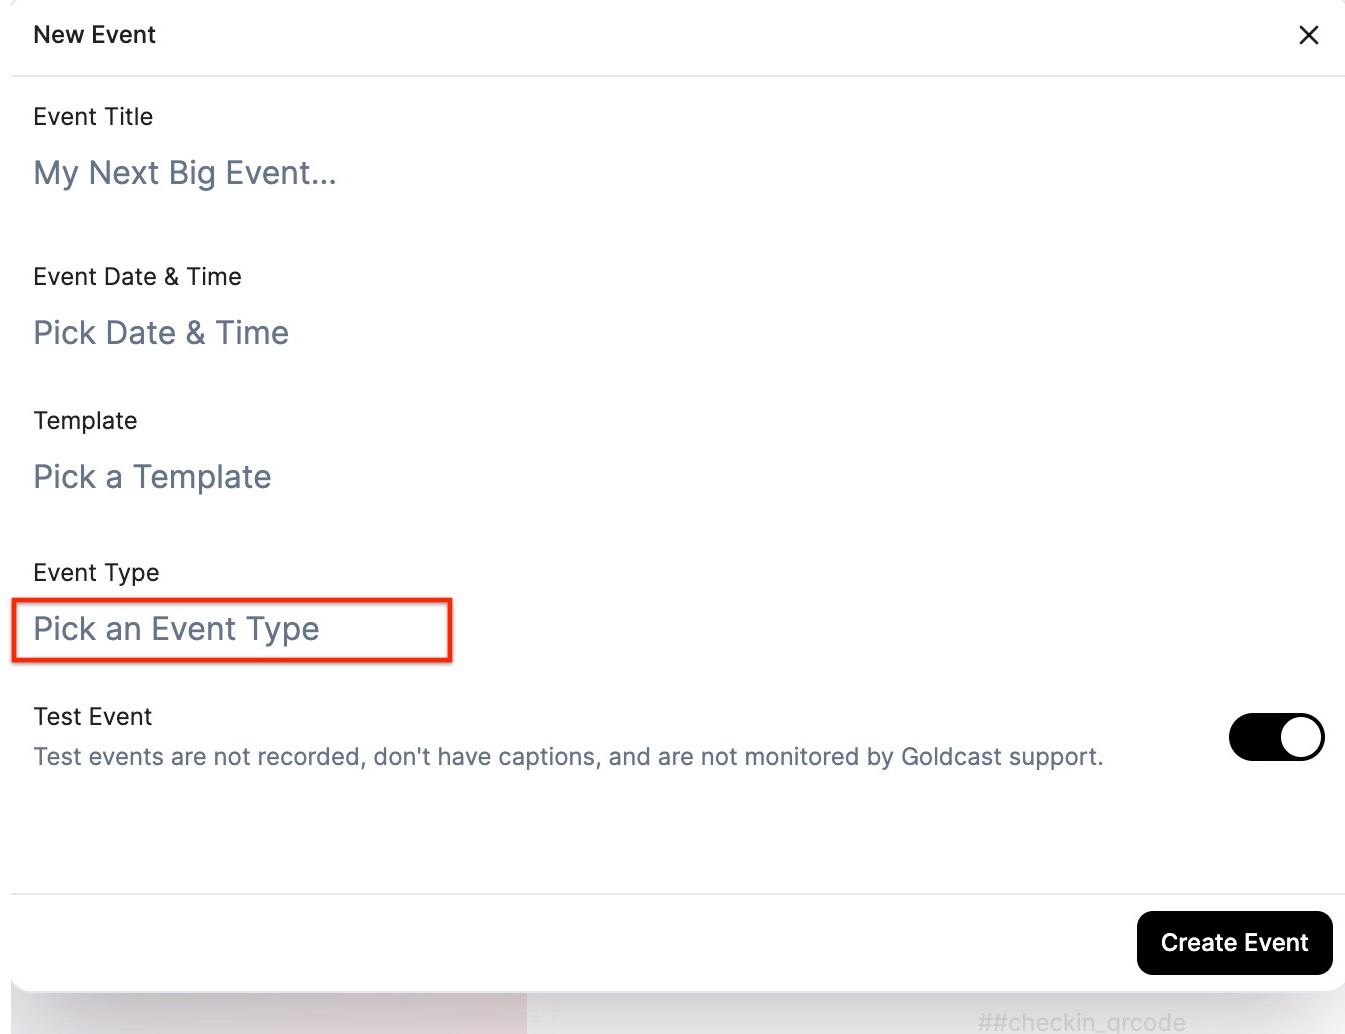
- Click on the Event Type field and choose the In-person tab. Enter the Venue Name in the Location field.
Heads Up! If your event venue isn't finalized or will likely change, you can edit it later using the Edit Event icon from the Event dashboard.
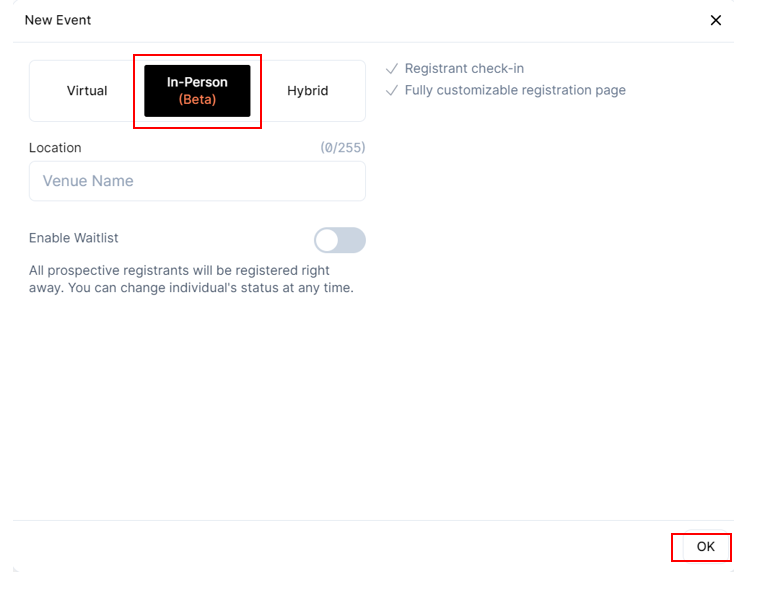
- If you wish to set up a waitlisted registration, turn on the Enable Waitlist toggle. To learn more, refer to our guide on waitlisting your event.
- Click OK, and Click Create.
Exploring the event dashboard
Once you have created the event, you can see it on the Event Dashboard, like any other virtual or hybrid event in Goldcast. In the Features section, you can notice that the event type is set to In-Person.
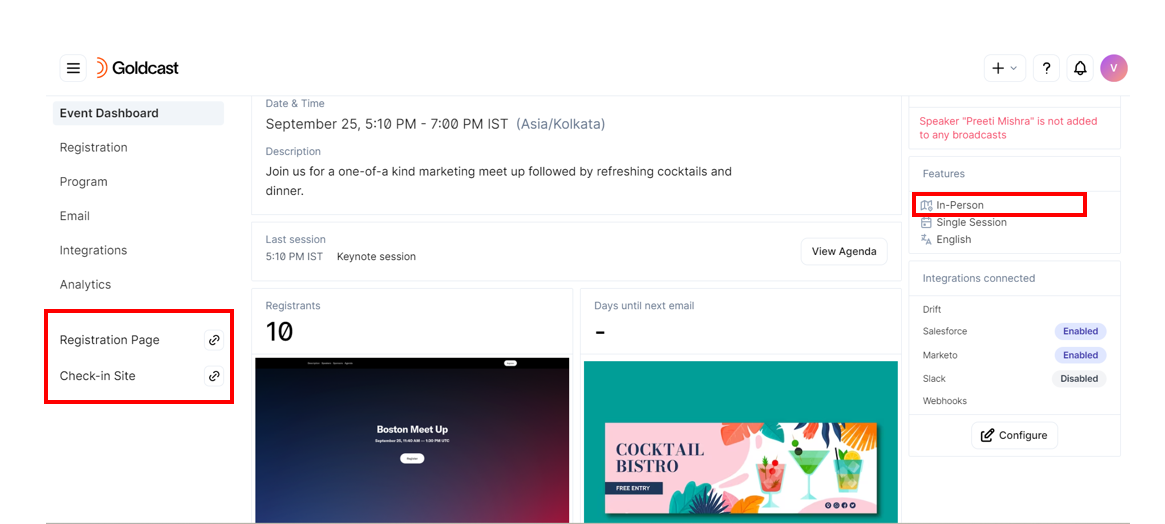
The dashboard provides a summary of crucial event details, such as:
- Date
- Time
- Description
- Agenda
- Alerts
- Features
- Integrations
- Registration page preview
- Email schedule
You can also quickly access the Registration Page and Check-in Site by clicking the corresponding quick links on the left.
Managing your event
Learn more about building your field event in the Goldcast Studio.
Registration page & form
The first step to planning a successful field event is setting up a responsive and intuitive registration page that allows attendees to register for your event. Use Goldcast’s intuitive and user-friendly Page Builder to plan and design the registration page for your upcoming field event.

Follow these steps to open the Goldcast Page Builder:
- Navigate to Registration → Page & Form using the left navigation panel.
- Click the Edit button to open the Goldcast Page Builder.
With our content blocks, you can easily rearrange and customize your event registration page. Once you're done, preview, save, and publish your page with just a few clicks. For more information, see Building a Goldcast Registration Page and Form.
Pro Tip: You can use the Social Thumbnail button to upload an image for displaying when sharing your event registration page link on social media.
Emails
As event day approaches, attendees often ask: Where’s the venue? What time does the event start? How do I gain entry? Goldcast’s Email Builder and Scheduling tool helps you provide attendees with all the required information and timely reminders delivered right to their inbox. Follow these best practices while creating and scheduling emails for your in-person events:
Schedule a confirmation email
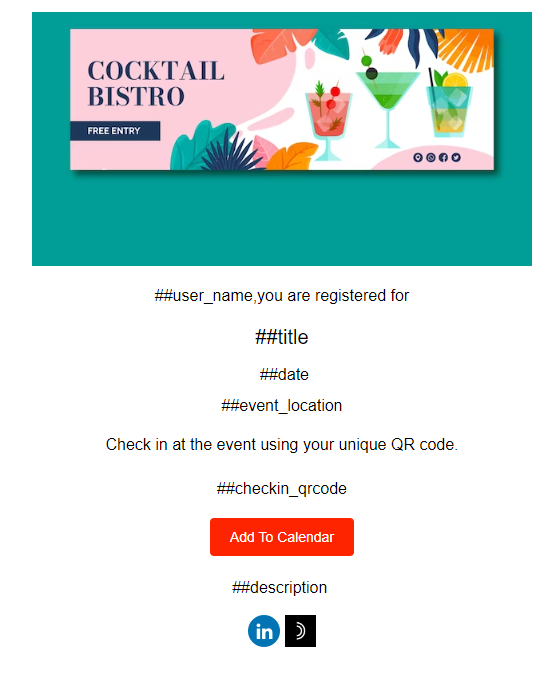
The event registration (or confirmation) email is sent whenever a registrant signs up for your event. The default Goldcast template of the registration email of an in-person event includes vital information about the event, such as:
- Event Title and Date
- Location
- Check-in QR code
- Add to calendar button
Make sure to include the registration email in your email schedule so that attendees receive essential event information as soon as they sign up for the event.
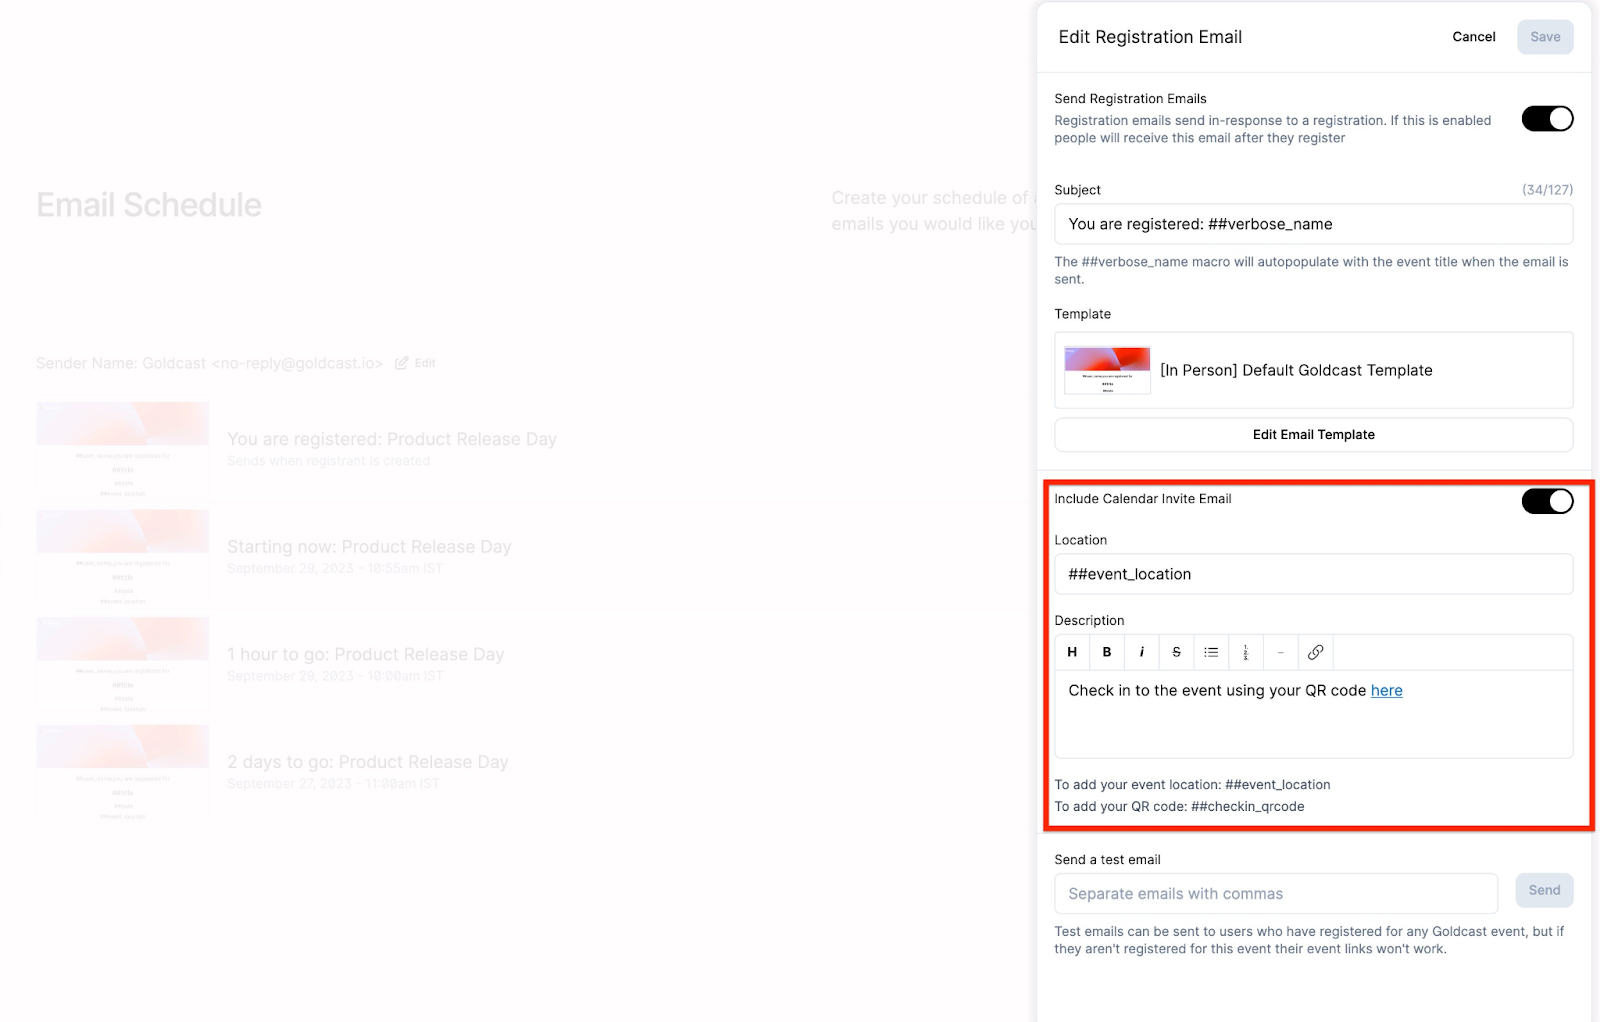
Include a calendar invite
Goldcast allows you to include a Calendar Invite email along with the registration confirmation email. You can customize it or turn it on/off by following these steps:
- Navigate to Email → Schedule using the left navigation panel.
- Click the Registration email to open the Edit Registration email drawer.
- Turn on/off the Include Calendar Invite Email toggle, depending on your requirements.
- Use the Location text field to add your event venue. By default, this pulls the event location entered.
- Use the Description text field to customize the body of the Calendar Invite email. By default, this text includes the check-in QR code.
- You can dynamically populate the body of the calendar invite by using the corresponding merge tags for Event Location (##event_location) and QR code (##checkin_qrcode).
Add the check-in QR code & venue to reminder emails
The check-in QR code acts as an entry pass for attendees on event day. So, double-check if you’ve included it in all reminder emails so attendees can quickly access it at the venue. By default, the Goldcast email template for in-person events and the calendar invite upon registration include the check-in QR code and event location. However, you can customize any existing or new email templates to align with your branding requirements and include the check-in QR code.
For custom emails, follow these steps to include the QR code and venue:
- Log in to Goldcast Studio and open your preferred event.
- Navigate to Email → Templates using the left navigation panel.
- Select your preferred template and click the Edit icon to open the Email Template Builder.
- Drag and drop a Text block anywhere within the email body.
- Use the following merge tags to populate your email with dynamic user and event data.
| Merge Tag | To Display |
|---|---|
| ##checkin_qrcode | Check-in QR Code |
| ##event_location | Event Location |
| ##title | Event Name |
| ##description | Event Description |
| ##date | Event Date |
| ##first_name | Recipient's First Name |
| ##last_name | Recipient's Last Name |
| ##$$ | Calendar Link |
| ##unsubscribe_link | Unsubscribe Link |
Once you’ve customized the email template, name it and click Save.
You can now use this newly created email template to schedule reminder emails or send custom one-off emails to registrants. Read our Crafting and Scheduling Emails guide to learn more about setting up automated notification emails for your event.
Event agenda
Like virtual events, you can create multiple sessions in Goldcast for your field events. Use the Program → Agenda tab to add sessions and schedule breaks between your sessions.

Heads Up! Field events can only include Live sessions. Other session types like Pre-recorded and RTMP are not available.
Speakers
You can invite and add as many speakers as you require to your field event. For detailed information, check our guide on adding and managing speakers to your event.
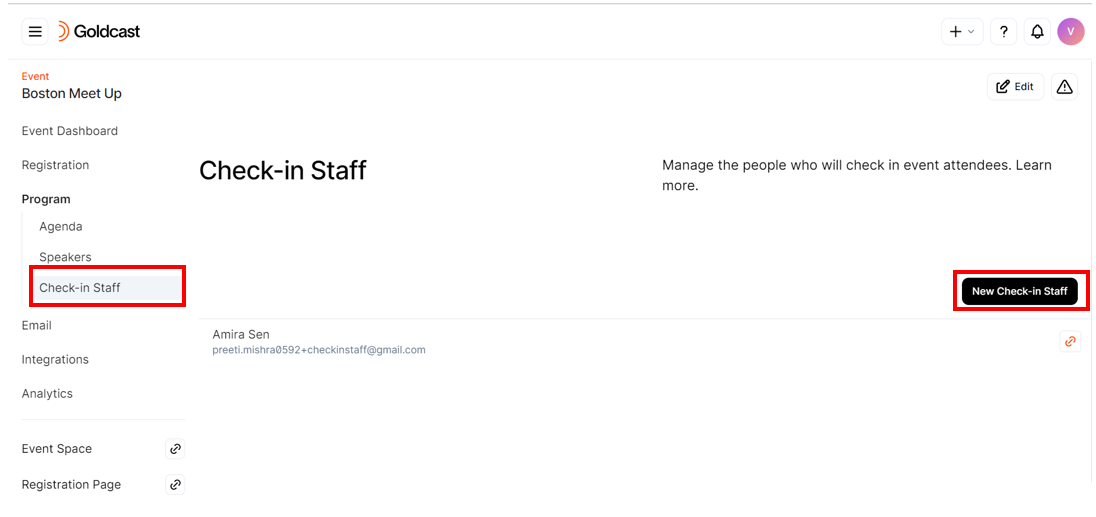
Check-in staff
A Goldcast field event requires check-in staff to scan the QR codes of attendees, mark their attendance, and admit them into the venue. Follow these steps to create profiles for check-in staff in the Goldcast Studio:
- Log in to Goldcast Studio and open your preferred event.
- Navigate to Program → Check-in Staff using the left navigation panel and click the New Check-In Staff button.
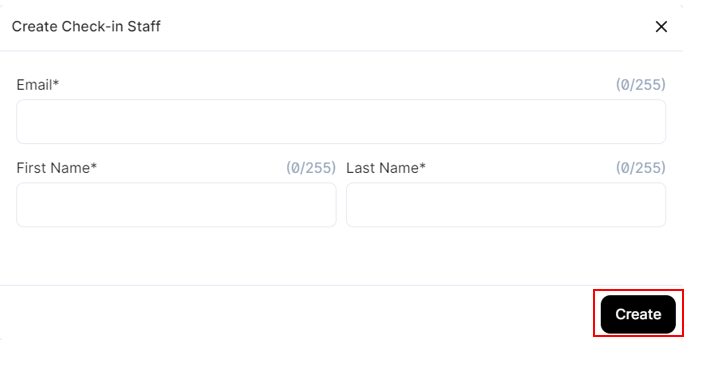
- Enter the email and first and last names of your staff members who’ll check-in guests at the venue.
- Click Create.
The check-in staff page lists all staff members who have been assigned check-in roles on event day. Notice the link next to each check-in staff member’s name.
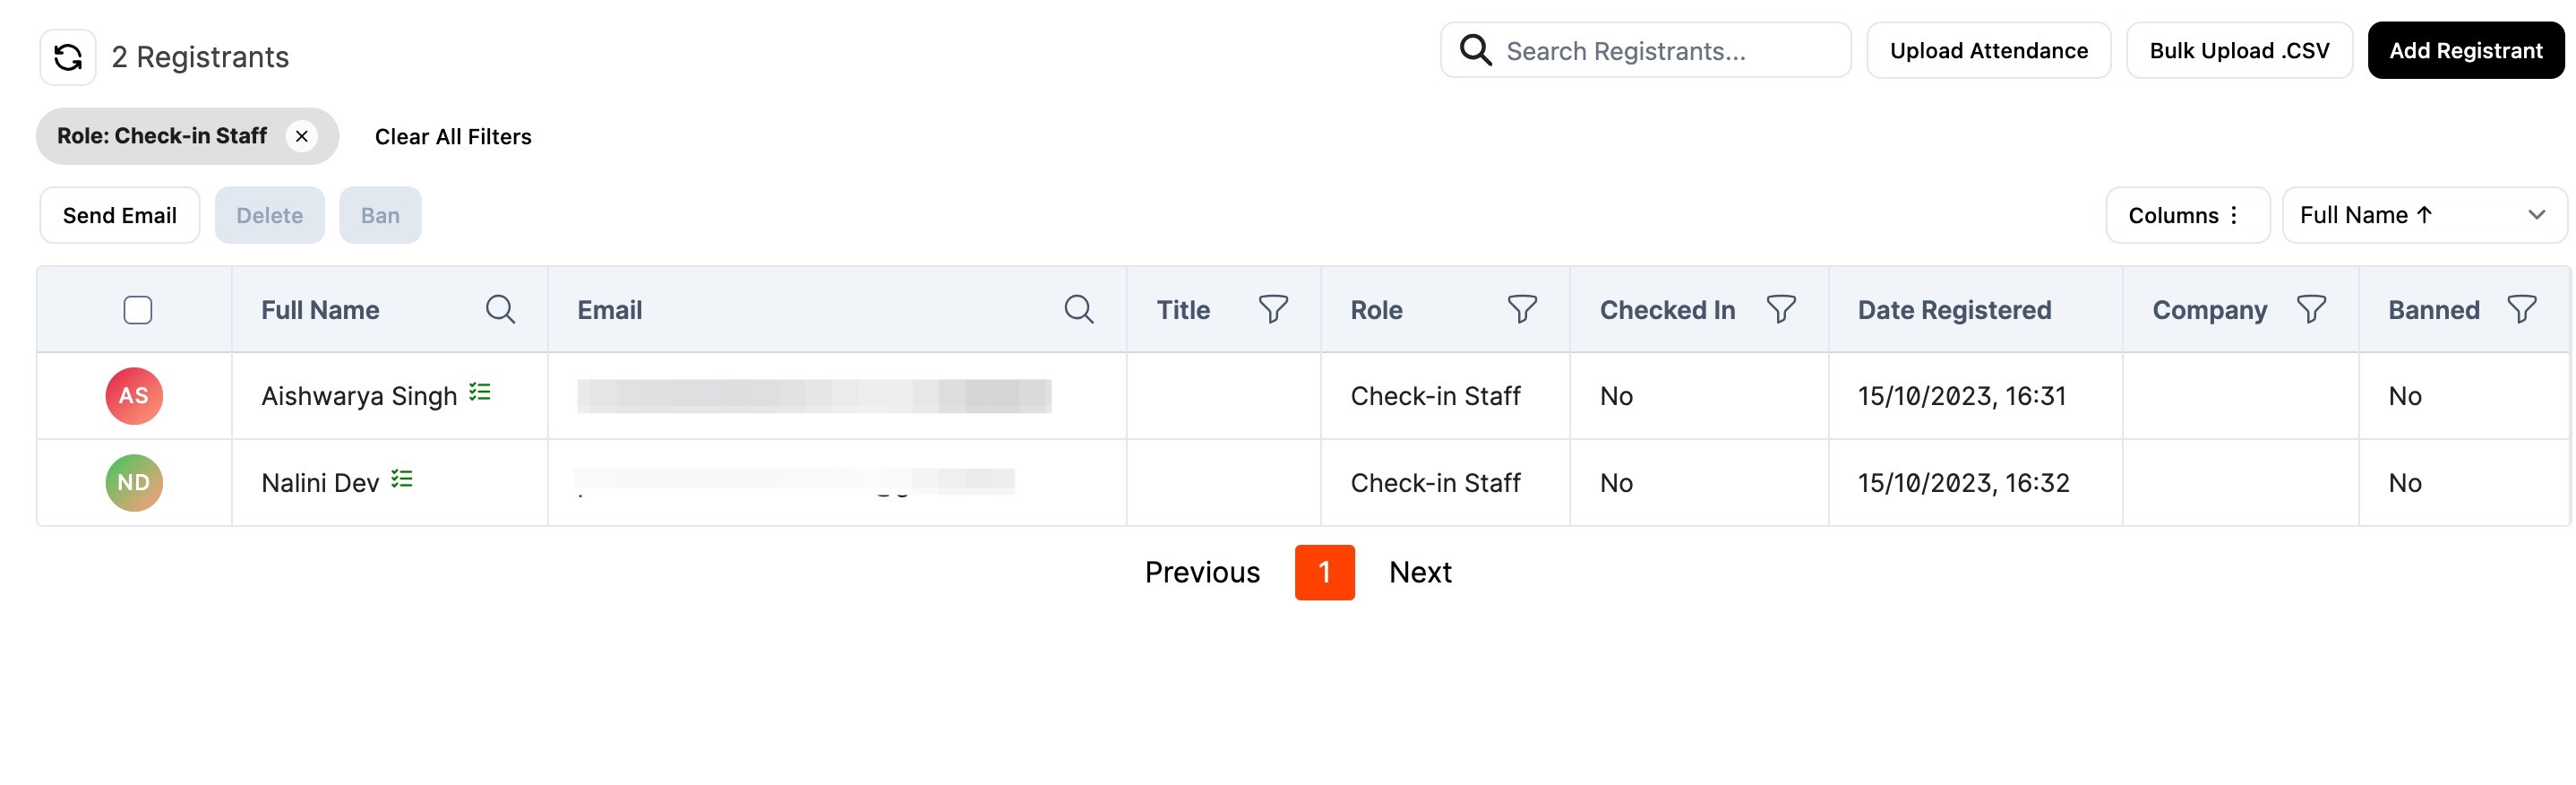
Once added, your check-in staff members will also be reflected in the Program tab with the role “Check-in Staff.”
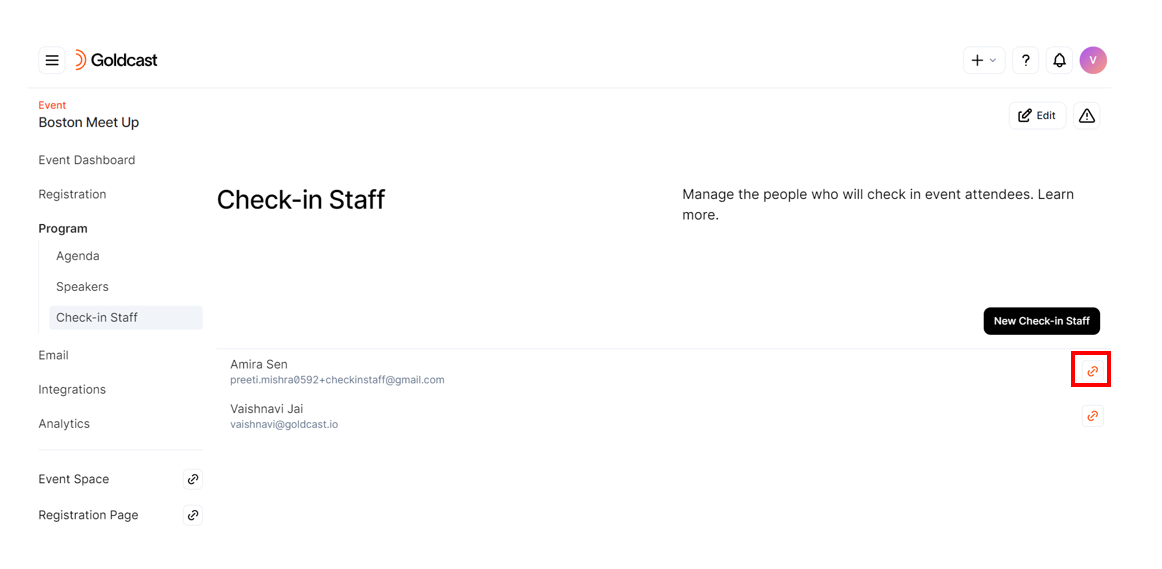
Make sure to share this link with your check-in staff before event day. This gives them access to the check-in website, which they’ll need to check in guests at the venue.
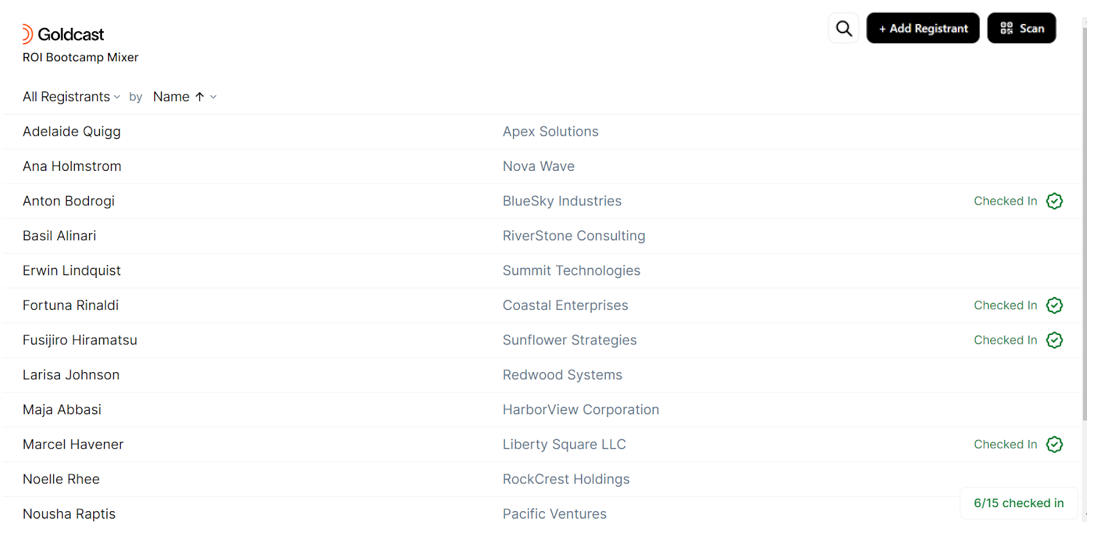
Here’s a sample of what the check-in page looks like.
You’re now all set to host awesome field events with Goldcast. The next step is to prepare your team to handle attendee check-in via the check-in website.
Pro Tip: Save your in-person event as a template to reuse registration and email branding for future events.