Table of Contents
Getting started
This guide will walk you through creating a single-session virtual event in Goldcast. Attendees can join your event by clicking their unique access link (magic link) using their web browsers. These events are great for customer training, product launches, demos, speaker roundtables, internal company meetings, and more.
Step 1: Create a single-session event
Login to your Goldcast account, click the + icon at the top right and select New Event.
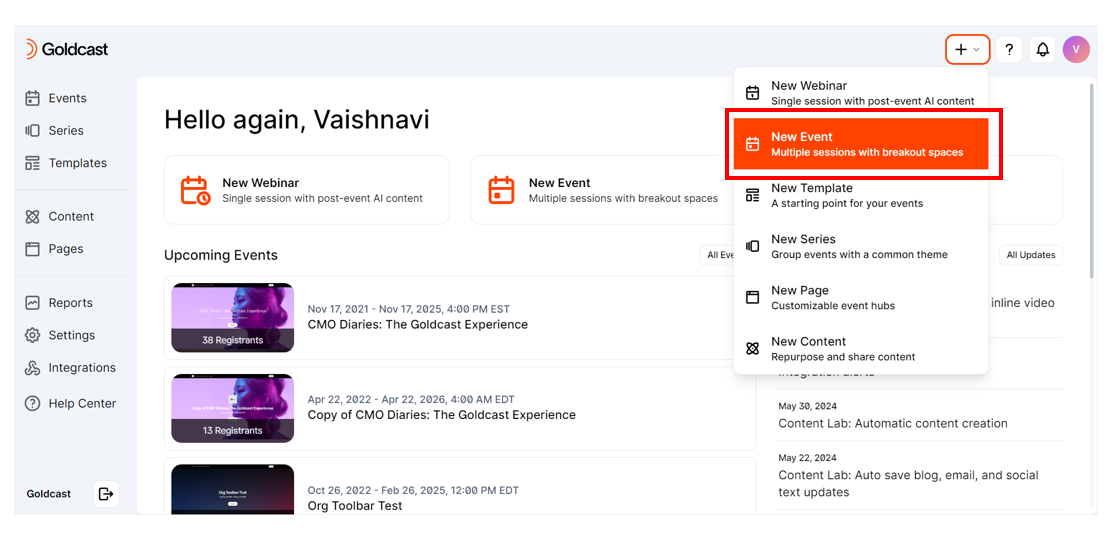
Enter the basic event details:
- Team: If your Goldcast account has teams enabled, you must choose the team you want to assign to this event.
- Title: The name of your event. You can edit it later via the event dashboard.
- Date and time: Select the date, start and end times, and time zone. Select single-session and click OK.
- Template: Choose an event template that matches your branding requirements.
- Type: For online events, select Virtual. If required, you can enable a waitlist for registration.
- Turn off the test event toggle, and click Create Event.
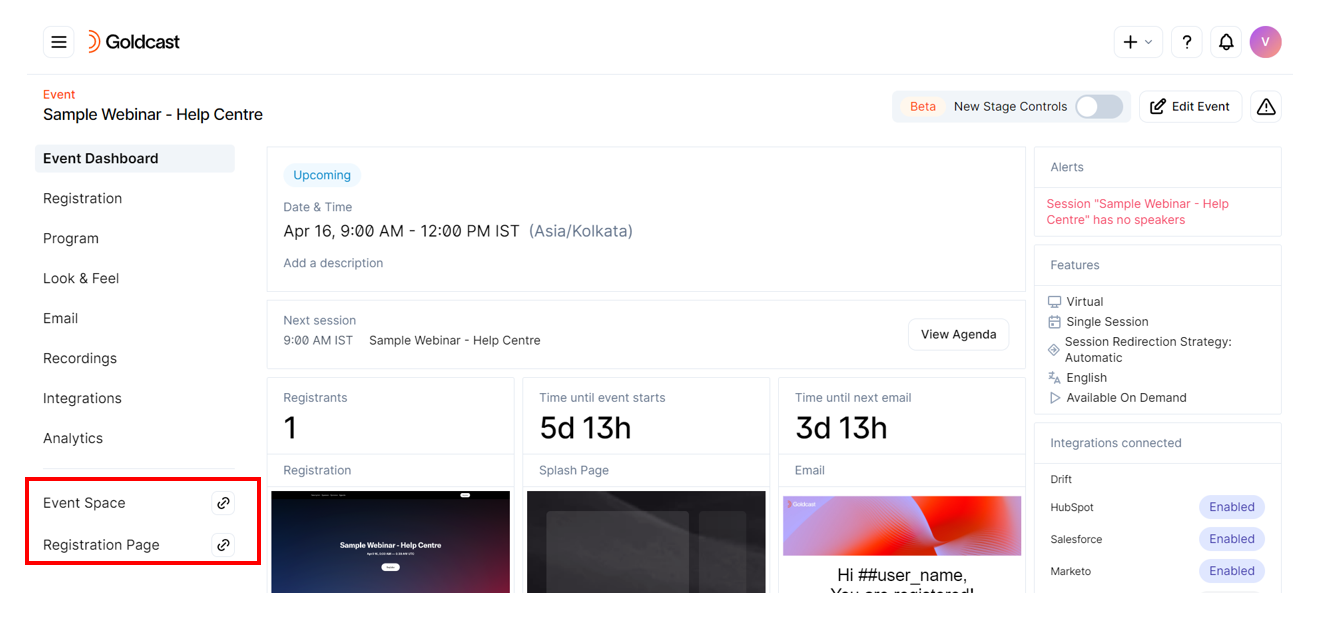
Once your event is successfully created, you’ll land inside the Event Dashboard.
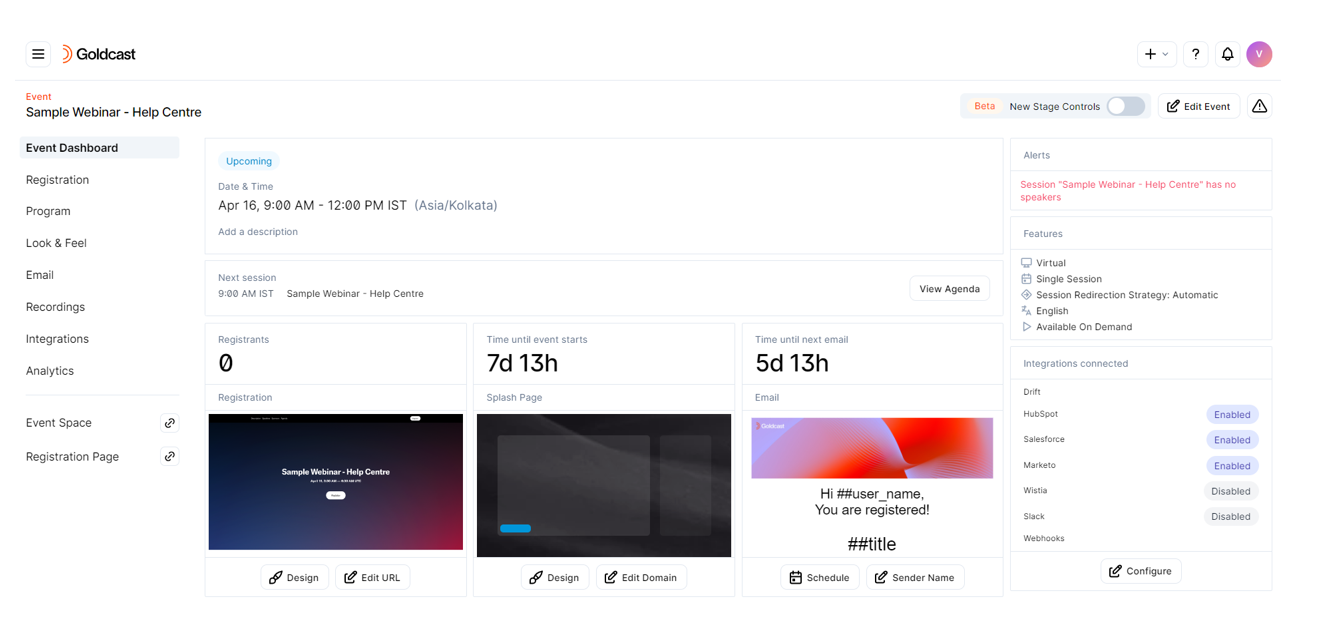
Heads Up! When you create a single-session event, Goldcast automatically adds a session to your agenda that has the same name, date, and duration as your event.
Step 2: Edit and customize the session
From the event dashboard, navigate to the Program → Agenda tab using the left sidebar.
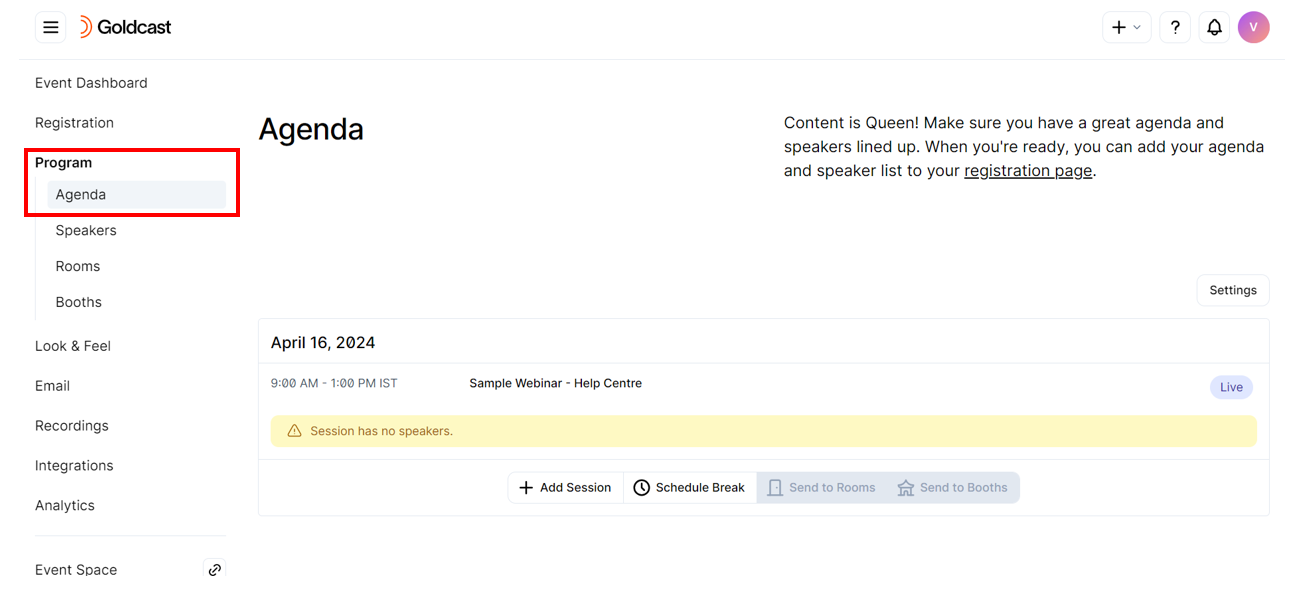
Click on the session to edit its settings. You can configure the following settings via this tab:
- Session name, date, start time, and duration: The event time is automatically localized based on your attendees’ time zones. For example, if an attendee accesses your EST event from a PST zone, they will see all the timing in PST.
- Session Description: Enter a short description of what attendees can expect in the session.
- Broadcast type: You can select from Live, Pre-recorded, or RTMP.
- On-demand: Turn off this toggle if you don’t want your event to be available for on-demand viewing by attendees who didn’t join the event live. By default, on-demand mode is turned on for all Goldcast events.
- Speakers: Add one or more speakers to your event.
- Slides: Upload a PowerPoint presentation to display during the event.
- Video: Upload video files to play on stage during the event.
- Post-session surveys: You can also create a survey to share with attendees to collect feedback.
- Engagement options: Goldcast offers several engagement tools, such as polls, resources, and text and video Q&A, to make your events interactive and immersive.
- RTMP Out: You can stream your Goldcast event in real-time to other platforms like LinkedIn Live, Facebook, and YouTube.
Step 3: Set up registration
Goldcast offers three different options to collect registrations for your event. You can:
- Use our in-built registration form and builder
- Manually register attendees (single or bulk)
- Collect registrations via an external platform and pass the information to Goldcast
In this guide, we’ll focus exclusively on how to use Goldcast’s registration page builder and native registration form. For the other options, refer to Registration Setup.
Create the registration form
- Click Registration → Page & Form on the left-side menu.
- Scroll to the Registration Form section and click the Edit button.
- This opens the Registration Form Builder. Customize the form by adding the required fields.
Heads Up! The fields Email, First, and Last Name are mandatory by default. You cannot remove them.
Drag and drop additional fields from the left-side panel. Use the gear  icon at the top to edit and modify fields. Click Save to update your changes.
Refer to Creating and Editing Registration Forms for more information on customizing your registration form.
Customize the registration page
Your registration page will include the form you created in the previous step. It can also display other information about the event, like the list of speakers, schedules, sponsors, etc.
Goldcast makes it easy to customize the registration page to match your branding and messaging requirements. To customize the page:
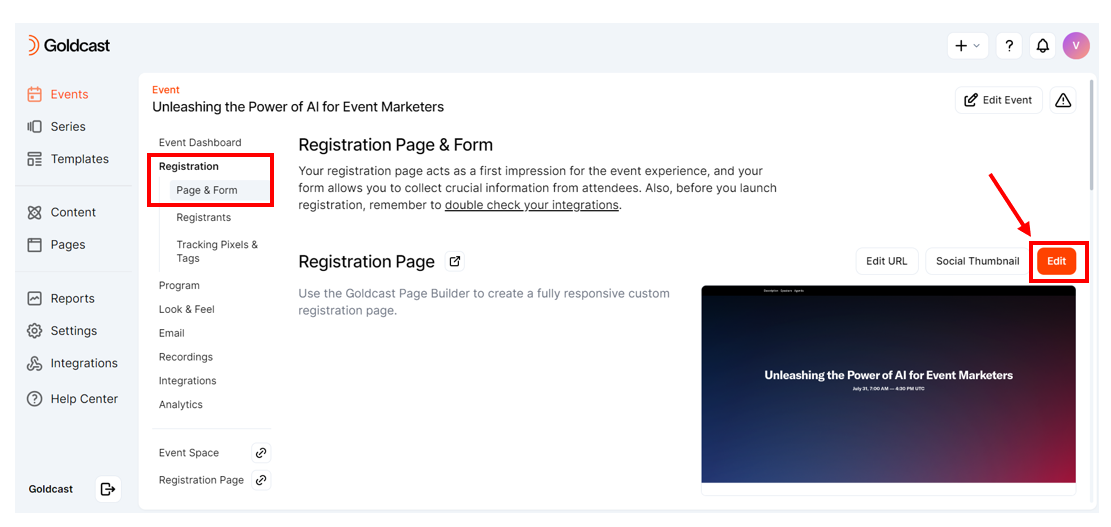
- Click Registration → Page & Form on the left-side menu.
- Scroll to the Registration Page section and click the Edit button.
Goldcast offers an intuitive and easy-to-use drag-and-drop page builder to customize your registration page. This page is fully customizable, and you can modify the layout to match your branding by including custom background images, changing text colors, etc.
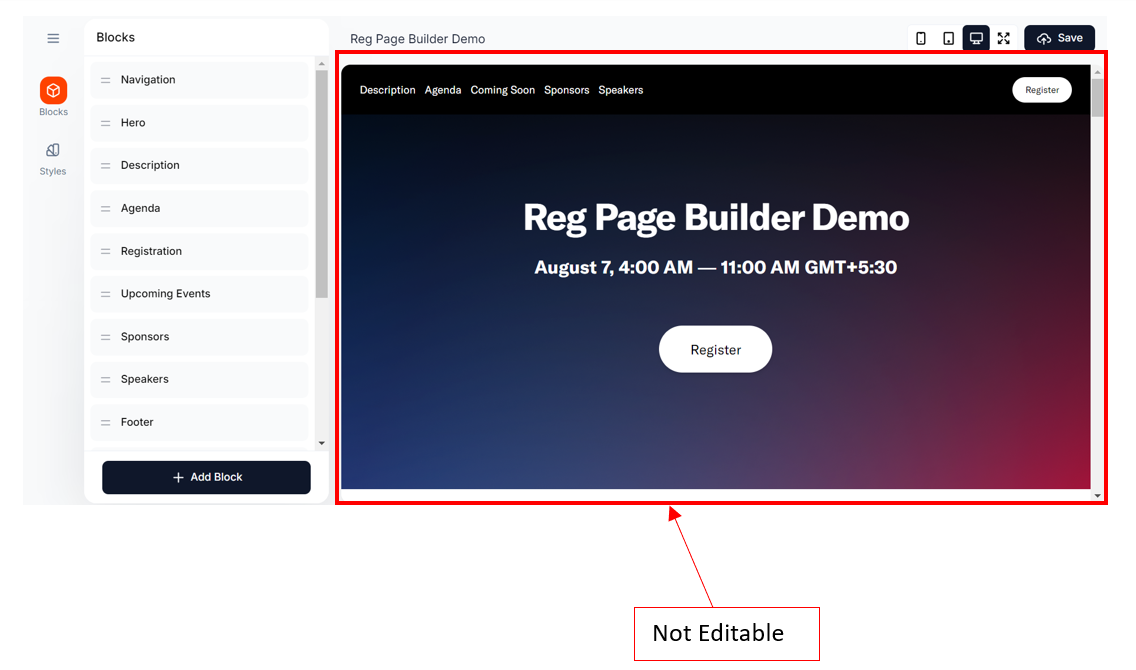
To help you get started, the registration page includes a few default blocks such as navigation, registration, description, speakers, etc. Using the left-side menu, you can reorder, edit, delete, or add new blocks to the registration page. The right side of the registration page builder is not editable, but it provides a real-time preview of the registration page as you make changes.
For an in-depth guide to customizing the registration page, refer here.
Step 4: Branding your event
The Look & Feel tab contains several tools and components to customize the appearance of your event.
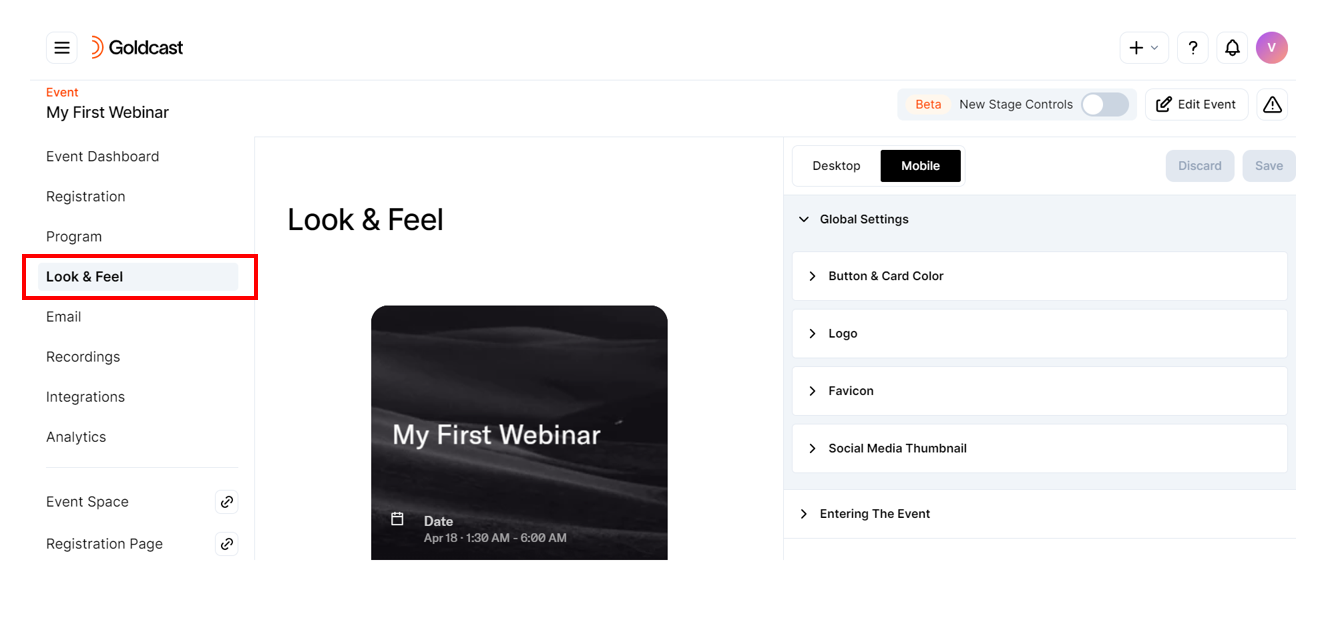
Global settings
These settings apply to both the landing page and the event stage. You can choose the button colors and upload a logo, favicon, and social media thumbnail.
Entering the event
When attendees click their magic links, they arrive at the landing page. You can customize the landing page's appearance by changing the background, font, and colors. You also have the flexibility to choose if you want attendees to go through the tech check and fill out the attendee profile before entering the event.
Stage
Customize the font, stage background, video stream background, stage popups, sidebars, and call-to-action button. You can also upload a filler slide (to use as a loading screen) and a buffer video (to play on stage before the session begins).
For more information on customizing your event to match your branding, refer to our guide on Event Look & Feel: Branding Your Event.
Step 5: Invite speakers
If you haven’t added speakers in Step 2, now would be the right time to add them to your event. One way to add speakers is by navigating to Program → Speakers using the left sidebar. On this page, you can add, remove, and edit speakers. Another way is to add the speaker(s) directly to your session via the Program → Agenda tab. Refer to Adding and Managing Speakers for complete instructions.
Once you’ve added speakers, share their unique magic links via email/chat. You can also point them to the Speaker Guide to help them get an overview of the platform's functionalities.
Speakers don’t have to register for the event. They can automatically access the event backstage by clicking on the magic link you shared with them.
Step 6: Customize audience engagement
One of the biggest highlights of a Goldcast event is the array of engagement tools that make your session fun, interactive, and engaging. You can customize the audience engagement tools by navigating to the Look & Feel tab → Engagement & Communication section. For more information on the different audience interaction tools available, refer to our guides on Engagement Tools.
Step 7: Set up integrations
Another massive highlight of running your events on Goldcast is the ease of connecting the platform with your martech, CRM, and sales tools. From the event dashboard, navigate to Integrations via the left sidebar to connect the event with required third-party applications like Salesforce, HubSpot, Eloqua, Drift, Slack, Marketo, Pardot, and more.
Pro Tip: Once you've connected your CRMs and MAPs with Goldcast, we recommend tracking the health and real-time status of the connected integrations using the Integration tab in Studio. Refer to this guide to learn how to check integration status.
Step 8: Schedule emails
Goldcast allows you to send scheduled emails to registrants automatically.
- Use the Email → Schedule tab to set your preferred email schedule for pre- and post-event emails. Make sure to turn on the registration email (with calendar invite), as it, by default, includes the magic link that registrants will use to access the event.
- Use the Email → Templates tab to customize the layout and content of the emails you send from Goldcast.
For more information, refer to Crafting and Scheduling Emails.
Step 9: Preview the setup
Woohoo! You’re in the final stretch! You’ve completed the basic steps of setting up a Goldcast single-session event. Use the Event Space and Registration Page links to check if everything is set up correctly.
Step 10: Promote your registration page
While Goldcast offers additional features to customize your event, you’ve now completed the basic setup. You’re now all set to kickstart event promotions. Copy the registration page URL and share it on your social media channels, email newsletters, blogs, and other marketing assets.
Pro Tip! Before sharing the registration page link, we highly recommend previewing it and doing a test registration to verify if everything works as expected.
Heads Up! You can continue editing the event setup, look and feel, and other details until the event day. So, there's no pressure to make everything perfect before sharing the registration link.
Next Steps
You can refer to our step-by-step guide to running a Goldcast event to learn more about what to expect on the event day. Meanwhile, we recommend you host a dry run to rehearse with speakers, moderators, and other organizers backstage and ensure you’re all set for the big day!