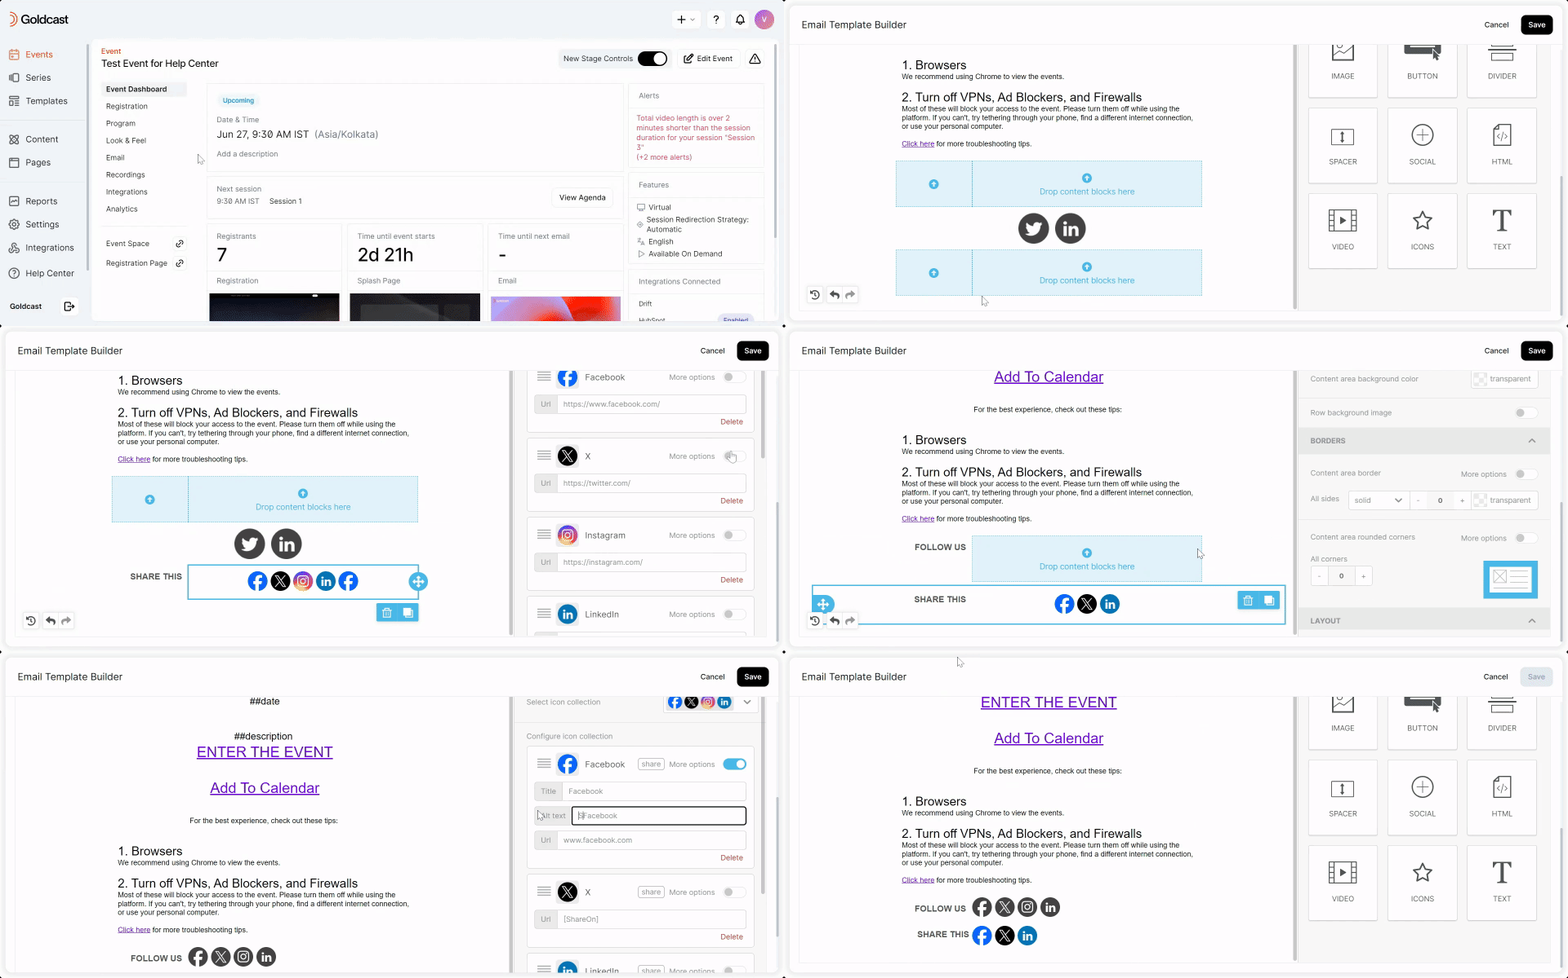
In addition to the social follow buttons, you have the option to include social sharing buttons in your Goldcast email templates. These buttons allow event registrants to share your emails or any resources you've sent on their preferred social media platforms.
Here’s a step-by-step guide to adding social sharing buttons to your Goldcast email templates:
- Log into Goldcast Studio and open your preferred event.
- Navigate to Emails → Templates and select the template you want to edit.
- Click Edit to open the Email Template Builder.
- Go to the Rows tab, and drag and drop a new row to the bottom of the email template.
- Go to the Content tab, click the Social button, and add it to your new row.
Pro Tip: Add social buttons to a separate row rather than an existing one to avoid confusion with social follow buttons.
- Include a text component in the row and specify the intended purpose of these buttons by including descriptive text like “Share This,” etc.
- Use Select icon collection to change how the buttons look. Click + Add New Icon and navigate to the Social Share tab to add more buttons/custom icons.
- Use Align, Icon Spacing, and Padding tools to arrange the buttons as required.
- Use the More Options button to modify the Title and Alt Text of each social share icon.
- Rearrange the icons by dragging and dropping them using the three horizontal lines in this section.

That’s it. You’ve completed adding social sharing buttons to your Goldcast email templates.