Table of Contents
|
Feature Availability |
Starter | Pro | Premium | Enterprise |
 |
 |
|
|
For customers with contracts starting March 2024 or later, feature availability is based on your pricing tier. If interested, contact your CSM or our Sales Team to discuss pricing options.
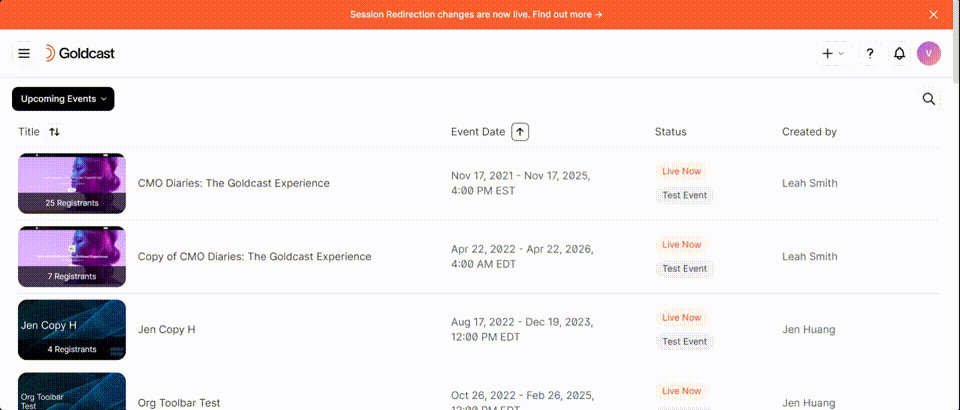
Templates help set up your events faster and with minimal effort. Start by creating a template that aligns perfectly with your brand style. This includes selecting the right fonts, colors, logos, and images, and configuring all necessary emails, integrations, and event settings.
Once you craft your template, it becomes the foundation for all your future events. When you create a new event, simply select your template, and voilà! All the settings—emails, integrations, and event details—are automatically applied. The new event will automatically inherit all the pre-defined settings from your template, saving you time and effort.
The best part, you can create and save multiple templates in Goldcast for various use cases. For instance, create one template for your weekly product demos, another for your monthly customer training sessions, and another one for your town halls, and so on.
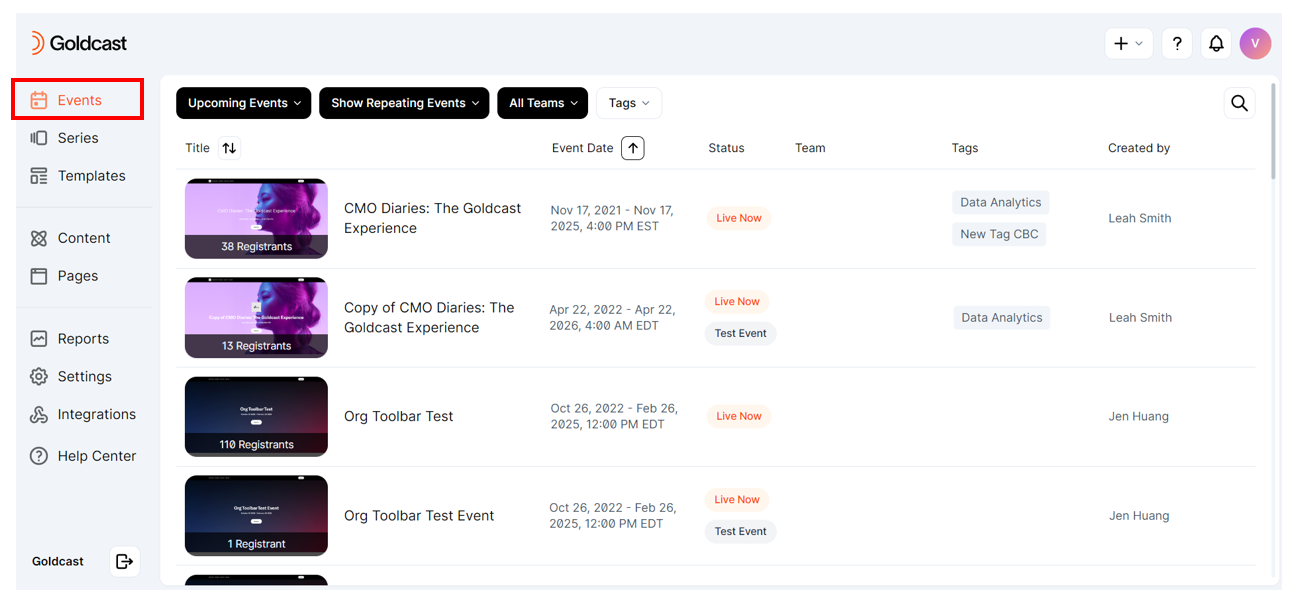
Create a template
- Log into Goldcast Studio, click the
 button at the top right of the screen, and click New Template.
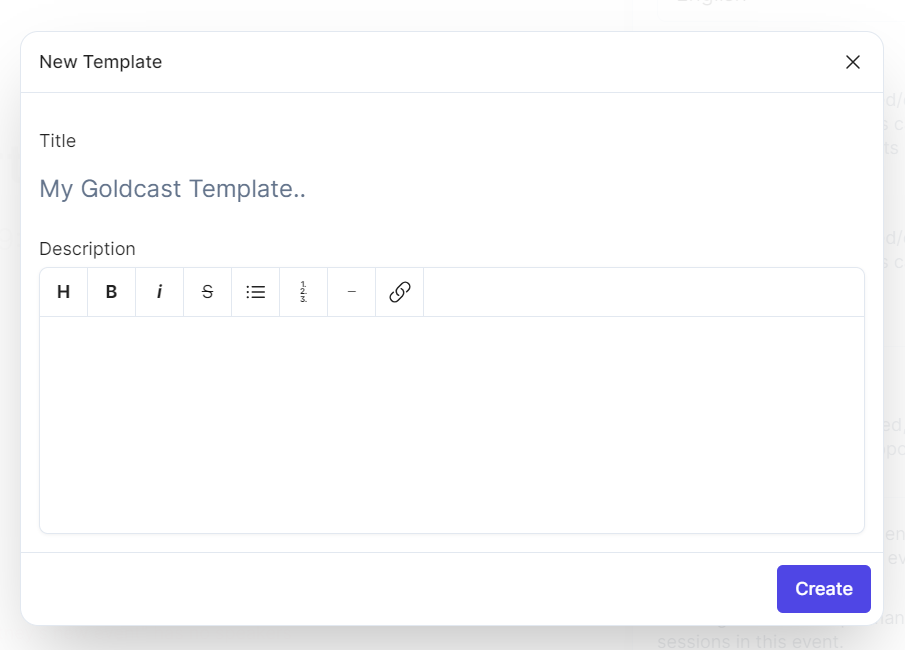
- The New Template popup opens on the screen.
- If you have Team Workspaces enabled, you must select the access level for the template:
- All users in the organization (Makes the template accessible to all Team Workspaces in your organization)
- Only users in this Team Workspace (Limits access to the template only to members of a specific Team Workspace).
- Enter a Title and Description (optional) for the template.
- Click Create.

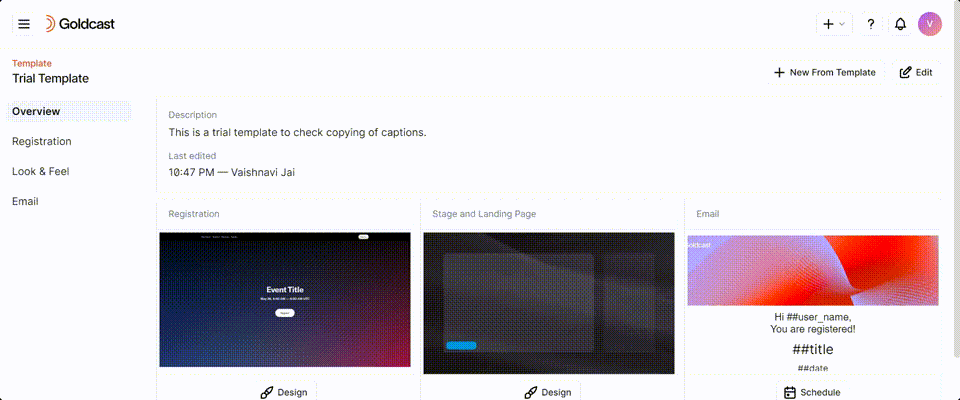
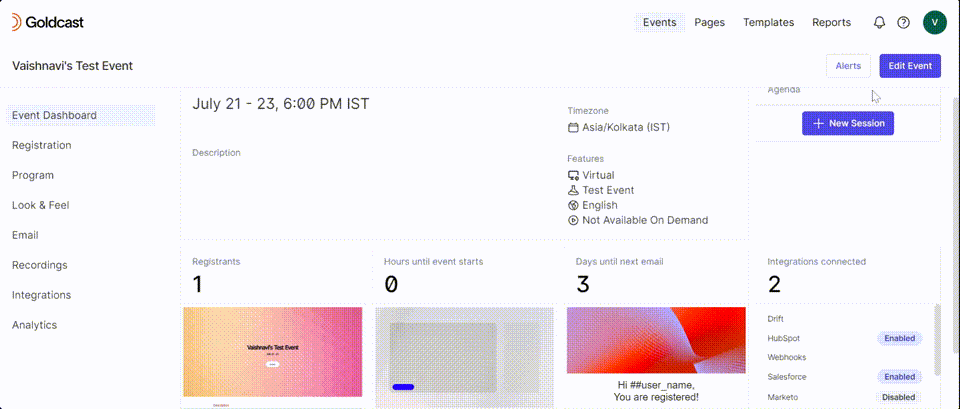
You will see the “Template Created Successfully” message and land on the Template Overview, where you can configure the different settings of the template.

Configure template settings
Templates include four main sections: Registration, Look & Feel, Email, and Integrations. You can configure these settings in the template, and Goldcast will automatically apply them to any new event or webinar created from it.

Heads up! Modifications or changes to templates DO NOT retroactively impact events that have already been created. Edits or changes you make to existing templates will only apply to future events created from that template.
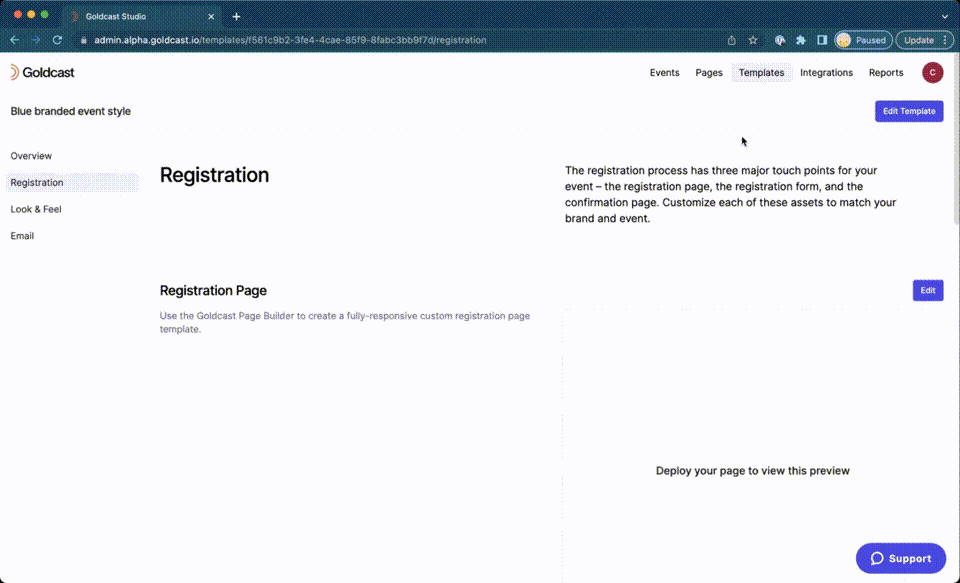
Registration
Once on the template dashboard, click Registration in the menu on the left side of the screen. This tab has four sub-sections: Registration Page, Registration Form, Registration Email, and Tracking Pixels & Tags.
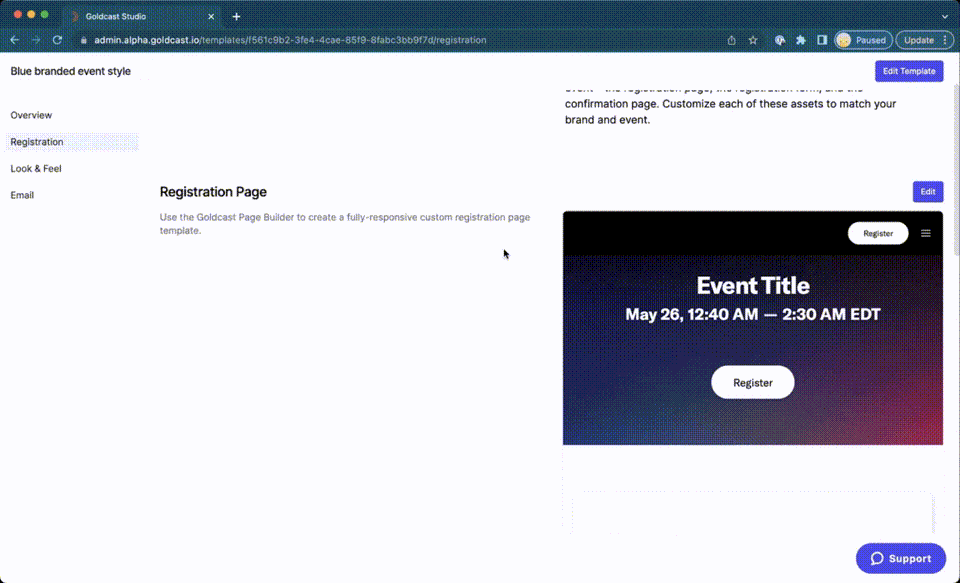
Registration Page
Event registration pages are the first touchpoint your audience has for your event. You can edit your registration page to align with your event and company branding and share important information with your audience.

To create a registration page, click the Edit button above the page preview. This opens the Goldcast Page Builder. For detailed instructions on how to use the Goldcast Page Builder, read more here.
Registration Form
The registration form will be used on the registration page to collect information about every event registrant. Goldcast forms allow you to customize fields based on your event requirements.
To edit the registration form, click the Edit button above the form preview. This opens the Goldcast Form Editor.

The default form includes First Name, Last Name, and Email. These fields are required on all Goldcast forms and cannot be removed. You can add additional fields to collect information from your registrants, create conditional logic, collect UTM tracking, and more. To add additional fields, drag and drop them from the list on the left into your draft form on the right. To edit a form field, hover over it and select its edit icon. A window will appear. From here, you can make changes as needed.
For detailed instructions on how to set up a Goldcast Form, read more here.
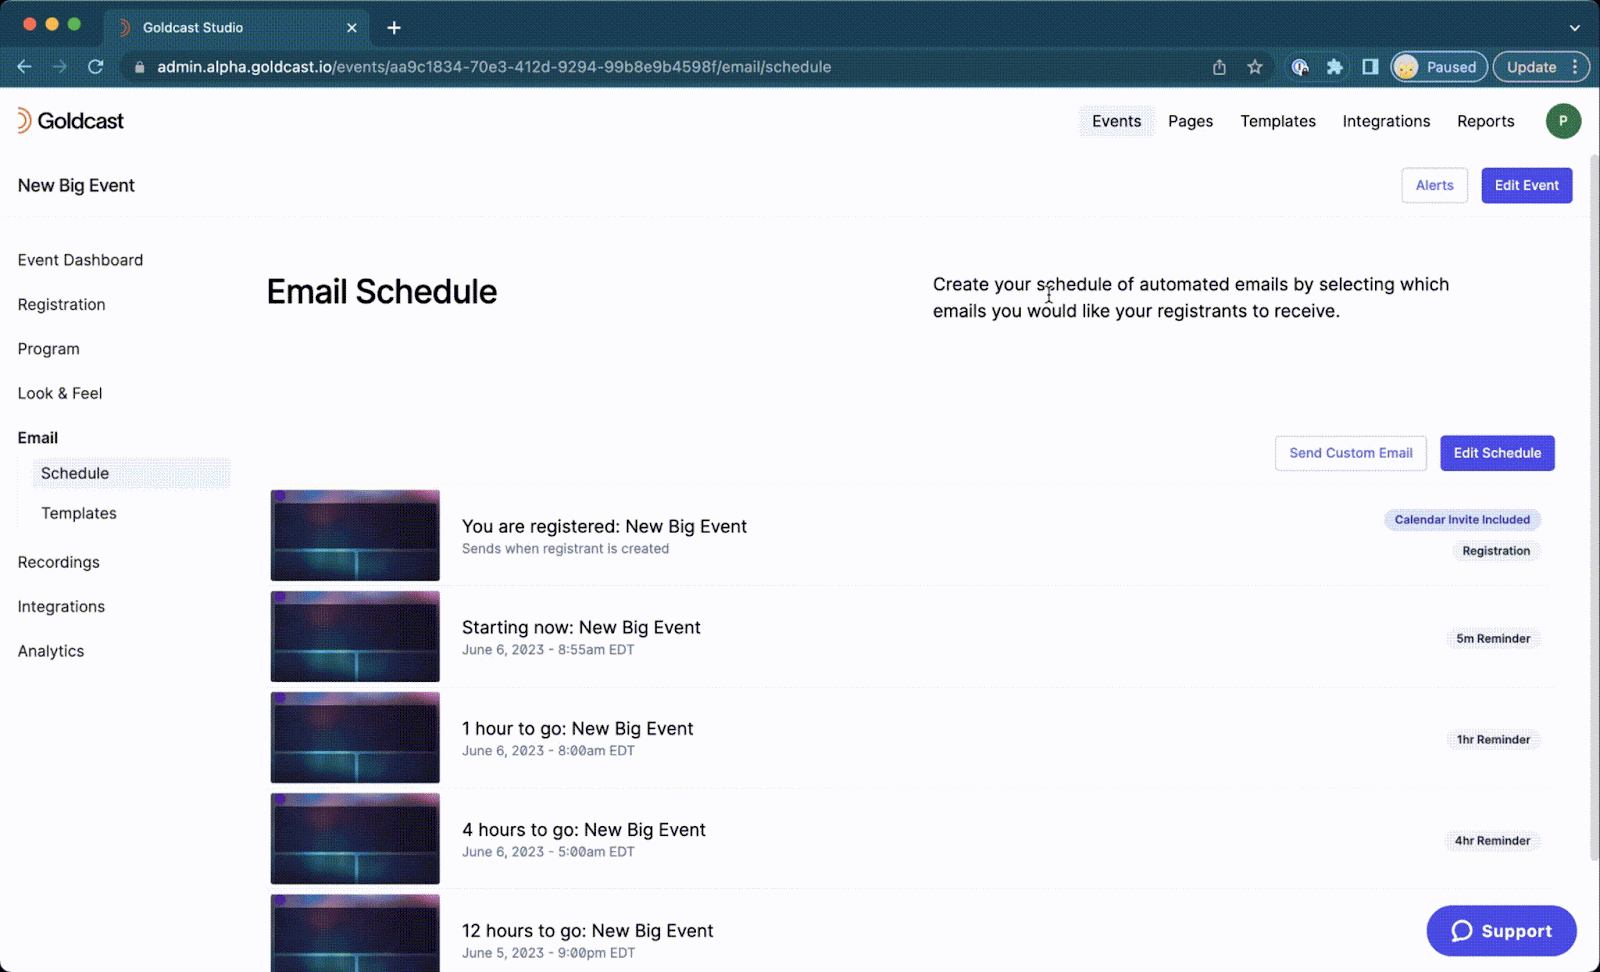
Registration Email
The registration email is the email confirmation your registrants will receive after they register to attend your event. To customize the design, content and settings of this email, click the Edit button above the email preview.

Here, you can choose the email settings, including:
- Turning the registration confirmation email on or off
- Enabling the calendar invitation
- Editing the email subject line
- Selecting an email template
To send a test email, enter email addresses separated by a comma in the test email field, then click Send.
To add or edit an email template, click Save to save your changes. Then, using the left panel, navigate to the Email → Templates tab. To update an existing email template, click on the template in the list. This will open the Goldcast Email Editor. For detailed instructions on editing emails, read more here.
To add a new email template, click the New Template button in the top right corner.
- Choose Create Template if you’d like to create an email template using the Goldcast Email Editor. Give your email template a name and build your template in the Goldcast Email Editor.
- Choose Upload HTML if you’d like to import an HTML template from your computer. If you need to make any edits to your HTML template, you will need to import a new template.
Tracking Pixels & Tags
You can also configure the tracking pixels and marketing tags for the registration page via the template. Navigate to Registration → Tracking Pixels & Tags to copy-paste the tracking codes you want to deploy on the registration pages of events created using this template.
Adding a Staff to Templates
Heads up! This feature is currently in Beta. To learn more, contact your CSM or our Sales Team.
The Staff section lets you define a list of team members—and their roles—that will be automatically added to any new event or webinar created from this template. This saves time and improves consistency by eliminating the need to manually add staff for every event. Once an event is created from the template:
- Staff is auto-added to the event with the role specified here.
- Email invitations are triggered based on your email settings. You can control notifications under the Email Settings tab.
Heads up! Emails are sent once the event is created—so confirm your email schedule before creating events to avoid unexpected notifications.
How To Access On Goldcast Studio Platform
Platform Panel → Templates → (open a desired template) → Program → Staff
Step-by-Step Guide to Adding a Staff to a Template
- Log in to the Goldcast Studio platform.
- Navigate to the Templates module.
- Open a desired template to which you want to add a staff member.
- Click Staff within Program.

- Click + New Staff.

- Enter the staff member’s details, such as Email address, First name, Last name, Title (optional), and Company (optional).

- Choose the staff member’s Role from the dropdown (for example, Primary or any Custom Role your admin has configured).
- Click Create to add the staff member to the template.
- Repeat to add additional staff as needed.
Important: At the moment, only users who are part of Goldcast Studio can be added as staff in a template. Attempting to add an external user as staff will result in an error.
We’re actively working on enabling support for external users and will be rolling this out soon.
How Template Staff Is Applied
- When a new event or webinar is created from this template, all staff listed here are automatically added with the role you selected.
- For webinars, staff are added to the event or session automatically.
- For multi-session conferences, staff are added at the event level, but you may need to assign them to specific sessions later in the agenda.
What Happens After Event Creation
- Once the event is created, staff will appear in the Staff section of the event.
- You can adjust assignments or roles within the event if needed.
- Email invites are sent according to your configured email schedule. Review and adjust your email settings to control who gets notified and when.
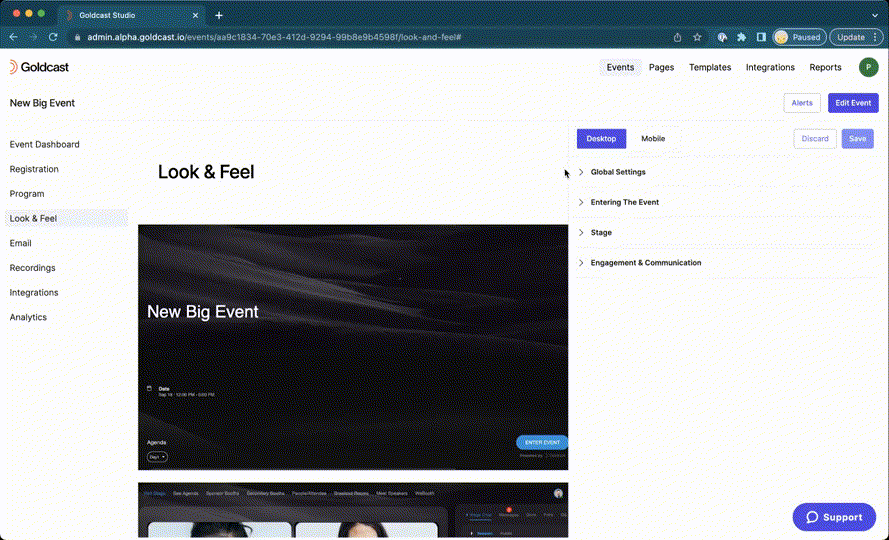
Look & Feel
This section allows you to configure the event landing page, stage, and engagement settings. These branding elements give your event a cohesive look and feel, and Goldcast applies them to any event you create using this template.
To configure these settings in the template, click Look & Feel on the menu on the left side of the screen.

On the right side of this page is a list of all the customization options. On the left is the preview window, where you can see how your branding choices will look in your event. These screens represent the themes across multiple Goldcast pages, including your event landing page, event stage, and other tabs inside your event, including the agenda, rooms, and booths.

Previewing and Saving Your Changes
After you have made the changes to the Look & Feel section, you can check your changes in the Preview Window and confirm the appearance of both the Desktop and Mobile views. Select the Desktop or Mobile Preview buttons at the top right of the page. When you are satisfied with your changes, click the Save button.
Heads up: Make sure to click the Save button to capture the settings you have configured.
For detailed instructions on how to use the Look & Feel section, read more here.
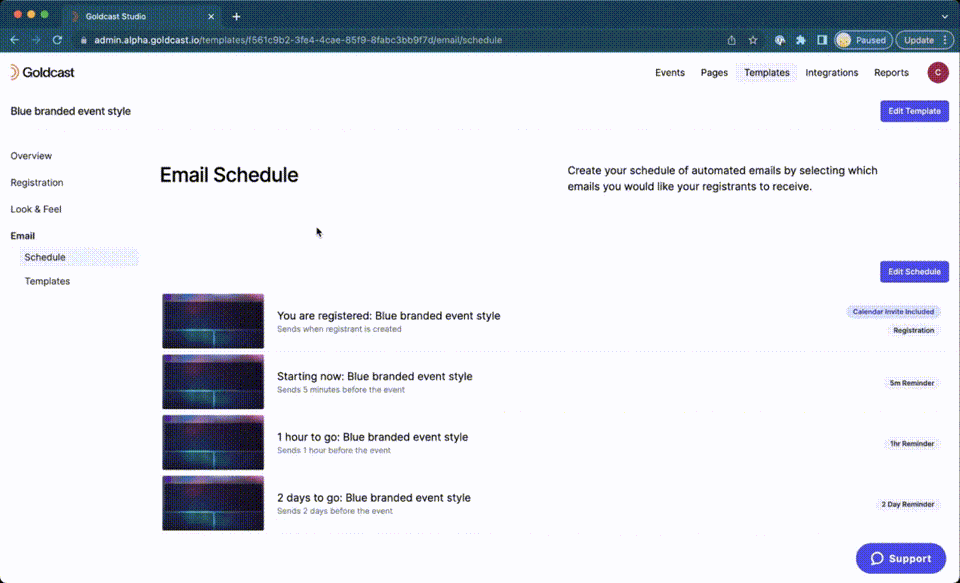
The email schedule you choose in your template will be applied to events created using that template. To edit the email templates and schedule, click Email in the menu on the left side of your event.

Updating an Existing Email Schedule
Goldcast’s scheduled emails include a comprehensive set of standard intervals: 7 days, 2 days, 1 day, 12 hours, 4 hours, 1 hour, and 5 minutes before your event begins. Additionally, you can schedule post-event follow-ups (1 day after) and custom emails at any time. You can choose which scheduled emails to send, update email subject lines and templates, and design custom emails as needed.
You can also configure the schedule for Speaker and Staff Emails from here. Manage your email templates to edit the design and content of each email to match your event's branding.
The following are the steps to update an existing email schedule:
- Log in to Goldcast Studio with your credentials.

- Go to the Templates tab to get a list of all your events.
- Click the desired template you want to edit.

- Navigate to Email → Schedule using the left panel. The Email Schedule page appears. This page displays the list of active emails in chronological order.
- Click the desired email schedule.

- (If needed) Update the subject line of the email schedule.
- Select the target audience for this email from the dropdown. The available options are:
- All Registrants – Sends to everyone who registered for the event, regardless of attendance status. For example, general announcements, schedule changes, event-wide updates, and so on.
- Event Attendees – Delivers only to registrants who actually attended the event. For example, post-event surveys, thank-you notes, and so on.
- Non-Attendees – Targets registrants who did not attend the event. For example, re-engagement offers.
- Select your desired send time using the relative time picker. The time picker has the following options:
- Before the event begins – Sends emails prior to the event start time. Ideal for reminders, preparation instructions, or last-minute updates.
- After the event begins – Sends emails once the event is live. Useful for welcoming late joiners, sharing real-time resources, or redirecting to alternative sessions.
- Before the event ends – Triggers emails as the event is winding down. Great for encouraging session feedback, promoting related events, or sharing urgent announcements.
- After the event ends – Delivers emails post-event. Perfect for follow-ups, recording access, surveys, or thank-you notes.
- Enable the toggle to activate the schedule email.
- Click Save. Upon clicking this button, the email gets successfully scheduled.

Creating an Email Schedule
The following are the steps to add a new email schedule in a template:

- Click New Email.

- Enter a clear and engaging subject line for your email.
- Choose a desired email template from the dropdown to define the email’s layout and style.
- Select the intended recipients from the dropdown. The available options are:
- All Registrants – Sends to everyone who registered for the event, regardless of attendance status. For example, general announcements, schedule changes, event-wide updates, and so on.
- Event Attendees – Delivers only to registrants who actually attended the event. For example, post-event surveys, thank-you notes, and so on.
- Non-Attendees – Targets registrants who did not attend the event. For example, re-engagement offers.
- All Staff – Sends to all assigned event team members, such as organizers, moderators, and support. For example, internal briefings.
- All Speakers – Delivers only to confirmed event presenters. For example, presentation deadlines.
- Use the relative time picker to schedule when the email should be sent. The time picker has the following options:
- Before the event begins – Sends emails prior to the event start time. Ideal for reminders, preparation instructions, or last-minute updates.
- After the event begins – Sends emails once the event is live. Useful for welcoming late joiners, sharing real-time resources, or redirecting to alternative sessions.
- Before the event ends – Triggers emails as the event is winding down. Great for encouraging session feedback, promoting related events, or sharing urgent announcements.
- After the event ends – Delivers emails post-event. Perfect for follow-ups, recording access, surveys, or thank-you notes.
- Click Schedule Email. Upon clicking this button, an email schedule gets successfully created.

For detailed instructions on how to use the Email Schedule & Templates sections, read more here.
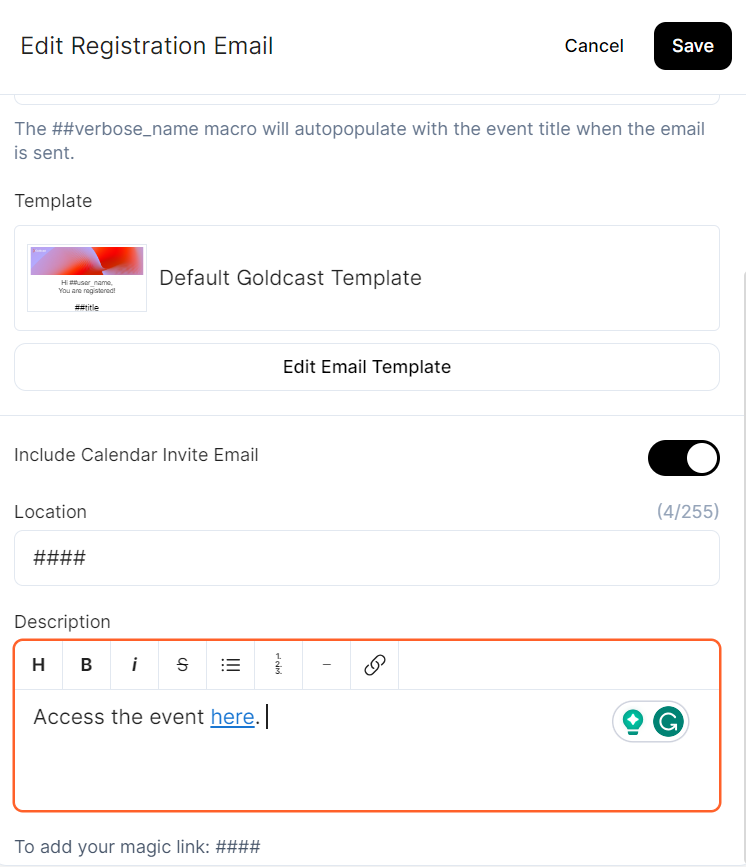
Calendar Invite
Guests receive a calendar invite when they sign up for an event. When creating a template, you can turn it on/off or customize it as per your requirements.
Follow these steps to customize the calendar invite:
- Open your preferred template and navigate to the Email section using the left sidebar.
- Click the Registration email and scroll to the Include Calendar Invite Email toggle. Turn it on/off as required.
- Use the Location and Description text fields to customize the invite.
- Click Save in the upper right corner.
Refer to our Guide on Customizing Calendar Invites for more instructions on configuring the calendar invite to suit your event’s needs.
Captions and Subtitles
By default, the captions and subtitles feature is turned off for newly created templates. However, you can edit the template to turn on captions and subtitles. In this case, the template passes the caption/subtitles settings to any new events created from it.
To turn on captions and subtitles:
- Navigate to your preferred template and click the Edit button on the right.
- Scroll down and turn on/off the captions and subtitles toggles.
- Click Save.
Integrations
Configuring the integration settings in an event template allows you to automatically apply these settings to all new events and webinars created from it. Once the integration settings are configured in a template, other users can create events from it, automatically transferring the integration settings to the new event/webinar.
This significantly reduces the time and manual effort needed to set up the event, as it eliminates the need to set up the same integration settings for each new event or webinar individually. It also reduces the likelihood of errors and streamlines the event creation process.
Click the Integrations tab on the left to configure these settings in the template.

Click the specific integration you want to set up, click the Settings button to enable it on/off for the event, and toggle on/off the custom activities, as required. Next, click the Edit button to configure the org-level and custom field mapping. To know more, refer to the individual integration guides for Goldcast-supported CRMs and MAPs.

Things to know
- You cannot configure Pardot lists at the template level. You must head to the individual event to set up the Pardot integration.

-
For Marketo, when connecting a Program ID at the template level, you must choose from one of the following configurations:
- No Program: If you choose No Program, Goldcast will copy only the activities set up at the template level but not the Program ID. You must enter the Program ID at the event level.
- Base Program: In this case, Goldcast will use the same Program ID for all events and webinars created from this template.
-
Clone Program: In this case, Goldcast creates a clone (copy of the Program ID) mentioned in the template for each new event created from it.

-
For Salesforce, when connecting a Campaign ID at the template level, you can choose either one of the following configurations:
- No Campaign: If you choose No Campaign, Goldcast will copy only the activities set up at the template level but not the Campaign ID. You must enter the Campaign ID at the event level.
-
Same Campaign: In this case, Goldcast will use the same Campaign ID for all events and webinars created from this template.

- For other integrations (Drift, Eloqua, HubSpot, Slack, Slack + Salesforce, Webhooks, and Wistia), all configurations set up in the template will be copied exactly as they are for new events/webinars created from it.
- For repeating events, integration configurations from the template do carry over.
On-demand page
Heads up! The on-demand page section is visible only for templates created from webinars.
Click the On-Demand Page tab on the left. Configure the layout, navigation, gate, branding, and other details of the standalone on-demand page of a webinar using this tab. For detailed instructions, see Customizing the On-Demand Page for Webinars.
To configure on-demand page settings, click the On-Demand Page tab on the left. These settings apply only to webinars created from the template. As events do not have a standalone on-demand page, these settings will not apply to events created from the template.

Duplicate a template
To duplicate a template:
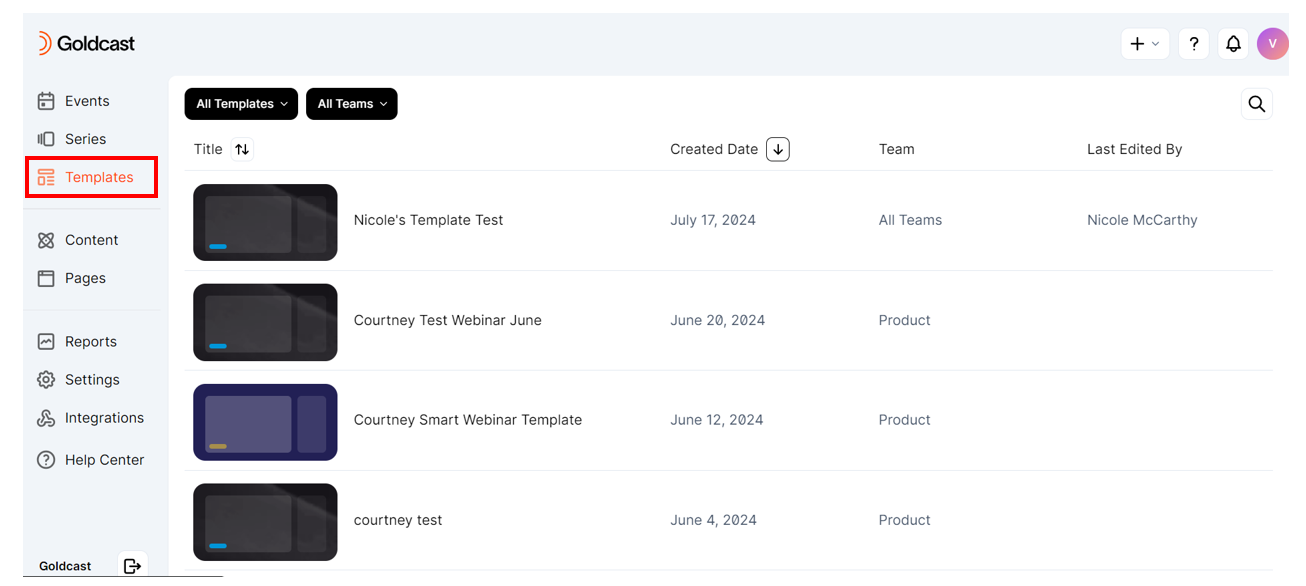
- Log in to Goldcast Studio using your credentials, and click Templates on the left navigation bar.
- Select your preferred template from the list and click the Edit button on the top right.
- In the Edit Template drawer, click the Duplicate Template button.
- Click Duplicate.
Delete a template
To delete a template:
- Log in to Goldcast Studio using your credentials, and click Templates on the left navigation bar.
- Select your preferred template from the list and click the Edit button on the top right.
- In the Edit Template drawer, click the Delete Template button.
- Click Delete.

How to apply a template
Goldcast requires you to choose a template while creating a new event or webinar.
For Events
- Log in to Goldcast Studio with your credentials.
- Click the
 icon on the top right and choose New Event.
- In the New Event popup, select a template from the Template dropdown.

- Enter the event details like Title, Type, Date & Time, Workspace, Series, etc., and click Create.
Note: Another method to apply a template is click the New from Template button in the template's dashboard, and choose New Event to create an event using that specific template.

For Webinars
- Log in to Goldcast Studio with your credentials.
- Click the icon on the top right and choose New Webinar.

- In the New Webinar popup, select a template from the Template dropdown.

- Enter details like Title, Date & Time, Workspace, Series, etc., and click Create.
Note: Another method to apply a template is click the New from Template button in the template's dashboard, and choose New Webinar to create a webinar using that specific template.

Create a Template from an Existing Event/Webinar
Creating a template of a past event or webinar helps to reuse its custom branding, design, layout, and settings for future events.
From an event
Follow these steps to build a template from an existing event:
- Log in to Goldcast Studio with your credentials and use the Events tab to open your preferred event.
- Click on the Edit Event button and scroll down to select the Create Template button.
- In the pop-up, provide a suitable name for your template. You can also describe it in a few words (optional). Click the Create button to complete the action.
From a webinar
Follow these steps to build a template from an existing webinar:
- Log in to Goldcast Studio with your credentials and use the Events tab to open your preferred webinar.
- Click on the Edit Event button.

- In the Edit Session Details drawer, scroll and click the Create Template button.

- In the pop-up, provide a suitable name for your template. You can also describe it in a few words (optional). Click the Create button to complete the action.

You have now successfully created a template from a past event/webinar. You can now apply this template to any future events you organize. All newly created templates are available under the Templates tab in Goldcast Studio.
Heads up! Templates created from webinars will also include an on-demand section, which duplicates the on-demand page settings from the original webinar.
FAQs
1: Can I use the same template for both events and webinars?
Yes. Templates are common to both events and webinars, and you can apply the same template while creating a new event or webinar. Goldcast automatically applies the settings you have configured to the newly created event/webinar.
The only difference is that if you've created a template from a webinar, it will include an additional on-demand page settings section.
2: Can I make changes to events created using templates?
Yes. Any settings that you have configured in the template act only as a starting point. You have the complete flexibility to edit and modify the newly created event per your requirements. Changes you make to the event override the settings created initially via the template.
3: Can I create events without using a template?
No. By default, Goldcast requires you to select any existing template (or the default template) while creating an event or webinar.
4: How many templates can I create?
There are no restrictions on the number of templates you can create.
5: Who has the permission to create an event template?
Users with the following Studio roles can create, edit, and delete templates:
- Organization admin
- Team admin (Can only create, edit, or delete templates within their team workspaces)
- Integrations editor
- Brand editor