Event tags are labels you can assign to events in Goldcast Studio. These tags help you categorize and organize your events based on any criteria relevant to your organization, such as event types, location, content types, target audience, marketing strategies, etc.
Event tags let you quickly filter and find specific events in the Studio, which can be highly convenient when you have many events to manage.
How to create event tags
- Log in to Goldcast Studio using your credentials.
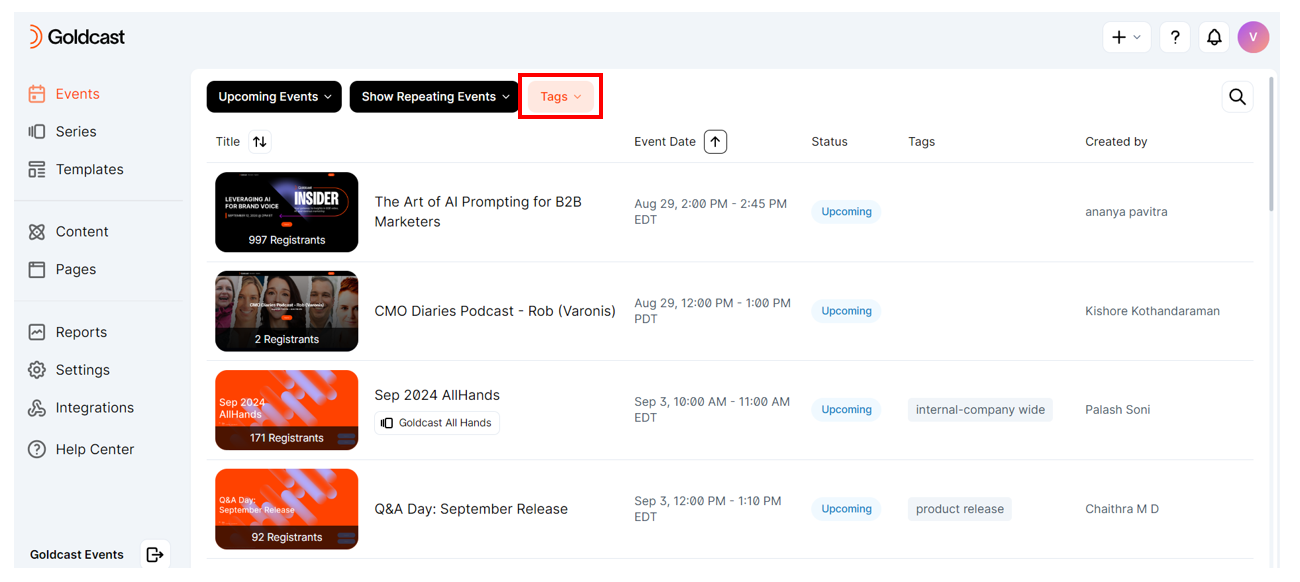
- Click Events on the left sidebar to open your Event list.
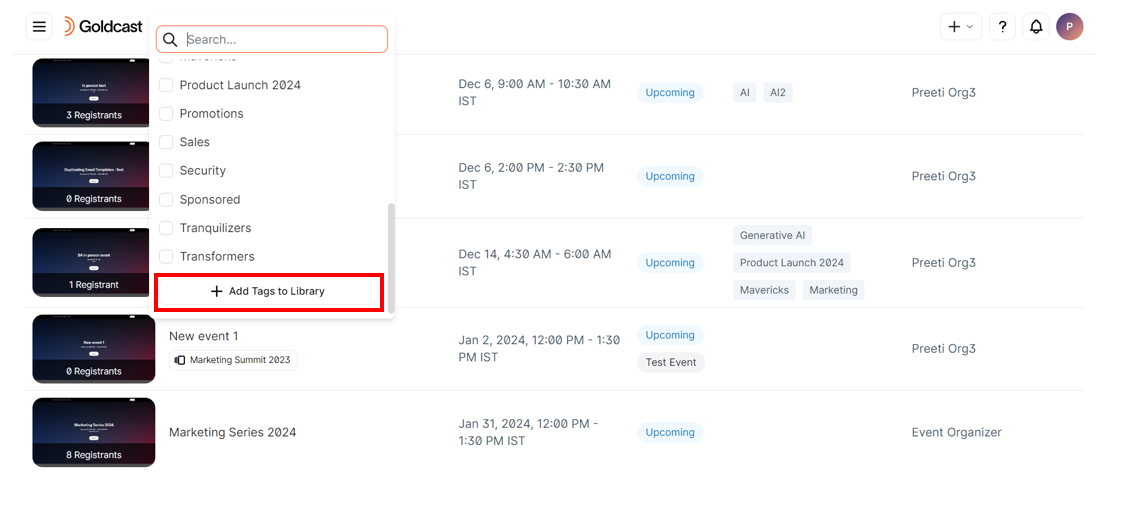
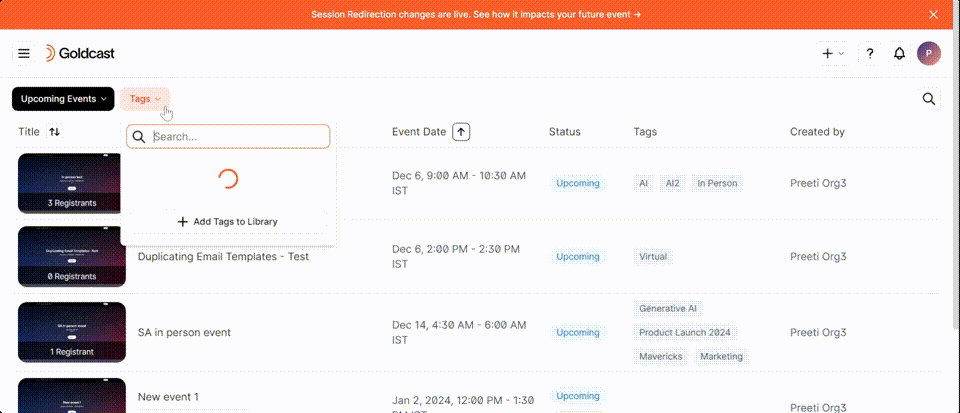
- Click the Tags button on the top left.
- In the dropdown list, scroll to the bottom and click +Add Tags to Library.
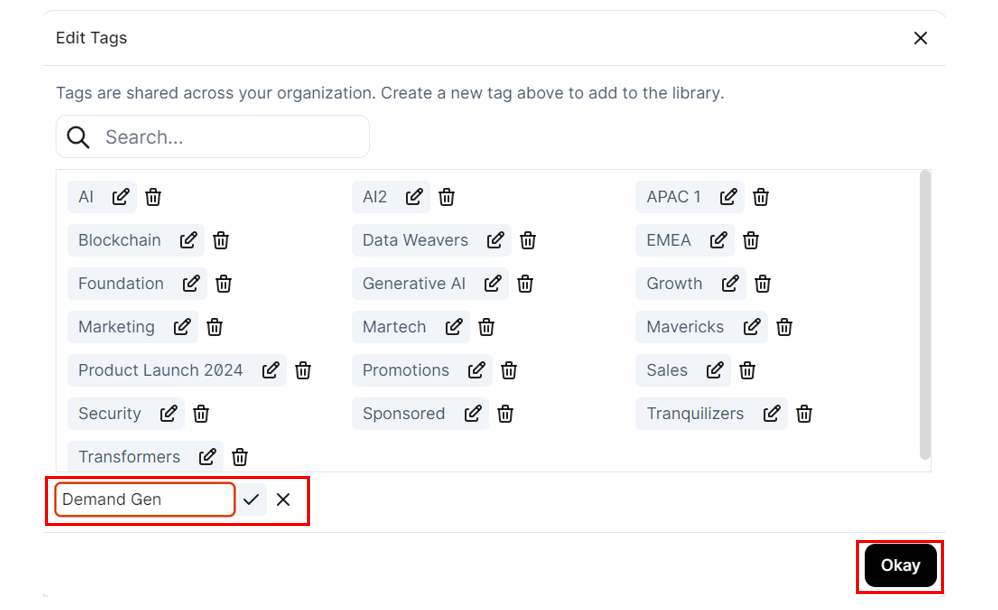
- Click the +Create New button In the Edit Tags popup.
- Enter your preferred Tag Name and click the checkmark icon to add it to the library.
- Click Okay to complete the action.
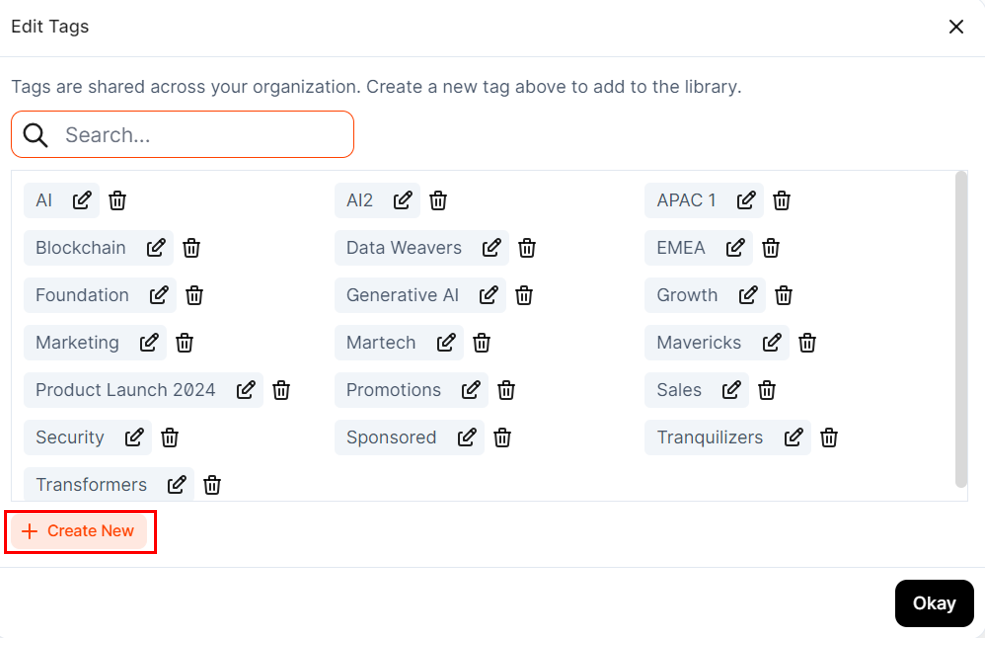
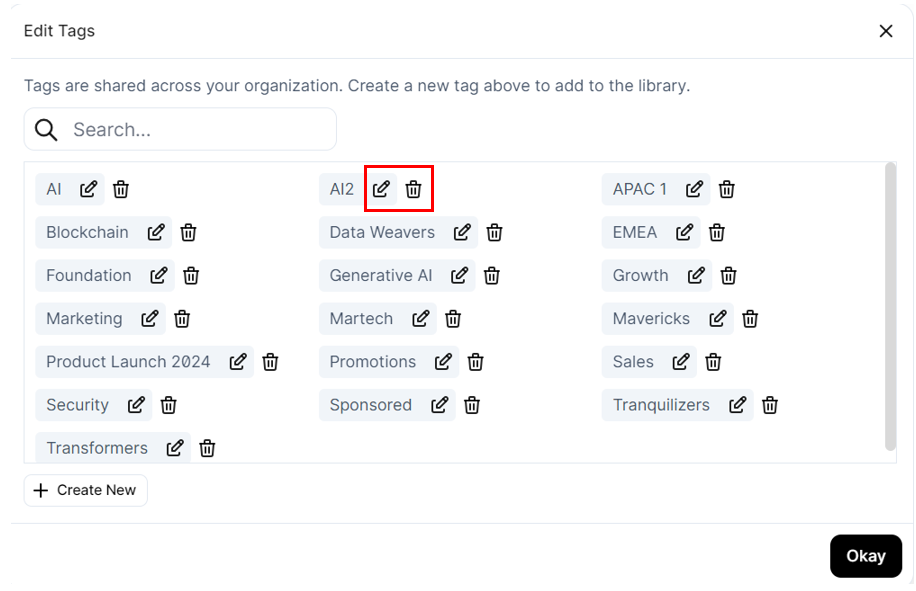
Note: Click the edit icon  to modify an existing tag and the delete icon
  to remove a tag from the Tag Library. Any changes you make here are reflected in real-time in the Events list in Studio and to applied events.
How to modify/delete event tags
- Log into Goldcast Studio and navigate to the Events list.
- Click the Tags button on the top left.
- In the dropdown list, scroll to the bottom and select +Add Tags to Library. This opens the Edit Tags popup window.
- Click the edit icon to modify an existing tag.
- Click the delete icon to remove a tag from the Tag Library.
- A tag not used in any event is deleted when you click the confirm Delete button.
- If it’s used in any event, you can see the list of events using the tag. Once you click the confirm Delete button, Goldcast removes the tag from the library and the associated events.
Any changes you make here are reflected in real-time in the Events list in Studio and to your events.
How to add tags to an event
Follow these steps to add tags to your events in Goldcast:
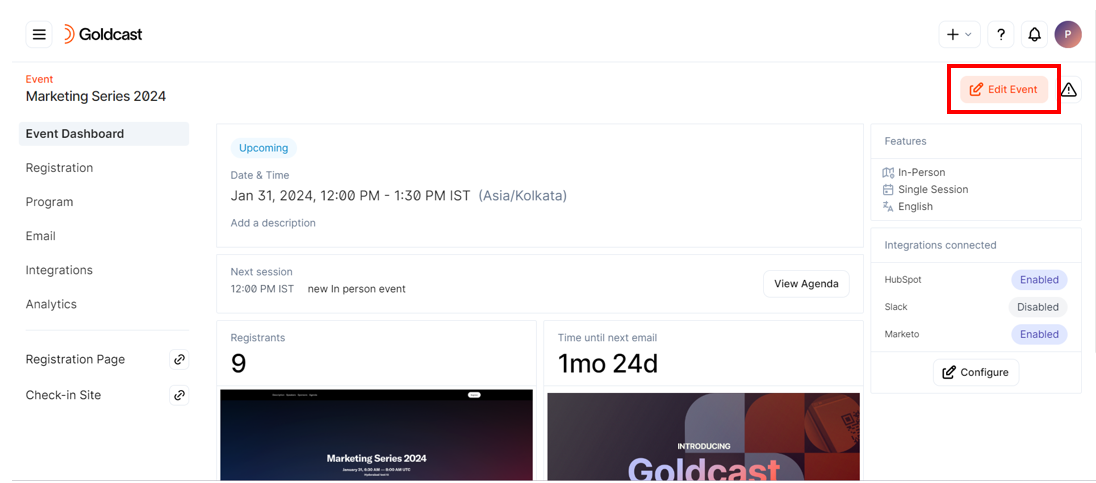
- Log into Goldcast Studio and select your preferred event from the Events list.
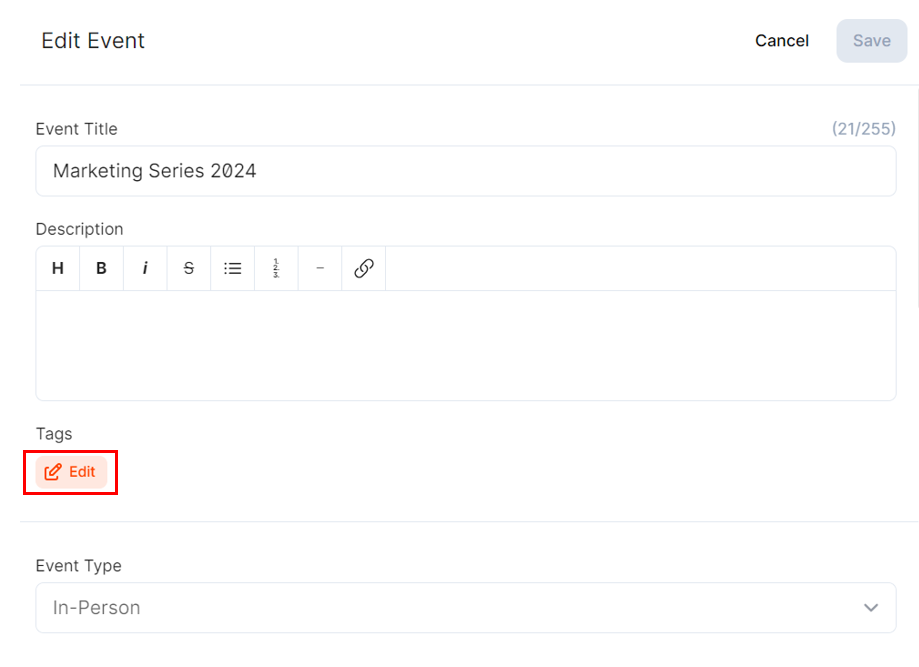
- Click the Edit Event button on the top right in the Event dashboard.
- Click the Edit icon in the Tags section of the Edit Event drawer.
- You can select any existing tags from your Tag Library or Create a New Tag to add to your event.
- Click the +Create New button to add a new tag that is not available in your Tag Library. Any new tag you create here is automatically added to your Tag Library.
- Click the
 icon to add an existing tag to this event.
 - Click the
 icon to remove applied tags from your event.
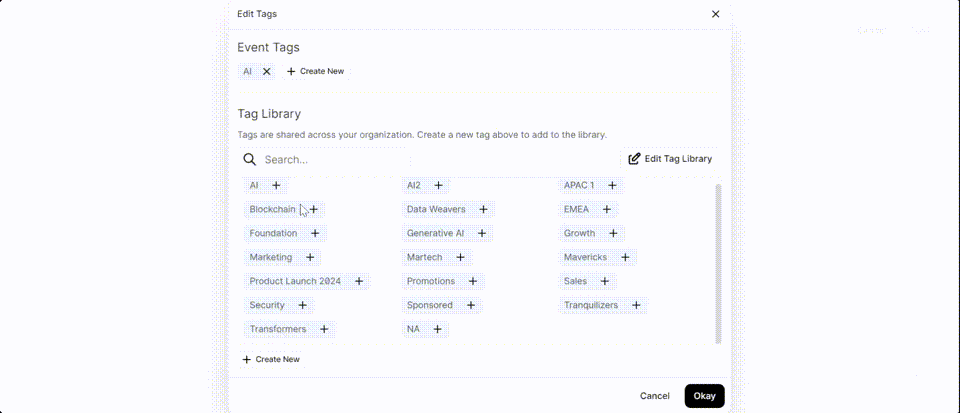
Note: You can edit tags in the library by clicking the Edit Tag Library button. You can create, modify, or delete existing tags from here. Any changes you make to the Tag Library will reflect in real-time in the Events list and to applied events.
- Once you’ve added the required tags, click Okay.
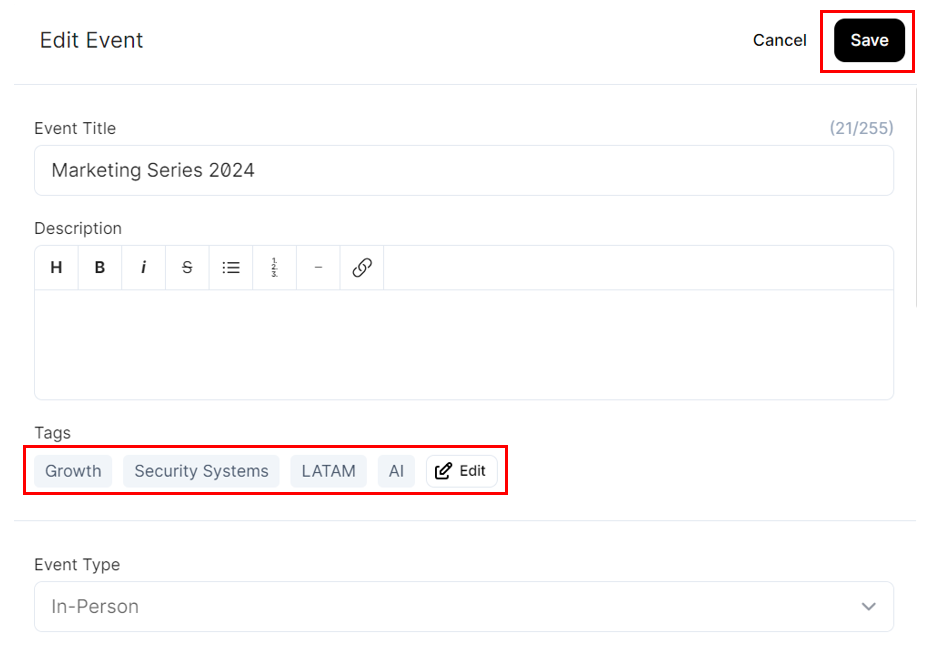
- In the Edit Event drawer, you can now see the tags you’ve added applied to your event. Click Save and close the drawer.
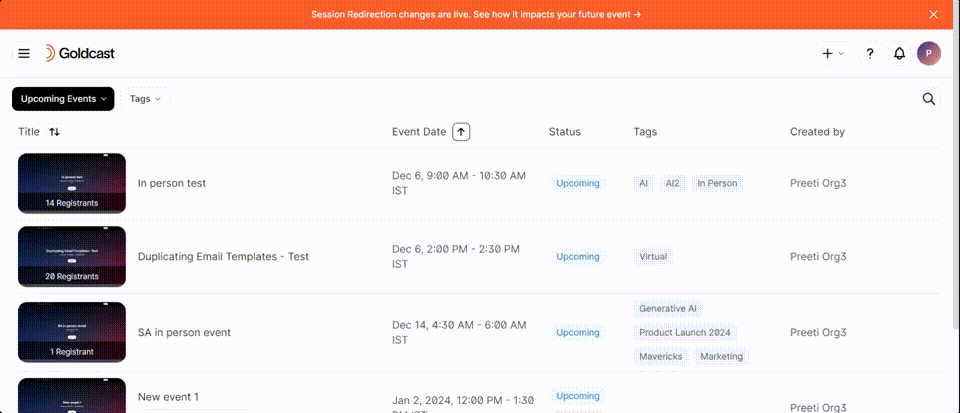
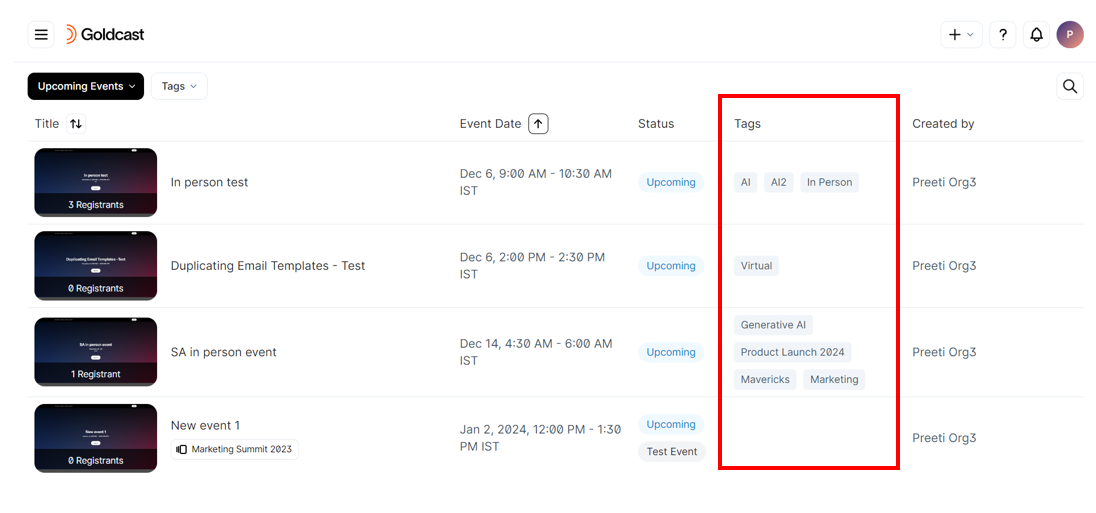
How to use tags to filter the Events list in Studio
Once you’ve added tags to your events, you can view them in the Tags column in the Events List.
Follow these steps to filter the event list using tags:
- Click the down arrow next to the Tags button.
- In the dropdown list, select one or more tags to filter events.
- You can now view all events containing these tags.
- Click the icon to remove the applied filters.
Note: The dropdown list is an OR function. It lists all events having at least one of the tags you’ve selected.
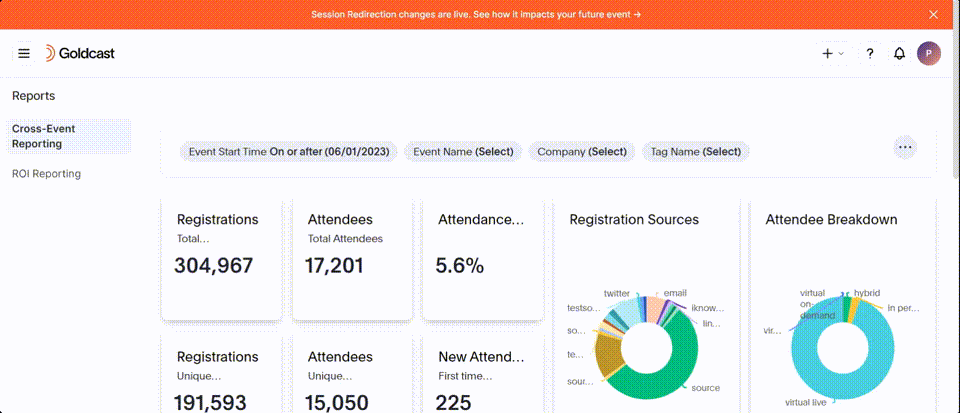
Filtering by tags in cross-event reports
You can also filter events based on tags in your cross-event reports. To know more, refer to our guide on Cross-Event Reporting.
FAQs
1. How many tags can I add to an event?
You can add as many as you require; there are no restrictions. Conversely, it’s not mandatory to add tags to an event. You can skip them if you don’t need them.
2. When should I create event tags? Before or after creating an event?
No restrictions.
- You can create event tags before creating an event (OR)
- Create an event and then apply new (or existing) tags.
3. Are event tags similar to room tags?
No. Event tags are different from Room tags.
4. Will my event tags sync with my connected CRMs/MAPs?
No. We do not support syncing event tags to your connected CRMs/MAPs.
5. Will my tags be visible to all my team members using Goldcast Studio?
Yes. All users in your Goldcast account can view/edit the tags you’ve created. Similarly, you can view/edit the tags created by other team members. All tags are stored in the Tag Library, which is common to all your team members.