Goldcast makes it super easy to create professional-quality virtual and hybrid events. This article guides you on creating and setting up a live session.
How to add a live session to your event agenda
A Goldcast live session allows you to stream live videos while communicating and engaging with your audience in real-time. Usually, it features a speaker(s) who interacts with audiences in real time. During a live session, you can also share slides, polls, and surveys, answer audience Q&A, play pre-recorded videos, and publish messages and scrolling tickers on stage.
Follow these steps to add a live session to your event agenda:
- Login to Goldcast Studio with your credentials, and click the Events tab on the left sidebar to get a list of all your events.
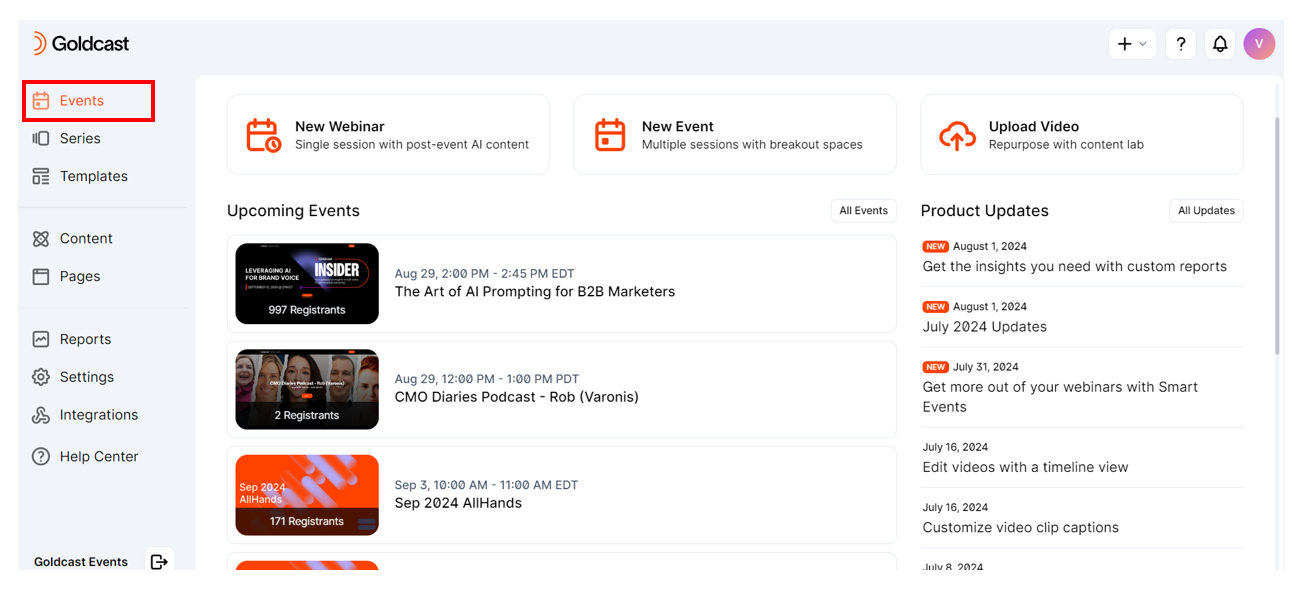
- Choose the event you want to add a live session to.
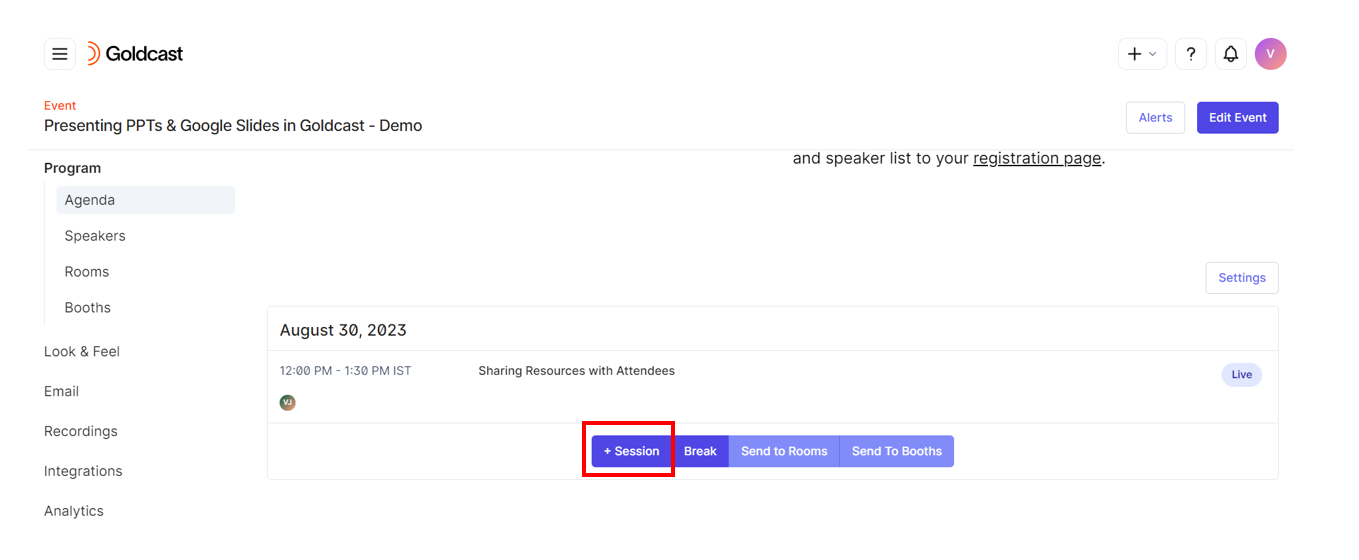
Note: Alternatively, you can create a new event or webinar and add a live session. - Navigate to Program → Agenda using the left navigation panel.
- Click the +Session button at the center of the Agenda tab.
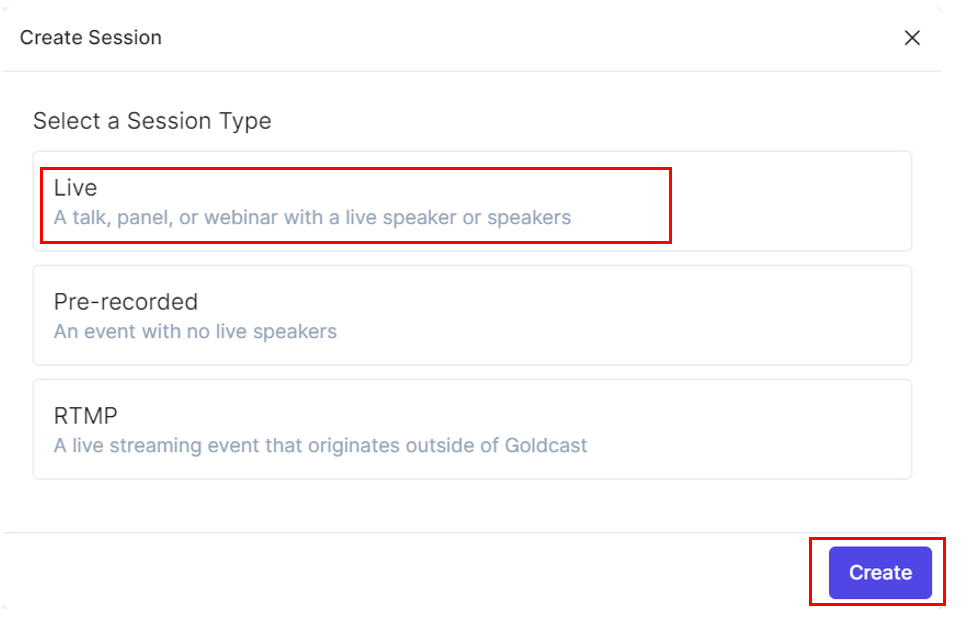
- In the Create Session pop-up, select Live as your session type and click Create.
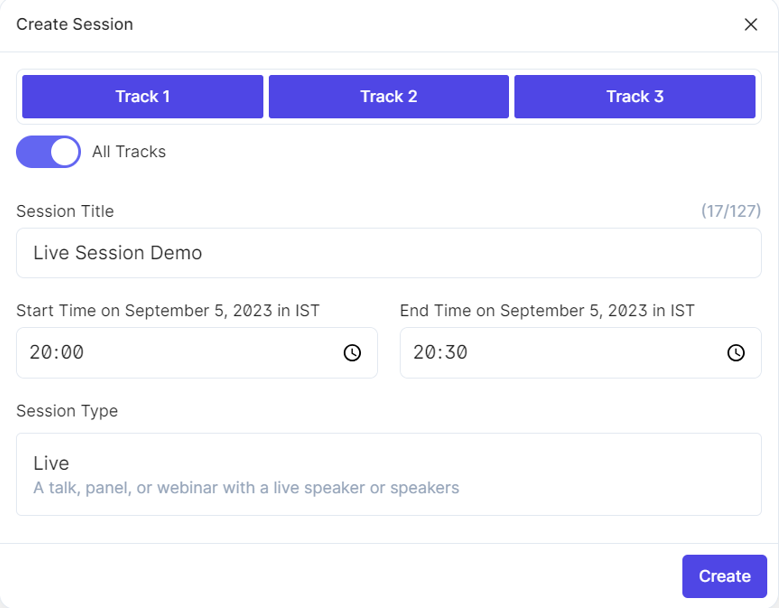
- Select the Tracks to which you want to add the live session. Turn on the All Tracks toggle if you want to add this session to all tracks.
- Enter the Session Title, Start and End Time, and click Create.
- Watch out for the Session Created Successfully message pop-up indicating you have successfully created your session.
Note: The session must fall within your event's start and end times. Also, it cannot begin within 30 minutes of creating it. For example, if you make a live session at 11 a.m., the earliest it can start is 11:30 a.m.
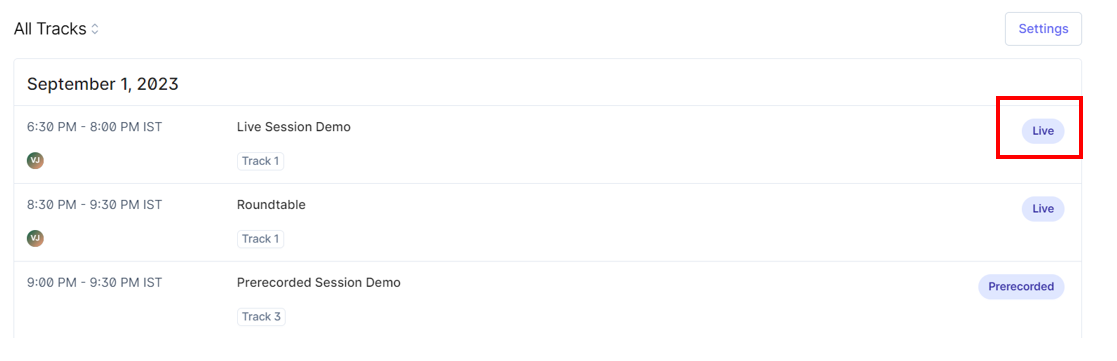
Once your live session is created, it’s visible in the Program → Agenda tab. A label will be displayed to the right of the session, indicating its type: live, pre-recorded or RTMP.
Editing a live session
Follow these steps to edit the details and engagement options of your live session:
- Navigate to your preferred session using the Program → Agenda menu on the left navigation panel.
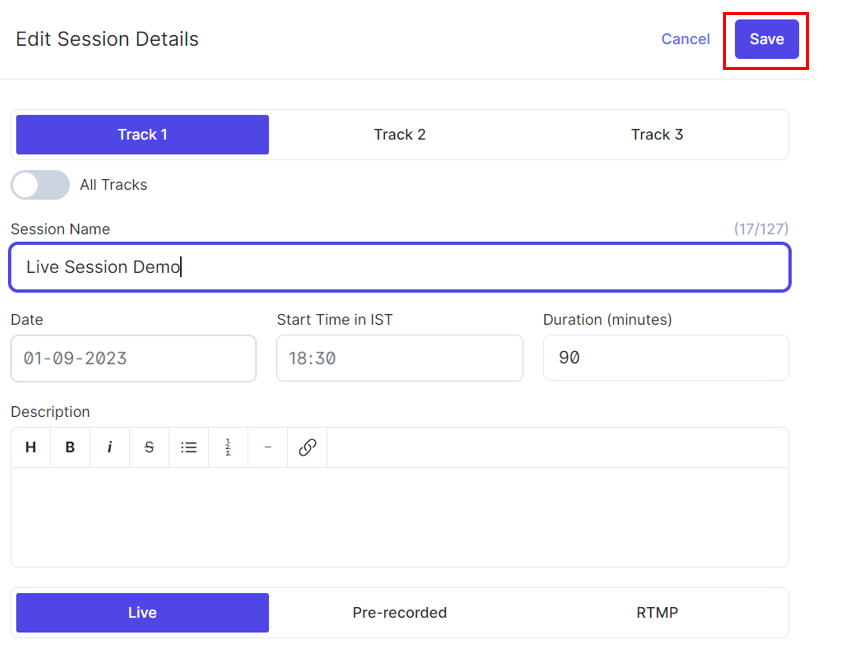
- Click on the session you want to edit. This opens the Edit Session Details window.
- If your event has multiple tracks, you can select which tracks to include a session by clicking the corresponding track names. You can add the session to all tracks by turning the All Tracks toggle on.
- Use the Session Name text field to modify your session name.
- You can also change the Date, Start Time, Duration, and Description.
Note: The session description field has a limit of a maximum of 1500 characters.
Adding speakers
Click the arrow next to the Speakers section. Use the +New Speaker button to add a new speaker, or click the Select Speaker button to choose an existing speaker from your list.

For more information, see our guide on Adding and Managing Speakers.
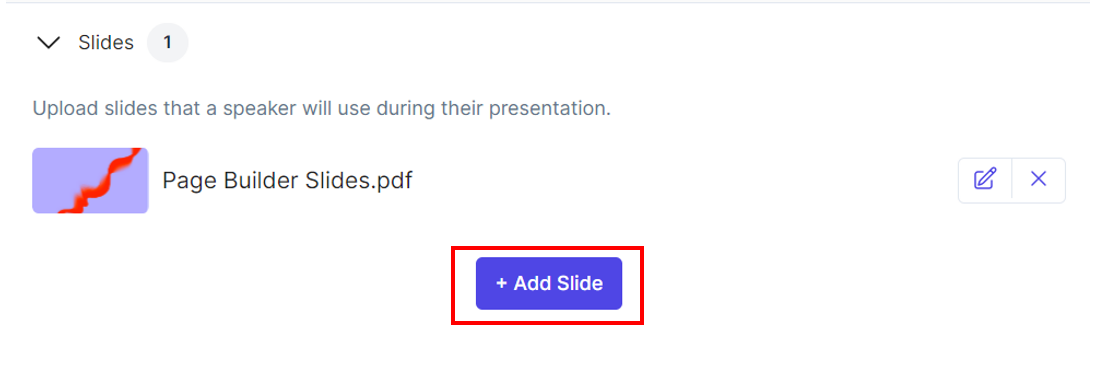
Adding slides
Click the arrow next to the Slides section. Click the +Add Slide button to upload a slide deck that you can share on stage during your session.
Adding video
Click the arrow next to the Video section. Click the +Add Video button to upload video files you want to play on stage during the live session.
Note: The maximum video size you can upload is 5GB. If you need to upload videos exceeding this limit, contact the support team at gc.support@cvent.com.

This opens the Goldcast video library, where you can view different video sources in your Goldcast account, such as:
- Manual Uploads: This category includes videos that you have personally uploaded for live or pre-recorded sessions, as well as any buffer videos you may have added.
- Event recordings: This section contains your past Goldcast events and webinars.
- Recording Studio (Beta): This category includes recordings you have created using Goldcast's Recording Studio.

To add a new video to the library, click the +Upload Video button. After you upload a video, its status will be "pending."

Note: You can continue with the rest of the event creation process without waiting for the processing to complete. However, check if the video has finished processing before your event starts; otherwise, the video won't play during your live session.
Select the video(s) you want to add to the session. Use the filters at the top of the video library to narrow down your search and find the video(s) you want to add. Once you've made your selection, click the Save button to finalize your choices.
Pro Tip: The video processing time is approximately four times the length of the video. So, make sure to upload your videos well in advance of the event so that the processing is completed and it's ready for you to play during the live session.
Heads up! If you're a customer from the EU/UK, the video library will have a slightly different UI than the one shown here. For any queries, contact your CSM or Goldcast Support.
Adding post-session survey
Goldcast allows you to include a post-session survey in your live session. You can use this survey to gather feedback and measure engagement. For detailed information on creating a survey, see our guide on Adding surveys to Goldcast events.
Engagement options
You can also use the Edit Session Details window to select the various stage engagement options you want for your live session. For more information on how to use these features, see our guide on Engagement Panel Overview.
Goldcast offers the following interactive features to boost audience participation and engagement in a live session:
RTMP Out
You can stream your live session on Facebook, YouTube, and other platforms using Goldcast's RTMP Out feature.
Once you finish editing all the session details, click the Save button in the top right corner to save your changes. Your session is now added to the event agenda.
Deleting a live session
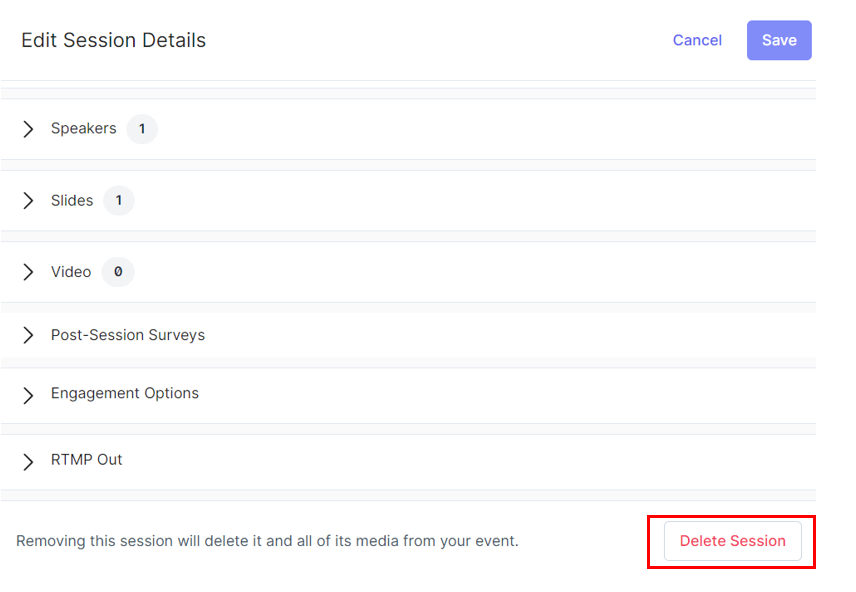
Deleting a session is permanent and will remove all the associated media from your event. So proceed with caution.
Follow these steps to delete a live session you no longer want to be part of your event agenda:
- Login to Goldcast Studio with your credentials.
- Choose the event to which the session belongs and navigate to Program → Agenda using the left navigation panel.
- Click the session you want to delete to open the Edit Session Details window.
- Scroll down to the bottom and click the Delete Session button.
FAQs
- Can I convert a live session into another format, such as pre-recorded or RTMP?
Yes. Click the session you’d like to convert and use the Edit Session Details window to change the session type.
 Note: You cannot convert the session format within one hour of the event start time.
- How many people can participate in a live session?
There are no restrictions on the maximum number of people joining your live sessions.
- How many live sessions can I include in an event?
There are absolutely no restrictions! You can include as many sessions as you require.
- How do I test a live session?
Want to test your live session before going live? No problem! Here’s how you can do it:
- Login to Goldcast using your credentials and select the Events tab to get a list of all your events.
- From the events list, select your preferred event.
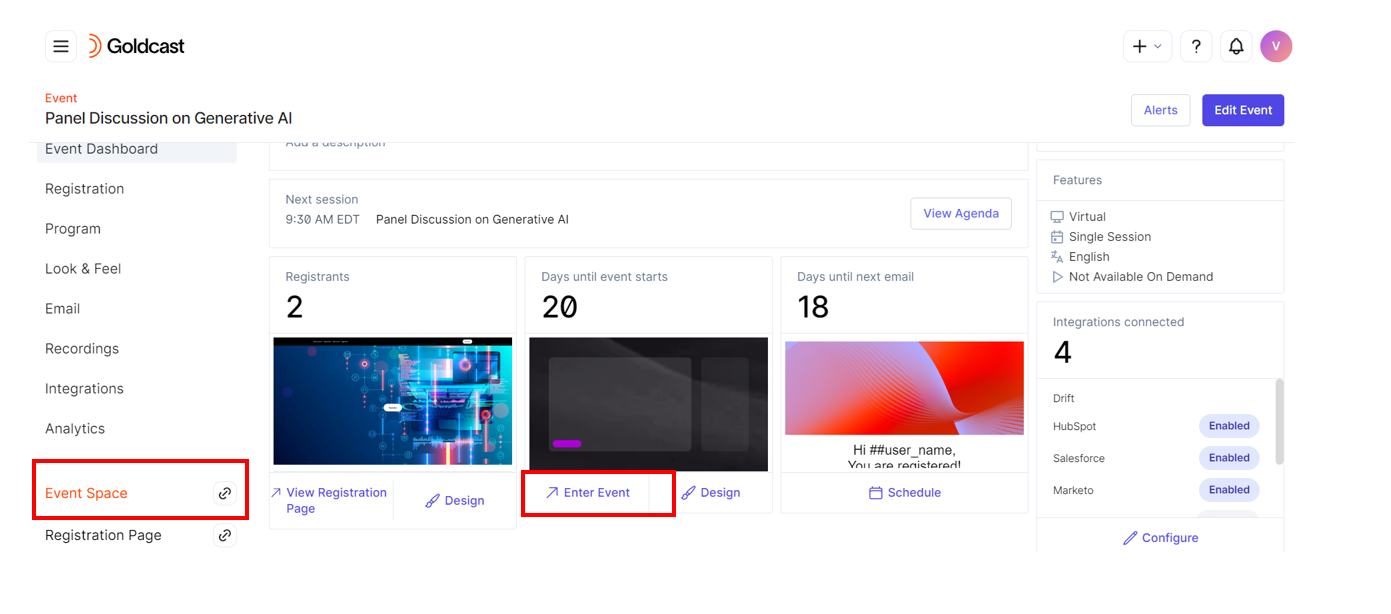
- Select Event Space on the left navigation panel to enter your event. Alternatively, click the Enter Event button in the Event dashboard.
You’re now in the Event Space. You can explore the engagement panel and other controls to familiarize yourself before the big day.