Table of Contents
Welcome to Goldcast! We’re excited to take you through how to plan, run, and wrap up your Goldcast event.
Below you’ll find a guided course on everything you need to know to get yourself up and running on the platform. To follow along with your own checklist, please download the PDF at the very bottom of this page.
Create a New Event
You have an idea for an event—wonderful! It’s time to put that idea into action and create it on the Goldcast platform. In order to launch your event on Goldcast, start here. Goldcast gives you the flexibility to create single and multi-session events.
Create a multi-session event
- Log in to Goldcast Studio with your credentials.
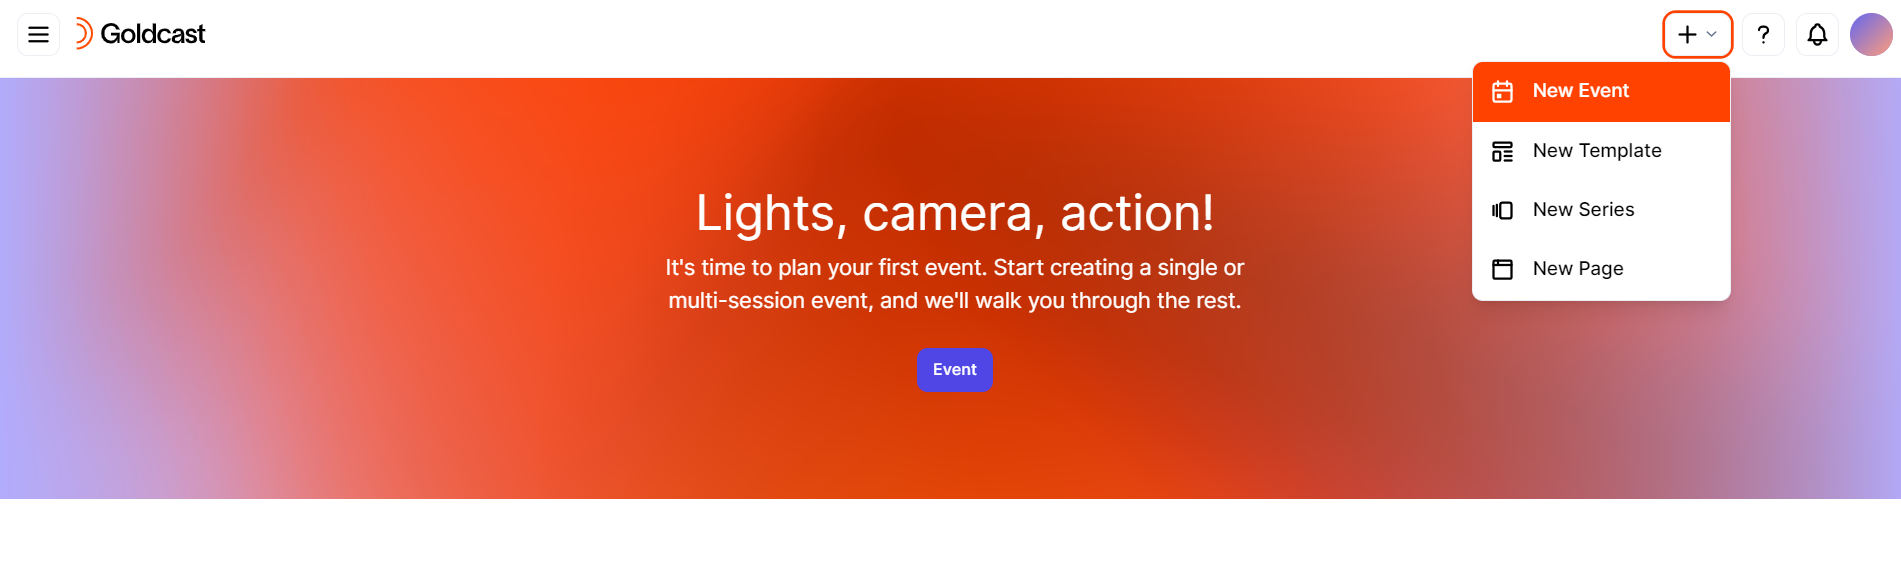
- From the homepage, click the
 icon and select the New Event button. This opens the new event popup.
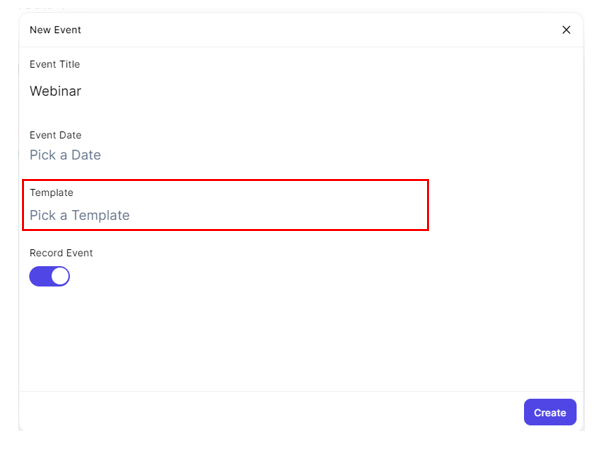
- In the New Event popup, enter your Event Title.

- Next, click the Pick a Date field and choose Multi Session. Specify the start time, duration, time zone, and date of the event.
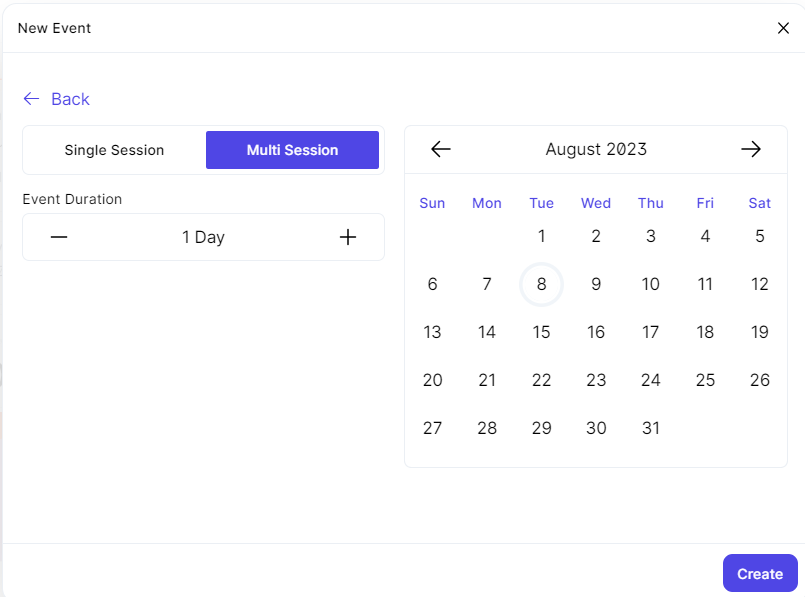
- Note that you can create your event using a template. To do so, in the New Event popup, use the Template dropdown to pick a Template of your choice. This creates an event that has the same look & feel, engagement settings, email settings, and registration setup as the chosen template. If you haven't created your own templates, you can use Goldcast's Dark or Light Event Templates.

- Click Create to complete the action and create your event.
Create a single-session event
- Log in to Goldcast Studio with your credentials.
- From the homepage, click the icon and select the New Event button. This opens the new event popup.
- In the New Event popup, enter your Event Title.
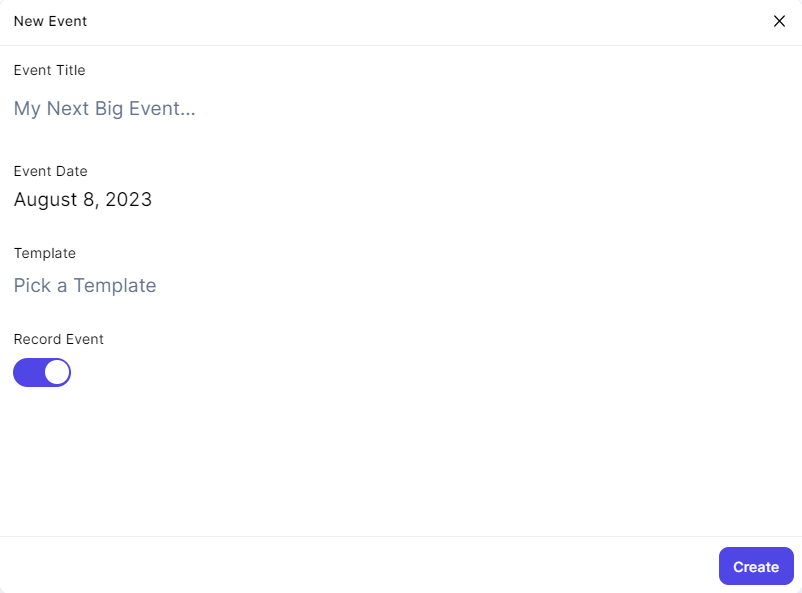
- Next, click the Pick a Date field and choose Single Session. Specify the start time, duration, time zone, and date of the event.
- To create a single-session event from a template, use the Template dropdown in the New Event popup to pick a Template of your choice. This creates an event that has the same look & feel, engagement settings, email settings, and registration setup of the chosen template.
- Click Create to complete the action and create your event.

When you create a single session event, your Agenda will be pre-populated with one session that matches the event details you entered during creation, including the name of the session and the start and end time of the session. This session is a Live session by default, but you can change it to pre-recorded or RTMP (Real-Time Messaging Protocol) streaming.
See below for more details on editing a session.
Event Dashboard
After clicking Create, you will land on your event dashboard. This is where you can see a high-level summary of your event, track tasks you need to complete, view errors that need to be resolved, see how many people have registered, and more.
Event Details
To edit your event details, click Edit Event in the upper right corner of the page. Here you can update all of your event details, including:
Event Title
The title of your event will appear on the event Landing Page for your event, and it can be pulled into email notifications sent out to event registrants using the tag ##title.
Description
This event description can be featured on your event Registration Page, and can be pulled into event emails using the tag ##description. If your event is listed on a Goldcast Events Hub, the description will also be visible there.
Event Type
Goldcast events can be a:
- Virtual event
- Field event (or)
- Hybrid event
Virtual events take place entirely online, while field events are in-person events that happen at a physical location. Hybrid events allow event organizers to host attendees and speakers both in-person and virtually simultaneously.
Event duration, date, time, timezone
Ensure the start and end date/time of your event are accurate. If you choose to send a calendar invitation to registrants with their registration confirmation email, it will be based on these dates/times.
Primary Language
This is the primary spoken language of your speakers, as well as the primary visible language inside your event menus and buttons. If you enable captions, it will detect and generate captions based on this primary language.
For example, if your event is taking place in Japan, the speakers are speaking in Japanese, and the majority of the attendees are Japanese-language speakers, select Japanese in this dropdown. This will ensure captions will appear in Japanese for any hard-of-hearing attendees. The event navigation bar and buttons will also appear in Japanese.
Learn more about setting up a primary language in your Goldcast event.
Captions
Speech-to-text captions are a great accessibility control—they display the words the presenter is speaking in the primary language in text on the screen. Goldcast supports captions in English, German, Japanese, Korean, Spanish, French, Dutch, and Portuguese.
Note that captions can’t be enabled less than one hour from the start of the event.
Subtitles
If subtitles are enabled, attendees can choose to translate the captions (see above) into one of the following languages of their choice: Chinese, English, Italian, German, Korean, Japanese, Spanish, French, or Portuguese.
Note that subtitles can’t be enabled less than one hour from the start of the event.
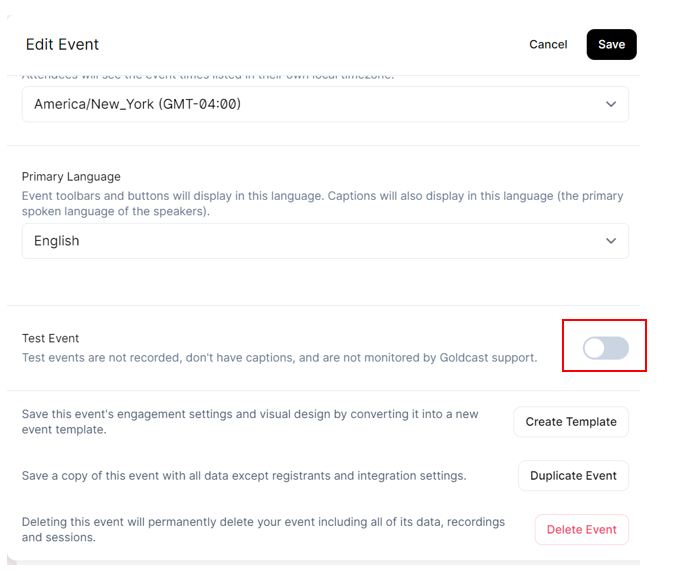
Test Event
Test events are not recorded, don't have captions, and aren't monitored by Goldcast Tech Support. If you are doing a run-through of your event, creating a draft event, or testing out a functionality, keep your event marked as a test. If this is a real event, make sure to turn this setting off. This will enable live Goldcast support for your event, as well as capture event recordings.
To turn off a test event:
- Log into Goldcast Studio, and select the event you want to edit.
- Click the Edit Event button on the right side of the event dashboard.
- Turn off the Test Event toggle and click Save.
Connect Your CRM to Goldcast
Before your event registration kicks off, you’ll want to make sure you’ve connected your CRM or MAP to Goldcast so you can receive post-event data from the event directly into your CRM/MAP. Your integration must first be enabled for your organization’s account, and then you can turn it on for this event. For more information on setting up your organization-level integrations, contact gc.support@cvent.com.
Once your organization’s integrations are set up, you’re ready to connect your event to your CRM/MAP.
From inside your event, click the Integrations tab on the menu on the left side.
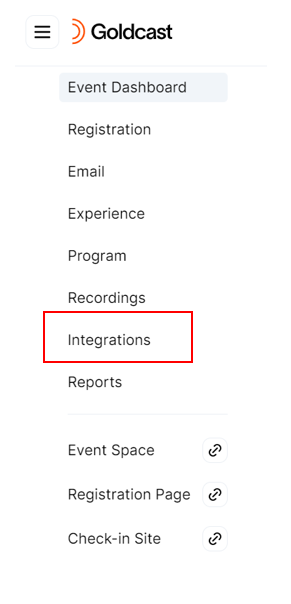
Goldcast supports integrations with:
Create or Connect Your Registration Experience
Each Goldcast event has its own registration page and form, which you can use to publicize your event and collect information from registrants. Or, if you prefer, you can use your own webpage and/or forms to collect registrant info.
Set Up Registration in Goldcast
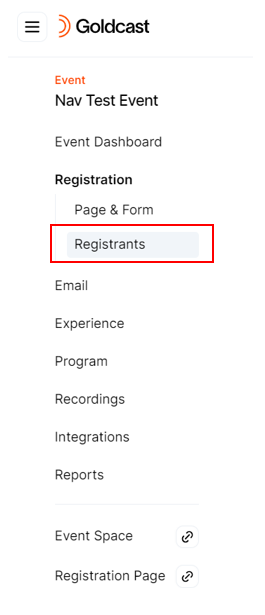
To edit your event registration, click Registration in the menu on the left side of your event.
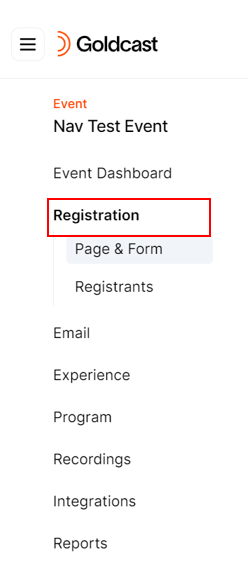
There are three major touchpoints to create for event registration:
-
Registration Page
- When you are creating your Registration Page, you have the option to use a Goldcast registration form, a HubSpot registration form, or a Marketo registration form.
-
Registration Form
- Your registration form can be customized to collect information from your registrants, use conditional logic, collect UTM tracking, and more.
-
Registration Email
- This is the email confirmation your registrants will receive when they sign up to attend your event. It will include a personalized, unique link they can use to enter the event.
- You can also choose to include a calendar invitation along with your email.
Learn more about setting up Registration in your Goldcast event.
Connect Your Own Registration Page to Goldcast
If you choose to collect registrations through your own registration page and form, you can send registrants to Goldcast through a Marketo Webhook, Hubspot Webhook, or Form ID, Salesforce Form, or Zapier.
Set Up Your Email Schedule
After your registrants sign up, you can choose for them to receive reminder emails about your event. To edit the email templates and schedule, click Email in the menu on the left side of your event.
Goldcast’s scheduled emails can be sent: 1 week, 2 days, 1 day, 12 hours, 4 hours, 1 hour, and/or 5 minutes before your event begins. You can choose which reminders to send, update email subject lines and templates, and send custom emails as needed.
Learn more about setting up emails in your Goldcast event.
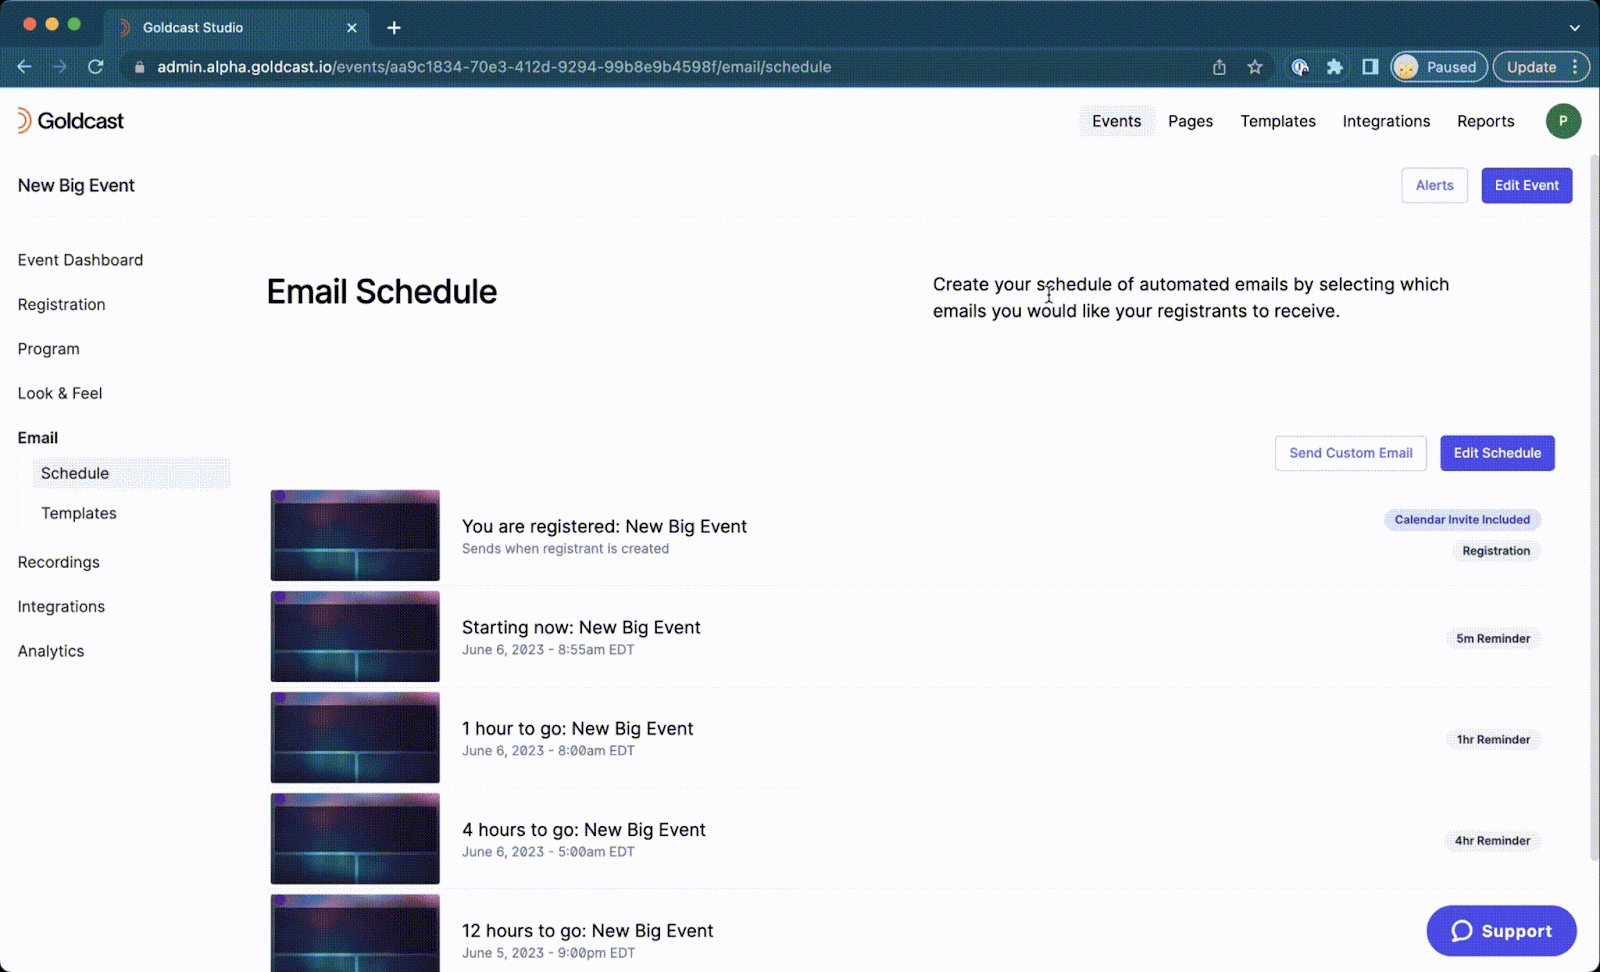
You can also customize the sender name by clicking Settings and entering the alias you’d like to display when your emails are sent.
Goldcast also enables you to customize your email domain. Click on your avatar in the upper right corner of the screen, then Settings, then Domain, and click Connect a Domain.
Learn more about setting up an email domain in your Goldcast event.
Bulk Upload Attendees (If Applicable)
If you’re hosting an internal event or have already received registrations for your site prior to connecting your Goldcast event to the registration form, you are able to bulk-upload attendees. When you do this, each person will receive the event registration confirmation email as soon as your upload is processed.
To upload a list of attendees, click Registration, then click Registrants in the menu on the left side of your event. Click Bulk Upload and follow the prompts to import your registrants.
Learn more about uploading registrants into your Goldcast event.

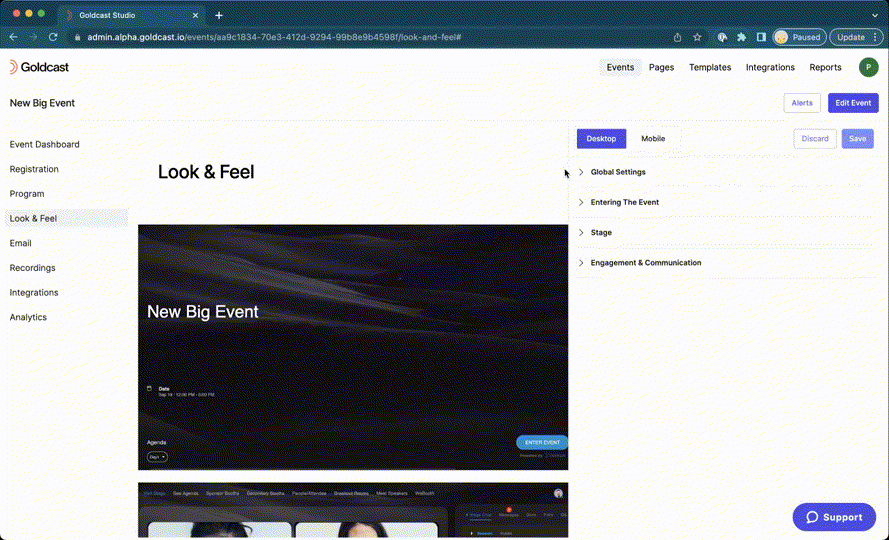
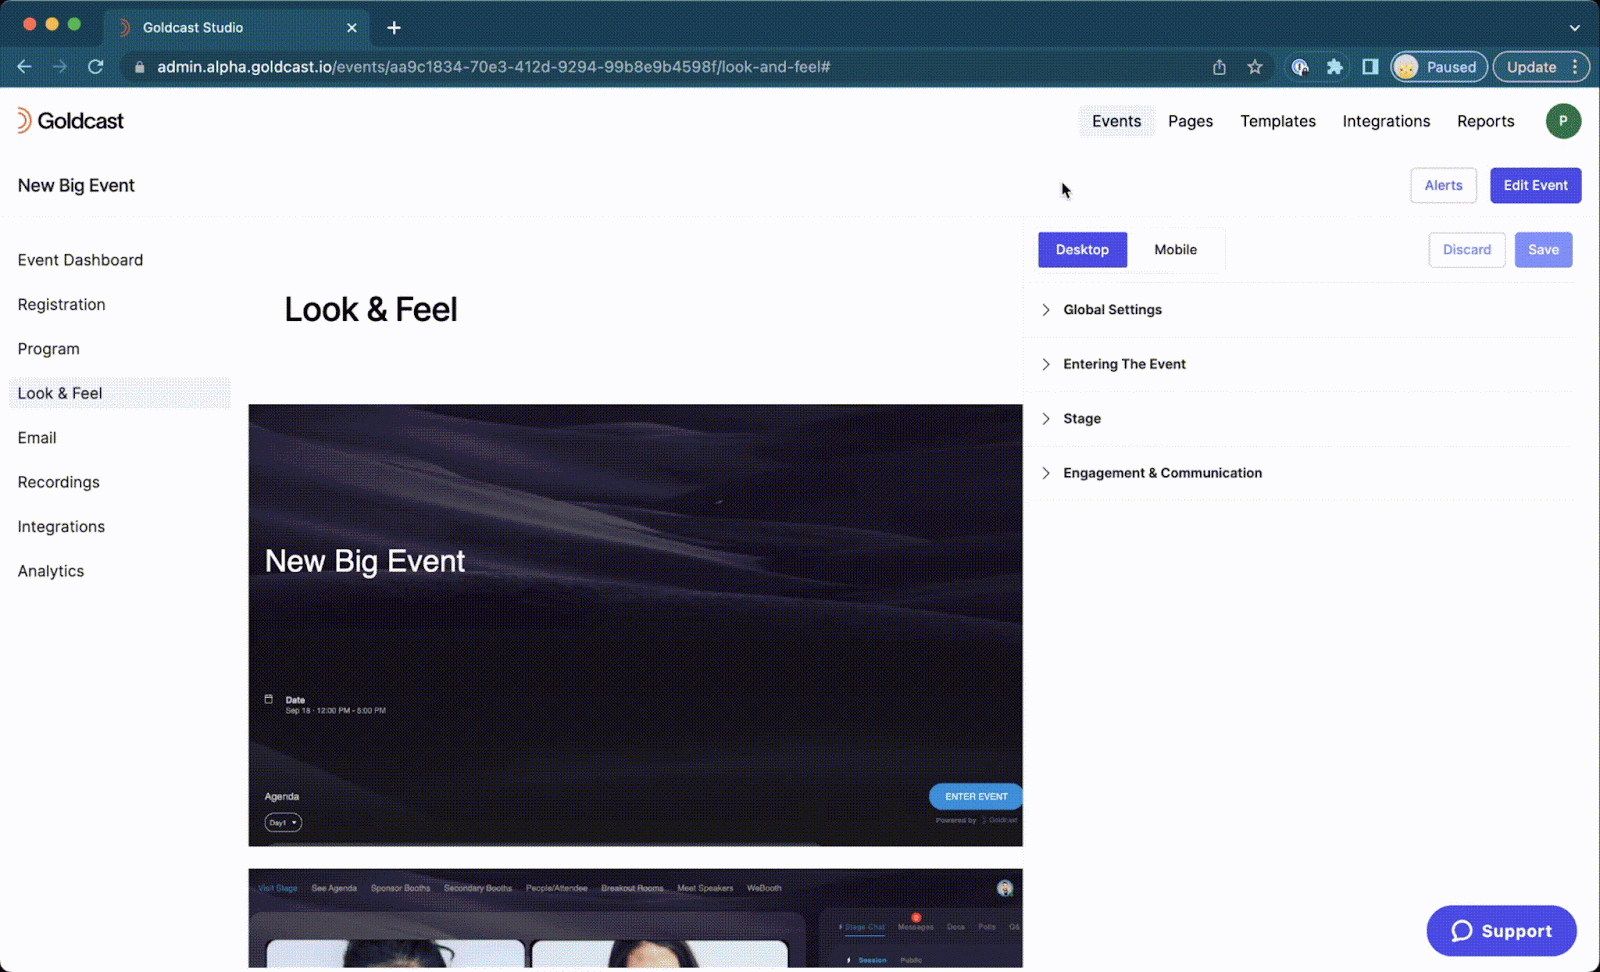
Update Your Event Look & Feel and Engagement Settings
Goldcast gives tons of customization options for how your event is branded. To edit your event's look & feel, click Look & Feel in the menu on the left of your event.
If you created your event from a template, the settings from the template will be set here. You can make any edits you'd like.
Here you’ll see a preview and be able to edit all of the settings for your:
- event landing page, where attendees will land when they click their magic link
- event stage, where your speakers will present, and attendees will engage
- mobile event views
Take time to update your Global Settings, Entering the Event experience, Stage, and Stage Communication settings.
Learn more about setting up your event Look & Feel in your Goldcast event.
Engagement Features You Don’t Want to Miss Out On
Goldcast has many different ways to keep attendees engaged during an event, so you don’t want to miss out on these engagement tools and the “wow” factor for your attendees. Here are a few of the engagement features you’ll want to pay attention to.
Inside the Stage Communication section, under Chat Experience, you’ll find many options for how your event attendees can engage with your speakers and other attendees.
Enable or disable Public Chat for all attendees, speakers, and event organizers to connect throughout your event. Enable or disable Session Chats, which are chat threads specific to the current live session only.
Pro Tip: If you are hosting a single-session event, you’ll only want to have one of these turned on. We’d recommend the Public Chat so attendees can interact in the minutes leading up to the session. And this way, they don’t have to bounce between two different chat options. If you are hosting a conference, we recommend having both turned on.
Private Chat enables all event attendees, speakers, and organizers to directly chat with one another.
Pro Tip: If it is a conference, we do recommend having this turned on so attendees can grow their network.
You can allow your attendees to engage with your speakers’ presentations by submitting text Q&A or video Q&A. You can choose to have your Q&A moderated, which means moderators are required to either approve or reject questions before they are shown to the audience in the Q&A tab.
You can allow attendees to submit questions anonymously, and you can show who answered a question, or give them an alias (like “Events Team” for example).
Pro Tip: if you’re a one-person event organizer, you’ll likely want to have Moderated Q&A turned off so you don’t have to manage this, but if you have a few people on the team running the show —or have trained the moderator on how to moderate Q&A—then you can turn it on.
Event Experience Options
Goldcast highly recommends uploading a Buffer Video for your event in the Stage section. A buffer video is a pre-roll video that plays before an event begins. If attendees join your event a few minutes early, it can make a warm experience that makes them feel welcome and excited for the event to begin.
Learn more about buffer videos.
Goldcast highly recommends enabling a Call to Action for your event in the Stage section. This creates a clickable button that your event attendees can interact with to request a demo from your team, claim swag, ask for a follow-up, or anything else your team can dream up. We strongly encourage doing this as it will provide your team with yet another data point that can help your lead generation and event interaction.
Create Your Agenda and Add Speakers
Goldcast enables you to host all types of events to support your event strategy, including:
- single session events
- multi-session virtual conferences
- simultaneous in-person and virtual hybrid events
Single-session events are typically no longer than 90 minutes and can be a webinar, presentation, Q&A session, product demo, roundtable discussion, and many other use cases.
Virtual conferences have multiple sessions in one agenda, and may take place over one day or many days.
A Goldcast hybrid event enables organizers to host both speakers and attendees from in-person locations and virtual locations simultaneously. Learn more about setting up a hybrid event.
Each event type can have different session types on the agenda:
- Live: Speakers are speaking live at the time the session begins. The speakers can answer questions in real-time, launch polls, and engage with the audience via video.
- Pre-recorded: The session has been recorded and is being played back at the start time of this session. Speakers can appear on stage but cannot engage in real-time on video with event attendees (since they were previously recorded). Event organizers and speakers can launch polls, answer Text Q&A, and respond in chat to engage with attendees.
- RTMP: This session is streamed through a third party like Streamyard, Zoom, etc.
You can add as many sessions as your event requires to your Event Agenda. To add a session, click Program in the menu on the left side of your event.
If you create a single session event, your session will be created for you. If you create a multi-session event, you can add sessions by clicking the + Session button at the bottom of the screen.
Select the session type, start and end time, and give it a title, then click Create.
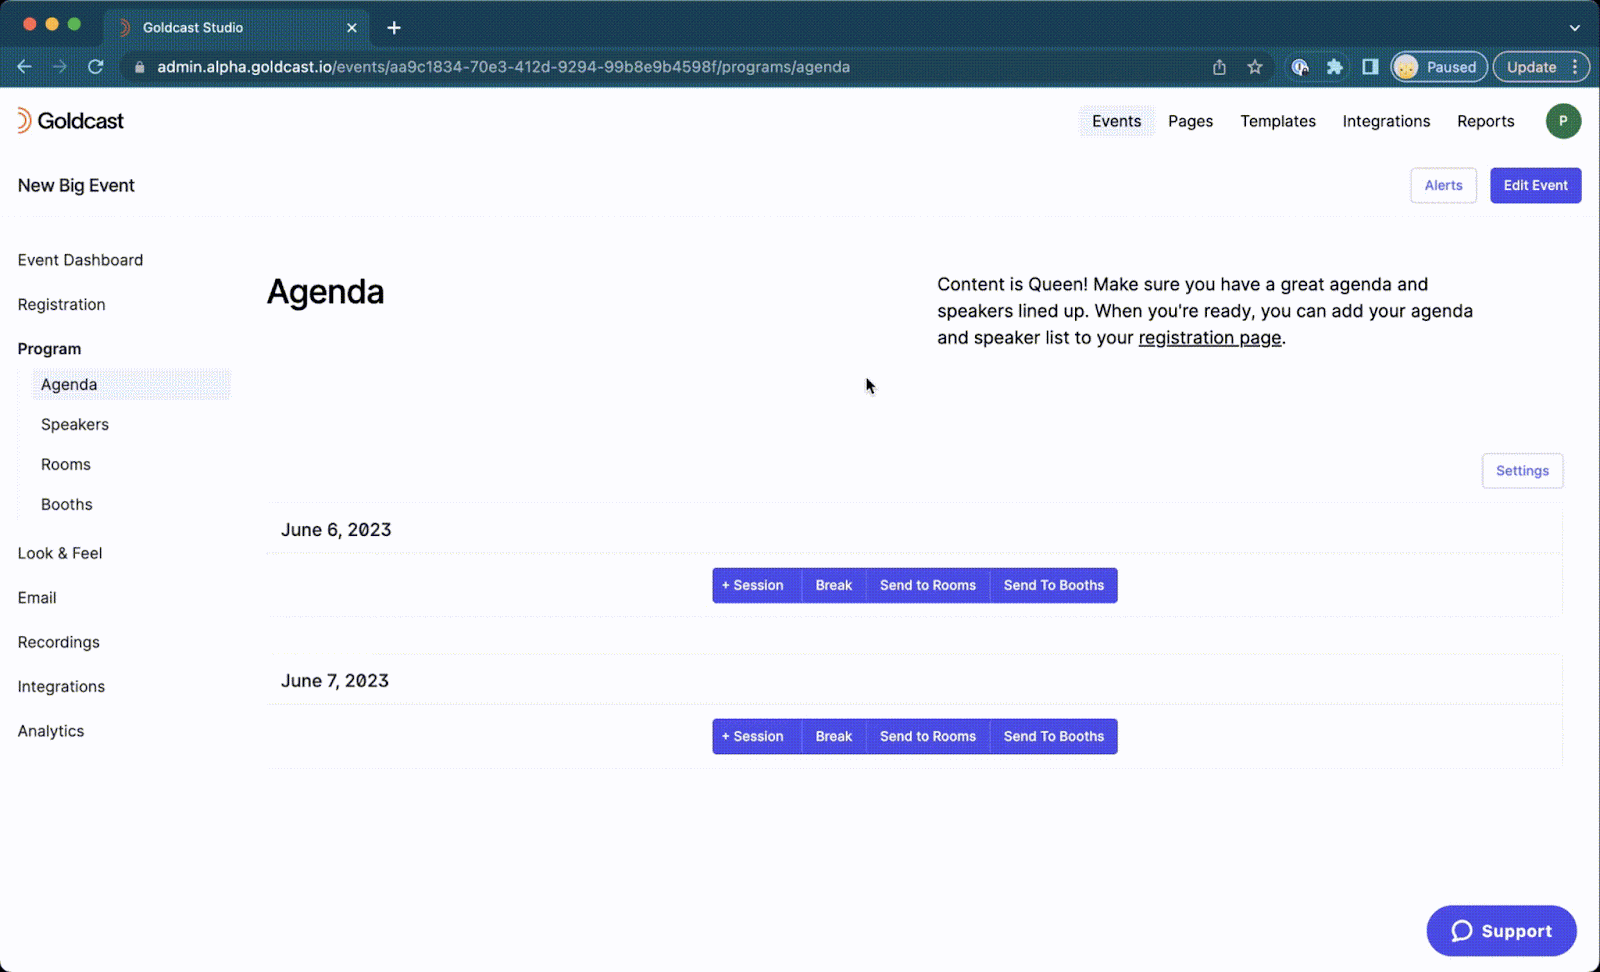
To edit your session, click on it in the Agenda list. Here you can change the session type, add speakers, insert session content like videos, slides, polls, and more.
If your sessions are part of an in-person/virtual hybrid event, there will be a special field where you can enter the physical locations (for example, Conference Room B).
Your agenda can also include Breaks, and dedicated time for event attendees to visit Rooms for small group discussions and networking, or Booths to connect with sponsors or consume content about your company or presenters.
Learn more about setting up event sessions, rooms, and booths.
Managing Your Registrants
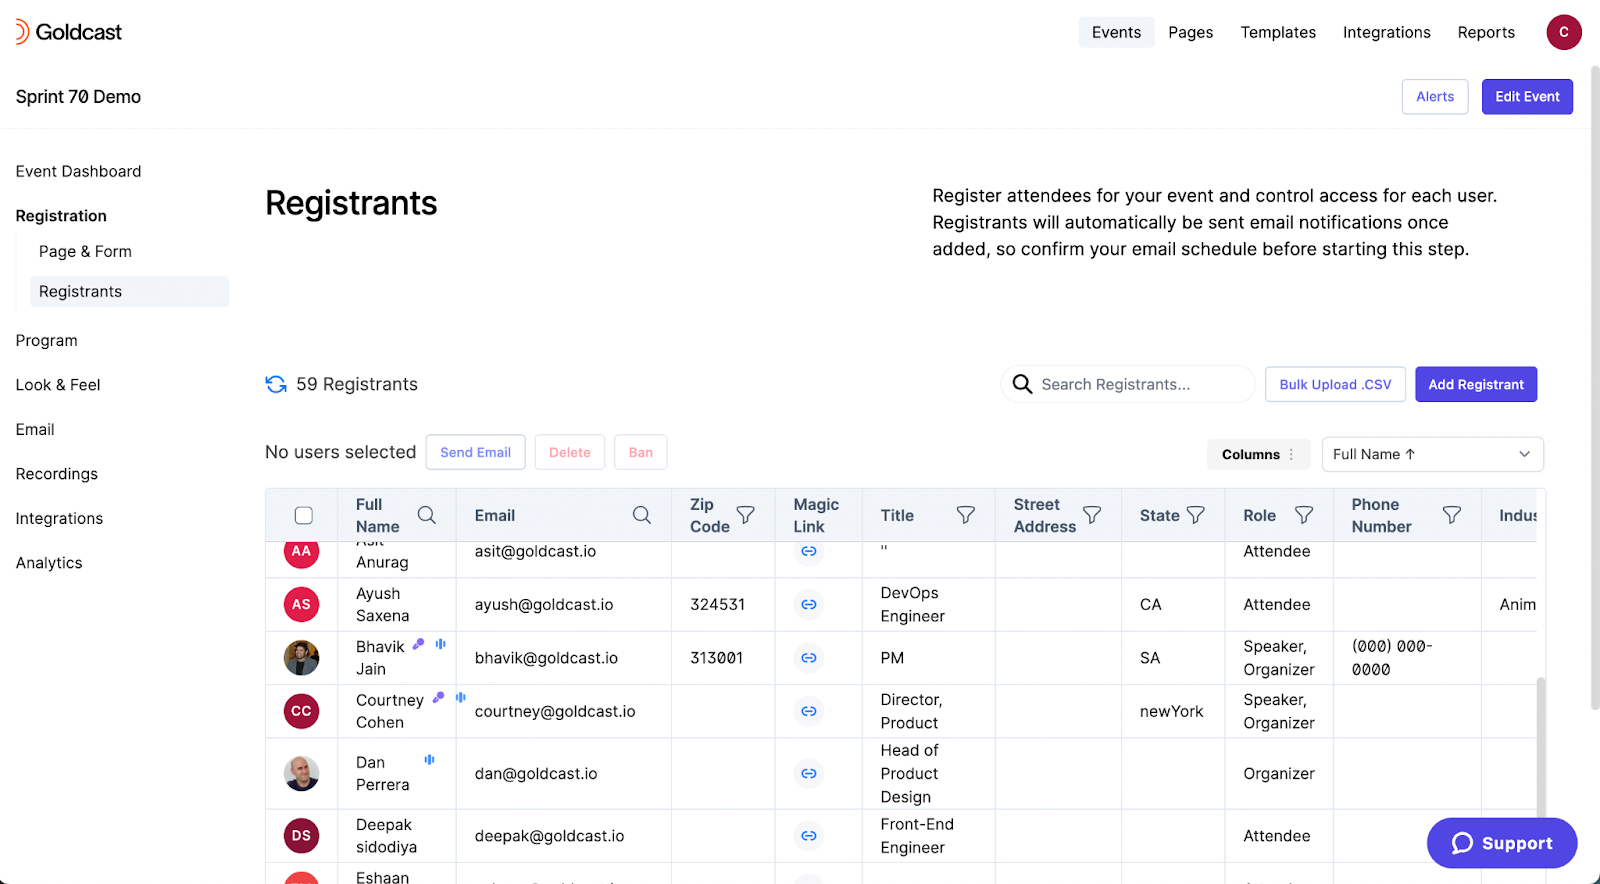
You’ve started to receive registrations—this is wonderful news! To see who has signed up for the event, you can click Registration and then the Registrants tab in the menu on the left side of your event.
Within this tab, you can:
- View, search, and sort your event registrants
- Ban registrants: click here to learn more.
- Access your registrant's individual magic link: click the link icon to copy their magic link.
- Important Note: this magic link should only be used by that registrant. Each registrant has a different magic link since it’s how we track data on a per-attendee basis.
How to Run a Speaker Tech Check Prior to Event Day
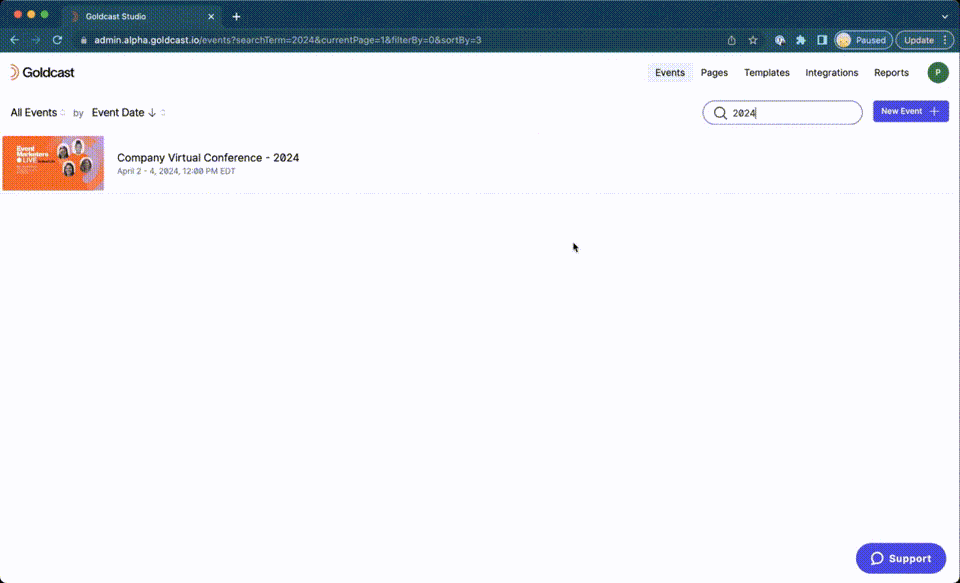
Prior to event day, you will want to run a speaker run-through for your virtual speakers. You may want to create a copy of your Goldcast event specifically for the run-through. To copy your event, click on the event name from your Goldcast homepage. Click duplicate in the center section of your event dashboard.
Note that each speaker will have a different magic link to join the run-through—they cannot use their real event magic link. Goldcast recommends sharing the run-through speaker magic links in a personal calendar invitation.
To host a run-through, you can meet your speakers in Zoom and then enter Goldcast—but be sure to shut down Zoom once everyone is inside the Goldcast event. Take your time having speakers practice going on stage, going backstage and then using any engagement items the organizer plans to use in event (share slides/share screen, open and share polls, start and stop pre-recorded videos).
For a step-by-step guide on hosting a speaker run-through and training, click here.
Be sure to share the speaker's guide to Goldcast with them in advance.
What To Expect Day of Your Event
It’s time for your event! In this section, we’ll take you through what event organizers, attendees, and speakers can expect during your event.
What Organizers Can Expect Day Of Their Event
Here are a few things you’ll want to keep in mind on the day of your event:
- Be backstage to greet your speakers at least 10 minutes before their session start time so you can ensure they’re all set and ready to go. And remember, each session has its own backstage if you’re running a conference!
- Here are some reminders on how to run engagement activities including:
- Launch polls (this help doc)
- Moderate and launch text and video Q&A (this help doc)
- Share media slides for the speaker (this help doc)
- Share your screen (this help doc)
- Play pre-recorded video during your live session (this help doc)
- How to view what an attendee is seeing (this help doc)
- Publish chat (this help doc)
- How to set up TV mode and in-person streams if running a Hybrid Event (this help doc)
- Attendees will not be able to see the speakers on stage until the session start time. It will say “live” on the bottom left corner.
- Attendees will be pulled from session to session—and each session will automatically start at the start time of each session—so make sure your speakers end on time!
- If the session runs long and there is not another session following, then attendees will remain in the session they are currently in. This means they will still be able to see the speakers if they're on stage, so make sure speakers leave the stage when finished. Always treat the stage as a "live mic".
What Attendees Can Expect Day Of Their Event
For attendees, the Goldcast experience is very straightforward. They will have their unique magic link in their calendar invite and reminder emails. Once they enter, they’re able to sit back, relax, watch the event, and interact with their fellow attendees.
This help doc will provide you with an overview of what they will experience.
What Speakers Can Expect Day Of Their Event
Day-of speaking at a virtual Goldcast event is incredibly straightforward for a speaker.
This help doc will provide you with information you can choose to share with your speaker—or feel free to create your own variation and send their way.
Post-Event Wrap-Up
Your event is complete—awesome job! Here are a few things you’ll want to do to officially wrap it up:
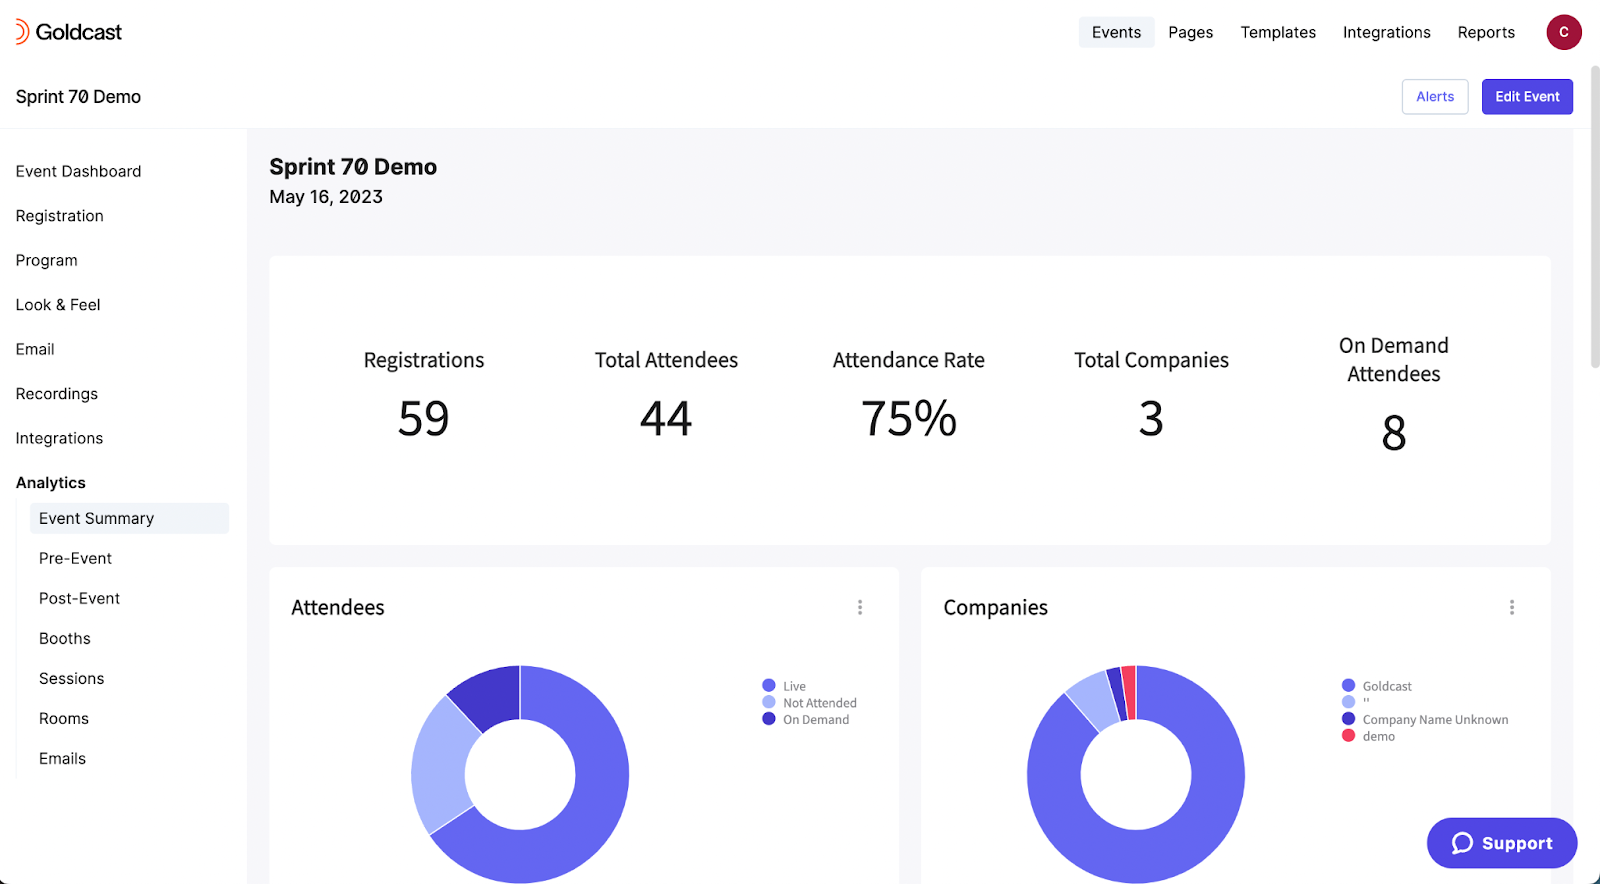
- Visit the Analytics section in the menu on the left side of your event to view the data Goldcast gathered about your event engagement.
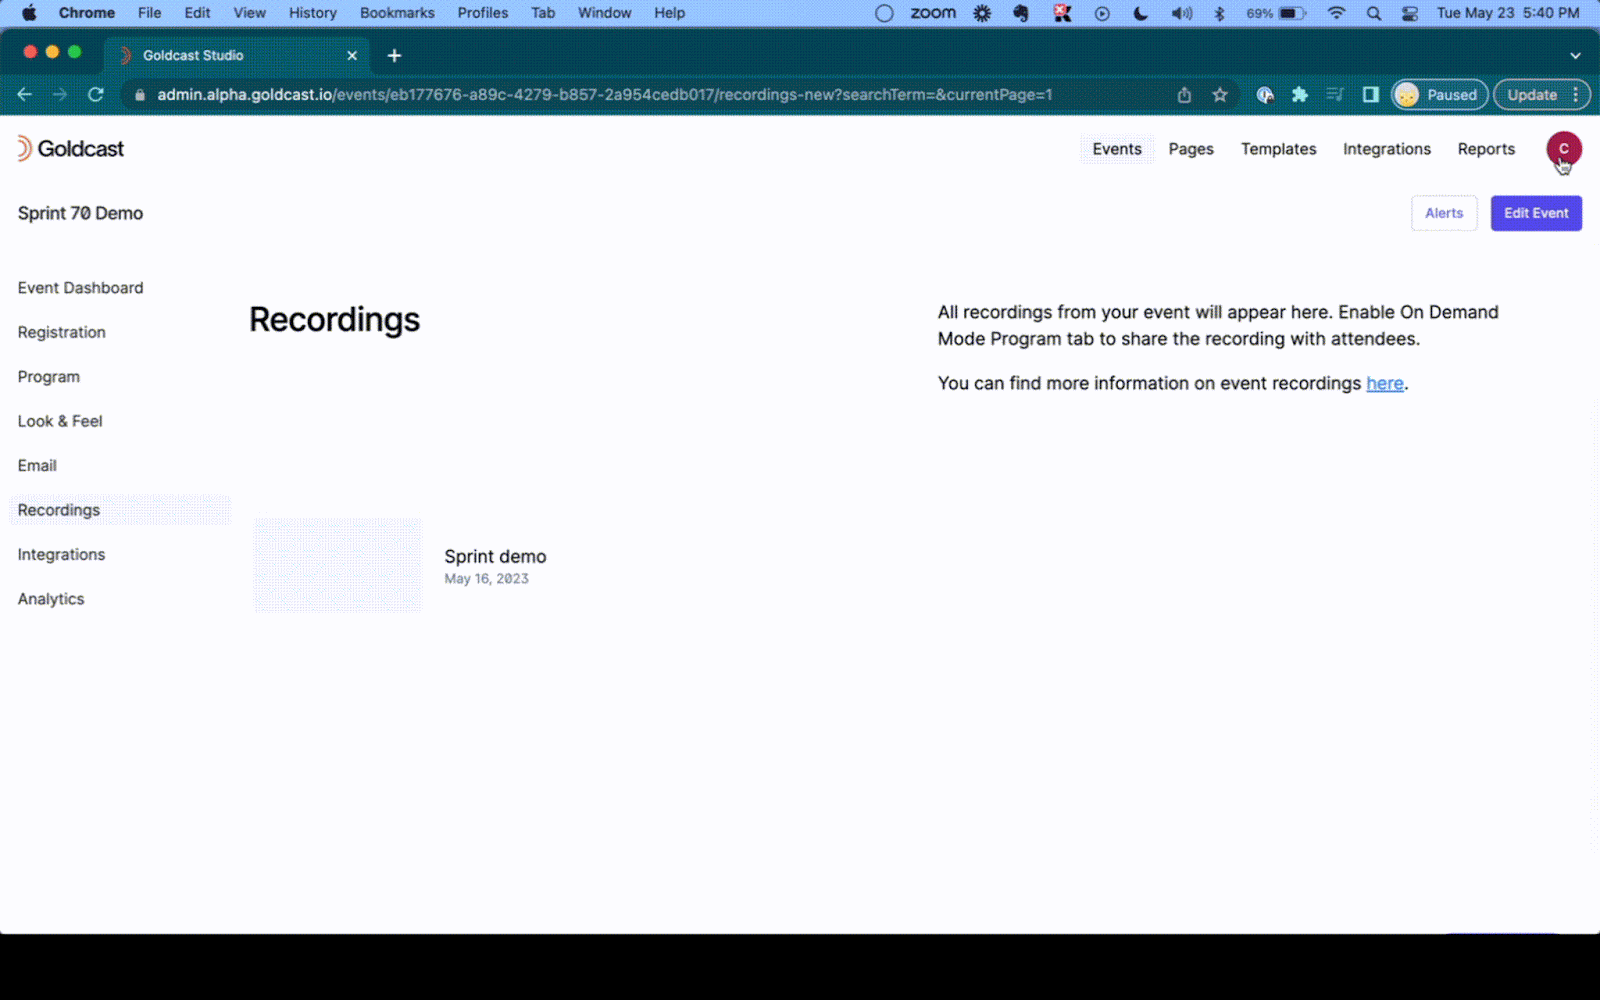
Learn more about the detailed information Goldcast collects. - Access the recordings for your event. To find the recordings for your event, click Recordings in the menu on the left side of your event. Each session will have its own recording listed here. Recordings take approximately 2x the session length to process after the session has completed. To view and download a session recording click on the recording name in the list.
- Looking to send out a post-event email and/or survey? You are able to do this through Goldcast with separate follow-up emails going to those who attended and those who did not attend.
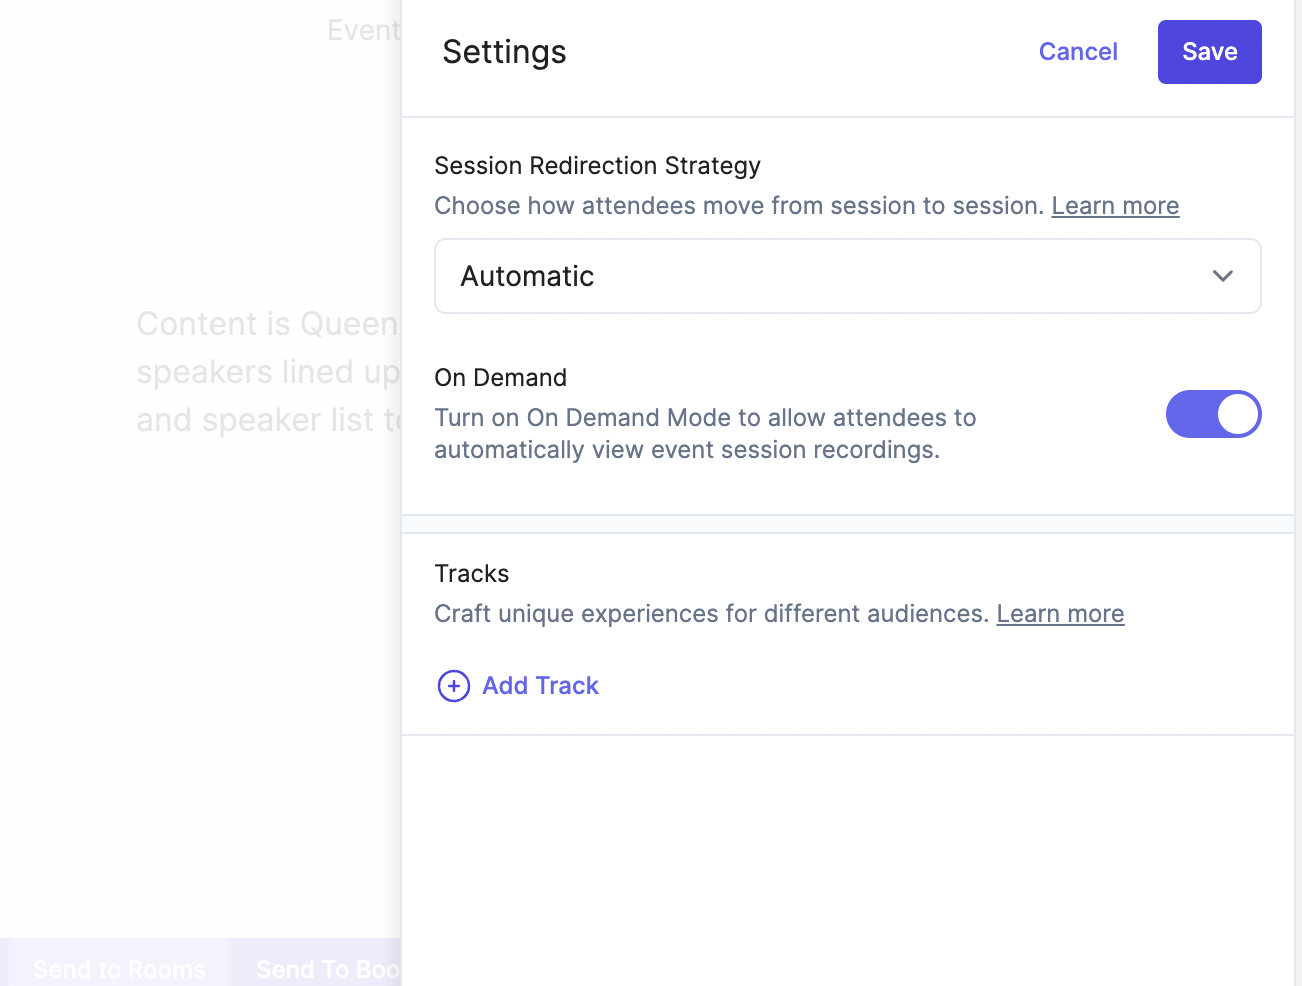
Learn more about sending a custom email. - Hosting content on-demand post-event? To enable On-Demand mode for your event, toggle the setting in the Program > Agenda > Settings section.
Learn more about setting up on-demand content.
Reach out to gc.support@cvent.com or chat in your Studio with questions anytime.